
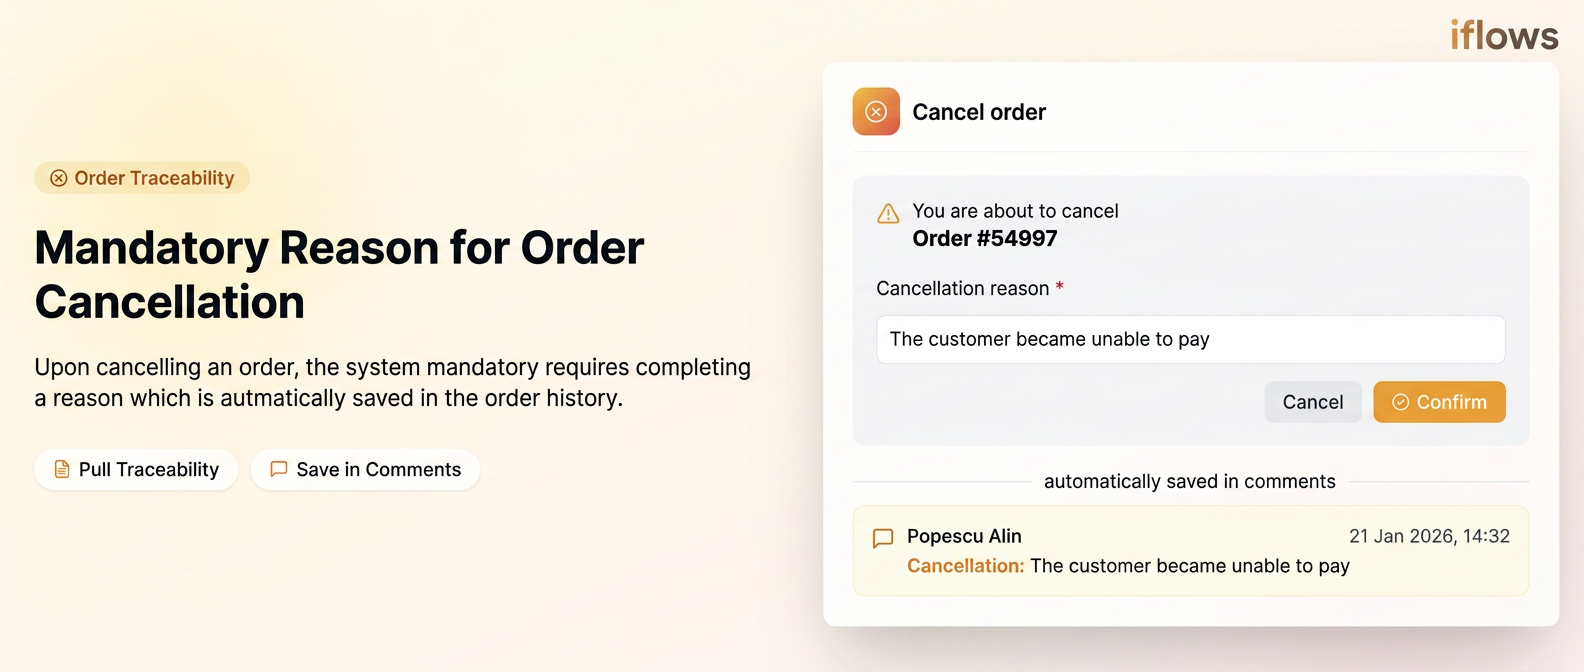
To ensure superior traceability and to allow for an accurate analysis of the causes leading to incomplete transactions, iFlows has optimized the order cancellation process. This update introduces the requirement to document each cancellation, providing valuable historical context for the entire team.
🎯 Why is this step necessary?
- Traceability: Precise identification of the user who performed the cancellation and the cited reason.
- Business Analysis: Understanding patterns (e.g., stock issues, pricing, customer change of mind) to improve internal processes.
- Historical Clarity: Eliminating doubts when an old order is later consulted by other colleagues or by management.
🛠️ How It Works (Step by Step)
1. Initiating Cancellation
The process begins by clicking the Cancel button (the red trash can icon) next to any active order.
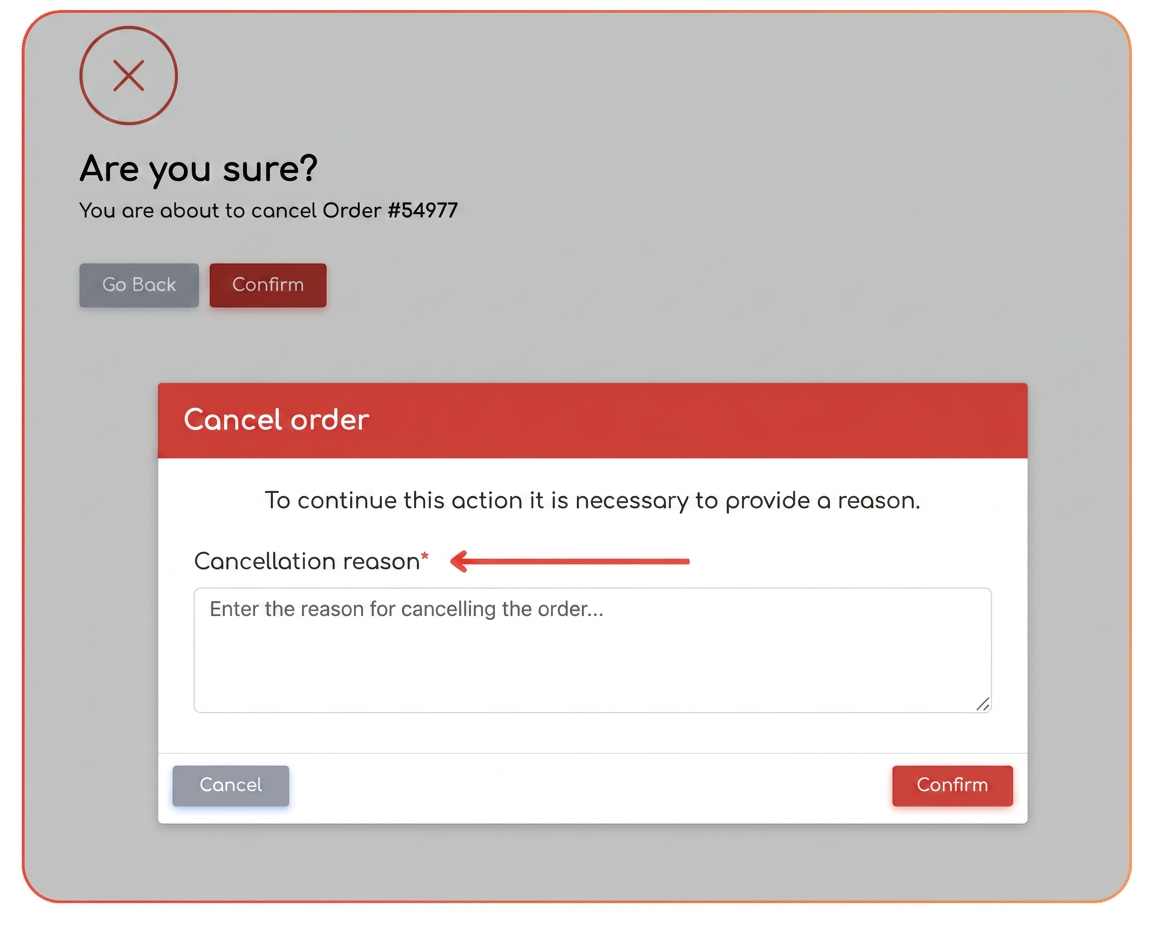
2. Requesting the Reason (Pop-up Window)
Immediately after initiation, the system will display a dedicated window titled "Order cancellation". This is a safety step to prevent accidental cancellations and to collect the necessary data.
3. Completing the Mandatory Field
In the "Cancellation reason" field, you must enter a brief explanation of the cause (e.g., "Customer became insolvent", "Product unavailable long-term").
- Note: The confirmation button becomes active only after entering text.
4. Finalization and Saving to History
After clicking the Confirm button:
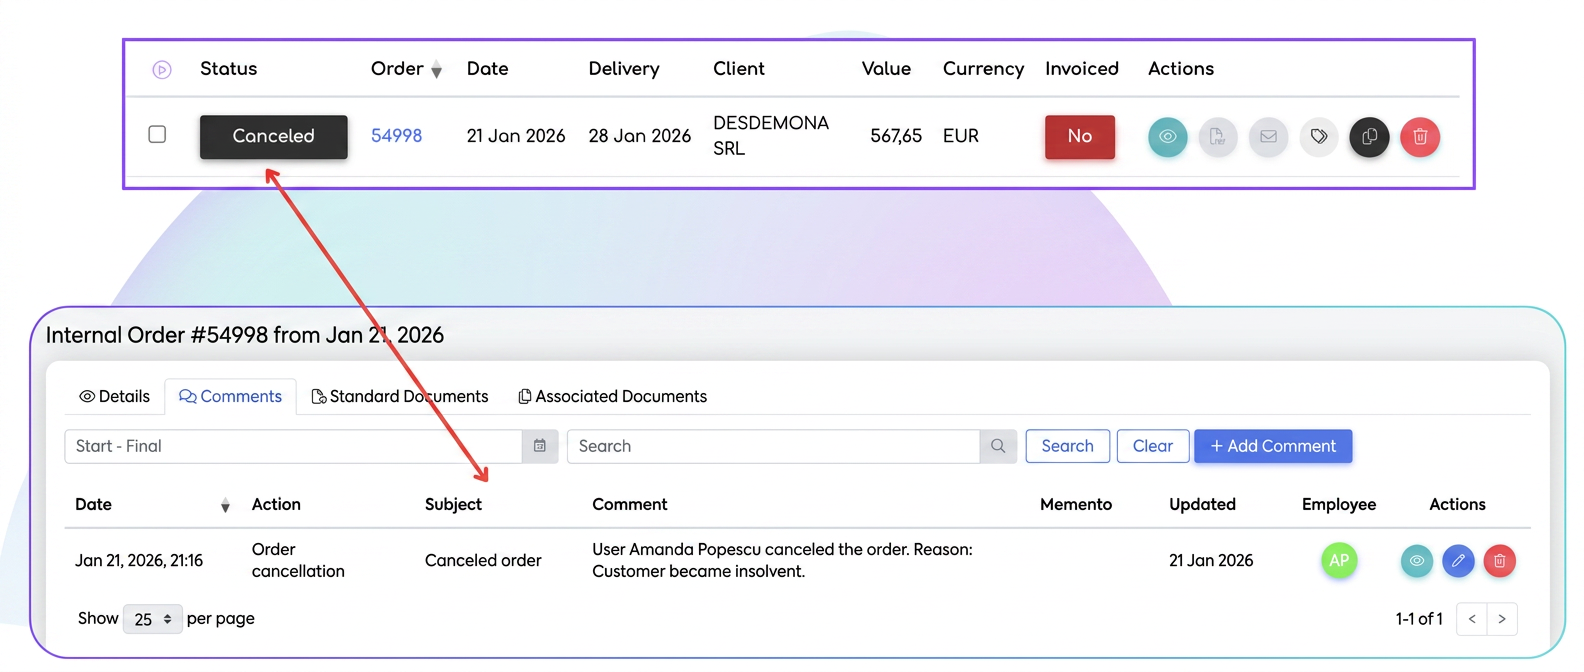
- The order status automatically changes to "Cancelled".
- Automation: The system instantaneously generates a note in the "Comments" section of that order. It contains the user's name, the action performed, and the explicit reason entered.
🔍 Where can you check the cancellation reasons?
- Open the respective order by clicking view.
- Access the Comments tab.
- You will find the complete record: Date, Time, User and the Explanation provided at the time of cancellation.