Part 1: Basic Procedure for Sending Email
Step 1: Navigate to the Orders section
- In the main menu, located on the left side of the screen, please click on the Sales option.
- From the sub-menu that opens, select Orders.
Step 2: Identify the order and access the send Email option
- In the displayed list, locate the order for which you want to send the email.
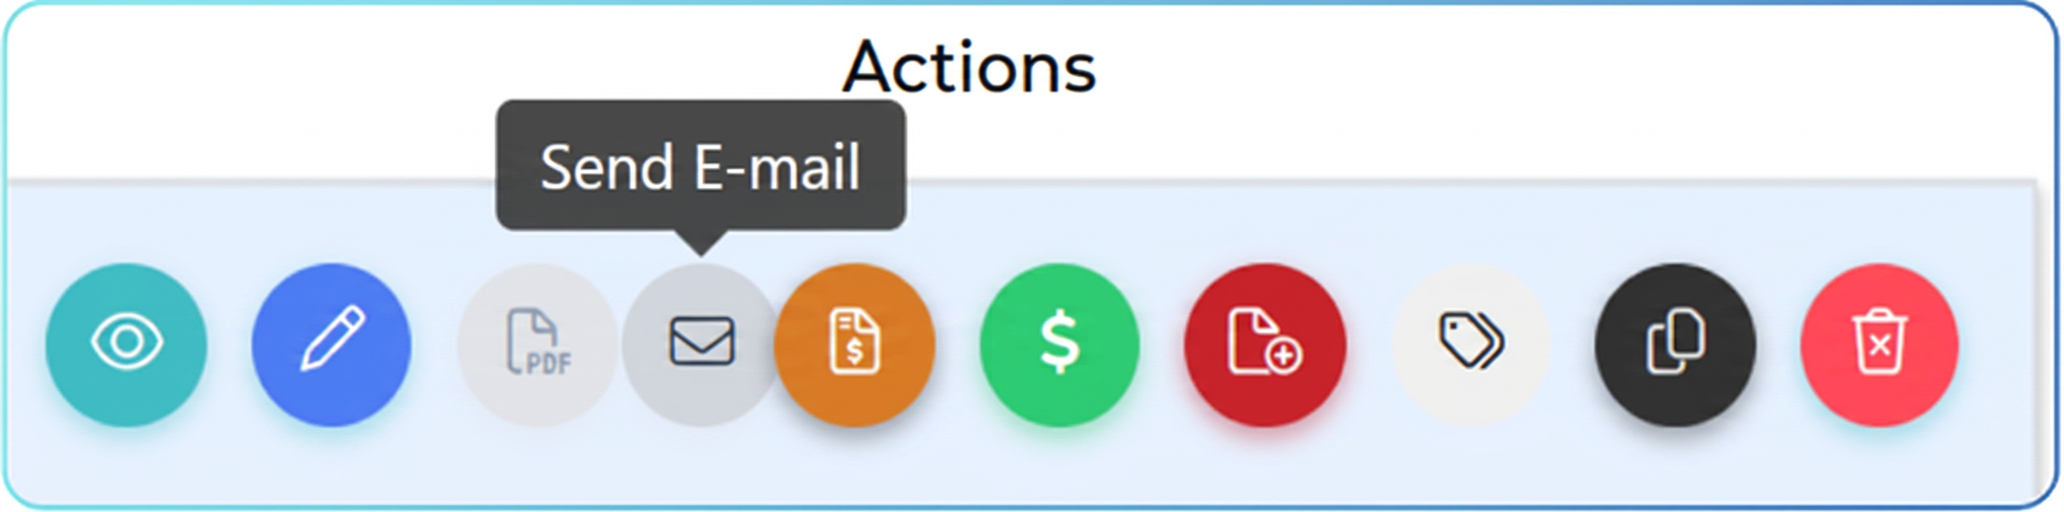
- Next to the respective order, in the last column on the right, titled Actions, click on the icon representing an envelope/paper airplane. This is the Send email button.
Step 3: Modifying the Recipient (Essential Step)
- After clicking the button, a new window will open, titled Send Email.
IMPORTANT WARNING: By default, the platform will pre-fill the Recipients field with the client's email address. It is imperative to modify this field to ensure the email reaches your colleagues, not the client.
- To modify, click directly on the Recipients field.
- A list of options will open, containing both client emails and a separate section called "Employees".
- Select one or more emails from the Employees section.
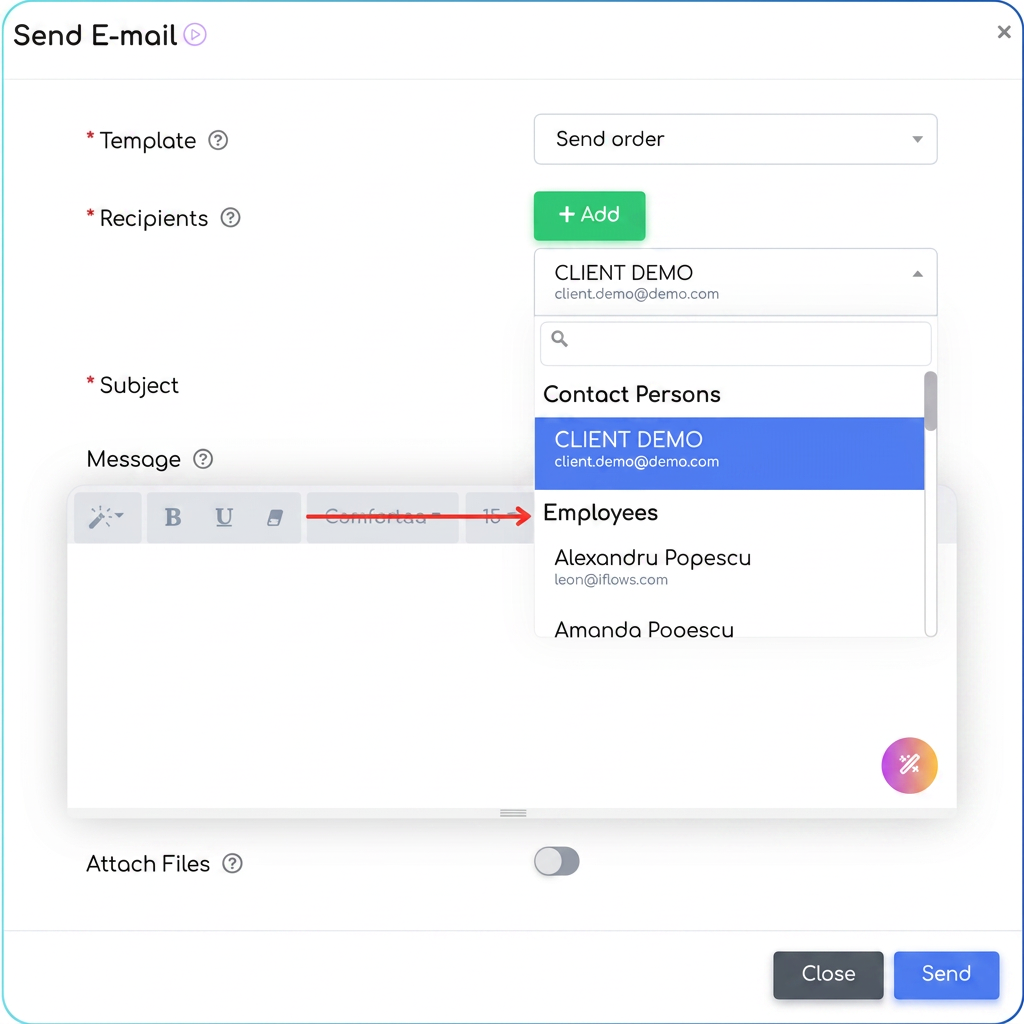
- To add multiple recipients: Click the green + Add button and select another colleague. You can repeat this action for each colleague you wish to add.
Step 4: Writing the Message
- In the main text box, titled Message, please draft the content you wish to convey to your colleagues. (Example: "Dear team, for the attached order, please let us know the estimated sheet metal consumption. Thank you!")
*This option is available if the variable "Information" is inserted in the email template.
Step 5: Finalizing and Sending the Email
- After verifying the accuracy of the recipients and the message, click the blue Send button, located at the bottom of the window.
- The process is complete. Your colleagues will receive an email containing the written message, with the respective order automatically attached in PDF format.
Part 2: Creating an Email Template for Efficiency (Optional)
If you frequently send this type of request, you can create a template to save time.
Step 1: Access the Templates section
- In the left menu, navigate to Settings.
- Then, select the Templates option.
Step 2: Creating a New Template
- Click the + New Email Template button.
Step 3: Configuring Template Details
- Section: It is MANDATORY to select the Order option.
- Name: Assign a relevant name to the template (e.g.: "Design department information request").
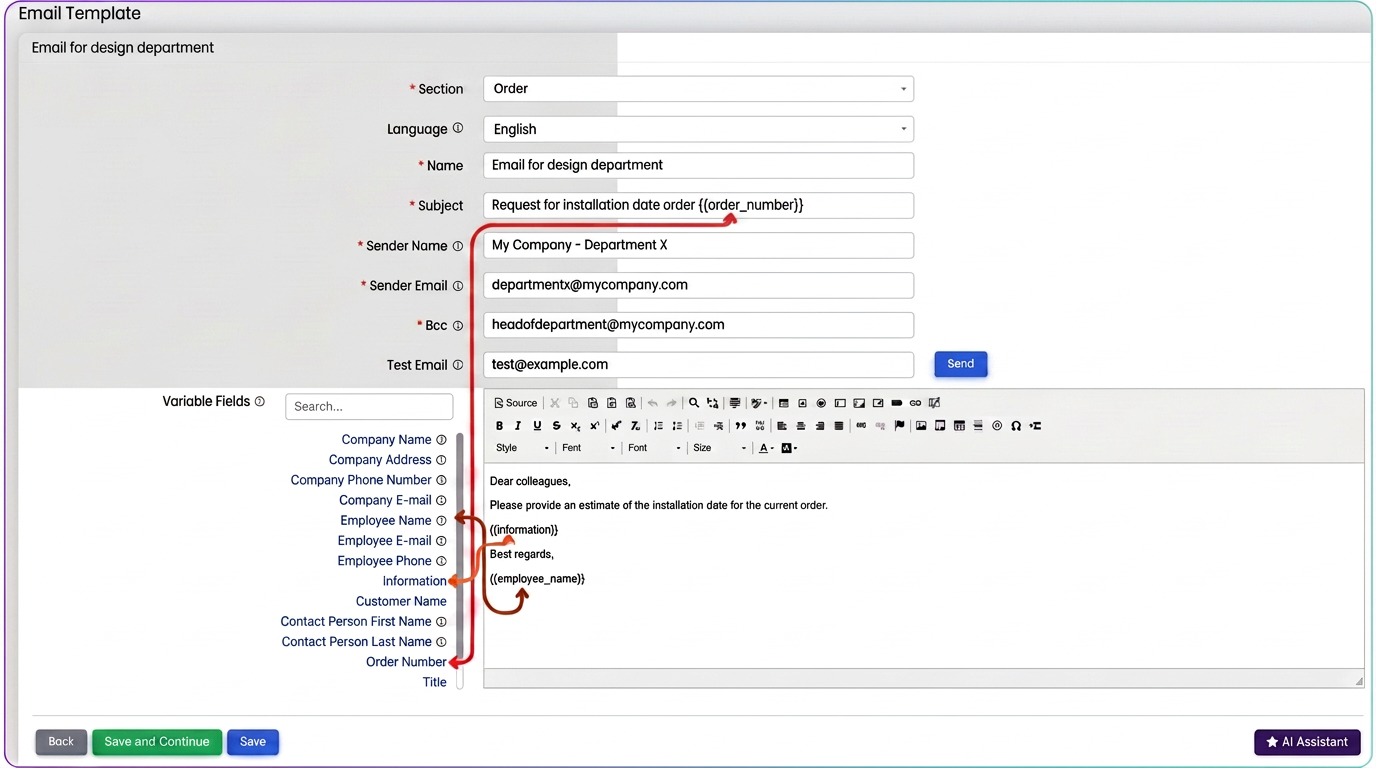
- Subject: Set a predefined subject (e.g.: "Information request for order [order_number]"). The [order_number] variable will be automatically replaced with the order number.
- Message: Write the standard text of the email (e.g.: "Dear colleagues, We kindly request you to provide the requested details... Respectfully, [employee_name]"). The [employee_name] variable will be automatically replaced with your name.
When you create or edit an email template, you will notice a list on the left titled Variable Fields. This is your palette of smart tags.
To insert a variable, follow these steps:
- Position the mouse cursor exactly where you want the information to appear in the template.
- Click on the desired variable from the list on the left. It will be automatically inserted into the text.
- For example, instead of manually writing the order number every time, place the variable [order_number], and iFlows will automatically insert the correct number (e.g.: 54713).
- Press the blue Save button to finish.
Using the newly created template:
- Next time you send an email from an order, in the Send Email window, select the name of the template you created from the Template menu.
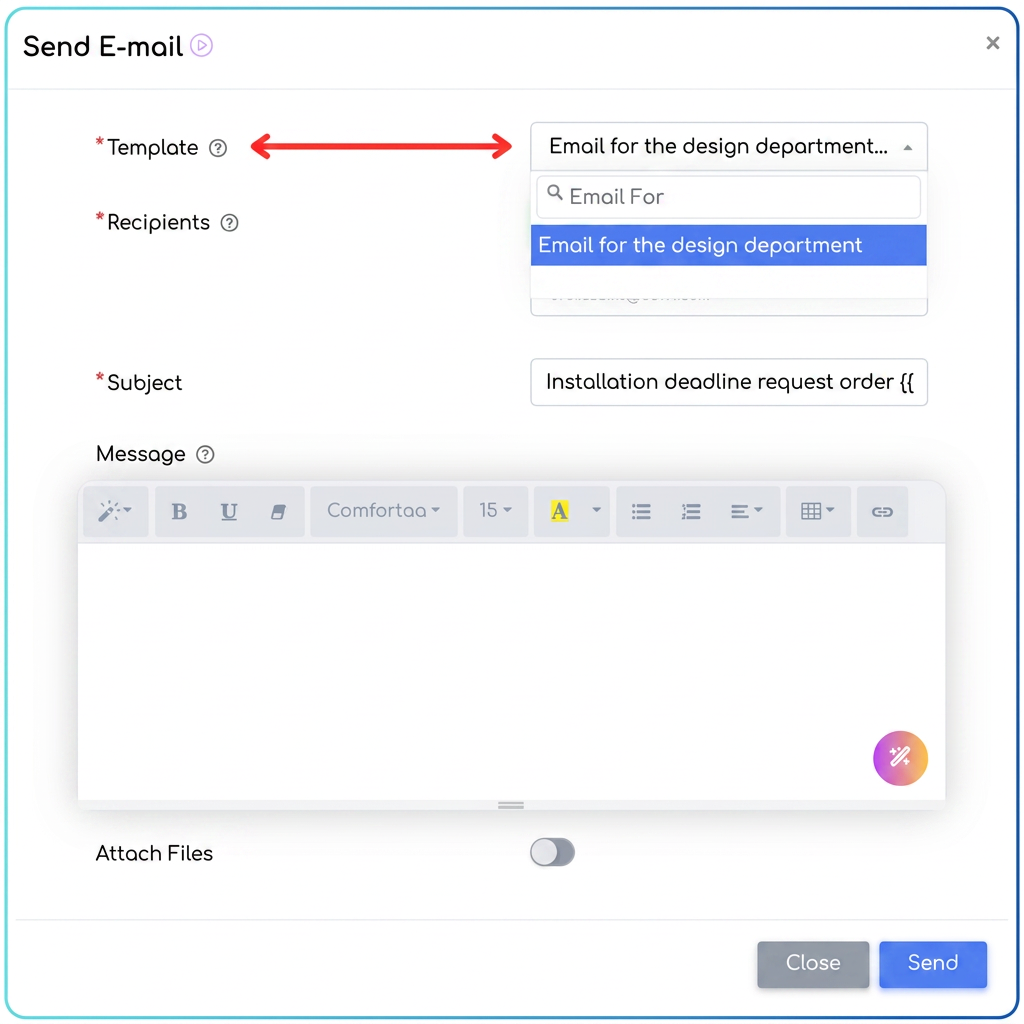
- The information will be filled in automatically, and you will only need to select the recipients (colleagues), following the instructions from Step 3.
