
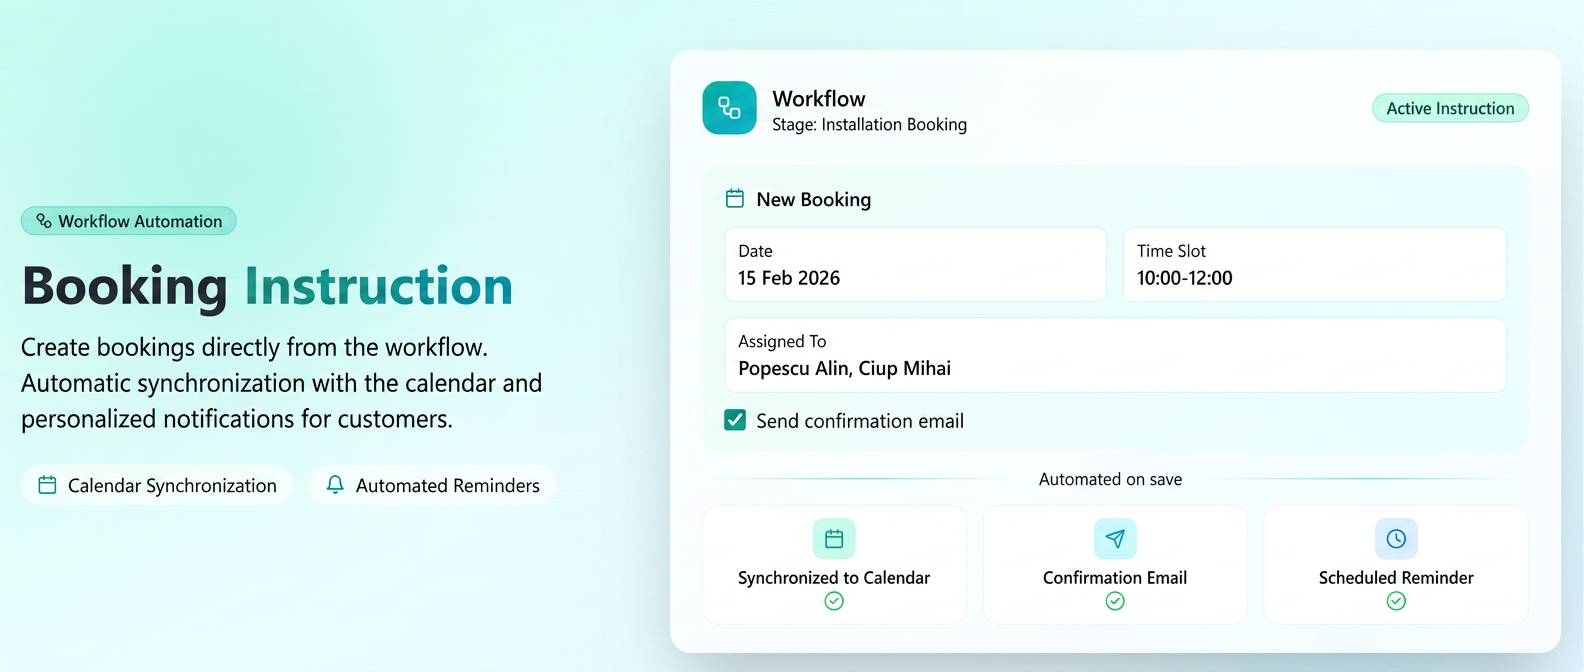
You can create appointments directly from the workflow; these synchronize instantly with the calendar and send personalized automated notifications to customers.
What this function does, in short:
- Total Integration: Create appointments directly from the workflow without navigating to other modules.
- Synchronization and Visibility: Data automatically appears in the appointment calendar, with full details available upon simple mouse hover.
- Intelligent Communication: Sends immediate confirmations and scheduled reminders, automatically pulling customer data.
🌟 What can you use this module for? (Practical examples)
Whether you are in production, services, or trade, you can schedule any field activity:
- Assembly and Installations: Scheduling the team for the installation of finished products at the customer's site.
- Service / Warranty Interventions: Managing repairs or technical checks.
- Measurement Visits: Trips to the customer to take dimensions before starting production.
- Maintenance: Scheduled visits for equipment upkeep.
- Deliveries with Special Handling: Scheduling offloads that require additional equipment or personnel.
- Customer Training: Scheduled sessions to teach the customer how to use the delivered products.
- Work Acceptance: Official meetings for signing completion reports (procese verbale).
- Technical Audit / Consultancy: On-site evaluation visits for complex projects.
Step 1: Configuring Templates
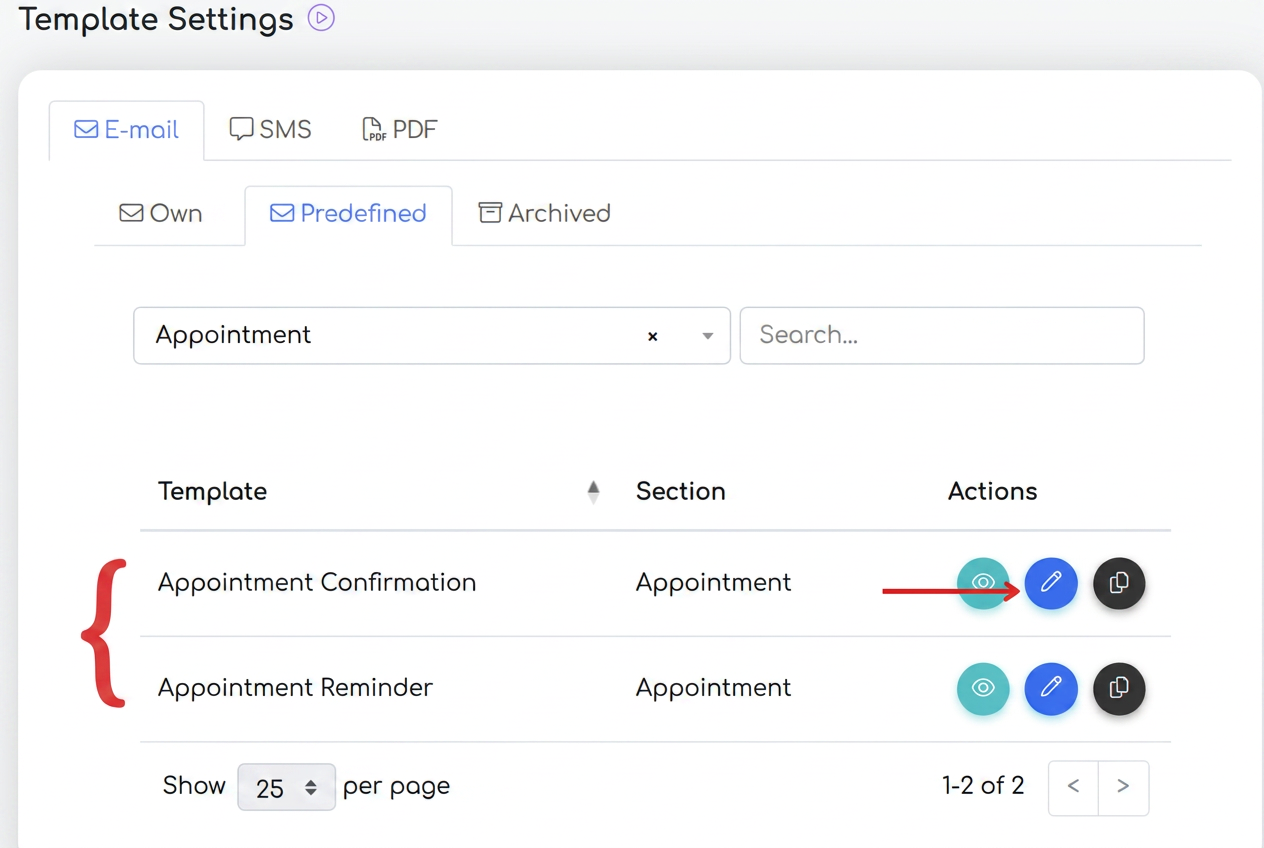
The system comes equipped with 2 predefined templates so you don't start from scratch. You can find them in Settings -> Templates -> Predefined, "Appointments" category. All you need to do is check and edit them as you wish:
- Appointment Confirmation: Sent automatically to the customer when you save the appointment, if the "send email" option is selected.
- Appointment Reminder: Used for automated reminders sent before the appointment.
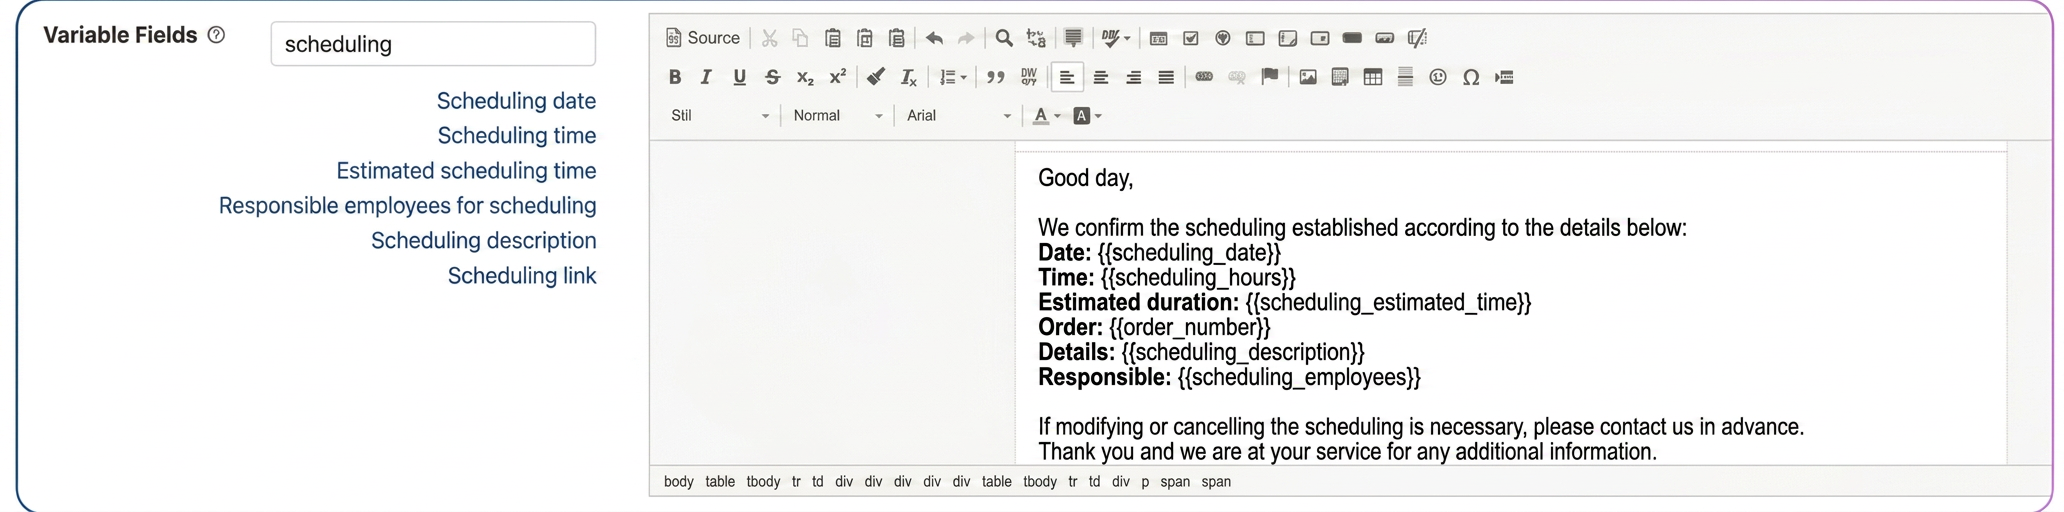
Personalization variables: Inside these templates, you can edit the text and use dynamic fields so the system fills in the data automatically:
- {Appointment Date}, {Appointment Time}, {Estimated Duration}, {Order Number}, {Responsible/Team}.
Step 2: Activating the instruction in the Workflow
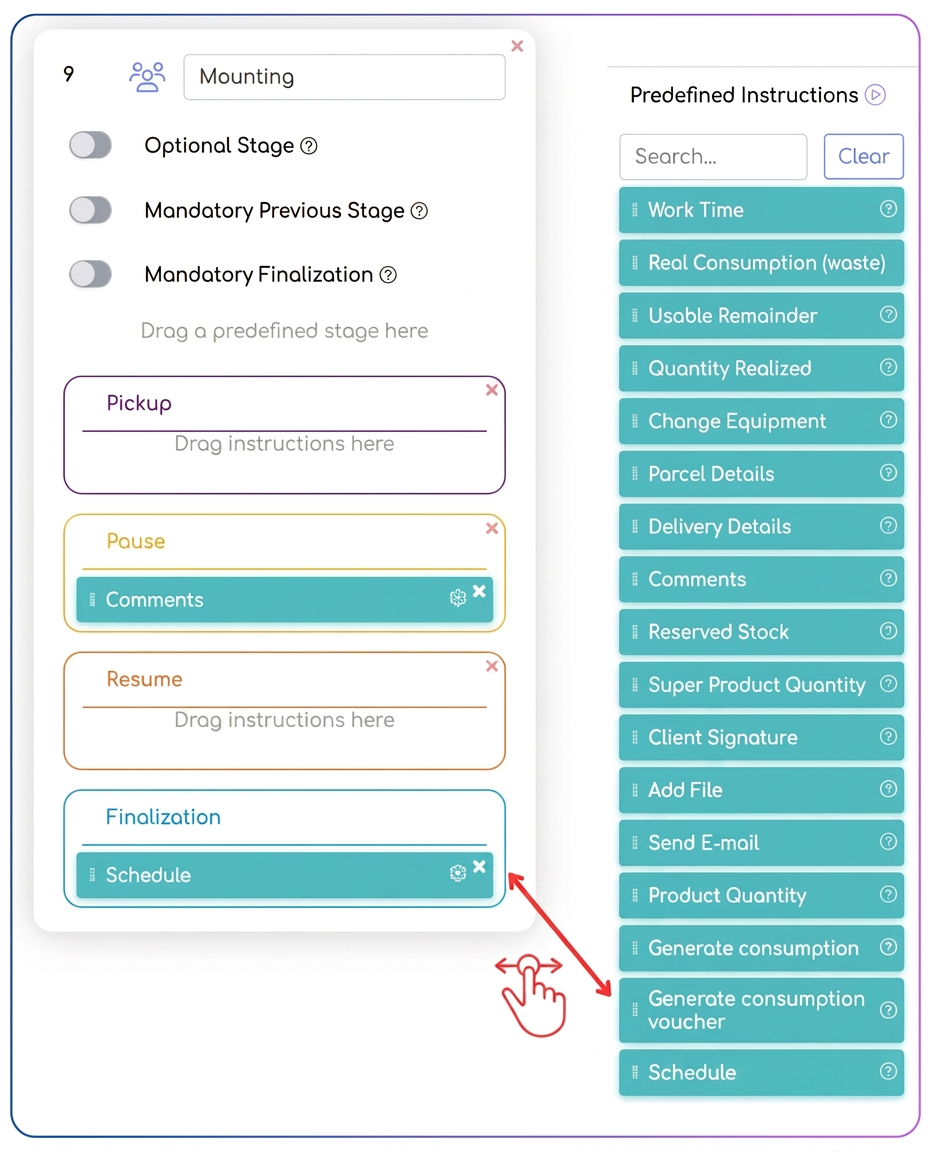
- Go to Settings -> Workflow -> Edit your workflow.
- Drag the "Appointment" instruction from the Predefined Instructions list into the desired stage (e.g., in the "Completion" phase of the "Installation Scheduling" stage).
Step 3: Operation - How to create an appointment from the Workflow
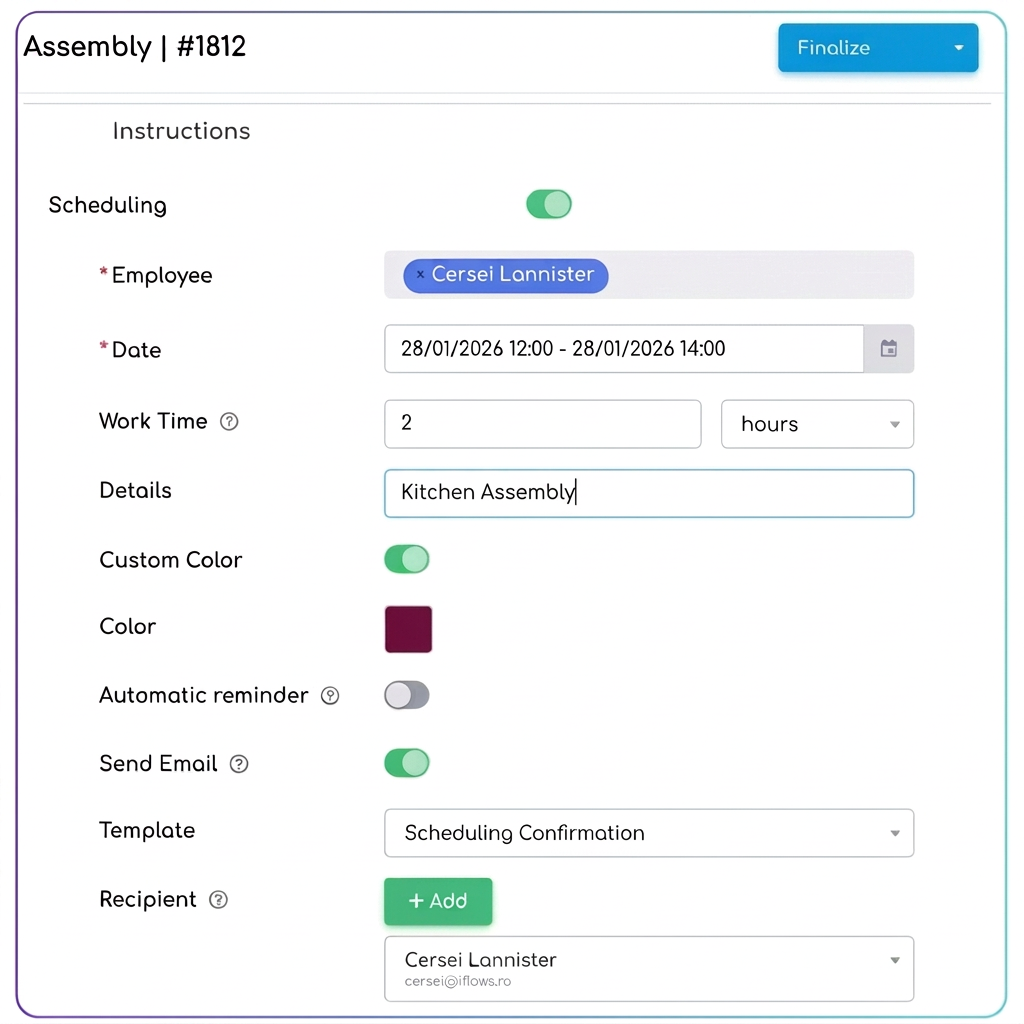
When the order reaches that specific step, the interface opens and automatically pulls the Customer and Order.
- Resources: Select the employee/team.
- Time: Choose the date (start/end) and exact times in the bottom selector of the calendar.
- Automation Options (Toggles):
- Send E-mail (Confirmation): Activate this to send details to the customer on the spot using the "Appointment Confirmation" template.
- Automatic Reminder: Set how long before the appointment a reminder notification should be sent (e.g., 24 hours before). It will use the "Appointment Reminder" template.
- Recipients: The customer's e-mail is pulled automatically. You can manually add other internal addresses (e.g., a project manager or another contact person).
Step 4: Monitoring and the New Calendar Design
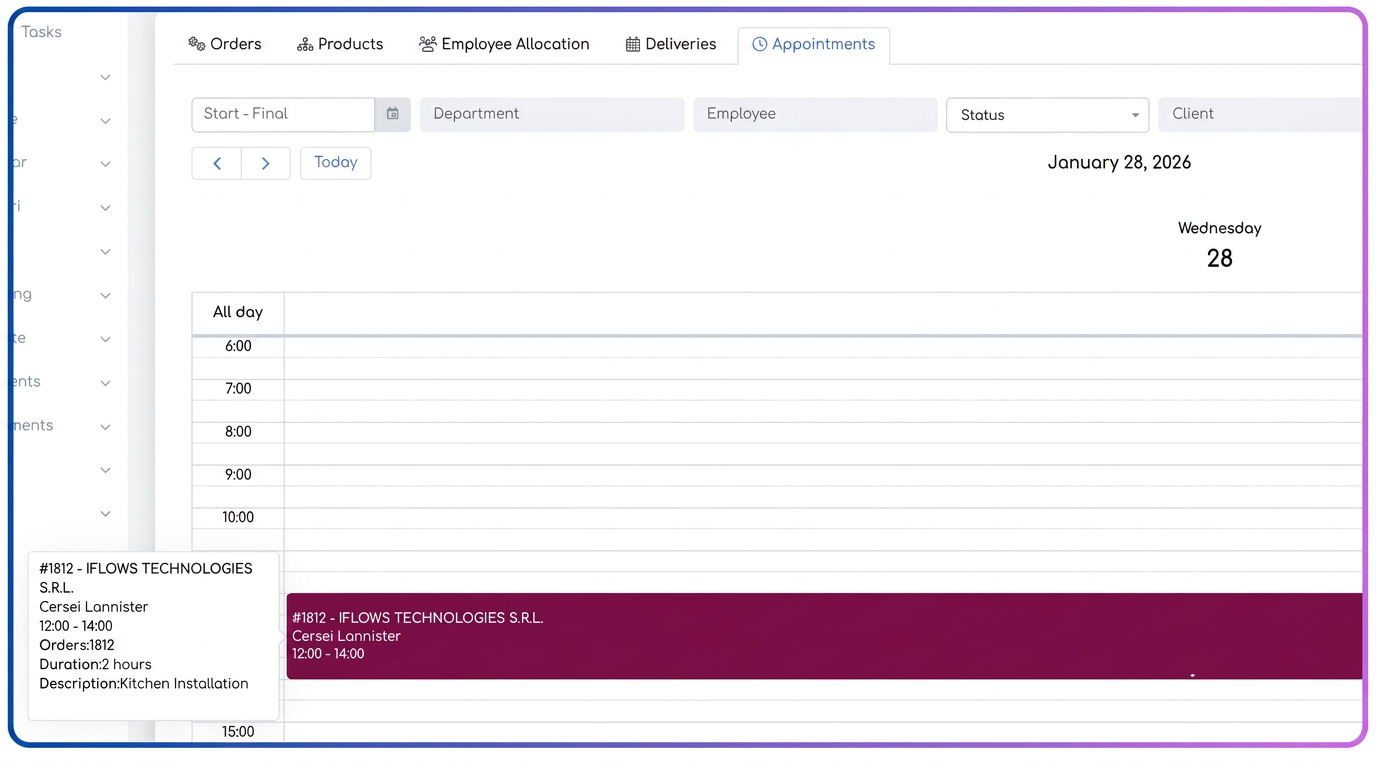
After saving, the appointment appears in the Appointments module, which features a modernized interface:
- Organized Cards: Clean design that highlights essential information.
- Detailed Tooltip (Hover): Without clicking, just hover the mouse over an appointment to instantly see:
- ID and Customer.
- Time interval and Duration.
- Responsible employee.
- Products/Services from the order subject to scheduling.
Traceability in Processing History
A major advantage of this instruction is that all details remain archived in the order history. Thus, anyone with access to the order can check:
- Who and when created the appointment.
- Time interval and established work duration.
- Notification status: You can clearly see if the confirmation email was sent, if the reminder is active, and the recipient's email address.
- Notes: Any additional details entered in the appointment form appear directly in the history.

By using the Appointment instruction, you ensure that no intervention is missed. Customers receive professional confirmations, the team has a real-time updated agenda, and you have total control over your field resources.