
1. In short
Appointments in Workflow (date and time, employees, working time) can now be linked to a concrete stage of the order workflow. The link becomes visible directly in Workflow, as a “pill” displayed above the stage button, showing the scheduled day and flagging in red any overrun of the Deadline; appointments can be filtered by stage, and the calendar event title includes the stage. The feature is used by planners and by the operators who create appointments from the workflow.

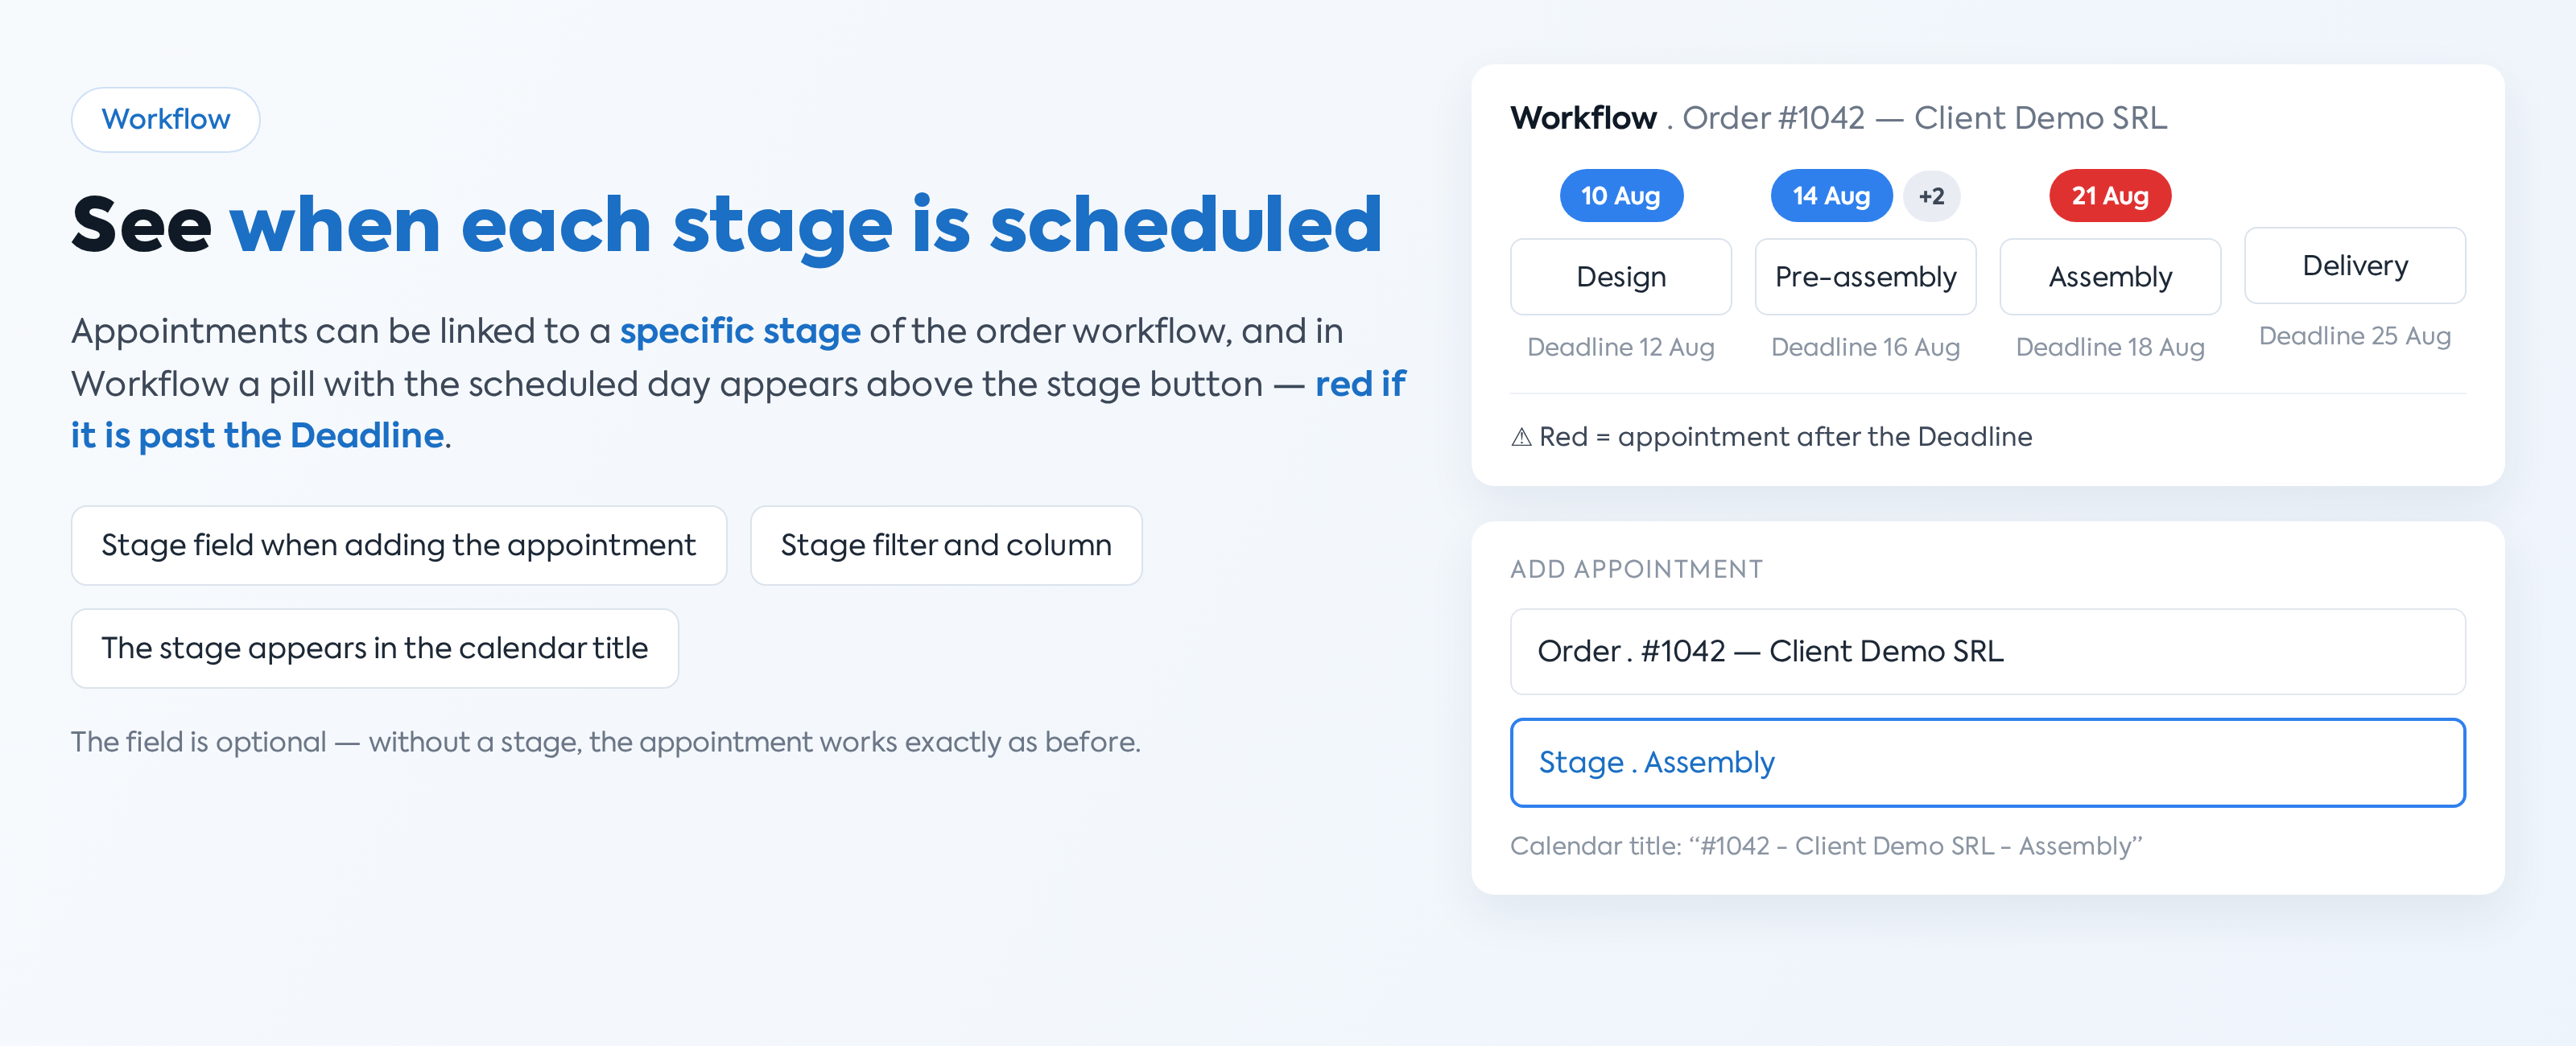
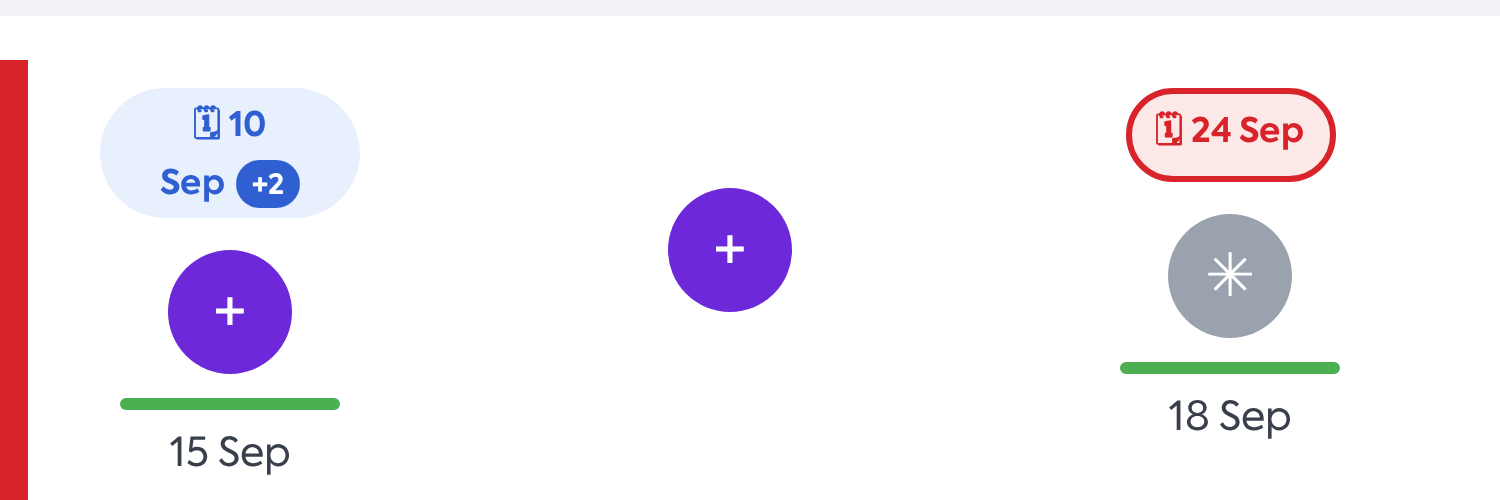
Workflow: the appointment pill displayed above the stage button, with the scheduled day and the “+N” counter.
2. Where to find it
- Workflow → Appointments → the Add Appointment / Edit Appointment window → the Stage field
- the action pop-up of a stage that has the Appointment component enabled
- Orders → edit order → Stages Included in the Workflow (the confirmation dialog when disabling a stage that has appointments)
- Appointments → the Stage filter in the filter bar and the Stage column in the Appointment list
3. Before you start
- There is no enabling setting: the Stage field is optional and available wherever the Appointments module is available.
- To load the list of stages in the Stage field you need at least one of the permissions Appointments – Add or Appointments – Edit (the Workflow category).
- Saving, editing and deleting appointments use the existing Appointments permissions.
- For scheduling from the stage action pop-up, that action must have the Appointment component enabled (Settings → Workflow → stage → action).
- The red colouring of the pill depends on the Deadline set per stage in the order.
4. Adding an appointment linked to a stage (from the calendar / grid)
Step 1. Open Workflow → Appointments and open the Add Appointment window (from the Calendar, from an existing event or from a cell in the Employee grid).
Step 2. Choose the order in the Order field (for example order #1042, Client Demo SRL). Until an order is chosen, the Stage field below it is disabled.
Step 3. Open the Stage field (a dropdown showing “Choose Stage”, with a clear button). The list is loaded automatically with the stages of that order’s workflow, in workflow order (for example Design, Pre-assembly, Assembly, Delivery), without the stages disabled for the order.
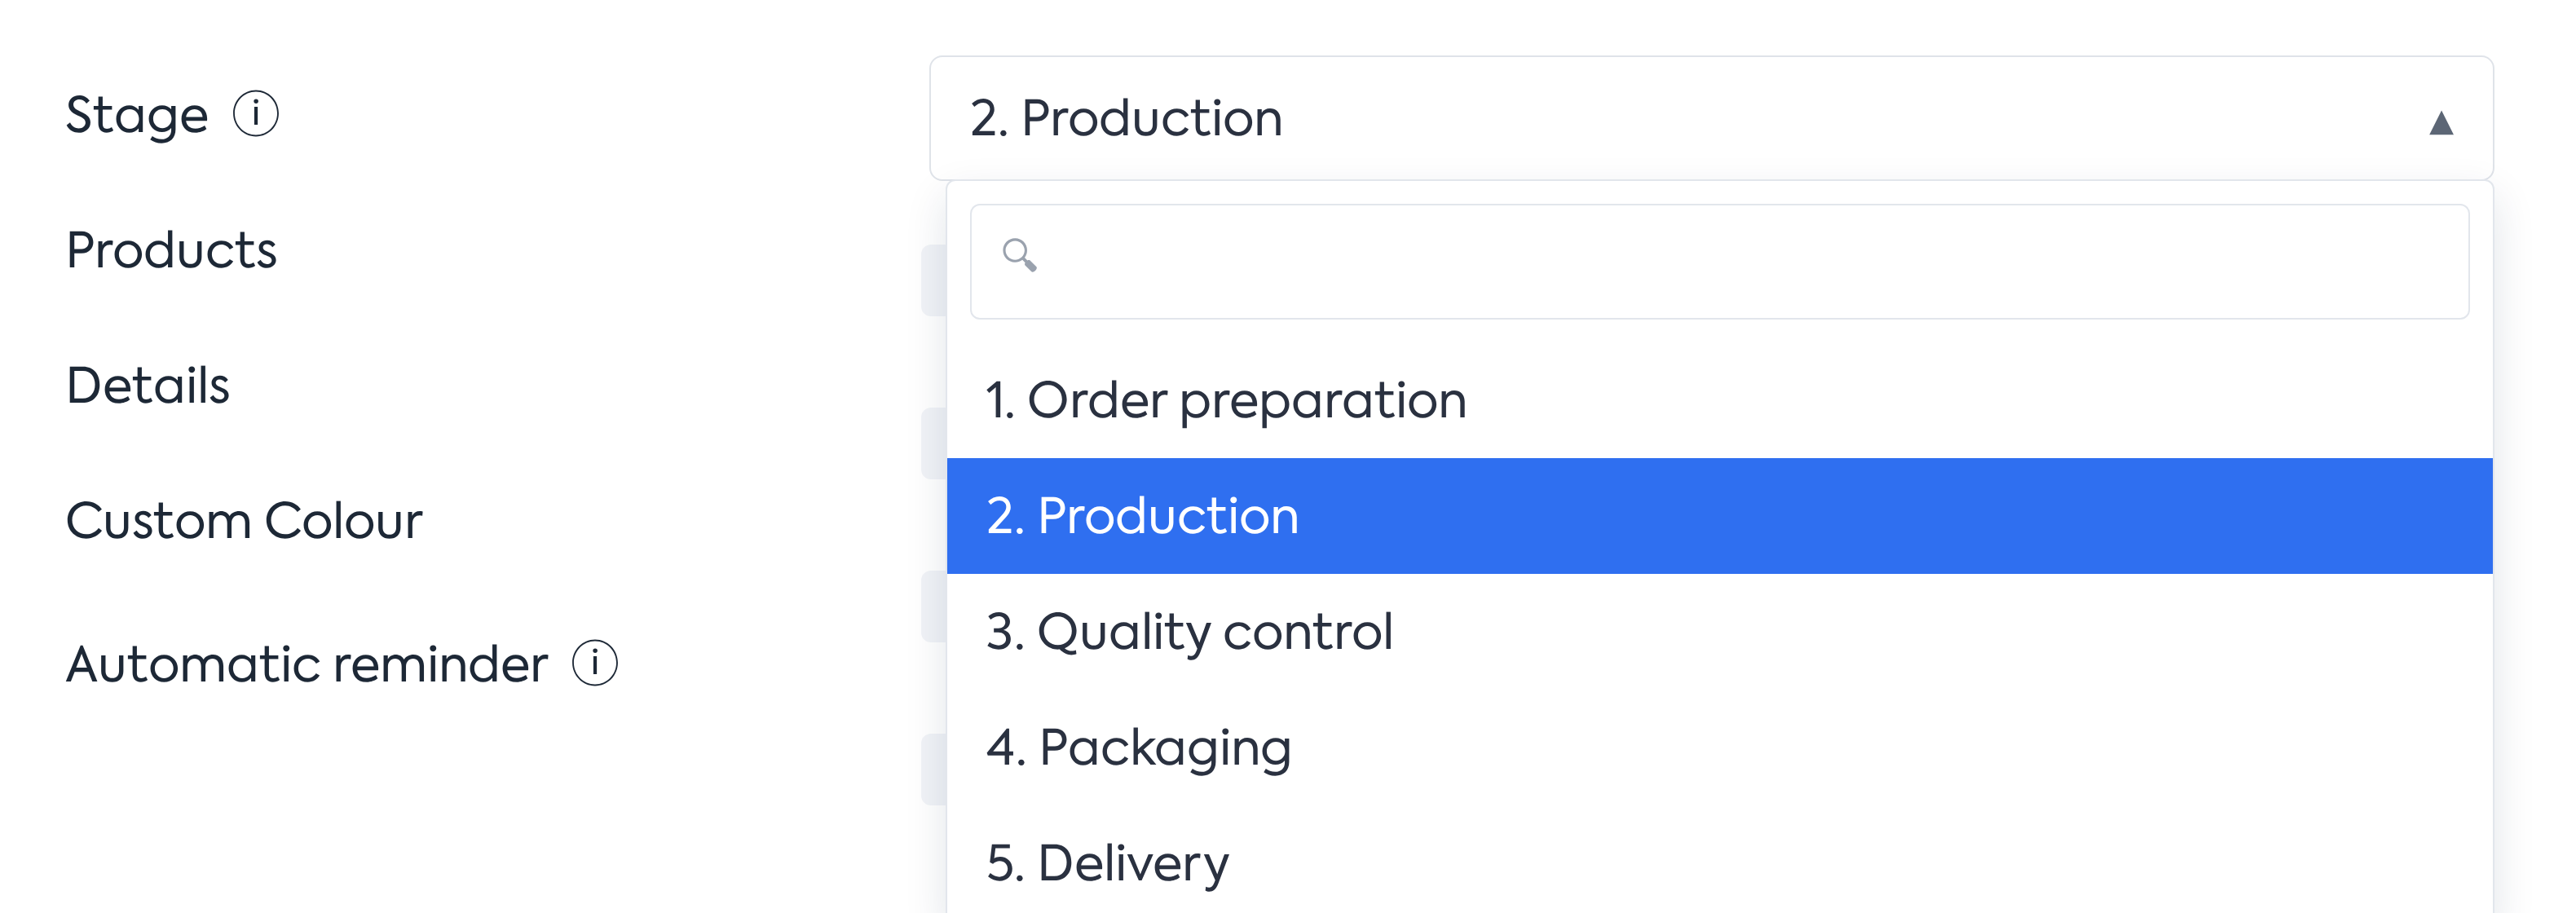
The Add Appointment window with the Stage list open after choosing order #1042: the workflow stages in workflow order.
Note: for stages with equipment there is one option per equipment instance (“Print 1”, “Print 2” …); if no order line has equipment, that stage does not appear. The field is optional; its tooltip: “Optionally link the appointment to a stage of the order workflow. Without a stage, the appointment works exactly as before.”
Step 4. Choose the stage you want (for example Assembly). The chosen stage appears in the field, with the clear button next to it.
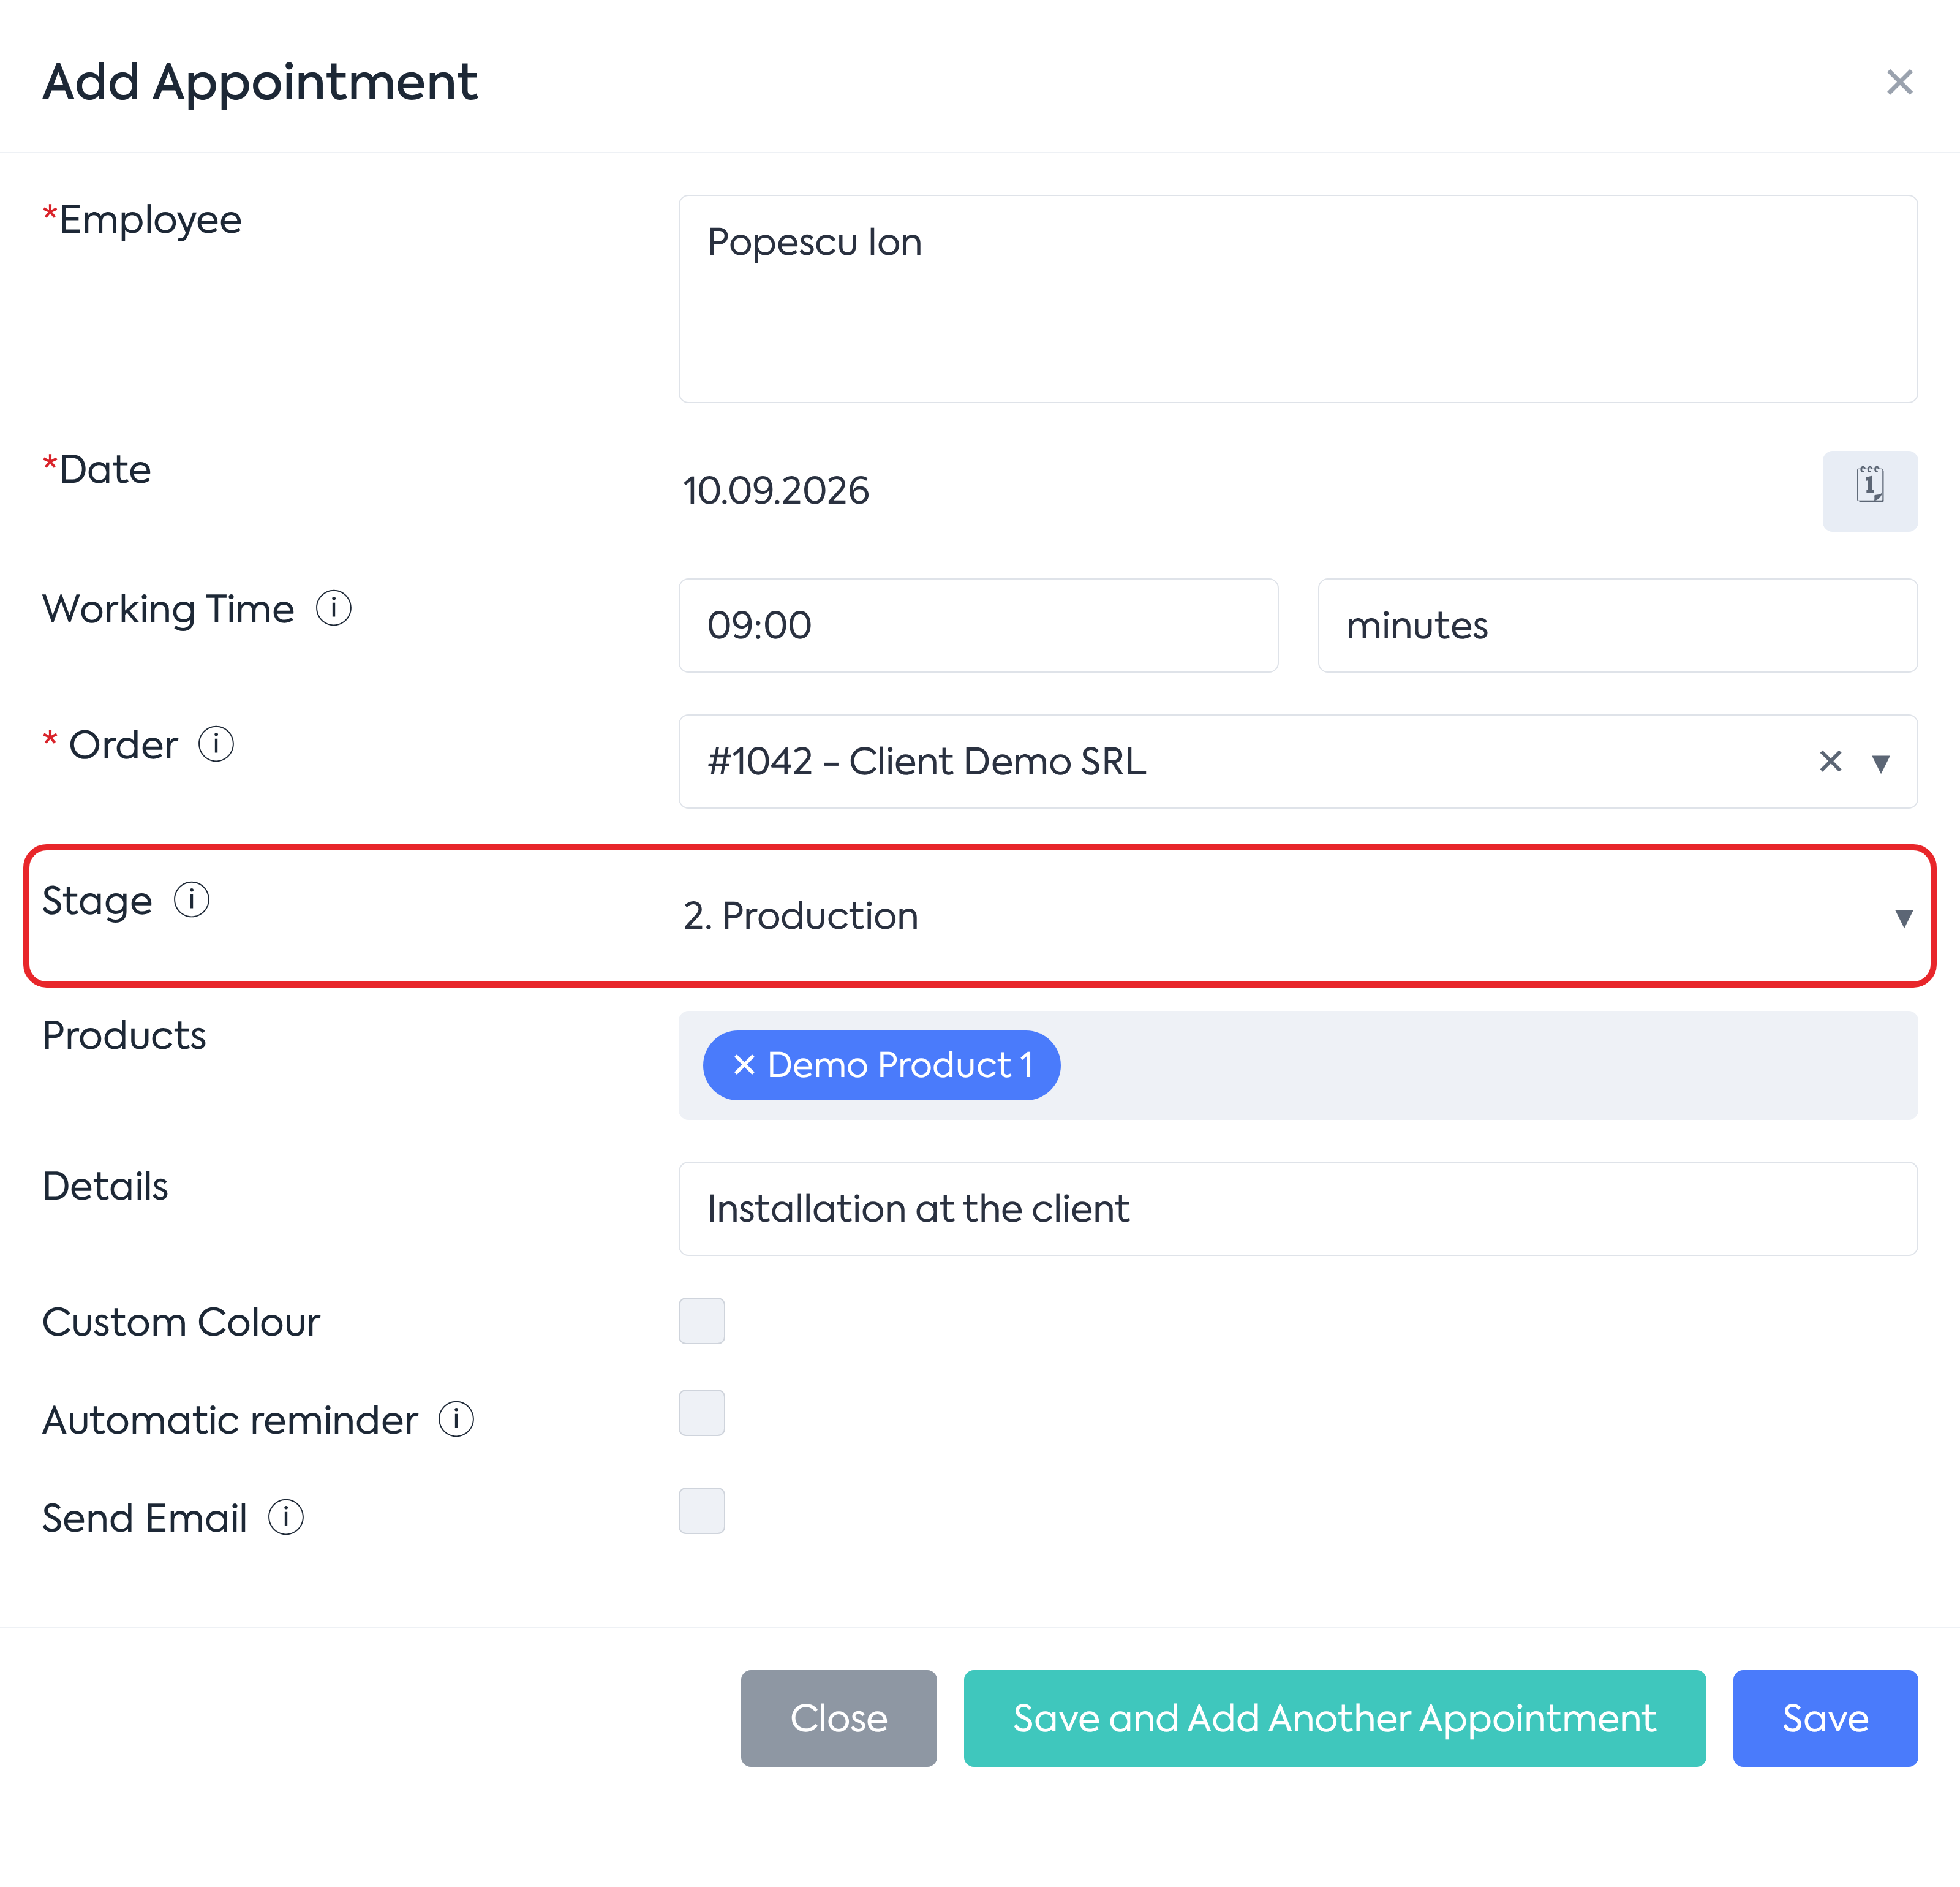
The Add Appointment window: the Stage field, right after Order, with the chosen stage and the clear button visible.
Note: changing the order reloads the list and clears the chosen stage; clearing the order disables the field. If the list cannot be loaded, the message “The order stages could not be loaded. Please try again.” appears.
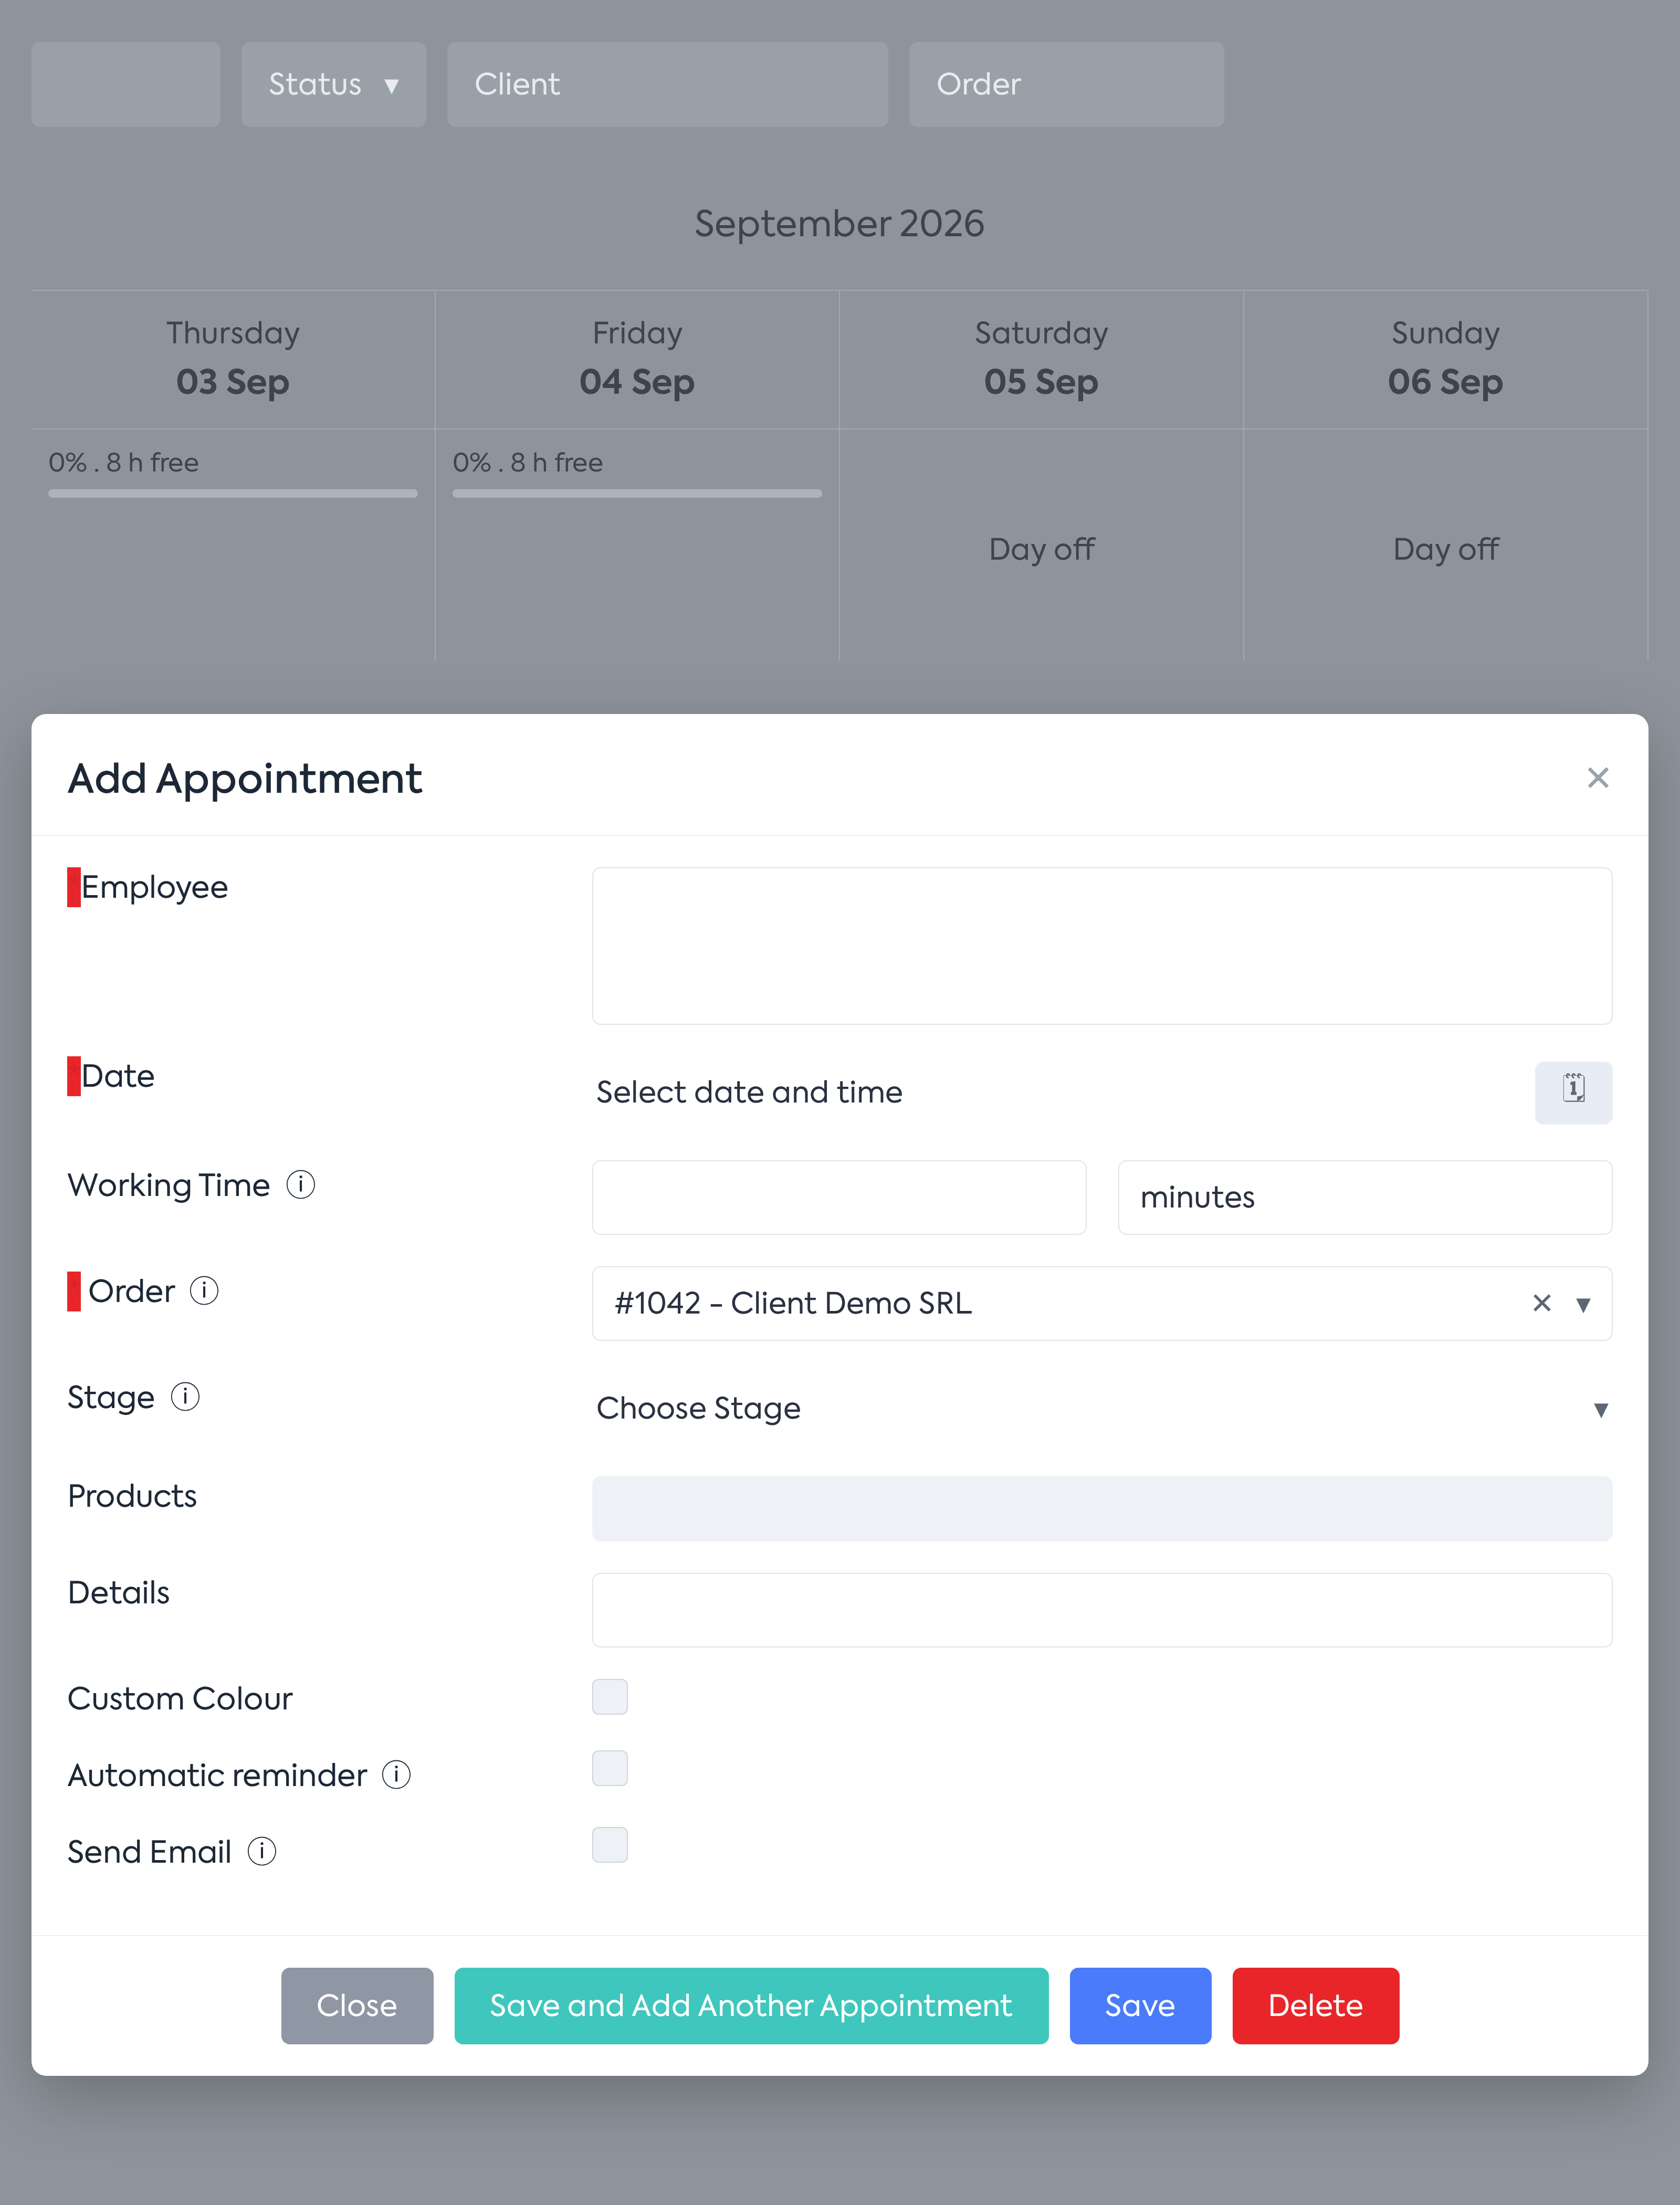
Step 5. Fill in the rest of the appointment as usual (date and time, employees, working time) and press Save (or Save and Add Another Appointment). The stage is validated against the chosen order; saving is refused with the messages “The selected stage does not belong to the order workflow.”, “The selected stage is disabled for the order.” or, for a stage with equipment and no instance chosen, “Select the equipment instance of the stage.”
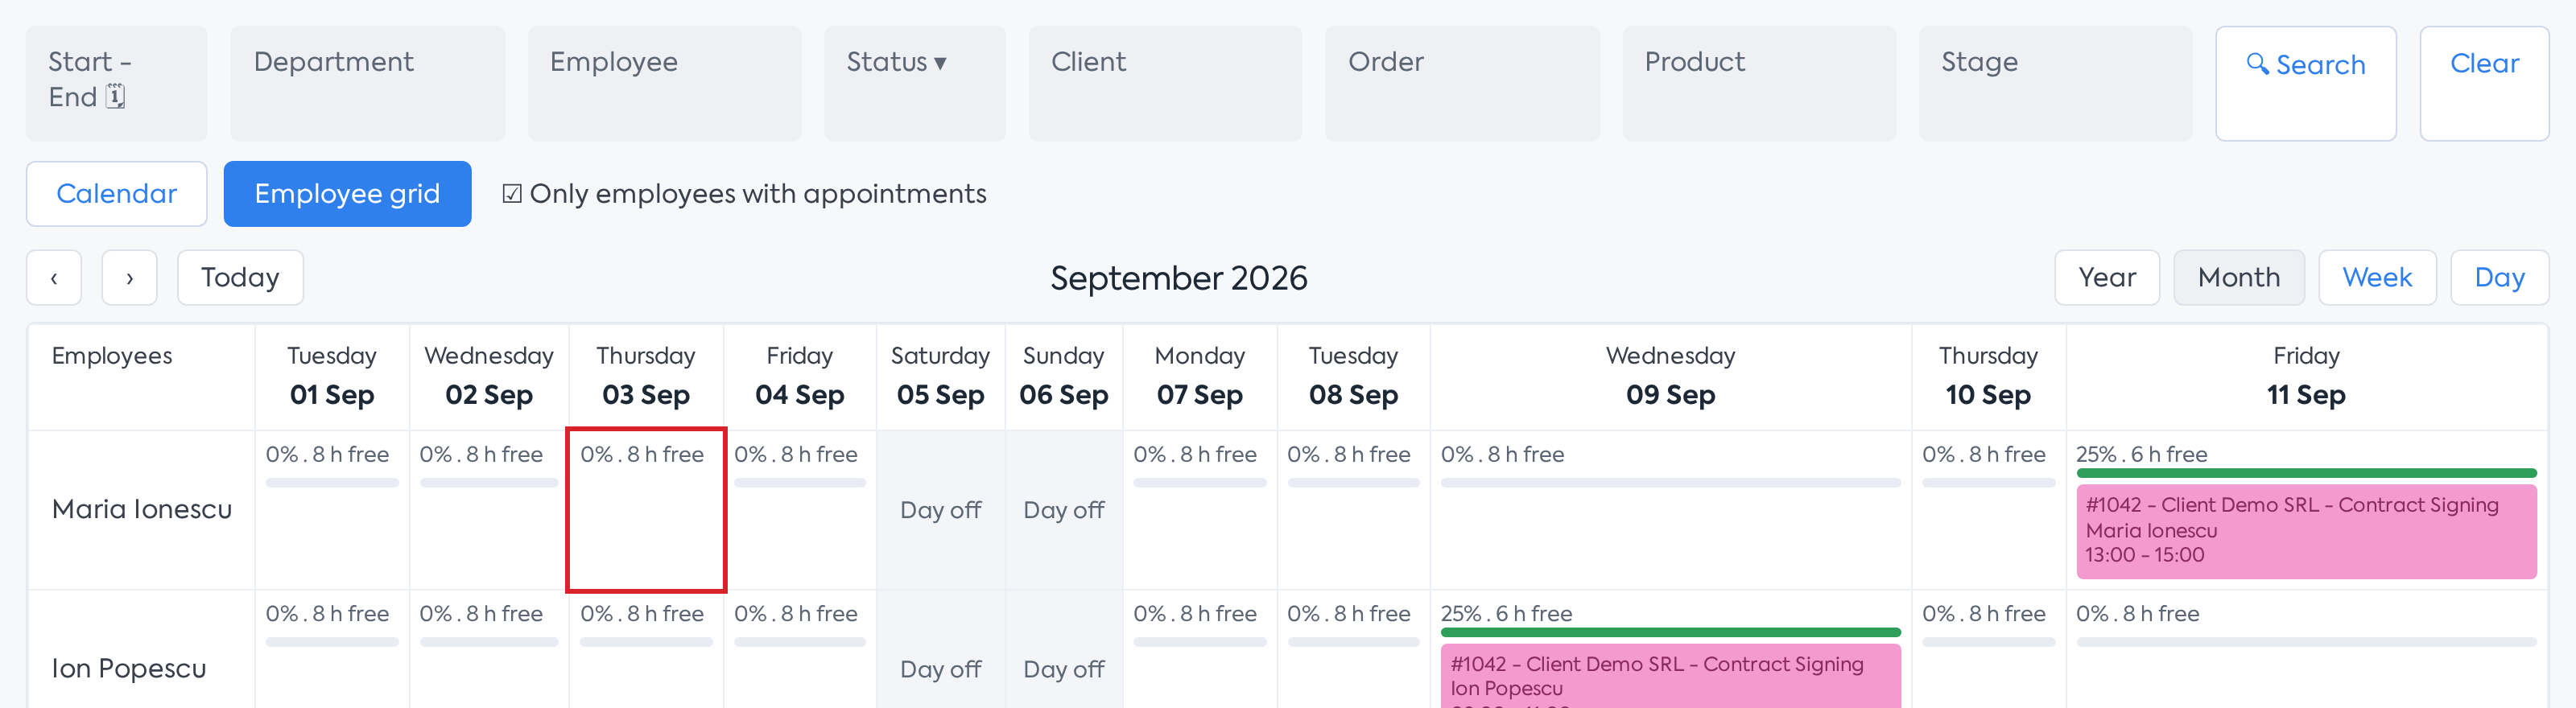
Step 6. Check the event in the calendar: the appointment title (shown in the calendar, in the grid and in notifications) includes the stage, in the format “#<order no.> - <Client> - <Stage>”, for example “#1042 - Client Demo SRL - Assembly” (followed, on the next lines, by the employees and the time interval).
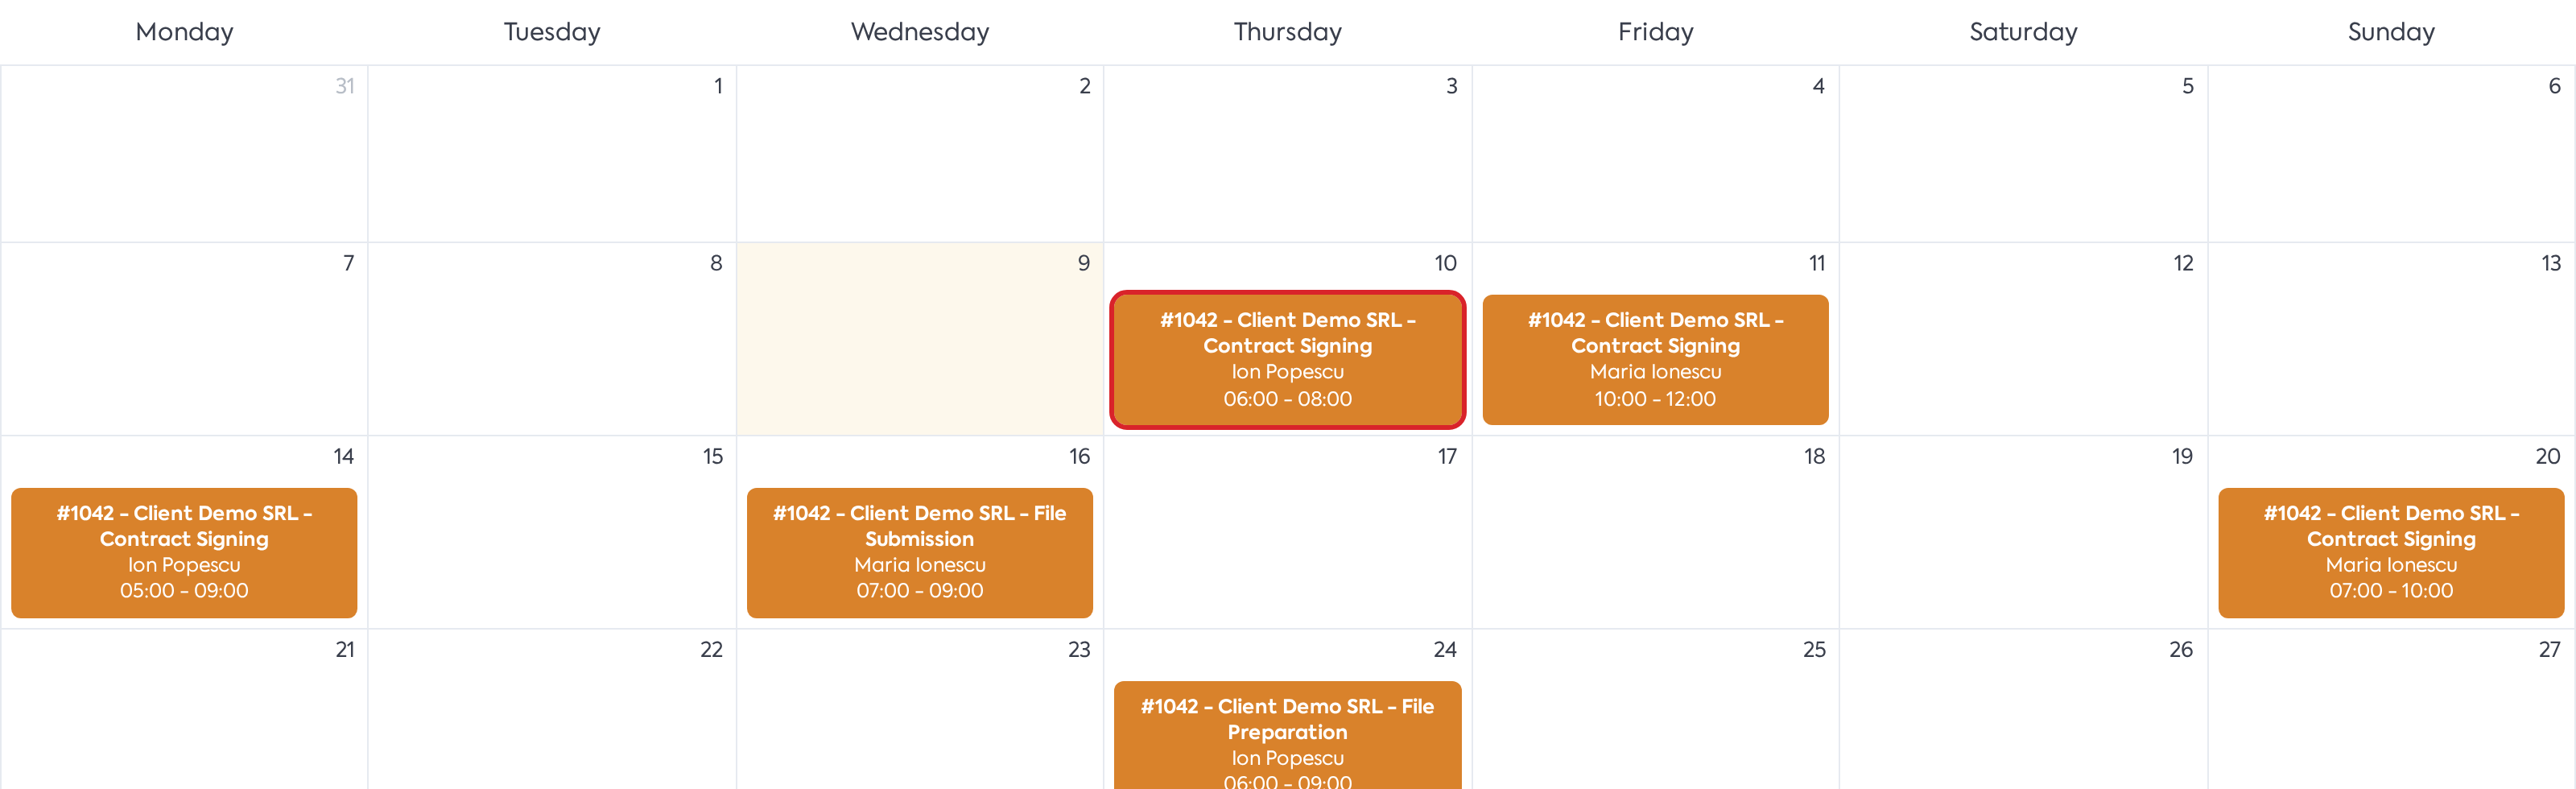
The Appointments calendar with the event that includes the stage in the title.
Note: moving or resizing the event by drag & drop keeps the stage. When editing an appointment, the saved stage appears preselected; clearing the field while editing removes the link, the appointment staying unchanged otherwise. When editing an appointment that already had a stage, if the list cannot be loaded, the field shows “Stage (loading failed)” and the stage is kept, but saving is blocked with the message “The order stages could not be loaded. Retry or reselect the order before saving.”
5. Scheduling from the stage action pop-up
Step 1. In Workflow, press the button of the stage whose action has the Appointment component enabled (for example the Assembly stage of order #1042). The stage action pop-up opens, with the appointment form.
Step 2. Check the Order and Products fields: these are taken automatically from the action context (order #1042, Demo Product 1).
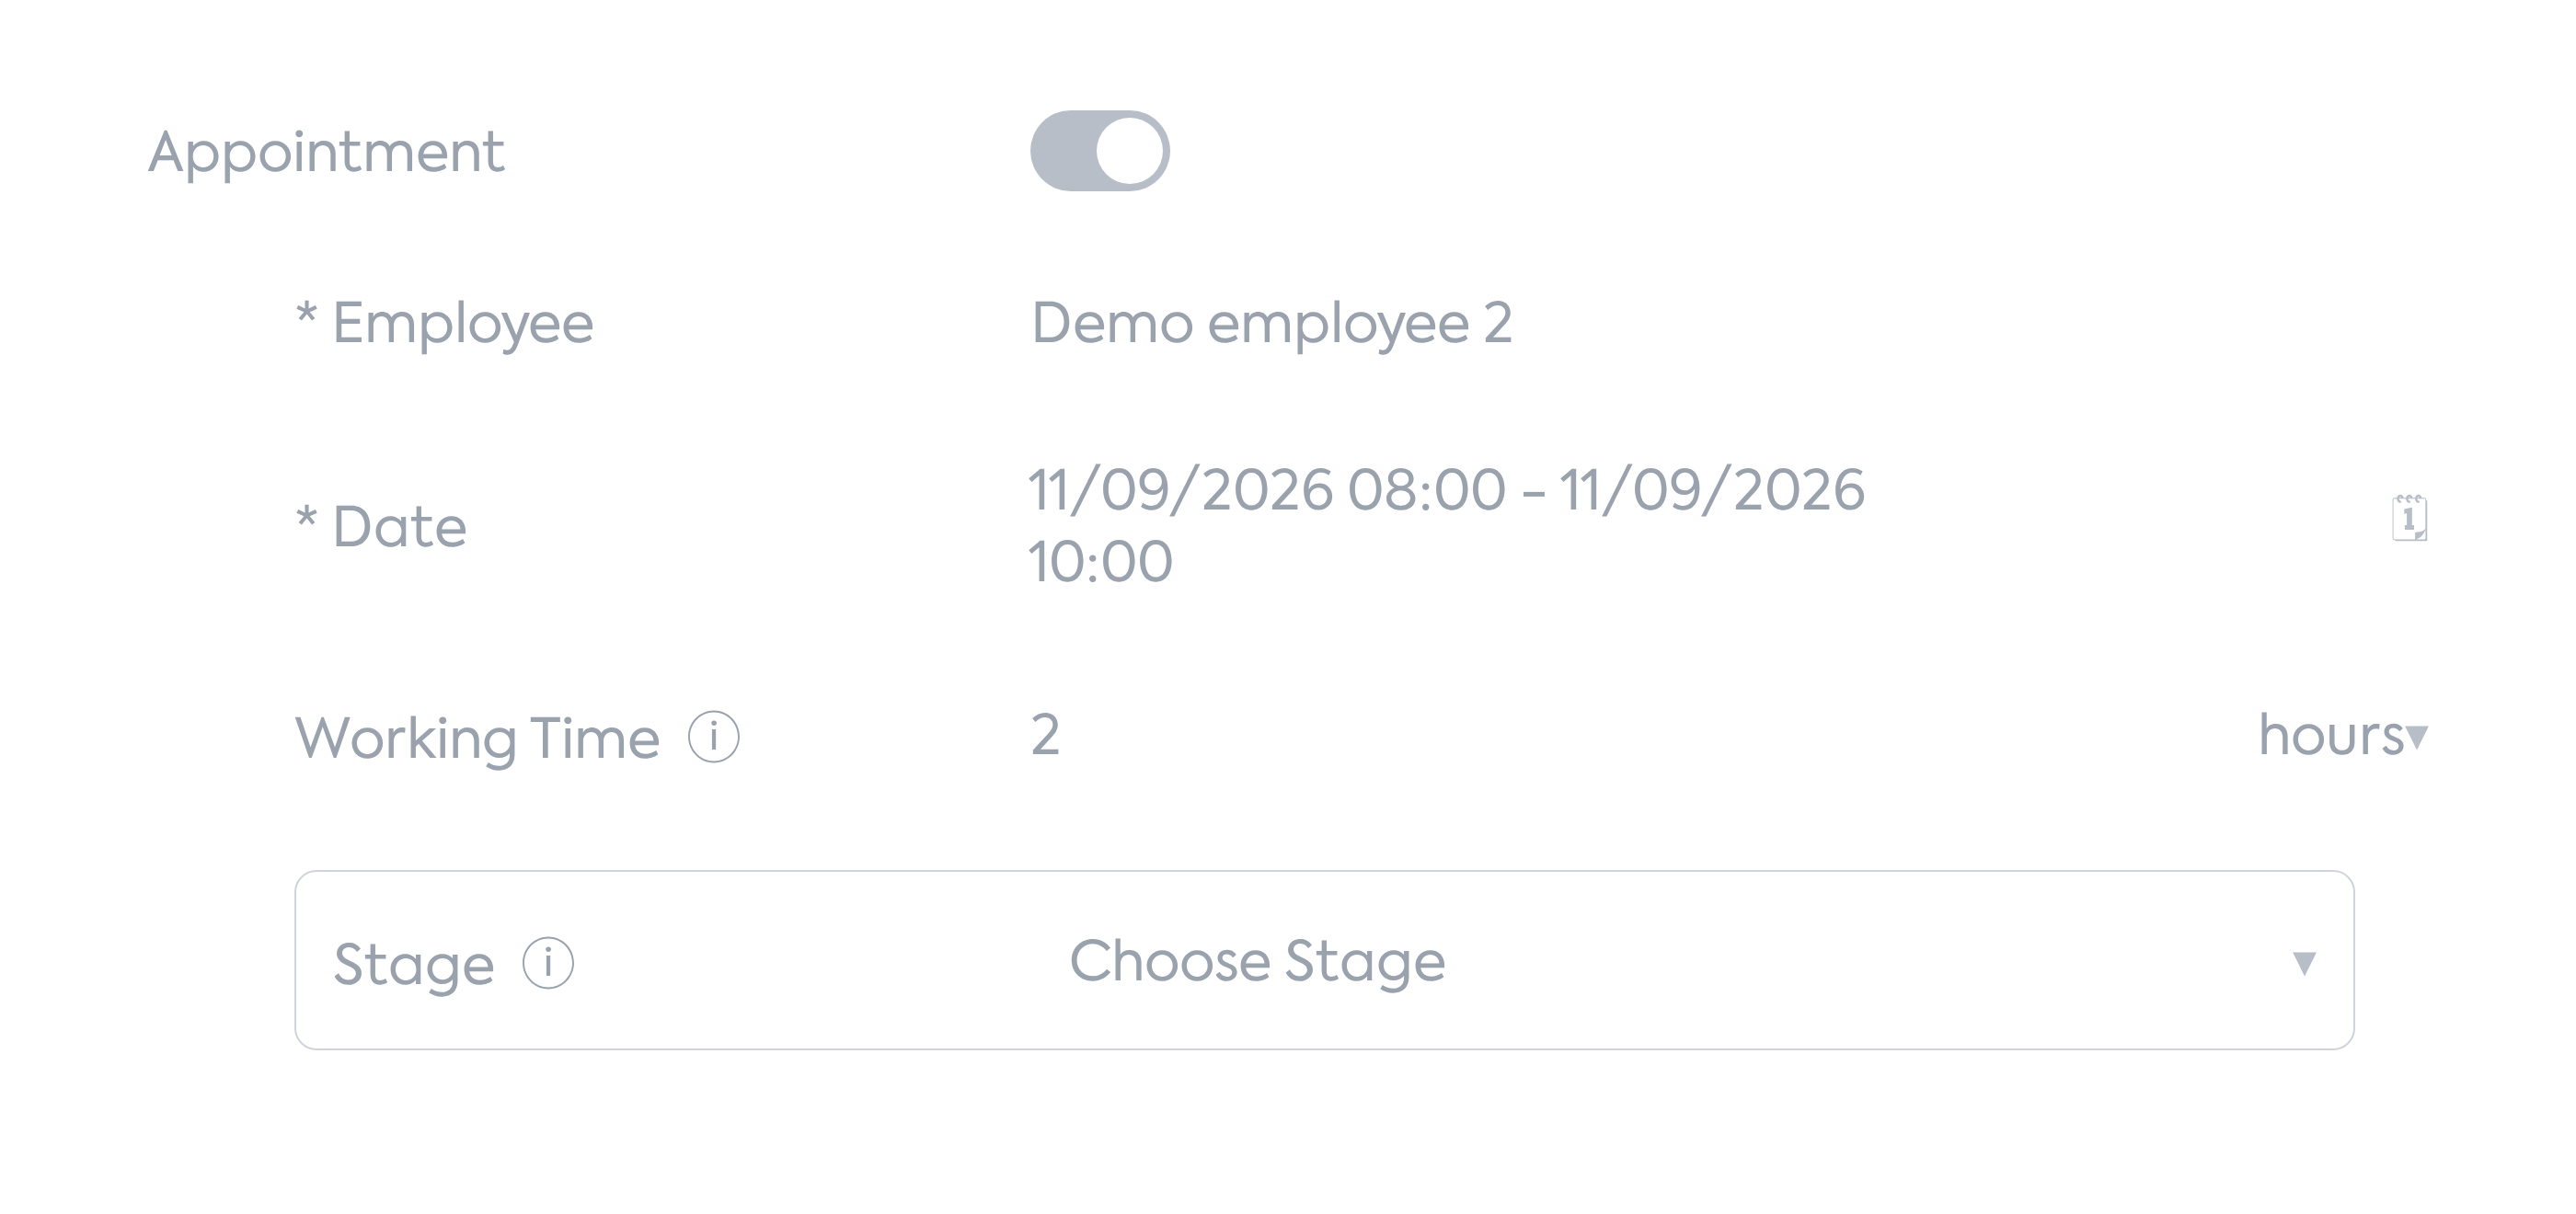
The stage action pop-up, the Appointment component: the fields taken from the context and the Stage field.
Step 3. Choose the stage in the Stage field, with the same rules as in chapter 4. The stage on which the action runs is not preselected — it is chosen manually; if left empty, the appointment is created without a stage.
Step 4. Complete the action. The appointment is created with the chosen stage.
Note: if the chosen stage is no longer valid at the moment of saving, the appointment is created without a stage, without blocking the action.
6. Reading the pill in Workflow
Step 1. Open Workflow (the Orders, Products or Employee Allocation tabs; on mobile, the cards). Each stage cell now has three zones: above the button — the appointment pill; the status button; below the button — the Deadline. For stages with equipment, each equipment button has its own pill and its own deadline.
Step 2. Read the pill: it appears only if the stage (or equipment instance) has at least one linked appointment and the stage is not disabled for the order. It shows the day and month of the first appointment in time (for example “10 Sep”) and, if there are several, a “+N” counter.
Step 3. Interpret the colour: blue by default; red if the day of the displayed appointment is after the day of the stage Deadline. Without a Deadline, the pill is always blue.
Step 4. Hover the mouse over the pill (on mobile, tap it). The tooltip “Appointments per stage (N)” shows one row per appointment — the date, the time interval, the employees (for example Ion Popescu, Maria Ionescu) and the difference from the deadline (“on time”, “-N d” or “+N d” in red). The first row, marked “shown”, is the one in the pill; when there are several appointments the note “The most urgent one is shown (first in time)” appears.
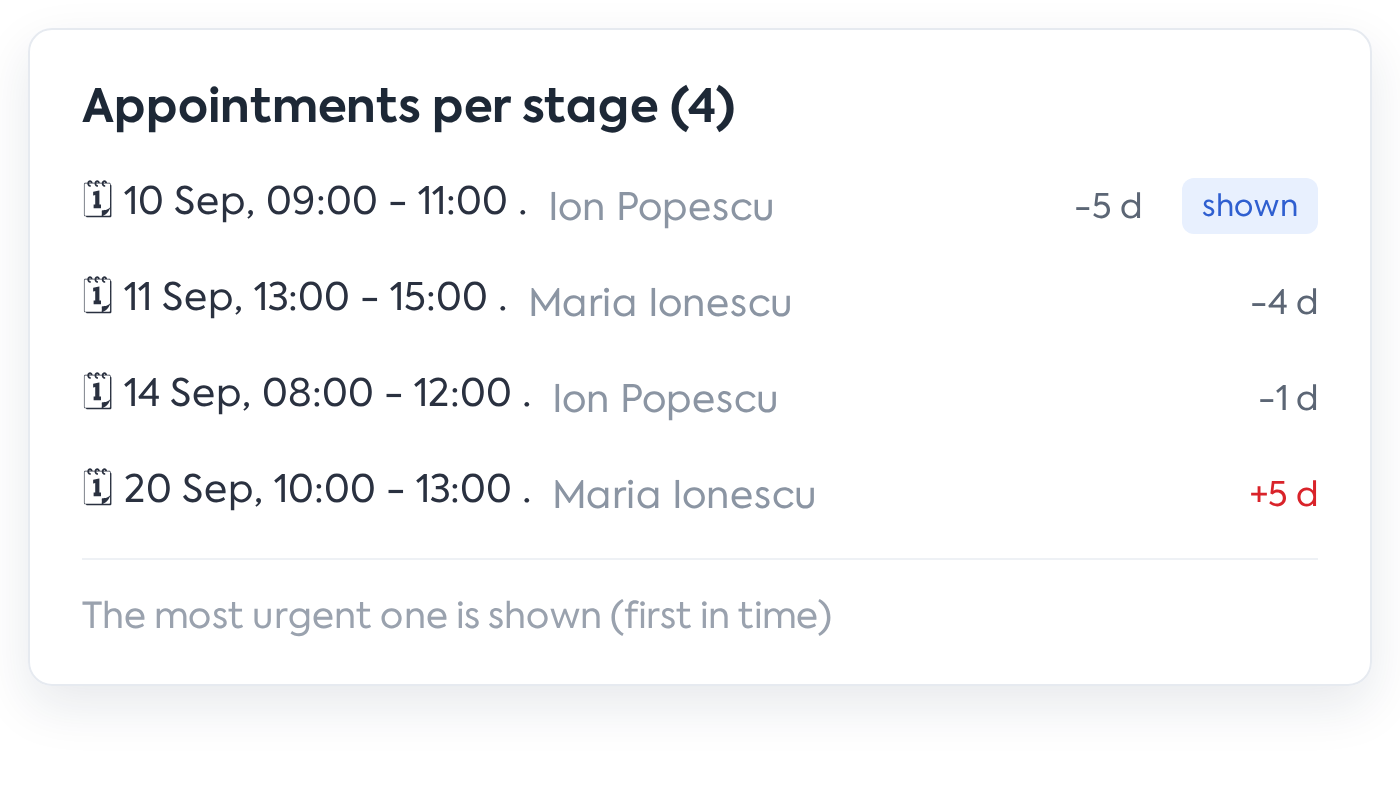
The pill tooltip “Appointments per stage (3)”: one row per appointment, with the date, the time interval, the employees and the difference from the deadline.
Note: the pill is informative — it does not open the appointment and does not trigger the stage action. It stays visible after the stage is completed as well. It updates automatically when appointments are added, changed or deleted.
7. The Stage filter and column in Appointments
Step 1. In Appointments, open the Stage filter in the filter bar (on mobile, in the filter panel). It has multiple selection and the Include / Exclude switch; the options are the stages of the selected workflow.
Step 2. Choose one or more stages. The filter is applied immediately, both in the calendar and grid and in the list, and it is kept when you return to the page.
Step 3. Switch to the Appointment list and look at the new Stage column, between Products and Start Date: it shows the stage name (with the instance number for equipment). The column is not sortable and is hidden on mobile.


The Appointment list with the Stage filter in the filter bar and the Stage column highlighted between Products and Start Date.
Note: in the Calendar and in the Employee grid, events with a stage show the stage in the title; the colours stay unchanged.
8. Disabling a stage that has appointments
Step 1. Open Orders → edit order (for example #1042) → the Stages Included in the Workflow section.
Step 2. Disable a stage that has linked appointments (for example Assembly). The “Warning!” dialog opens with the message “This stage has linked appointments. If you disable it, the appointments will no longer appear in the workflow. Continue?” and the buttons Cancel / Continue.
The “Warning!” dialog with the confirmation message and the Cancel / Continue buttons.
Step 3. Choose one of the options:
- Cancel → the stage stays included;
- Continue → the disabling becomes effective when the order is saved.
Note: when turning on the Exclude the order from the workflow completely option, the check is done for all stages, with the message “Some stages have linked appointments. If you disable them, the appointments will no longer appear in the workflow. Continue?”. If the check cannot be performed, “The appointments linked to the stage could not be checked. Please try again.” appears and the stage stays included.

Step 4. Press Save on the order. The appointments are not deleted and do not lose their stage — only the pill disappears from the workflow; when the stage is re-enabled, the pills reappear.
9. What you see afterwards
- In the Add Appointment / Edit Appointment window: the Stage field after Order.
- In the stage action pop-up (with the Appointment component): the Stage field.
- In Workflow: stage cells with three zones — the appointment pill (blue / red, with the “+N” counter), the status button, the Deadline; a pill and a deadline per equipment button.
- In Appointments: the Stage filter in the filter bar, the Stage column in the Appointment list, event titles in the format “#<order no.> - <Client> - <Stage>” in the Calendar and in the Employee grid.
- In Workflow: the “Warning!” dialog when disabling a stage that has appointments.
- In the unified Calendar, the iCal feed, the e-mails and the appointment notifications: the appointment title includes the stage.
10. Rules and limits
- The Stage field is optional; without a stage, the appointment works exactly as before.
- The field is disabled until an order is chosen; the list contains the stages of the order workflow, in workflow order, without the stages disabled for the order.
- Stages with equipment: one option per equipment instance (“Print 1”, “Print 2” …); if no order line has equipment, the stage does not appear. When saving, choosing the equipment instance is mandatory.
- Changing the order reloads the list and clears the stage; clearing the order disables the field.
- Loading error message: “The order stages could not be loaded. Please try again.” When editing an appointment that already had a stage, it is kept (the field shows “Stage (loading failed)”), but saving is blocked with the message “The order stages could not be loaded. Retry or reselect the order before saving.”
- On Save, saving is refused if the stage does not belong to the order workflow (“The selected stage does not belong to the order workflow.”), is disabled for the order (“The selected stage is disabled for the order.”) or the equipment instance is missing (“Select the equipment instance of the stage.”).
- From the stage action pop-up, the stage is not preselected; if the chosen stage is no longer valid when saving, the appointment is created without a stage, without blocking the action.
- The appointment title: “#<order no.> - <Client> - <Stage>”; drag & drop keeps the stage.
- The pill: it appears only with at least one linked appointment and the stage active for the order; it shows the day and month of the first appointment in time and the “+N” counter; blue by default, red if the day of the displayed appointment is after the day of the Deadline; without a Deadline it is always blue.
- Tooltip: “Appointments per stage (N)”, one row per appointment, the difference from the deadline “on time”, “-N d” or “+N d” (red); with several appointments, the note “The most urgent one is shown (first in time)”.
- The pill is informative (it does not open the appointment, it does not trigger the action), it stays visible after the stage is completed and it updates automatically.
- The Stage filter: multiple selection, Include / Exclude, applied immediately in the calendar, grid and list, kept when returning to the page.
- The Stage column in the list: between Products and Start Date, not sortable, hidden on mobile.
- Disabling a stage that has appointments from the order: the “Warning!” dialog with Cancel / Continue (a plural message for Exclude the order from the workflow completely); the appointments are not deleted and do not lose their stage, only the pill disappears; when re-enabled, the pills reappear.
- If a stage is deleted from the workflow (Workflow settings), the linked appointments remain, but without a stage.
11. Settings and permissions
There are no new settings. The relevant existing settings: the Appointment component on stage actions and the Deadline per stage in the order (it determines the red colouring of the pill). Permissions:
- loading the list of stages in the Stage field — at least one of Appointments – Add or Appointments – Edit;
- saving, editing and deleting appointments — the existing Appointments permissions;
- checking the appointments when disabling stages from the order — Orders – Edit;
- the pills in Workflow — visible to anyone who sees the Workflow.
12. Impact in other modules
- Workflow: a new look of the stage cells (reserved zones, pills, deadline per equipment).
- Appointments: new filter, column and field; event titles with the stage.
- Orders: confirmation dialog when disabling stages that have appointments.
- Unified calendar and iCal feed, appointment e-mails and notifications: they take the appointment title, so they include the stage.
- Workflow settings: if a stage is deleted from the workflow, the linked appointments remain, but without a stage.