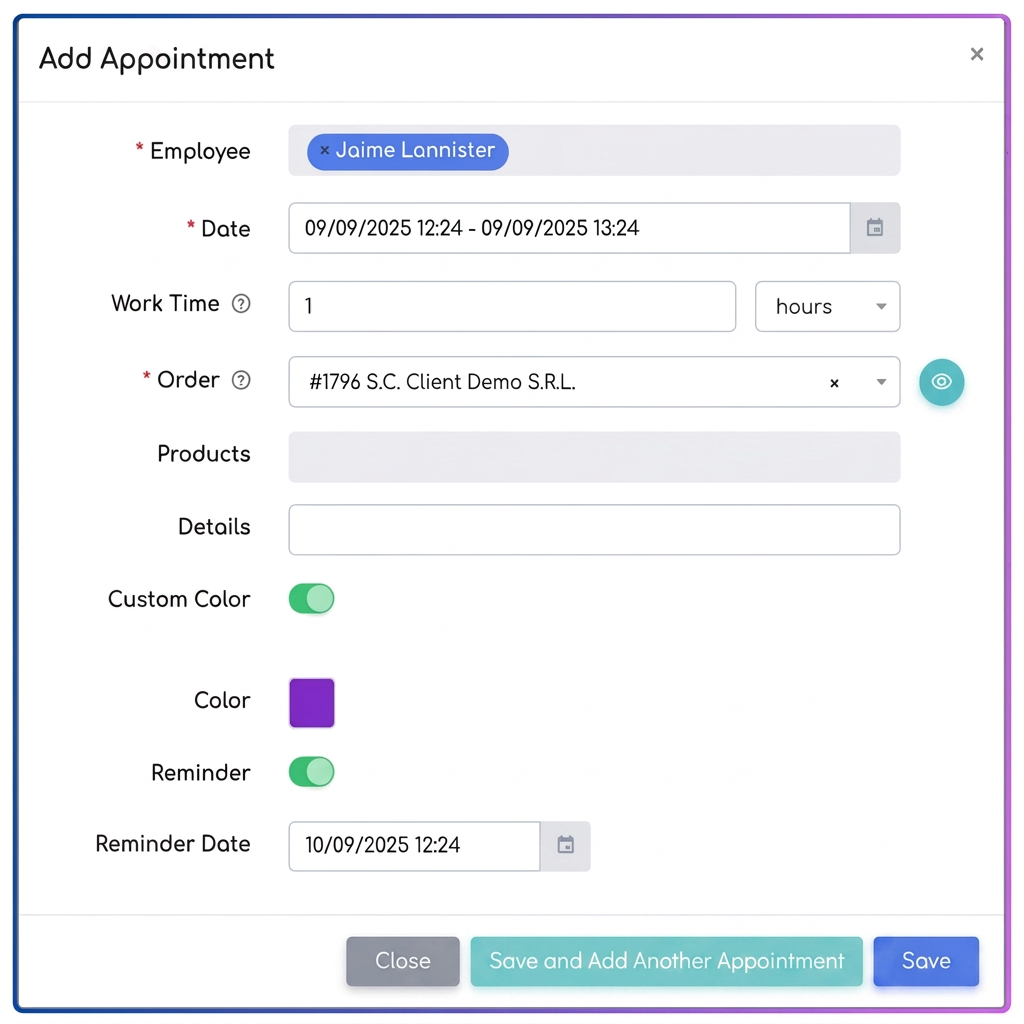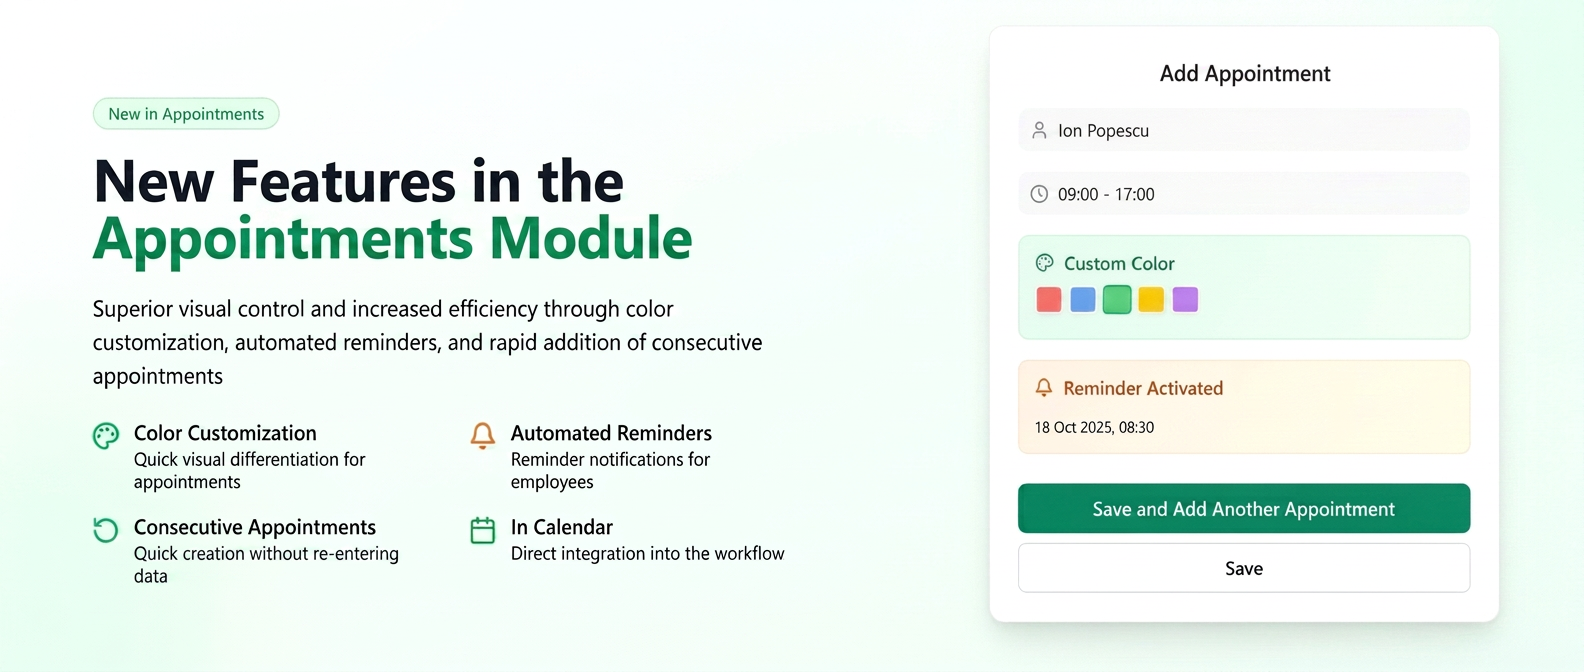
To increase efficiency and provide you with superior visual control, we have optimized the Appointments module with new features that allow for color customization for events, setting automated reminders, and quickly adding multiple consecutive appointments.
Starting Point:
Navigate to the left menu to Workflow and select the Appointments tab. You will see the work calendar.
Feature 1: Color Customization for Appointments
This option allows you to assign specific colors to each appointment, helping you visually differentiate between appointment types.
Step 1: Create a new appointment by clicking on a free day in the calendar. The "Add Appointment" pop-up window will open.
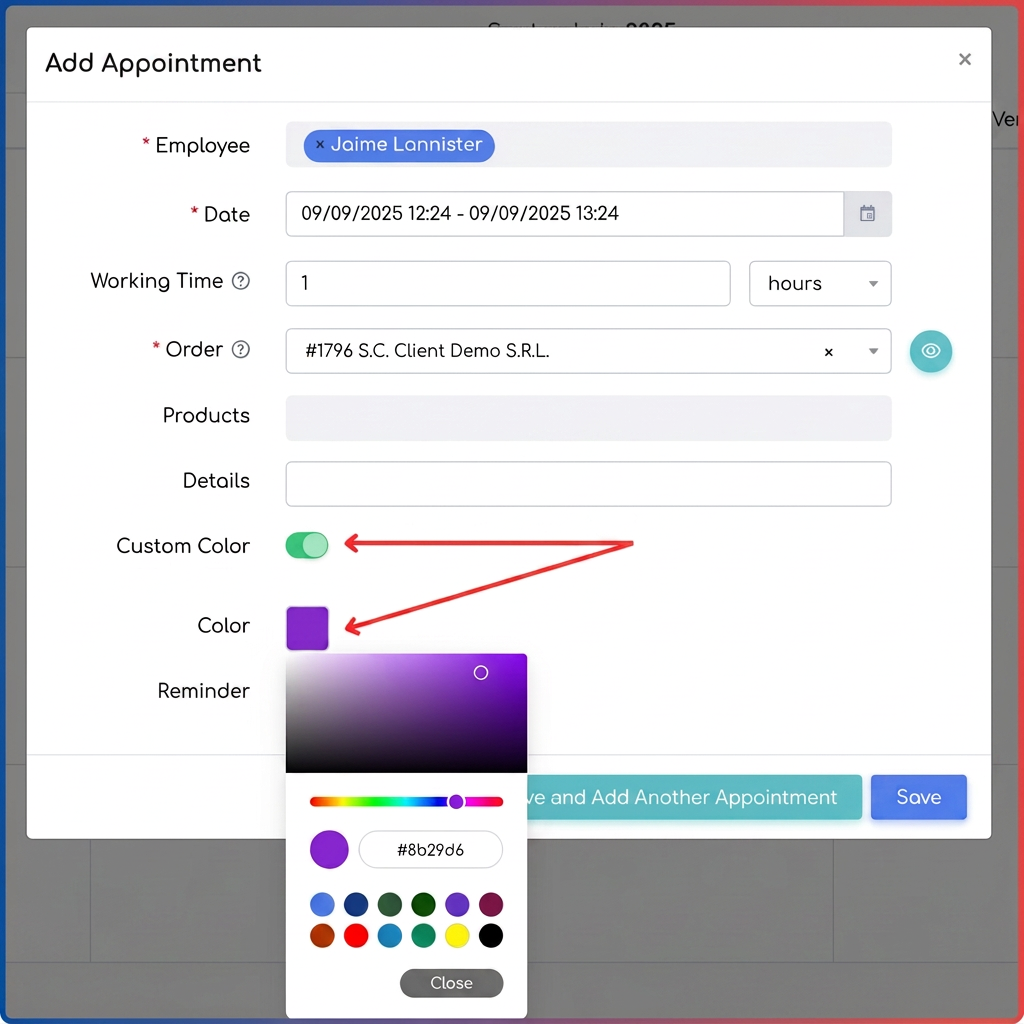
Step 2: In the open window, locate the "Custom Color" option and activate the toggle.
Step 3: Once activated, a new field called "Color" will appear. Click on the colored square to open the color picker.
Step 4: Choose the desired color in two ways:
- Select any shade from the color palette.
- Choose one of the predefined colors at the bottom of the picker.
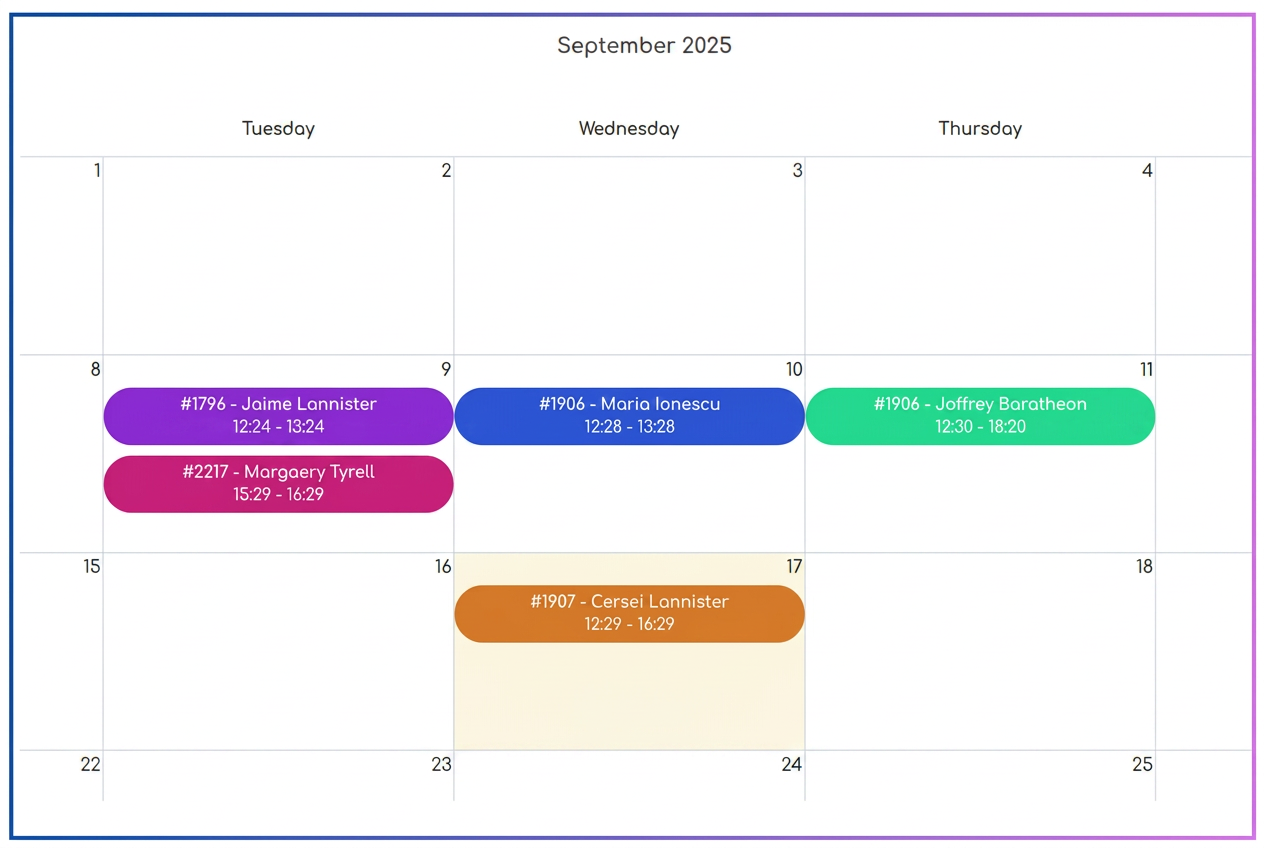
The saved appointment will appear in the calendar with the background in the color you selected.
Feature 2: Adding a Reminder (Reminder Notification)
You can now set an automatic reminder for employees assigned to an appointment.
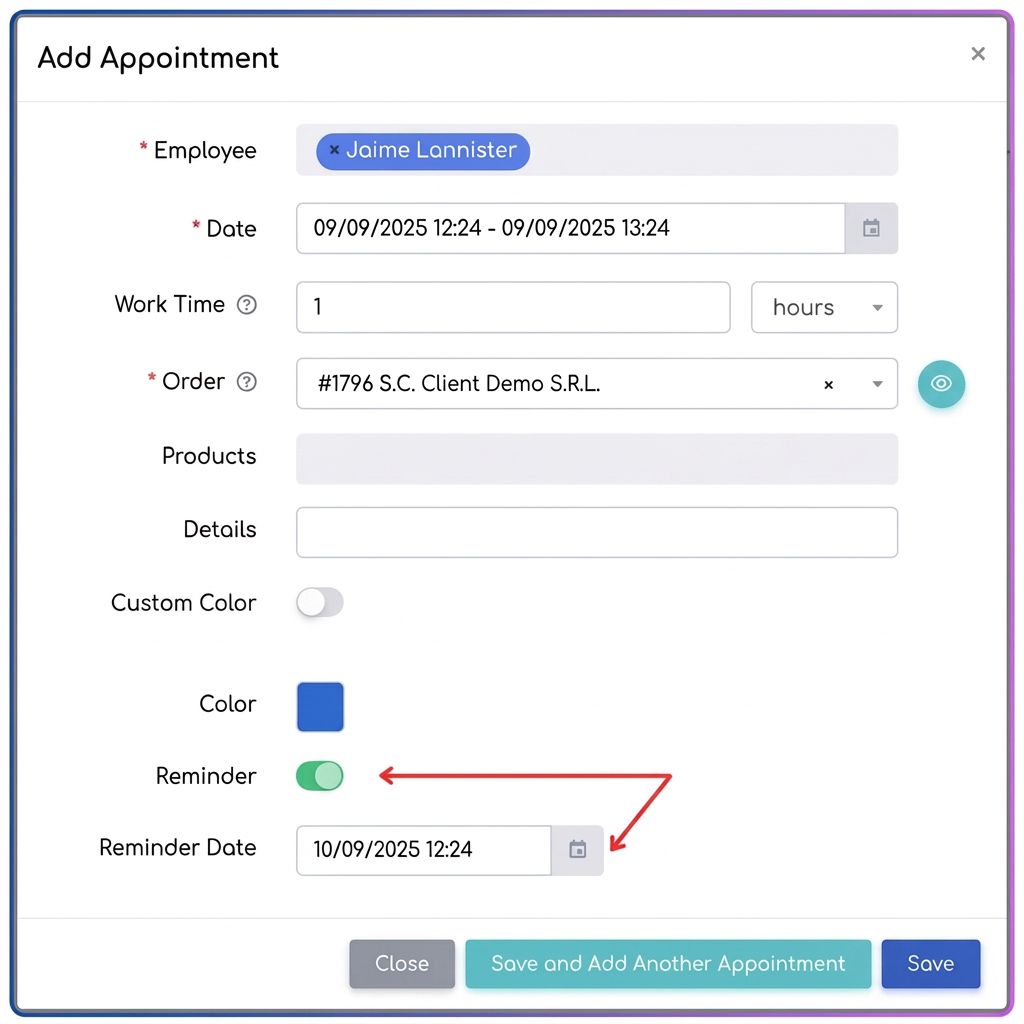
Step 1: In the same "Add Appointment" window, locate the "Reminder" option and activate the toggle.
Step 2: Upon activation, a new field will appear: "Reminder Date". Click on this field to set the exact date and time you want the reminder to be sent.
Important: The reminder notification will be sent automatically to the employee (or employees) you selected in the "Employee" field at the top of the window.
Feature 3: Save and Add Another Appointment
For situations where you need to quickly create multiple similar appointments (for example, for the same employee or the same order, but on different days), we have added a new button that saves you precious time.
Step 1: Fill in all the details for the first appointment (Employee, Order, Working Time, etc.).
Step 2: Instead of clicking the "Save" button, click the new "Save and Add Another Appointment" button.
What happens?
- The appointment you just configured is saved and added to the calendar. You will see a confirmation message at the top of the screen ("Appointment has been saved").
- The "Add Appointment" pop-up window does not close.
- All fields remain filled with the information you previously entered.
Step 3: Now you can change only the necessary details for the next appointment (for example, the date or the product) and press "Save and Add Another Appointment" again to continue or "Save" to finish. This eliminates the need to re-enter the same data multiple times.