
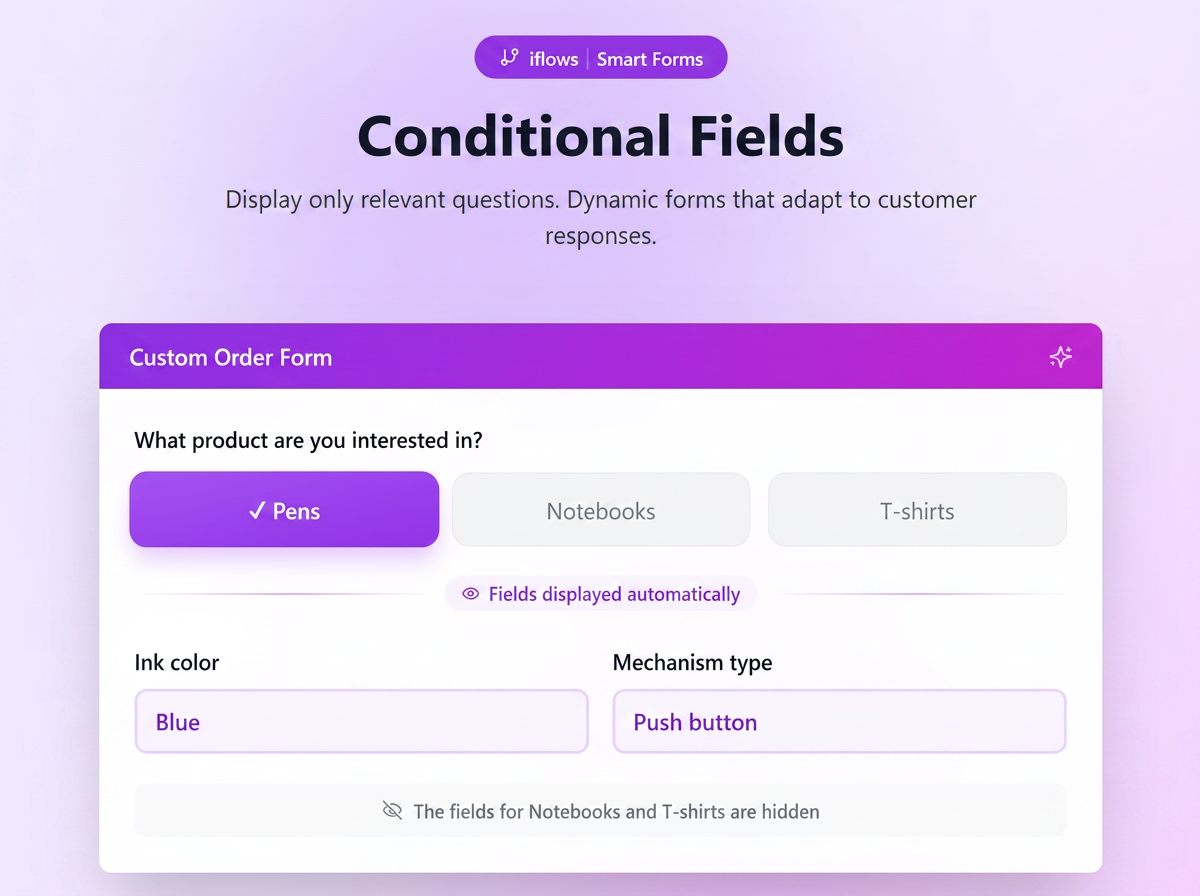
🌟 What are Conditional Fields and why use them?
Imagine you go to a restaurant and the waiter asks: "Would you like coffee or tea?". If you answer "Coffee", the next natural question is "With or without milk?". It makes no sense to ask about the type of tea if you chose coffee.
This is exactly what Conditional Fields do: they hide irrelevant questions and display only those that matter based on the customer's previous answers.
💡 Use cases:
- Promotional Sales: If the user chooses "Pens", show the "Ink color" field. If they choose "Planners", show the "Format (A4/A5)" field.
- Auto Services: If the user chooses "Oil change", show the "Engine type" field. If they choose "Tire service", show the "Rim size" field.
- Advertising Production: If the product "Business Cards" is selected, finishing fields appear: "Lamination (Matte/Glossy)" or "Rounded corners". If "Flyers" is selected, these finishing options disappear.
- Furniture Production: If to the question "Do you require assembly?" the customer checks "Yes", then two new fields appear: "Floor level" and "Is there a freight elevator?". If they check "No", these logistical details no longer appear, simplifying the form.
🛠️ Step 1: Creating all necessary fields
Before setting the logic, you must have all the "puzzle pieces" created.
- Go to Marketing -> Forms -> Custom Fields. *Note: you can also create fields while building the form - so you can choose to skip directly to point 2.
- Create both the "Parent" field (the one that triggers the action) and the "Child" fields (the ones that will be initially hidden).
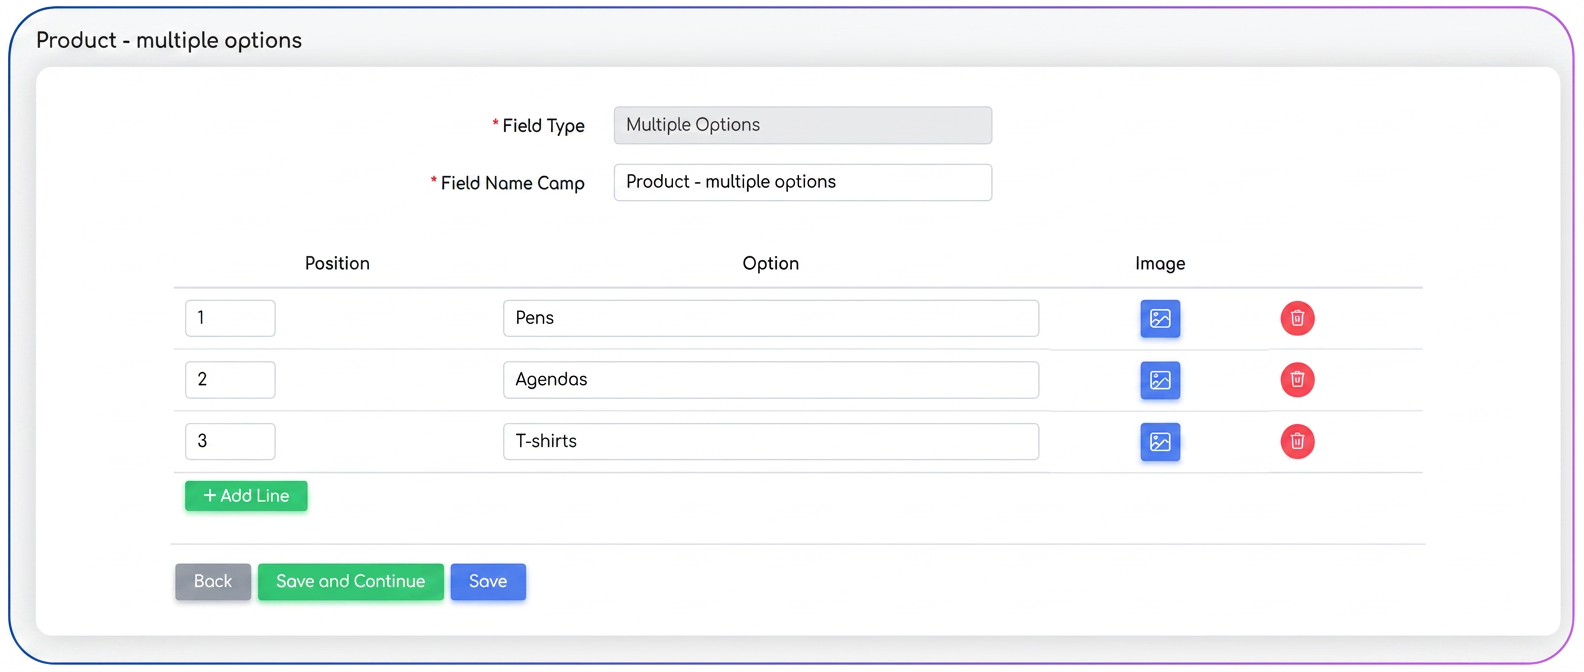
- Example: Create the field "Which product interests you?" (Parent - Select or Multiple Choice type) and the field "Pen color" (Child)
🏗️ Step 2: Building the Form
Now you need to place all these fields into a form.
- Go to Marketing -> Forms -> Add New Form (or edit an existing one).
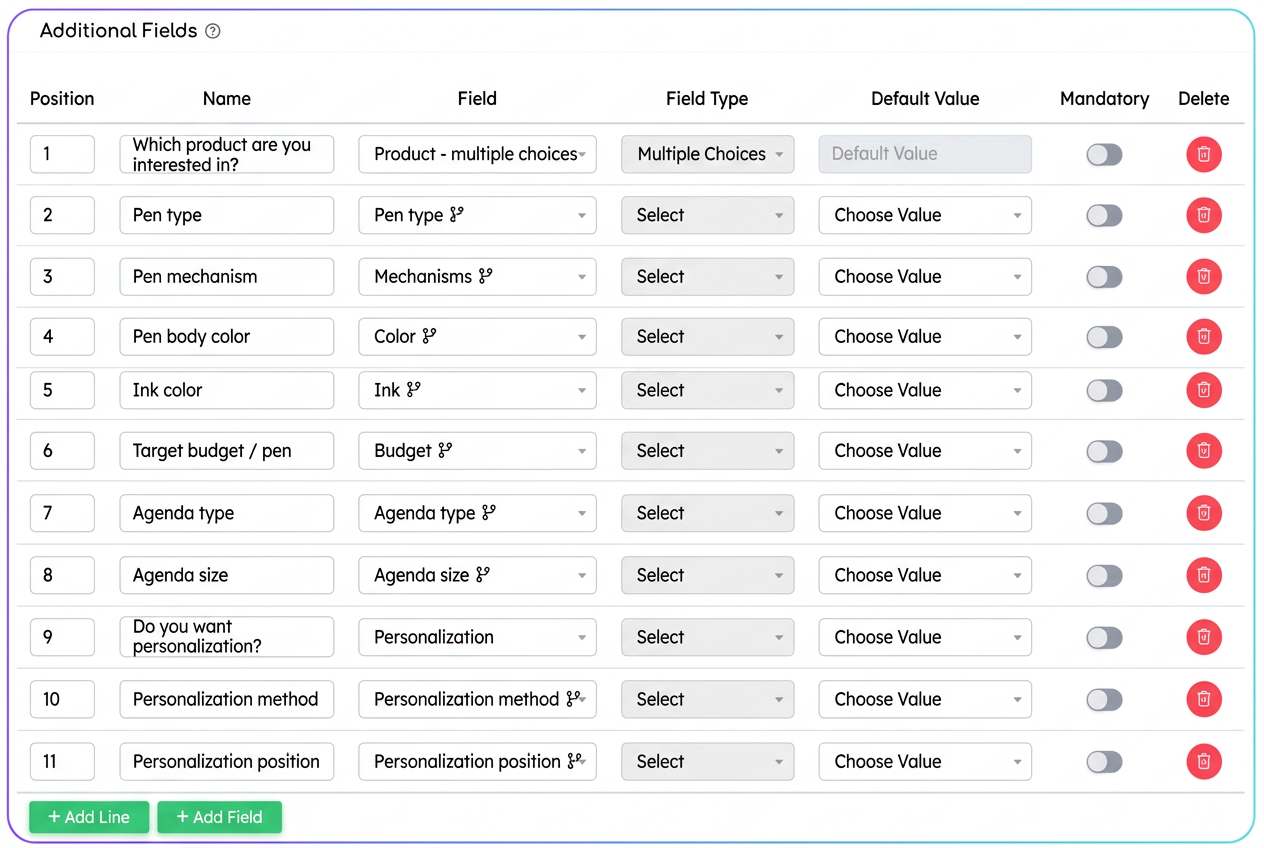
- In the Additional Fields section, add all the fields created in Step 1, regardless of whether they are parent or child.
- Save the form. At this point, if you view the form, you will see all fields one below the other (it looks cluttered, but this is normal for now).
🧠 Step 3: Defining the Logic (The Magic)
Now we will tell the system: "Hide field X and show it only if option Z is selected in field Y".
- Return to the Custom Fields list.
- Find the Child Field in the list (the one you want to be initially hidden).
- Example: The "Pen Mechanism" field.
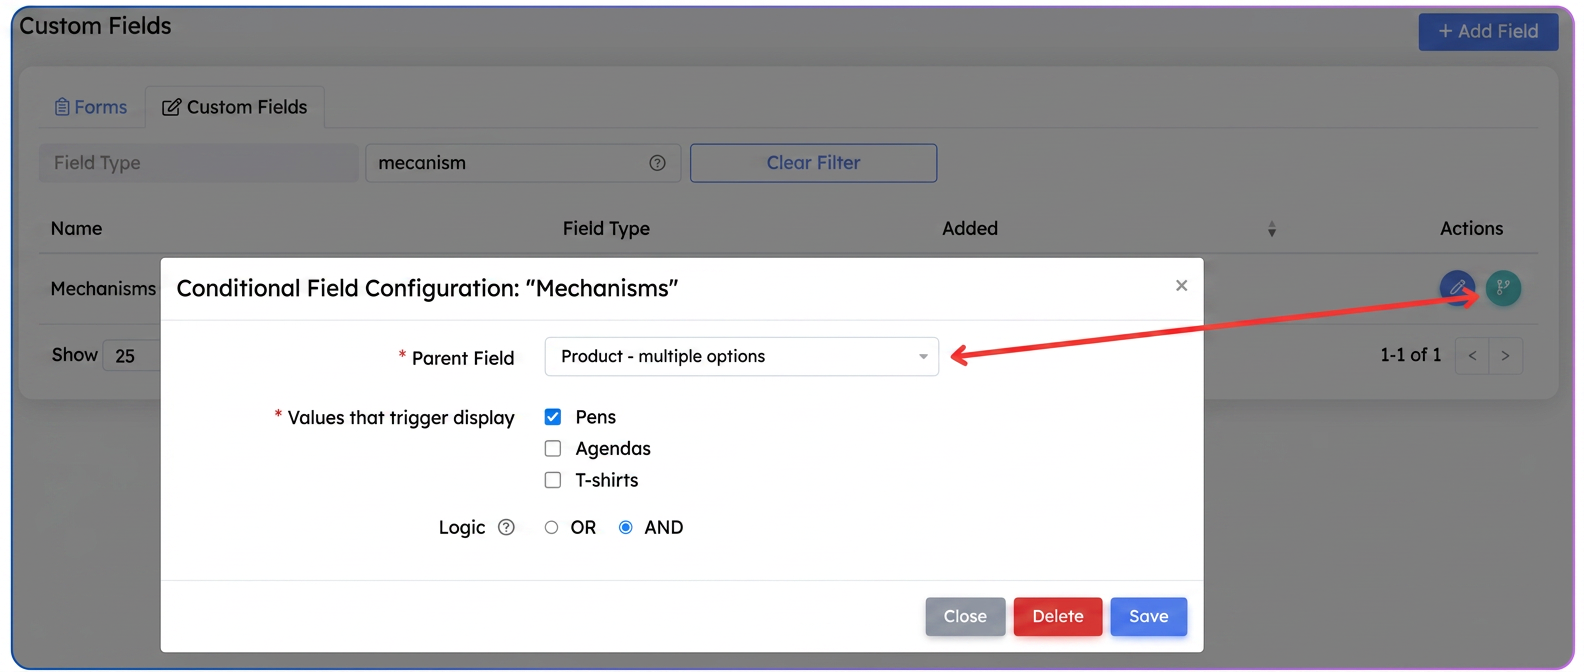
- In the Actions column, click on the blue "Set Condition" icon (looks like a branch sign 🔀).
- A pop-up titled "Conditional Field Configuration" will open:
- Parent Field: Choose the main question from the list (e.g.: "Which product interests you?").
- Trigger values: Check the box corresponding to the option that should activate this field (e.g.: check "Pens").
- Logic (OR / AND): If you choose multiple trigger values, select OR (if any of them are chosen) or AND (if all of them must be chosen - applies to multiple checkboxes).
🧠 Understanding the Logic: OR vs. AND
This setting tells your system exactly which combination of answers should "show" the hidden field.
🔵 Case 1: "OR" Logic (Either one or another)
The child field appears if the customer checks any of the options you selected. This is the most commonly used setting.
- Concrete example: You sell promotional materials. You have a parent field: "Which products do you want?" with options: [Pens], [Planners], [T-shirts], [USB Sticks].
- You want to display the field "Which customization method do you want?" only for rigid objects.
- Setting: Select OR and check: [✓] Pens, [✓] Planners, [✓] USB Sticks.
- Result: If the customer checks only Pens, the field appears. If they check Pens and Planners, the field appears. If they check only USB Sticks, the field appears. It is enough to check one of them.
🔴 Case 2: "AND" Logic (Both one and the other - Both mandatory)
The child field appears only if the customer checks all the options you selected at the same time. If they check only one, the field remains hidden.
- Concrete example: You have a custom clothing store. The parent field is: "What would you like us to print?" with options: [Front], [Back], [Sleeve].
- You have a special offer: a field named "Full Package Discount Code" that you want to show only to those who customize the t-shirt everywhere.
- Setting: Select AND and check: [✓] Front, [✓] Back, [✓] Sleeve.
- Result:
- If the customer checks only [Front] and [Back] -> The discount field DOES NOT appear.
- If the customer checks [Front], [Back] AND [Sleeve] -> Only then does the "Discount Code" field appear.
💡 Summary:
| Logic | Rule in short | When to use it? |
| OR | "I want it to appear if any of these options are chosen." | When several different products need the same information (e.g.: clothing size). |
| AND | "I want it to appear only if all are checked at once." | When you want to offer something special (a discount, a gift, an extra service) only for a specific combination of products. |
- Click on Save.
👀 Step 4: Checking the Indicators
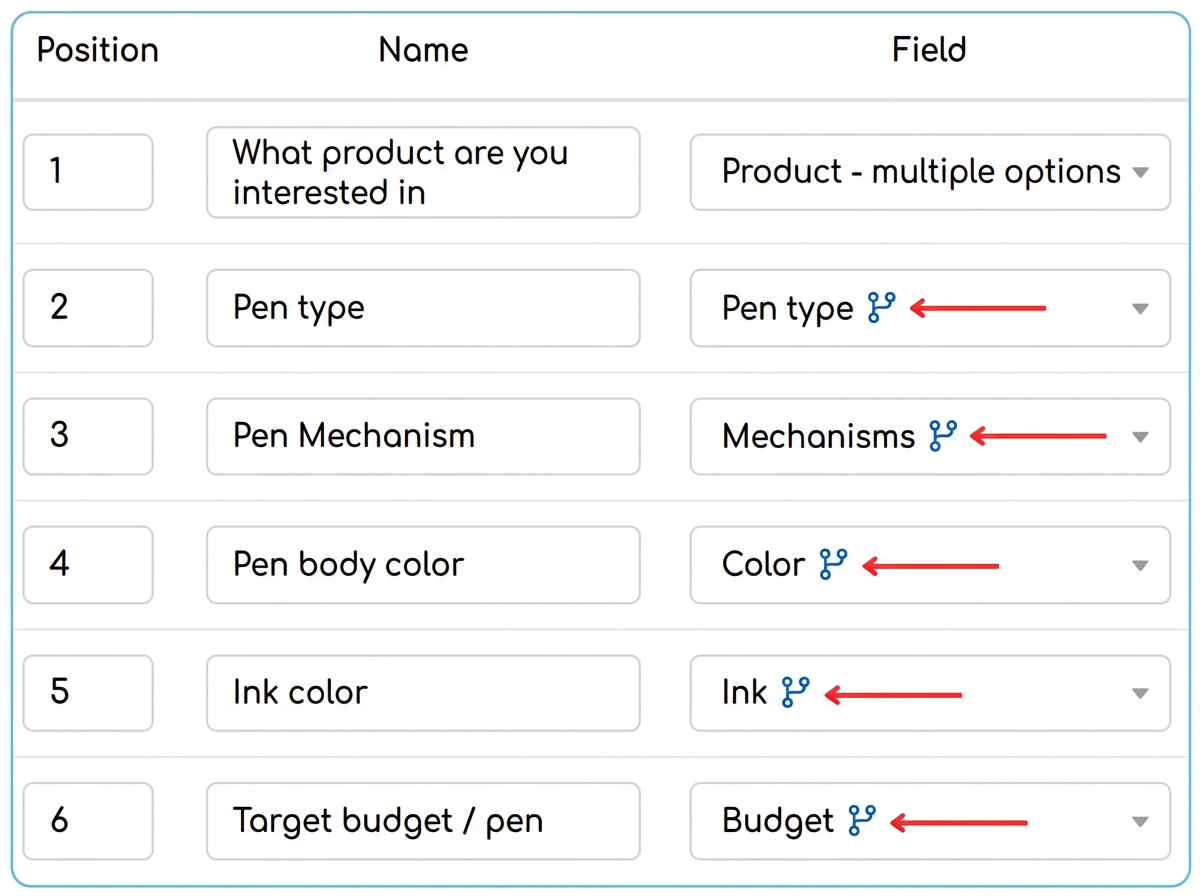
After you have saved the condition, you will notice, when navigating in form edit mode, a small icon next to the field name (a branch sign). If you hover your mouse over it (mouse-over), the system will confirm: "Parent field: [Field Name]".
Step 5: Testing the Form (Final Result)
The final step is to see how it works for the customer
- Open your public form link or click view on the form.
- Observe: The fields set as "child" (e.g.: Pen color, Mechanism) have disappeared from the page. The form looks clean.
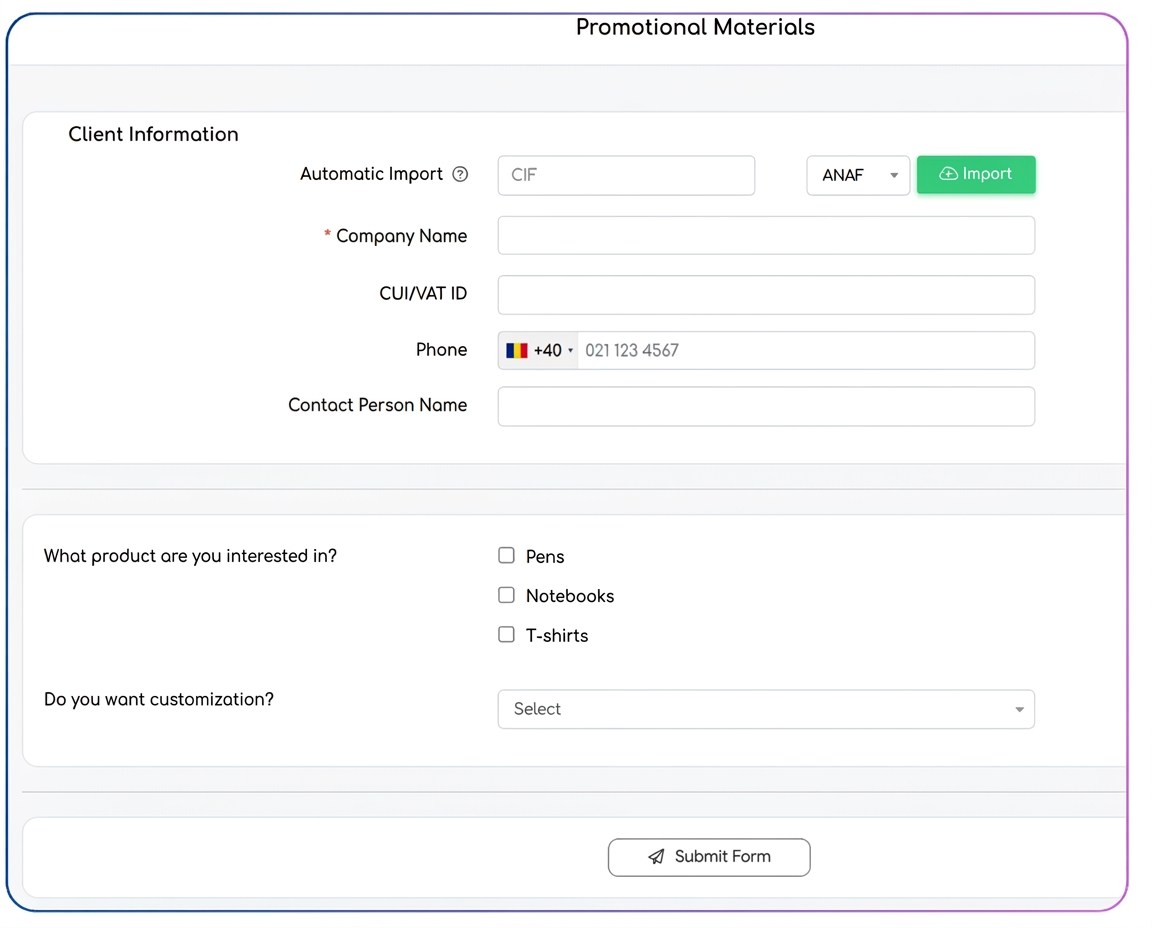
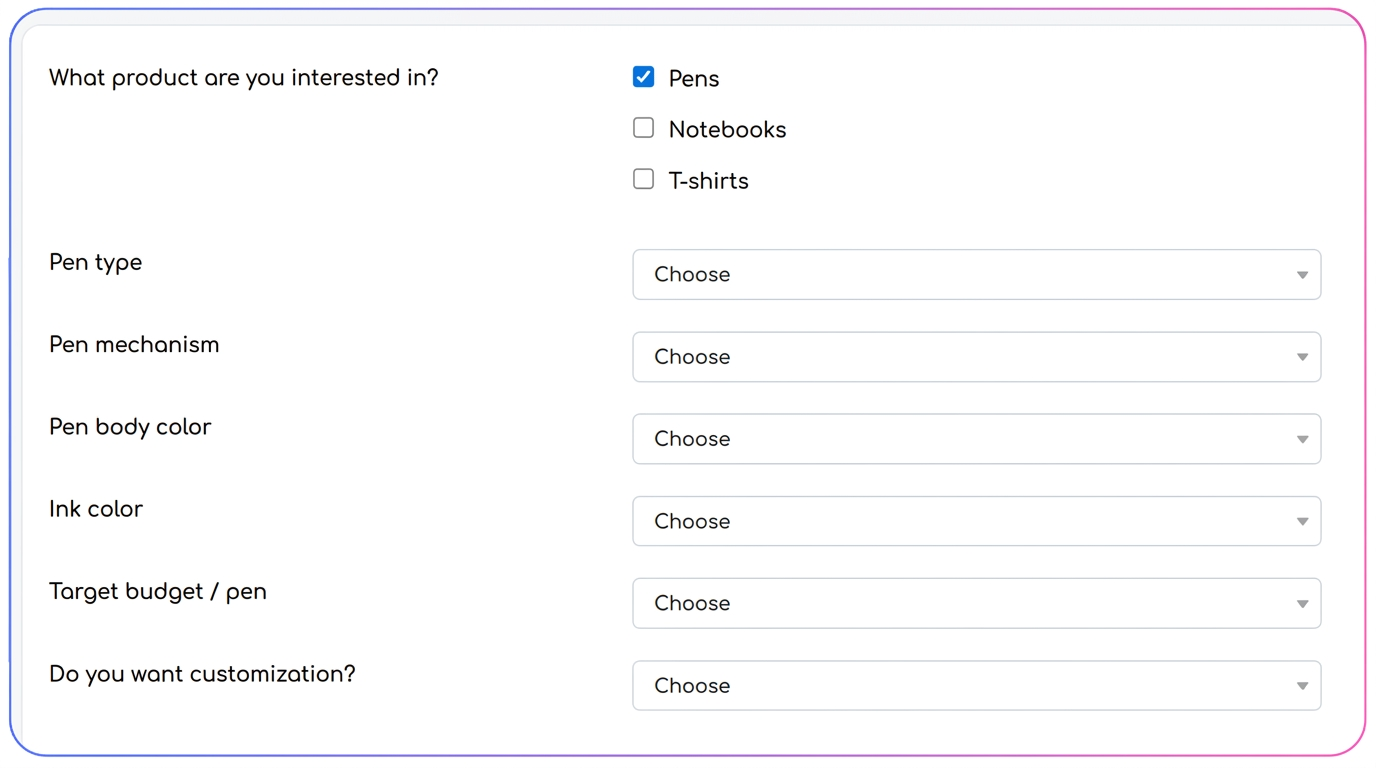
- Action: Select the "Pens" option in the main question.
- Result: Instantly, under the question, the specific fields for pens will appear. If you uncheck "Pens" and check "Planners", the pen fields disappear and the planner fields appear.
⚠️ Useful tips for success:
- Order matters: In the form, make sure the "Parent" question is placed above the "Child" questions. You cannot ask about the pen color before asking if they want pens.
- Required Fields: If a field is set as mandatory (Required) BUT is hidden by a condition, it WILL NOT block form submission. It only becomes mandatory to fill in once it becomes visible.
- Always test: After setting up complicated logic (with many branches), complete the form as if you were a customer to ensure the flow is logical.
📋 Difference between "Name" and "Field" (Data Source)
1. Name (or Question)
This is the text your customer sees. It is specific to that form and that moment.
- Purpose: To tell the customer what they need to fill in.
- Example: "What color would you like the planner cover to be?" or "Choose the body color for the pen".
2. Field (Reusable Component)
This is the "engine" behind it, which contains the response options (e.g.: Red, Blue, Green). It is a component you create once and can use in 10 different forms.
- Purpose: To store data and options, saving time.
- Example: You create a single field named "Standard Colors" containing [White, Black, Red, Blue].
🔥 Why use them this way? (The Power of Reusability)
Let's take the color example, it's the clearest:
- Situation A (Planners): In the form, under Name you write: "Planner Color". But for Field you choose the "Standard Colors" component.
- Situation B (Pens): In the same form (or another), under Name you write: "Pen Color". But for Field you choose the same component: "Standard Colors".
If in a month you no longer have Red in stock, you don't need to modify every question in every form. You go to "Custom Fields", delete "Red" from the "Standard Colors" component and it will automatically update everywhere you used that field (both for planners and pens).