
The notification module in iflows ensures rapid and clear information regarding all relevant events within the platform.
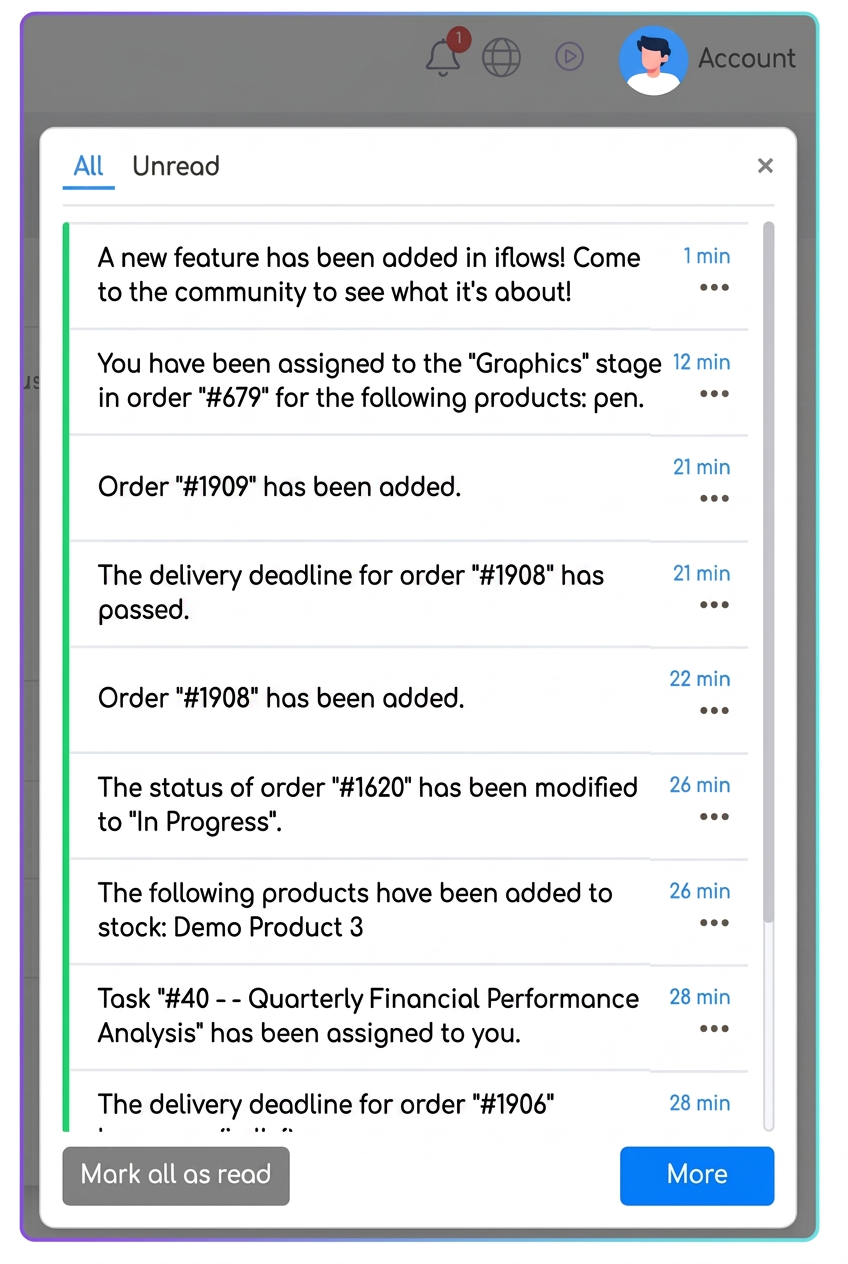
1. Location and display of notifications
- Bell Icon
- Located at the top right of the interface.
- If there are unread notifications, the bell displays a numeric indicator (e.g., 3, 5, 10).
- Dropdown Menu (first image)
- By clicking the icon, a window opens with the most recent notifications, listed in chronological order.
- There are two tabs: All and Unread, to easily distinguish notifications already marked as read from those still requiring attention.
- Automatic marking and quick access
- Selecting (clicking) a notification from the list automatically marks it as "read" and redirects the user to the relevant screen (e.g., order details, assigned task, etc.).
- Quick actions
- "Mark all as read": A button located at the bottom of the list, allowing you to set all unread notifications to read with a single click.
- "More" button: Opens the detailed panel, where advanced filtering and administration functions are available (described in section 2).
2. Advanced notification management
- Detailed panel
- Accessed via the "More" button in the notification window or from the main menu → Notifications.
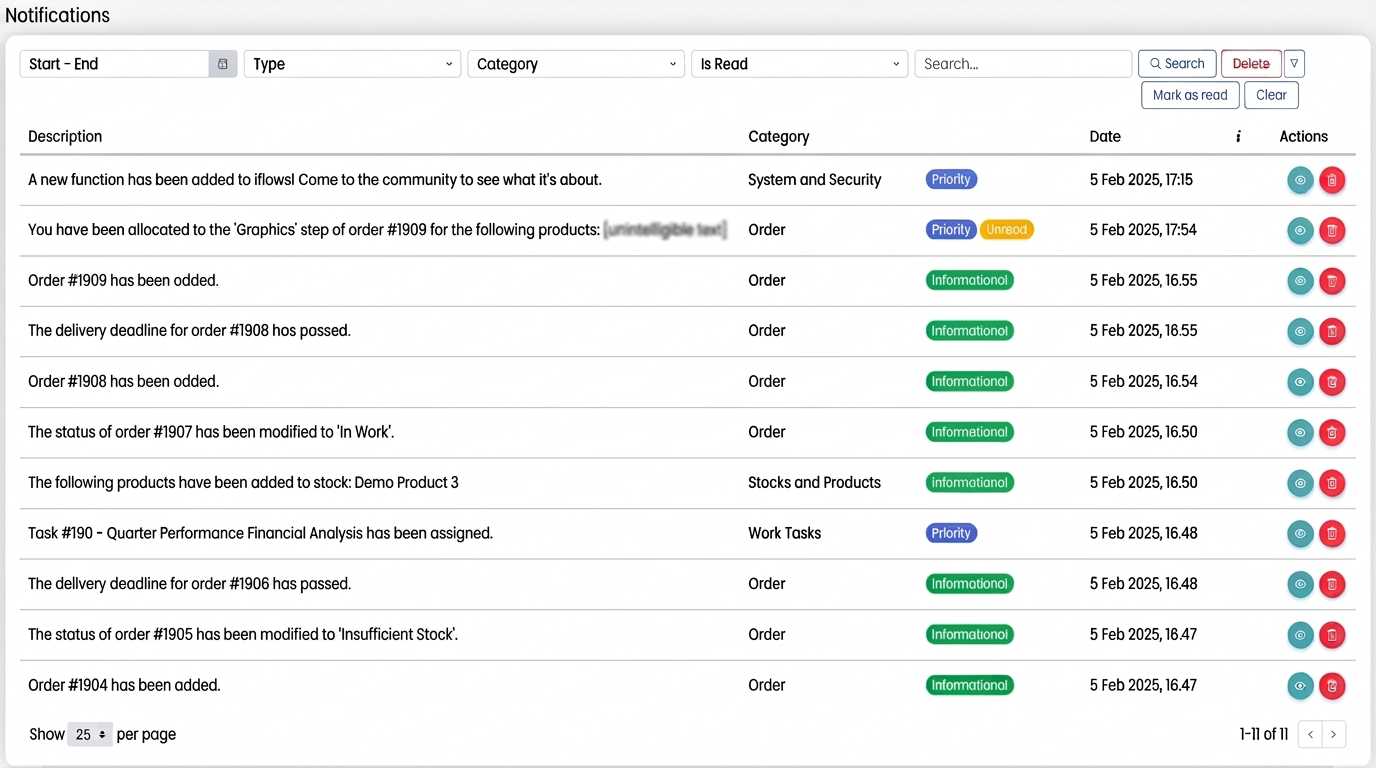
- Presents all notifications in a table.
- Individual Actions:
- "Eye" icon (for viewing and marking as read)
- "Trash can" icon (for deleting the notification)
- Individual Actions:
- Filters and search
- On the top bar, you will find filtering fields by Time range, Type, Category, Status (read/unread), and a text Search field.
- These options facilitate the quick identification of specific notifications (e.g., search by order number).
- Bulk actions
- "Read all": marks all displayed notifications as read (only applies to the current selection based on filters).
- "Remove all": deletes all notifications displayed in the list (caution, this action is permanent).
- Pagination
- At the base of the table, the total number of notifications and navigation buttons between pages appear, useful when there is a large volume of alerts.
3. Customizing notifications
- Accessing settings
- From the main menu, select .
- General options
- Show live notifications: if enabled, notifications appear in real-time without refreshing the page.
- Priority notifications only: when enabled, "Informational" type notifications are hidden, leaving only "Priority" ones visible.
- Enable/Disable notification types
- In the relevant sections (e.g., Orders, Invoices and Payments, Work Tasks, Stocks and Products, etc.) there are toggles that allow turning notifications on/off for each event (e.g., "Delayed order", "New order", "Order status change", etc.).
- Setting importance: "Informational" vs. "Priority"
- Each notification type can be configured individually:
- "Priority": appears highlighted in the list and the dropdown menu, signaling the need for urgent action.
- "Informational": has a consultative nature, without necessarily requiring immediate intervention.
- Each notification type can be configured individually:
- Special roles: Operators can receive only two types of notifications:
1. New order in the workflow
2. System updates or technical issues (to be quickly informed in case of maintenance or errors).
Related articles
Notifications Menu ReorganizationTutorialsDifferentiated notifications by delivery method (Email/SMS)TutorialsHow to send automated SMS notifications upon order shipmentTutorialsActivating and Customizing Overdue Invoice NotificationsTutorialsI noticed in the settings that there are notifications sent to the customer upon offer expiration, which I have enabled, but these are not sent to me as well, like the offers are.Forum