
In short
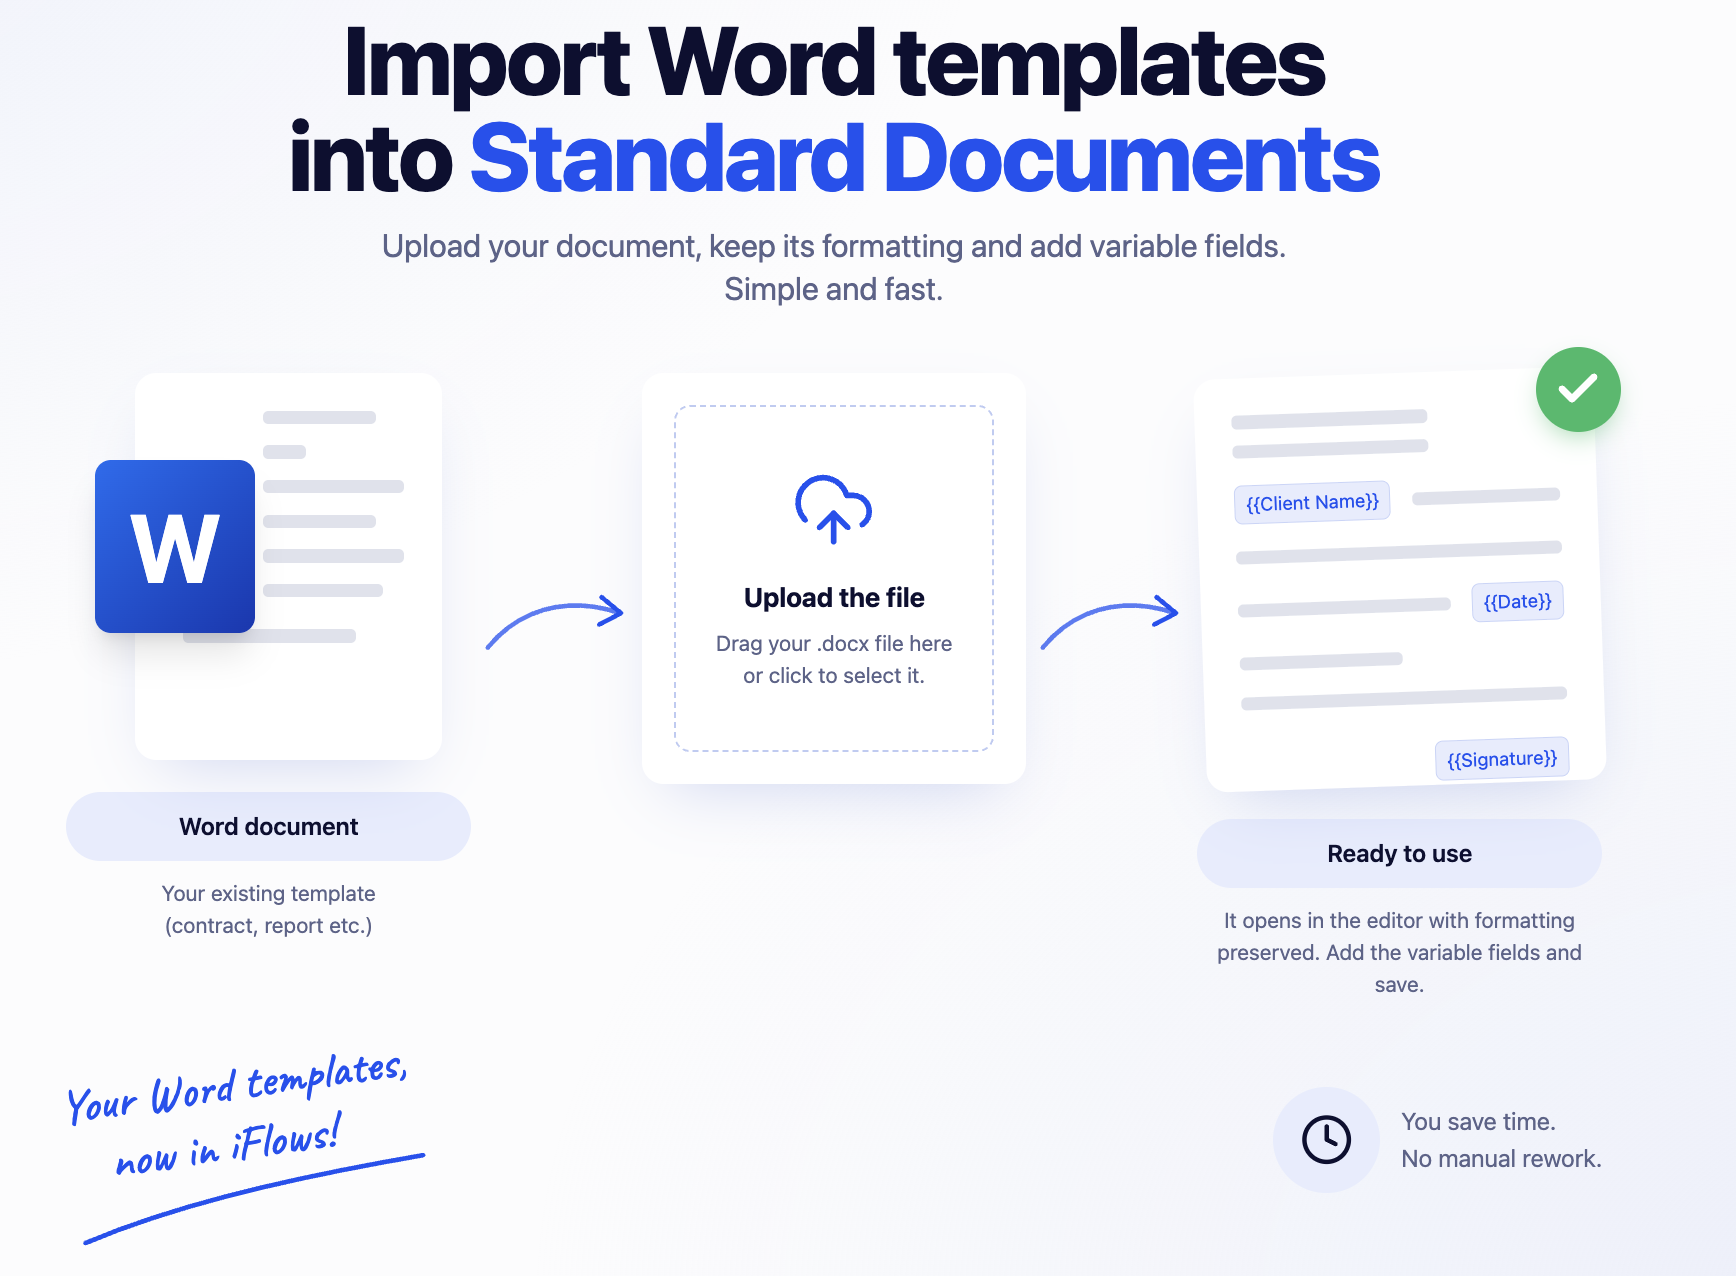
Standard document templates (contracts, reports, statements, certificates, etc.) can now be created starting from an existing Word document. The file is uploaded to the platform and opens directly in the standard documents editor, with its formatting, tables, images, header, and footer preserved. All that’s left is to insert the variable fields (client, order, company data) and save.
The New Template button now opens a window where you can choose between a blank document and importing a file. This feature is useful for companies that already have their document models drafted in Word and no longer need to manually recreate them in the editor.
Where to find it
- → Standard Templates tab → New Template — the New Template window, the Import a file option.
- After import: the Add Standard Document page, with the document open in the editor.
Before you begin
- You need add permission for Documents – Standard Documents.
- Prepare the document as a .docx file, maximum 20 MB, without macros. .doc files must first be saved from Word as .docx.
- Determine which section the template is for (Client, Quote, Order, Invoice, Supplier, Service, Employees, Vehicles): this determines the available variable fields.
Importing a Word file
Step 1. Open , the Standard Templates tab, and click New Template.
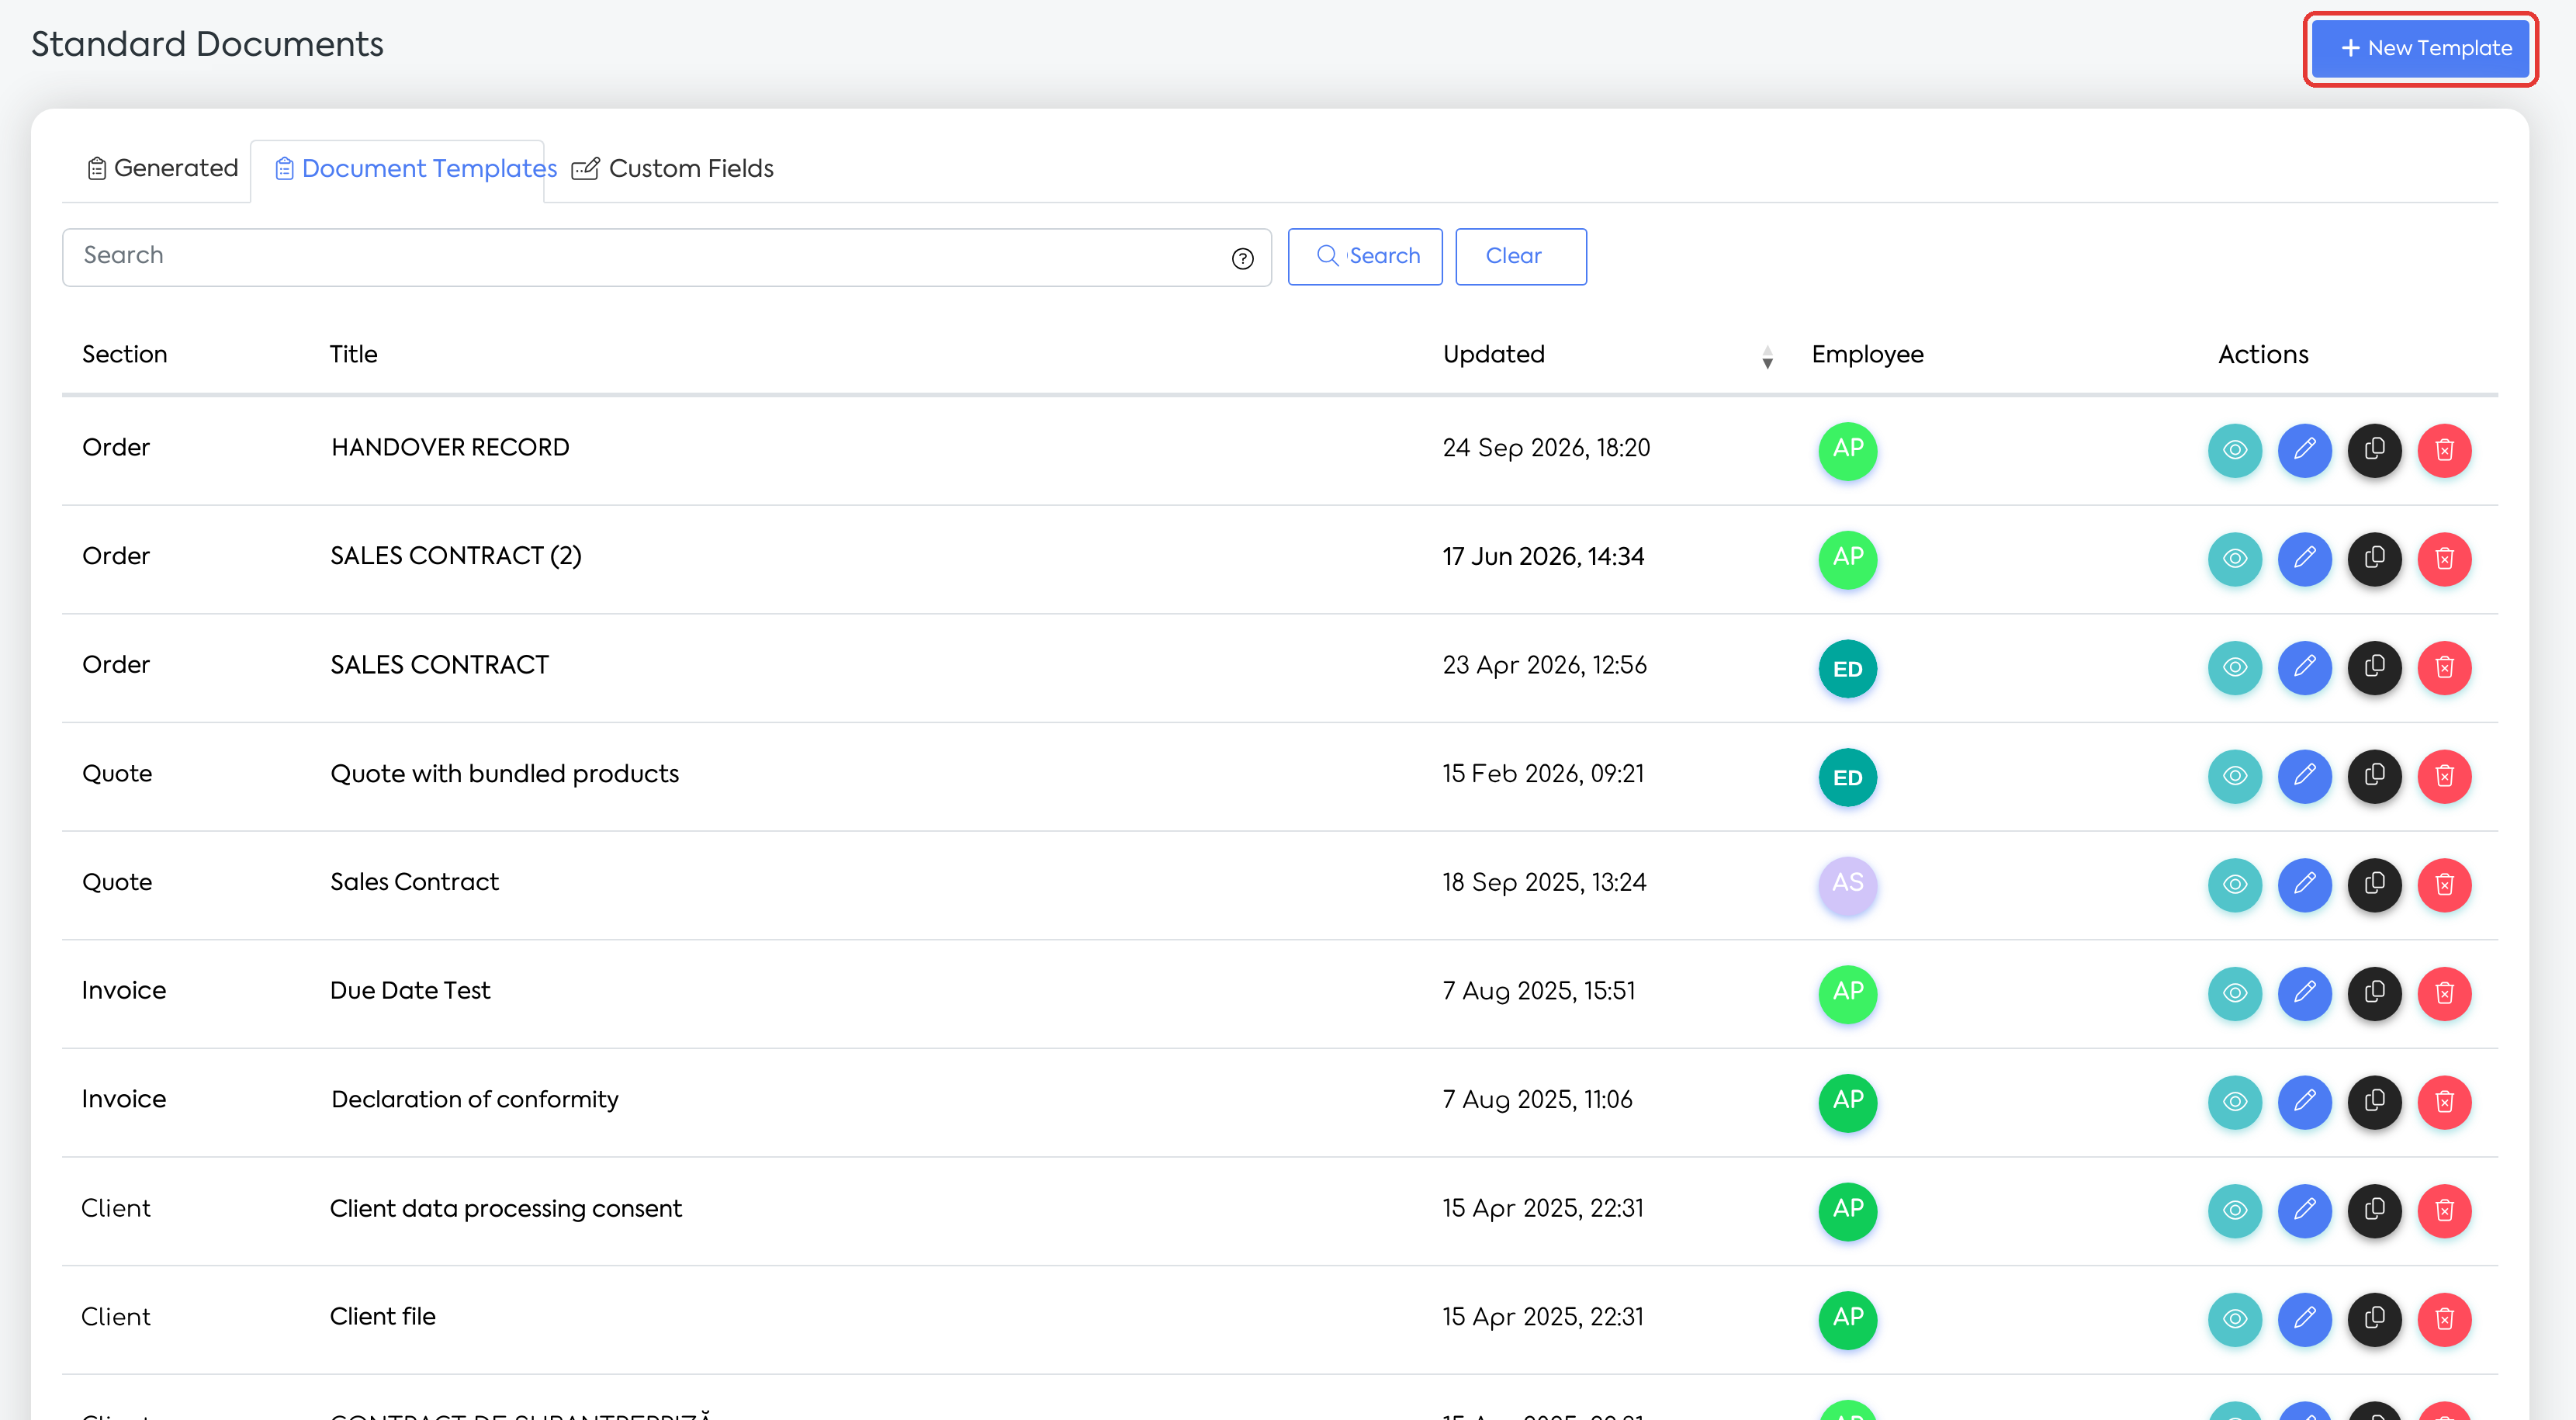
The Standard Templates tab, with the New Template button.
The New Template window opens, with two options:
- Start from scratch — “A blank document opens in the editor and you build it from the beginning.”;
- Import a file — “Upload an existing Word document. Formatting, header and footer are preserved.”
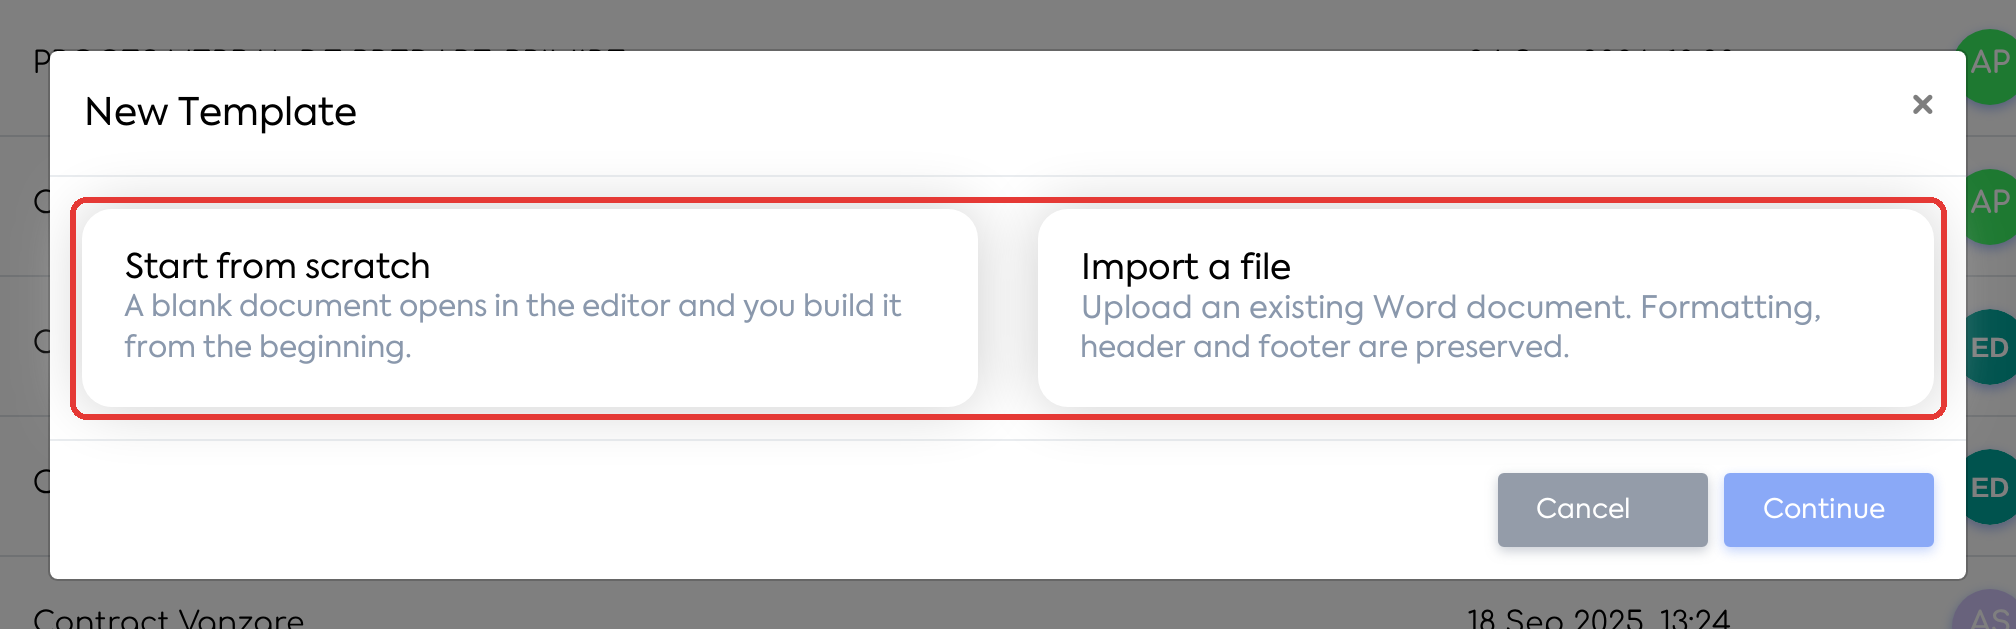
The New Template window, with the two options; the Continue button is inactive until you choose one.
Step 2. Choose Import a file. The upload area appears, with the instructions “.docx only, max 20 MB” and “After import it opens directly in the editor…”.
Step 3. Drag the document into the “Drag the file here” area or click Browse... and select it from your computer. The chosen file appears in the upload area. Only one file can be chosen; if you choose another, it will replace the first one.
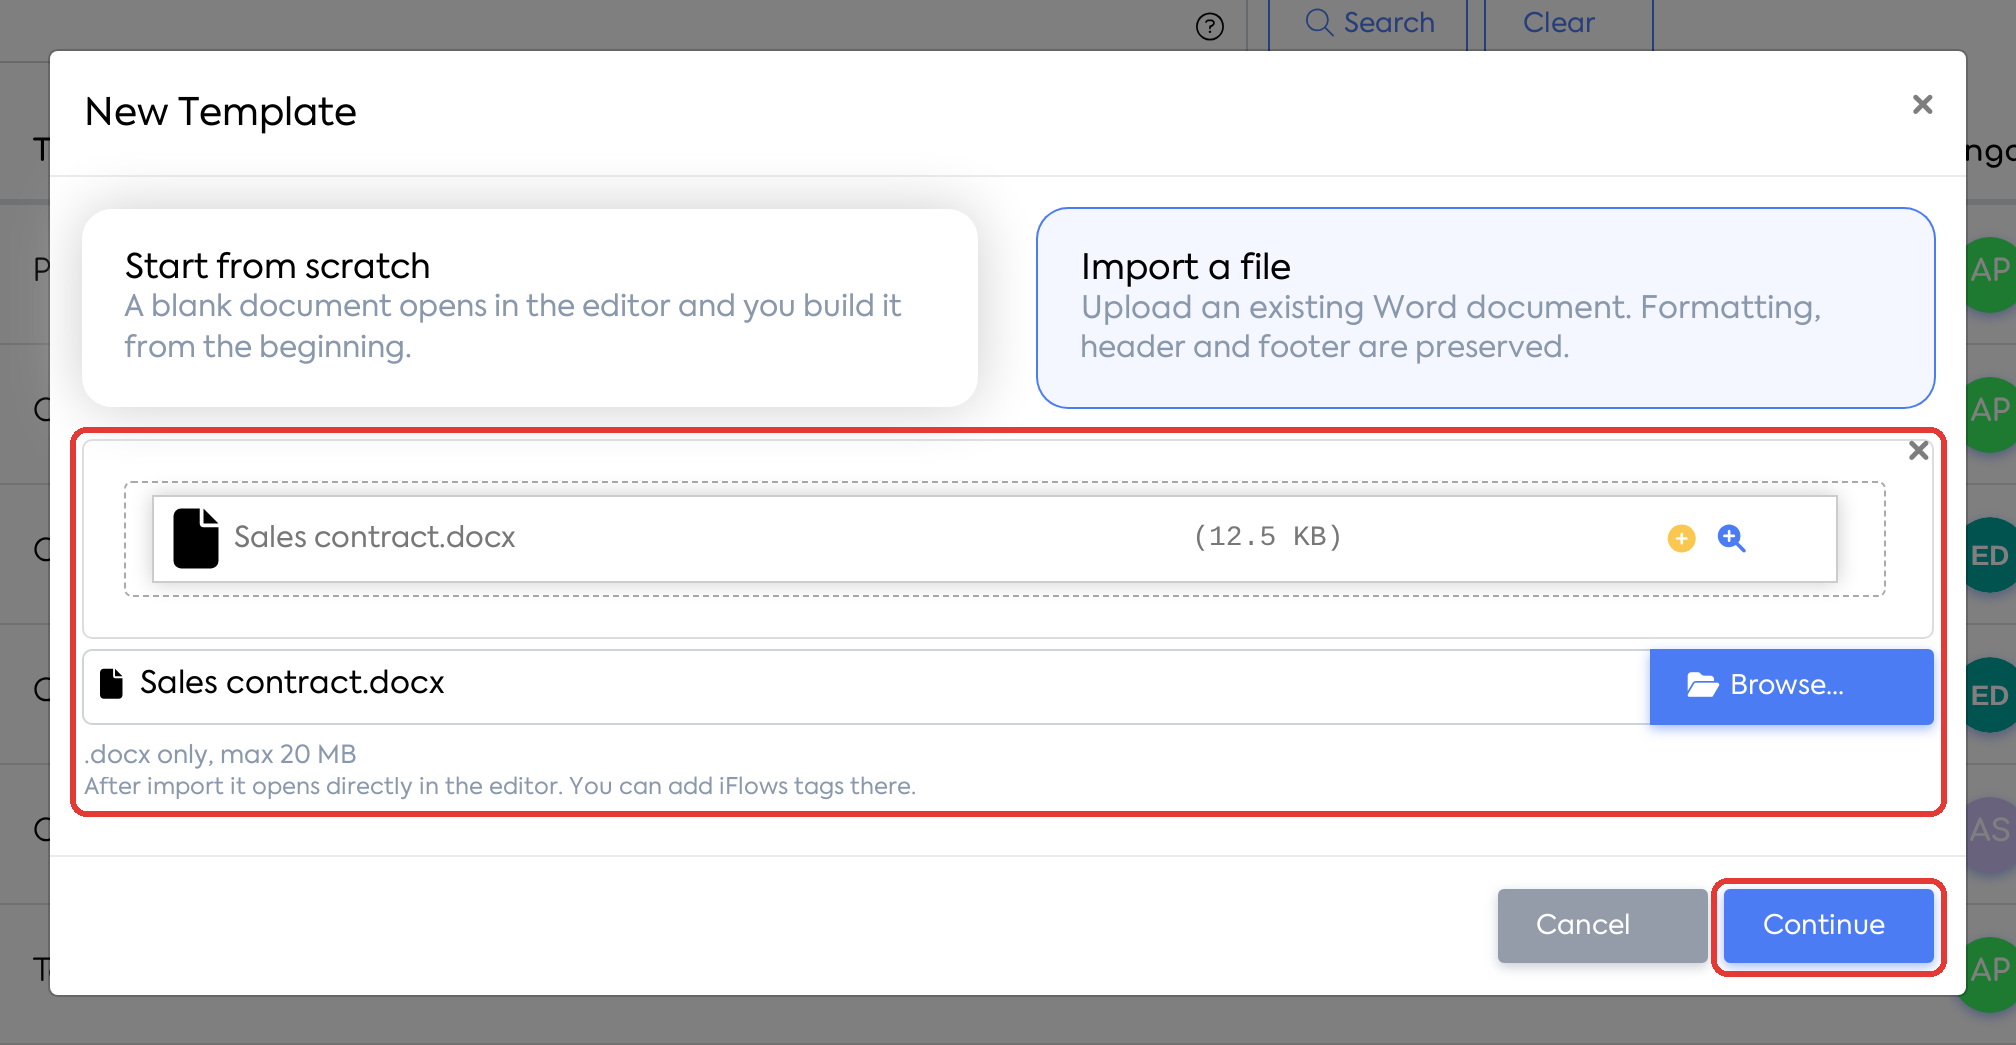
The Import a file option, with the chosen document for import and the Continue button.
Step 4. Click Continue. The platform verifies the file and opens the Add Standard Document page, with the Word document already loaded in the editor.
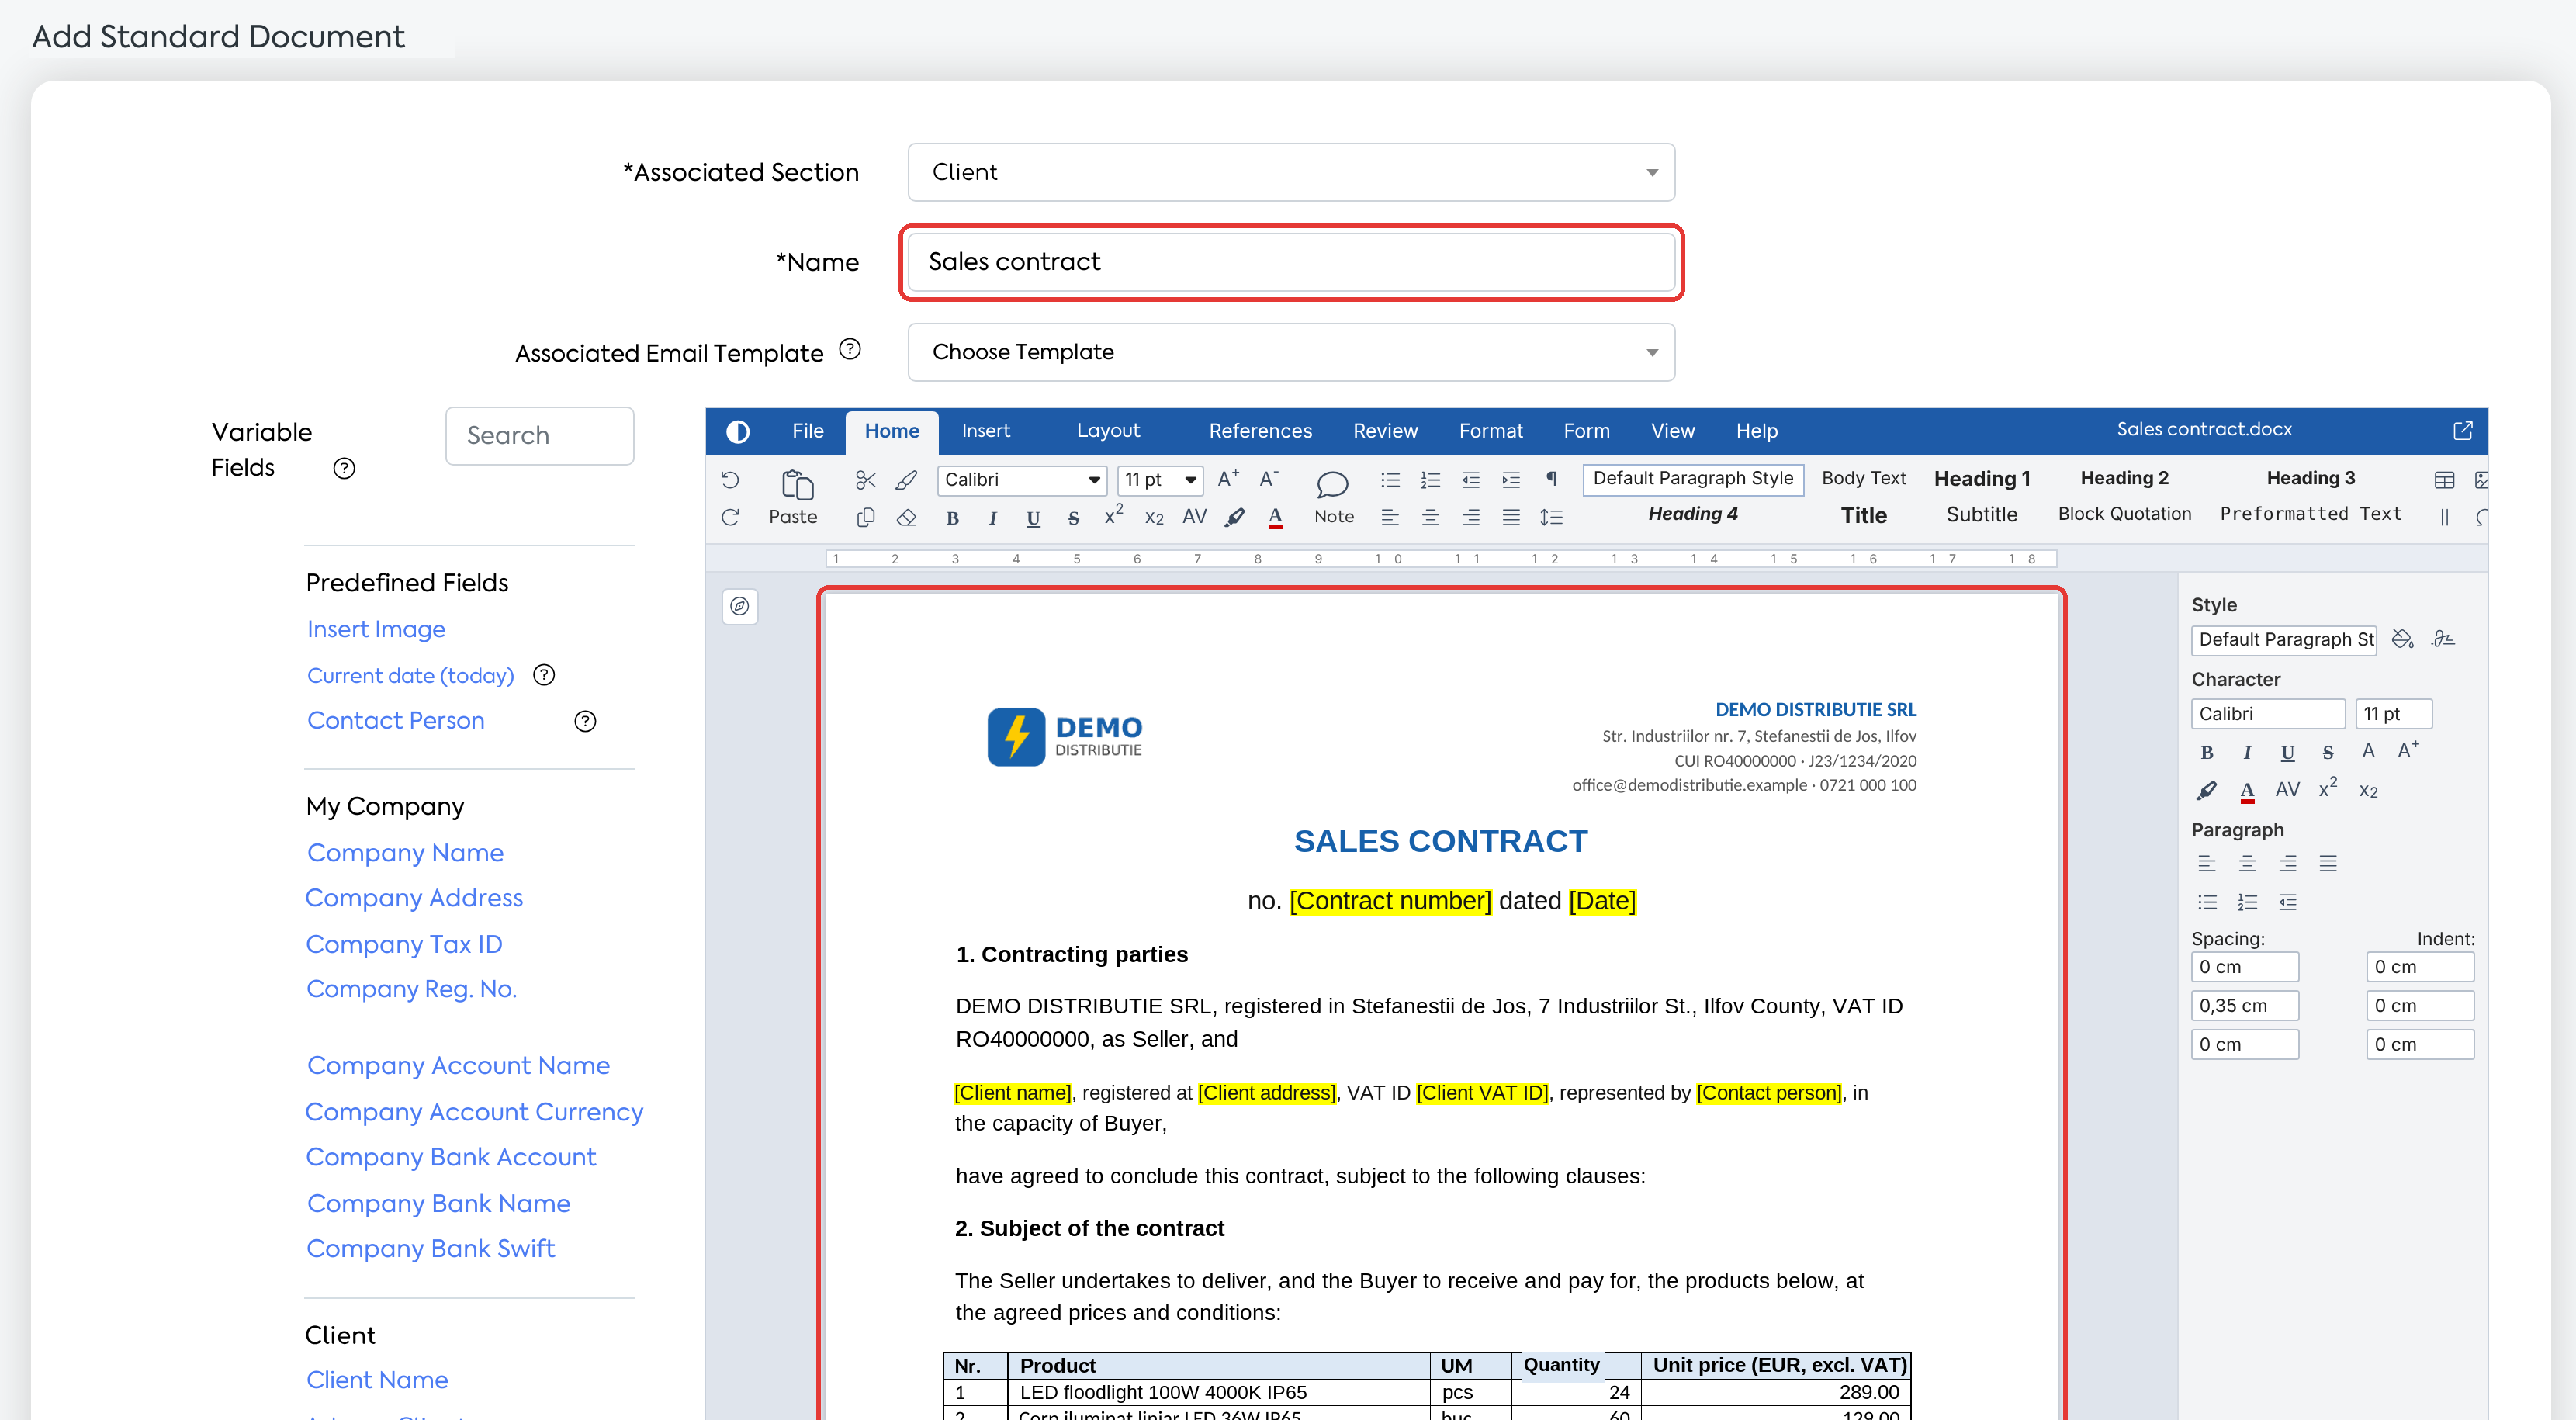
The Word document open in the editor, with the header, title, text, and table preserved; the Name field is pre-filled from the file name. The yellow highlights are placeholders to be filled in.
Note: the Continue button is inactive until you choose an option, and Cancel closes the window. When you close the window, the choice and the file are reset. If the file is not accepted, the message appears below the upload area, and you can choose another file.
For a blank document, choose Start from scratch and click Continue.
Completing the template
Step 1. Fill in the template details:
| Field | What to fill in | Required |
|---|---|---|
| Associated Section | The section for which the document is generated. After import, “Client” is preselected. Choose the appropriate section before inserting variable fields. | Yes |
| Name | Pre-filled with the file name, without the extension and without the number in parentheses at the end, if preceded by a space (for example, “Offer (1).docx” becomes “Offer”). It can be modified. | Yes |
| Associated Email Template | The email template used when sending the generated documents. | No |
| Service Template | Appears only for the Service section. | Yes, for Service |
Caution: choose the correct section from the start. After saving, the Associated Section can no longer be changed when editing the template.
Step 2. Replace the placeholder texts in the document with variable fields: place the cursor in the desired spot and click the field from the Variable Fields panel (for example, Client Name, Client Address, Client Tax ID). The fields can be inserted into text and into table cells.
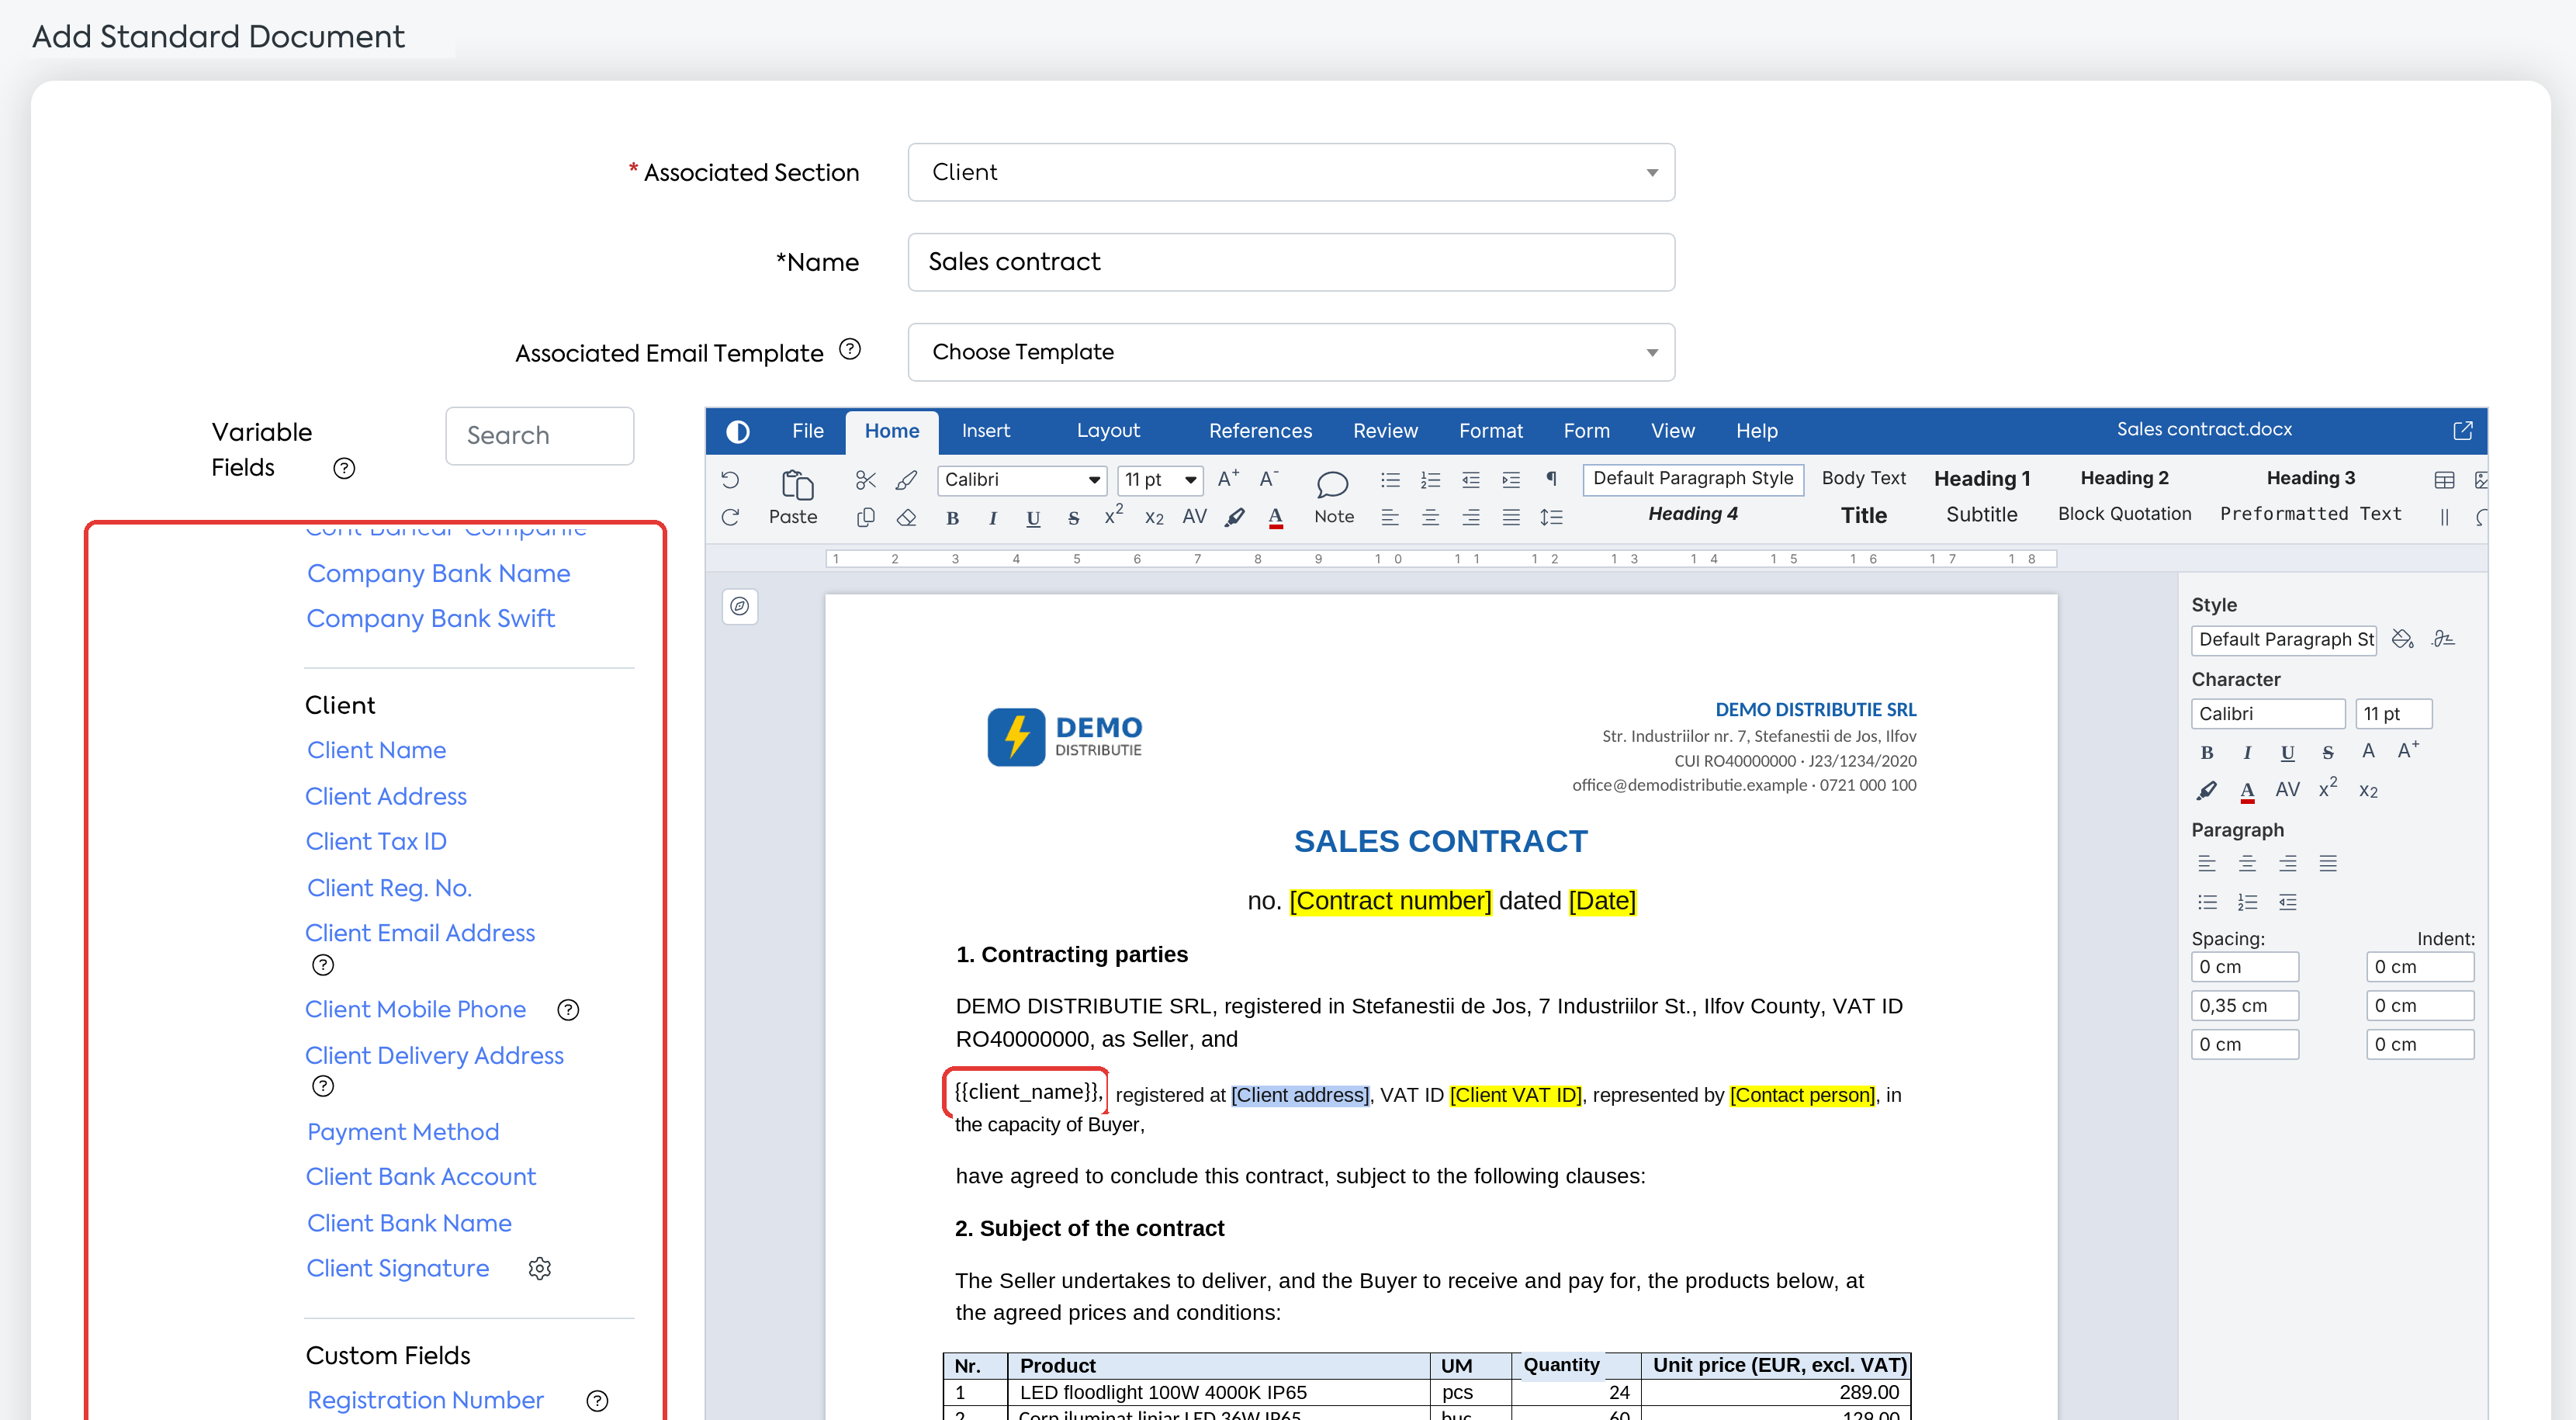
The placeholder for the client's name has been replaced with the Client Name field from the Variable Fields panel; the next placeholder is selected.
Important: the import does not automatically convert placeholders from Word. Texts like [Name] or <<Name>> remain plain text, including in the generated documents. Word mail merge fields and form controls are not automatically filled upon generation. All of these must be replaced with variable fields from the panel.
Step 3. Static images from the Word file, such as a logo in the header, are preserved. Variable images and signatures are inserted from the Variable Fields panel (for example, Insert Image, Client Signature).
Step 4. Check the document in the editor, then click Save or Save and Continue. The buttons become active after the document has fully loaded in the editor. Save takes you back to the Standard Templates list, and Save and Continue keeps you on the editing page.
Note: the template is only created upon saving.
What you'll see afterwards
- The template appears in the Standard Templates list, under the chosen section. It is used just like any other template: generate, send by email, sign, clone.
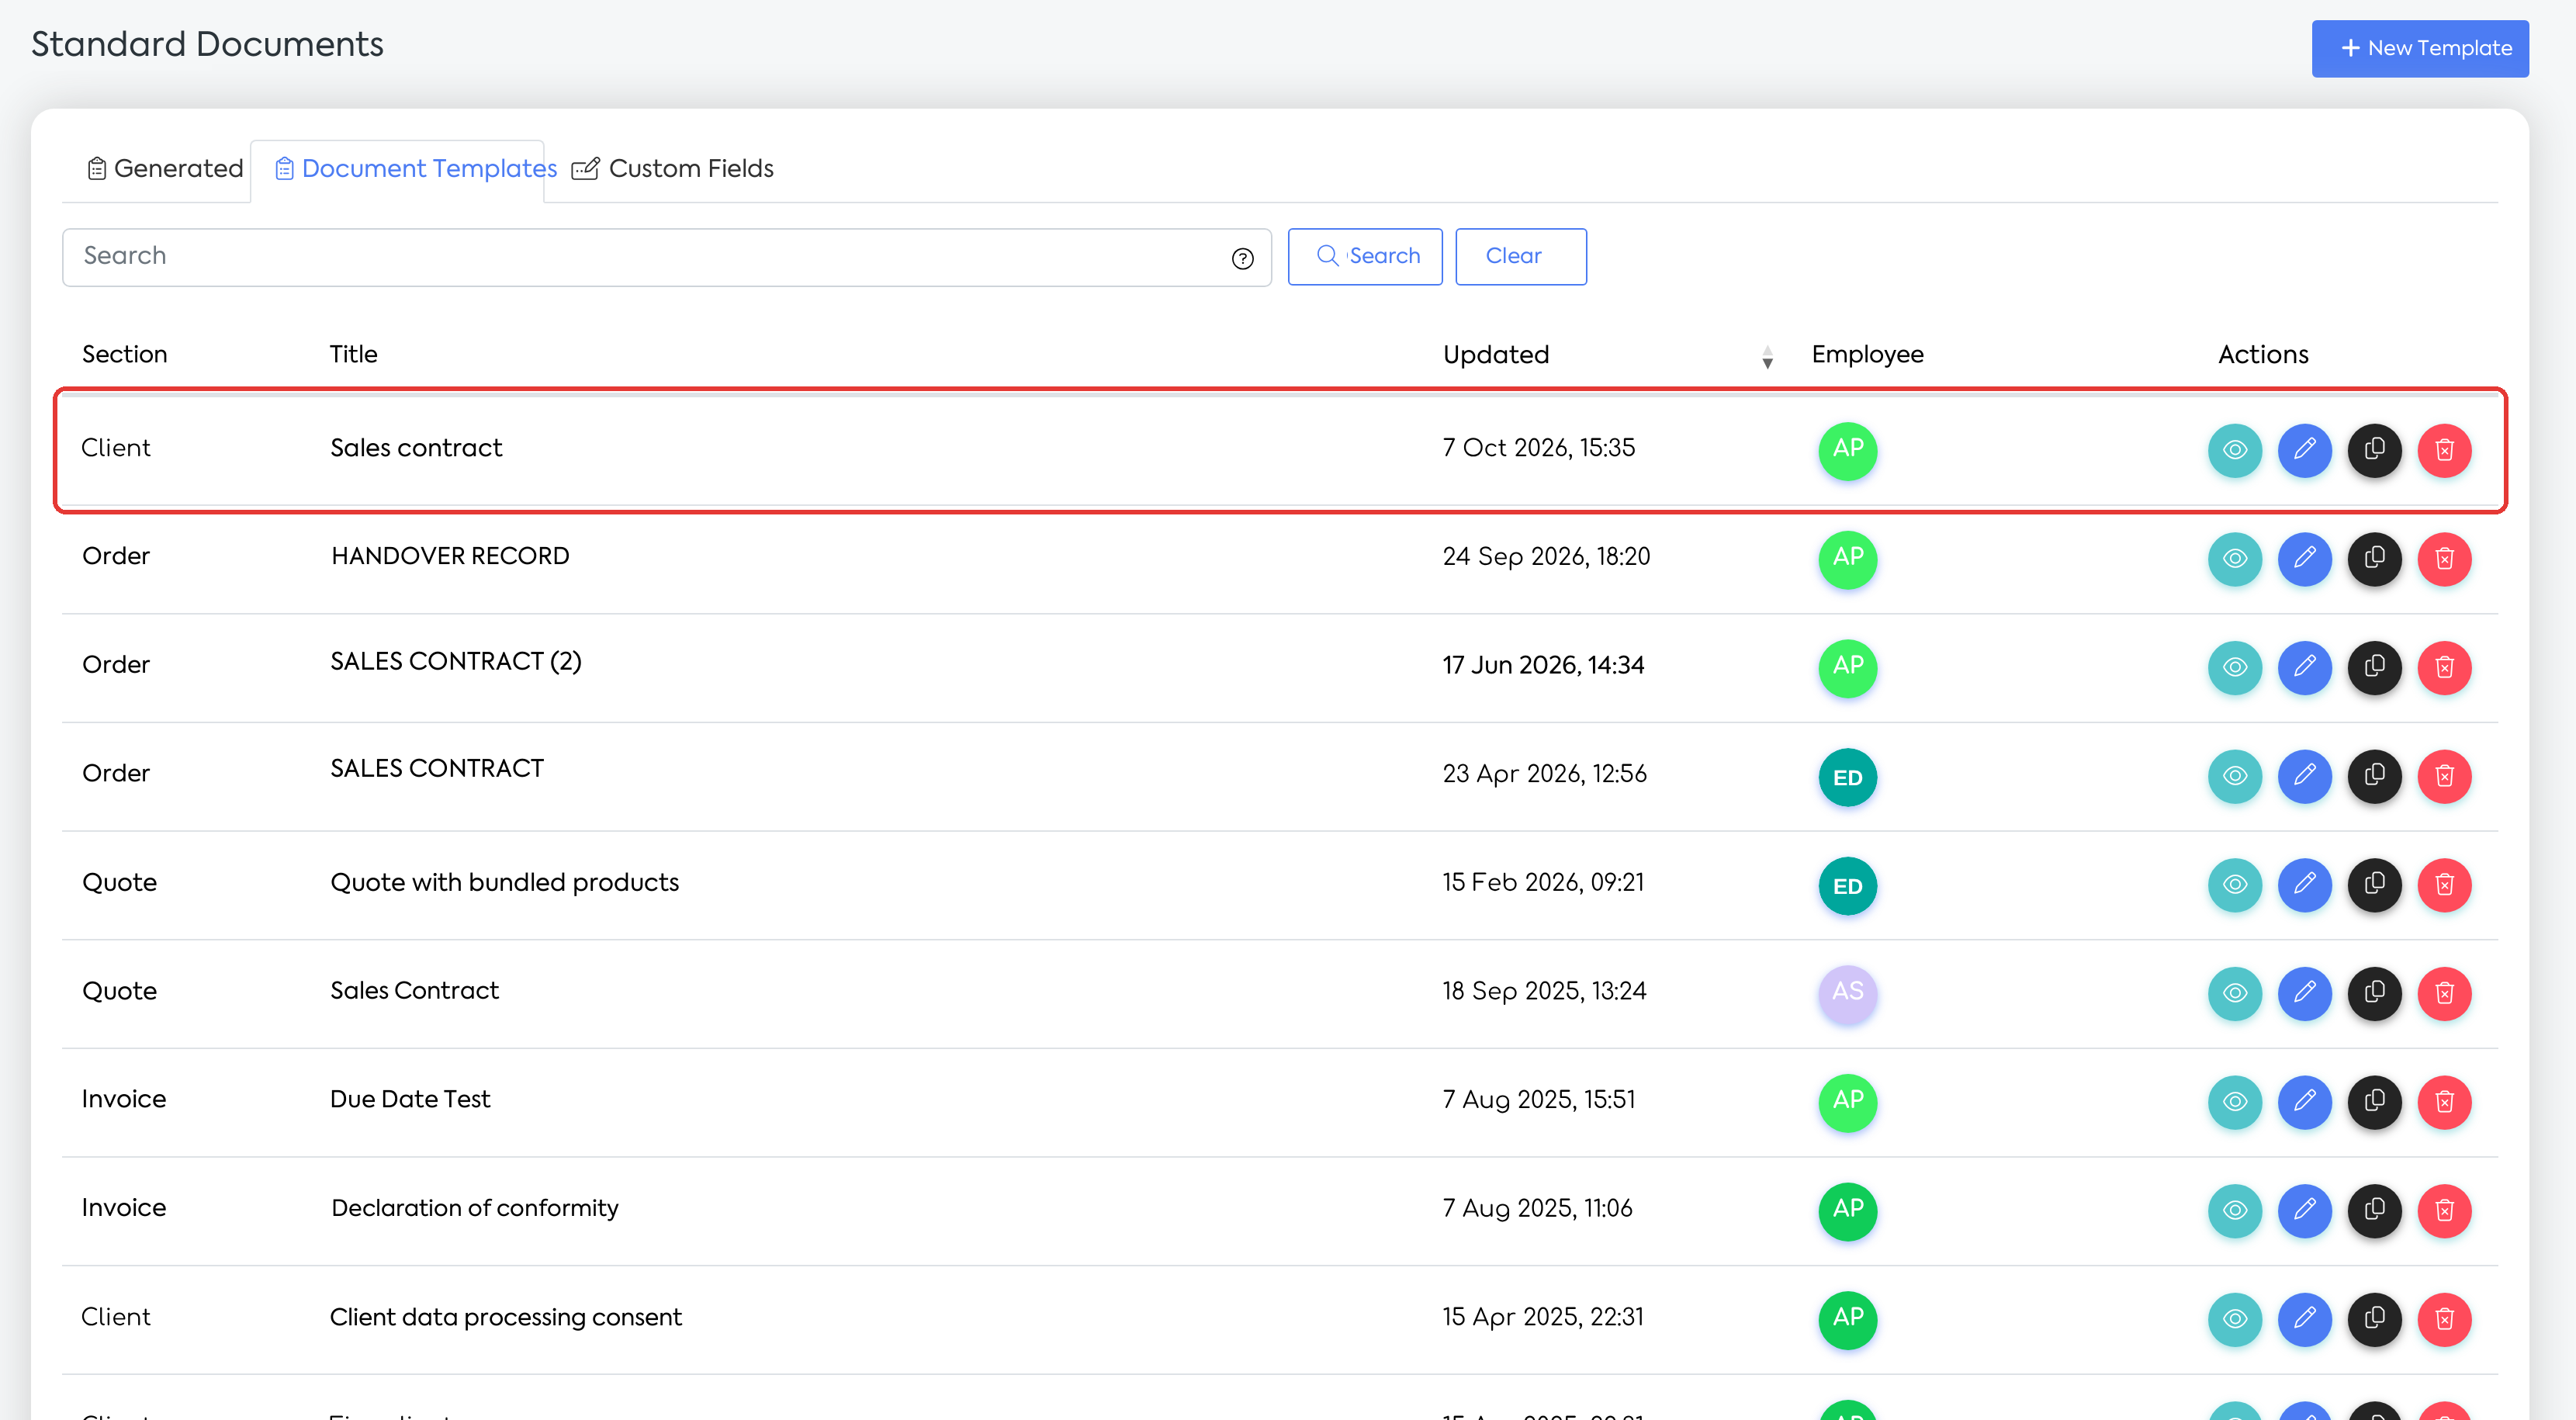
The imported template appears in the Standard Templates tab.
- When generating standard documents, the template is available in the chosen section, just like templates created in the editor.
- The generated documents preserve the formatting and page settings of the Word file (for example, Letter format instead of A4).
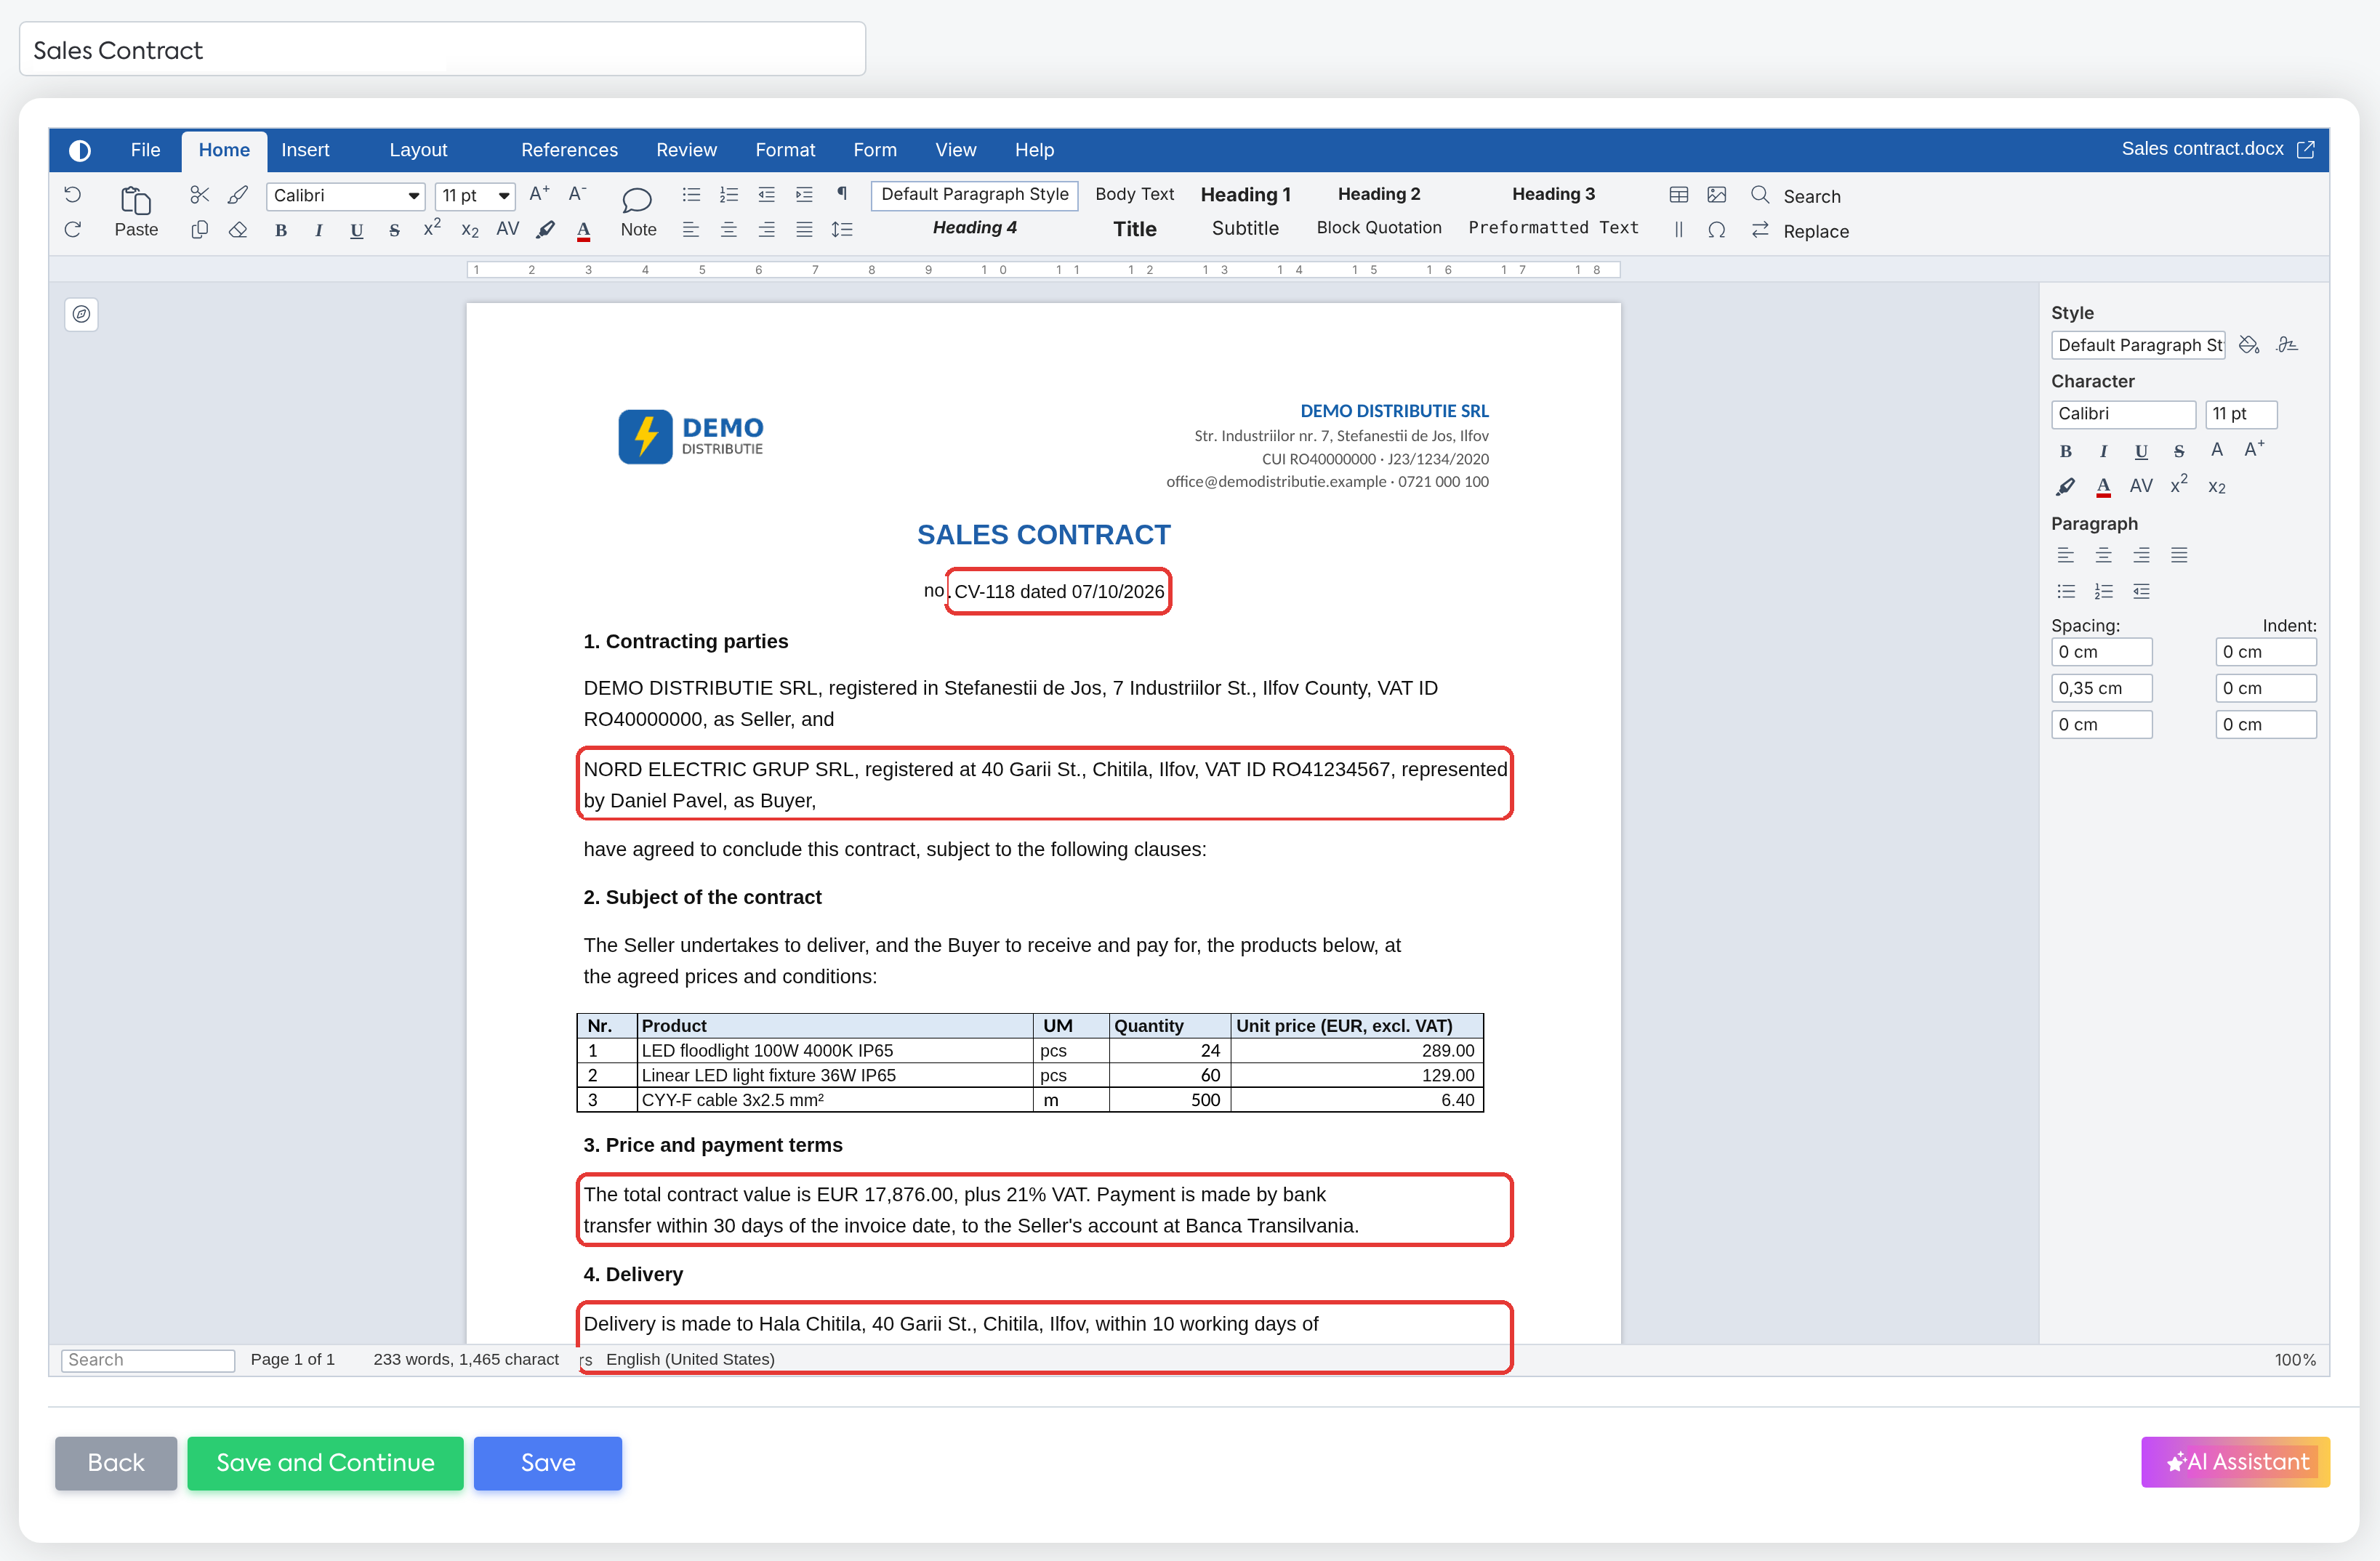
The document generated from the imported template: the client and contract data are filled in, and the Word formatting is preserved.
- After saving, the template is stored as a Word (.docx) file.
Rules and limitations
Accepted files
- A single .docx file of up to 20 MB is accepted. .doc, .docm, .dotx, .odt, .rtf, .pdf, or .xlsx files, empty or corrupted files, and .docx documents with macros are not accepted.
- If the file does not have the .docx extension or exceeds 20 MB, it will not be accepted for upload.
Messages displayed below the upload area
| Message | When it appears |
|---|---|
| “Choose a .docx file.” | You clicked Continue without choosing a file. |
| “The file is empty.” | The file has no content. |
| “The file is too large.” | The document contains too many large images or too many elements, even if the file is under 20 MB. |
| “The file is not a valid Word document.” | The file is corrupted, contains macros, or is not a Word document, even if it has the .docx extension (for example, a renamed .xlsx or .doc file). |
| “The import could not be started.” | The import did not start; please try again. |
| “Virus detected in file …” | The file is infected. This message appears if the antivirus scan is active for your account. |
| “The file could not be validated.” | The antivirus check could not be performed. This message appears if the antivirus scan is active for your account. |
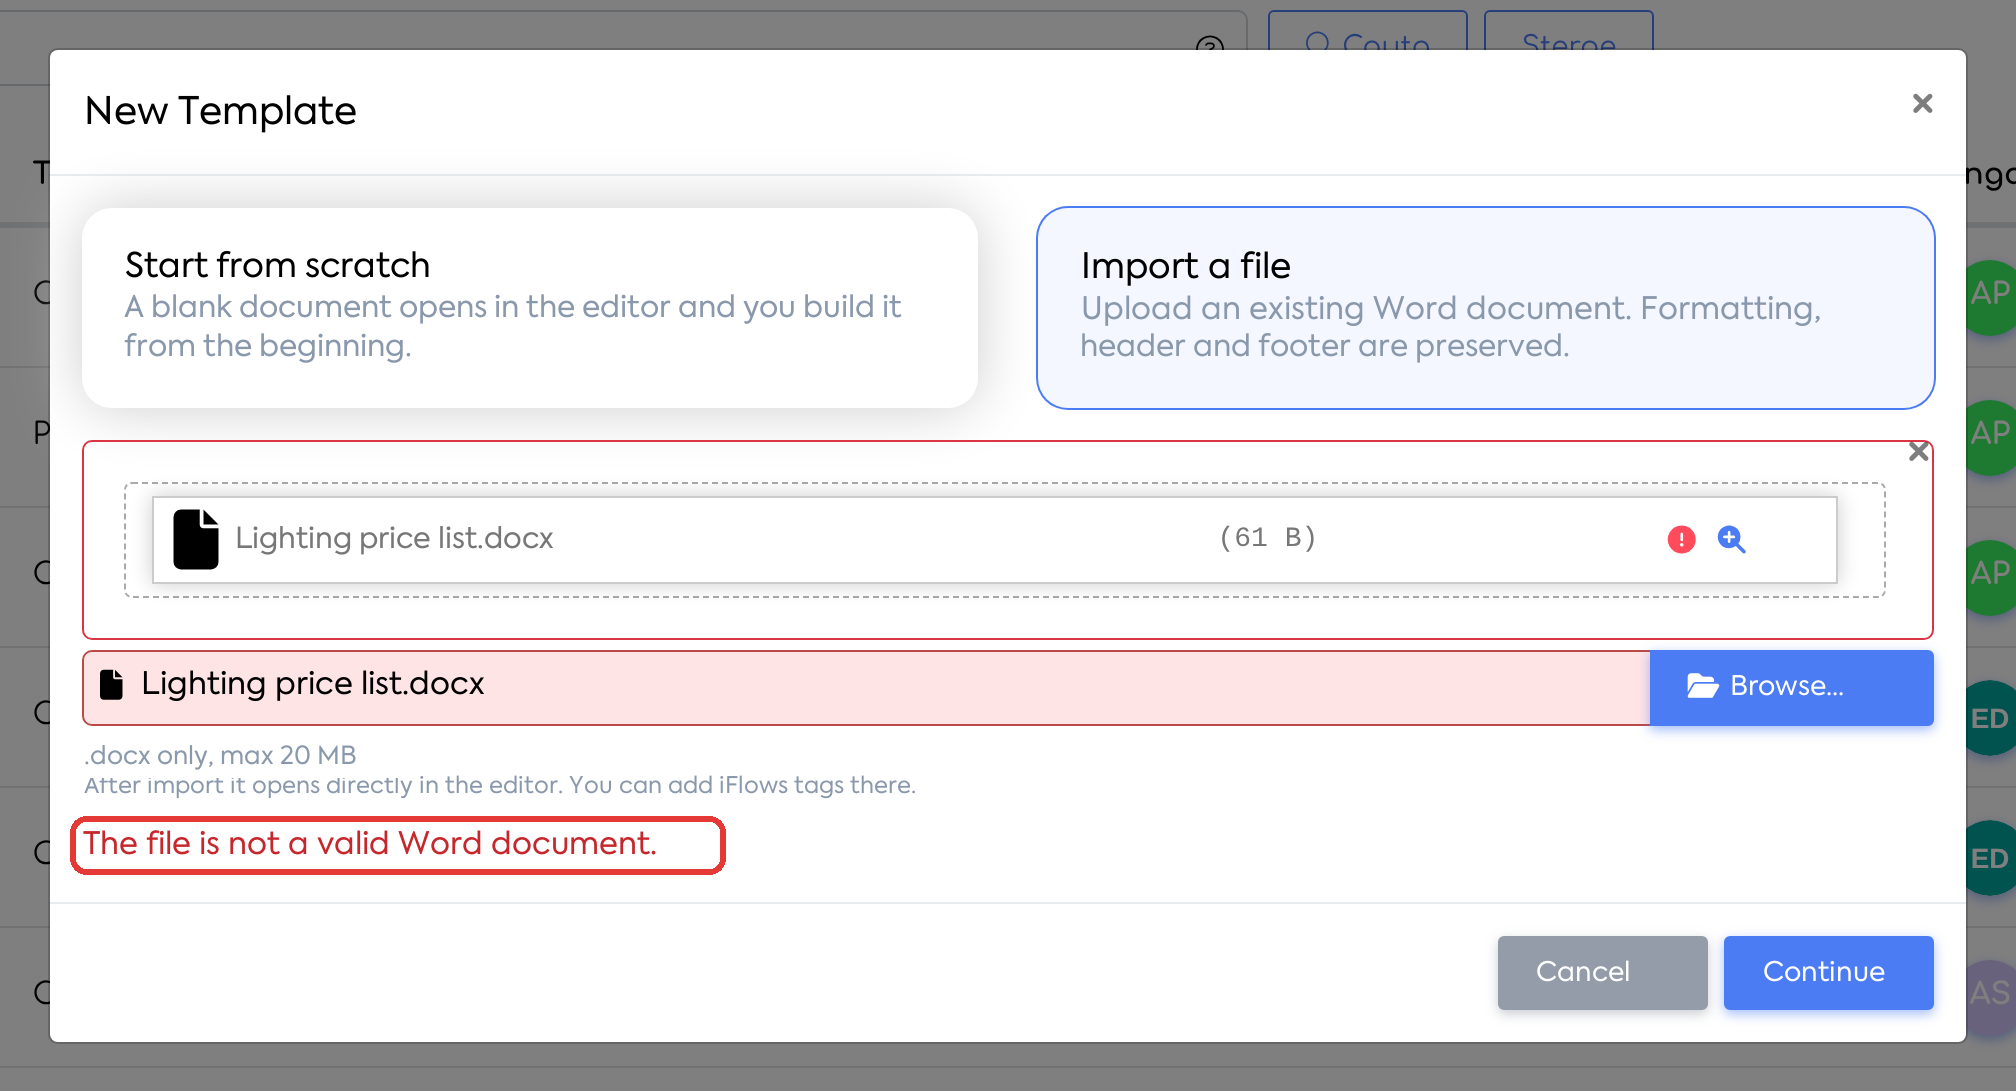
A file that is not a valid Word document is rejected, with the message displayed below the upload area.
The imported document
- An imported and unsaved document is automatically deleted after at least 24 hours; the import must then be redone.
- The imported document can only be used by the user who imported it or by an administrator.
- The page that opens after import can only be used once. If you return to it after saving (using the browser's Back button or by reloading), the message “The selected template file is not allowed.” appears, and a blank template opens. If the imported document has already been automatically deleted, the page will no longer open; you must redo the import.
Name and fields
- If a template with the same name already exists, a number (“ (2)”, “ (3)”, etc.) is added to the pre-filled name. If the file name does not contain any letters or numbers, the Name field will remain empty and must be filled in.
- Variable fields copied from another iFlows template (displayed between double curly braces, {{…}}) will work upon generation if they have been kept unchanged.
- The display in the editor may differ slightly from Word for special fonts or advanced Word elements.
Settings and permissions
- There are no new permissions or settings. The import feature is available to users with add permission for Documents – Standard Documents.