
At a glance
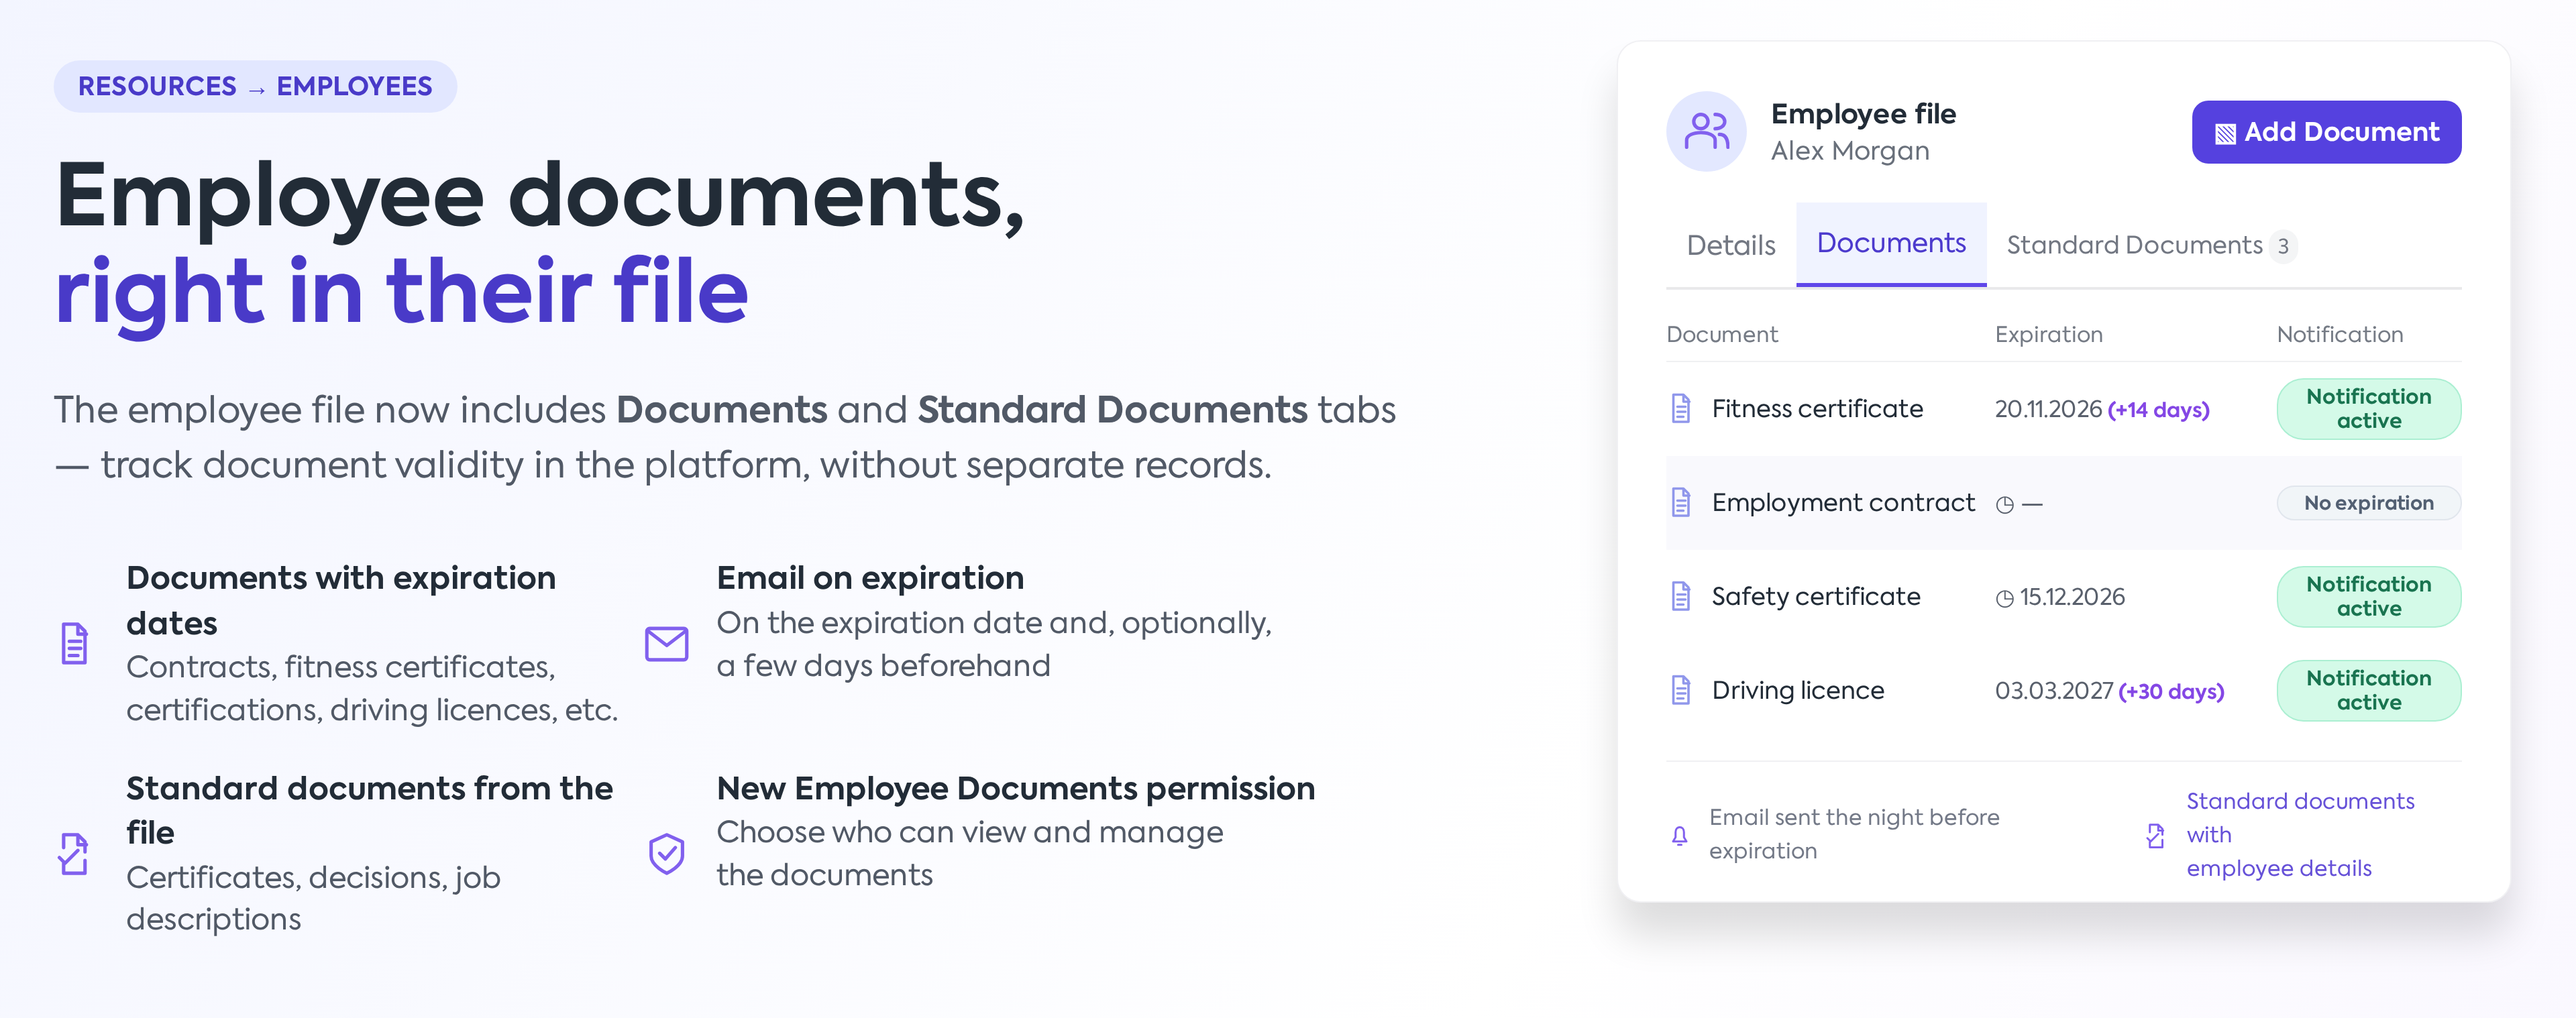
The employee file now has three tabs: Employee Details (the existing content), Documents and Standard Documents. In the Documents tab, you keep employee documents (contract, fitness certificate, certifications, driver's license, etc.), with an Expiration Date and email notification on the day of expiration and, optionally, a few days before. In the Standard Documents tab, you generate documents directly from the file based on a template (certificates, decisions, job descriptions).
The feature helps you track the validity of employee documents directly in the platform, without separate records.
Before | Now | |
|---|---|---|
Employee documents | No dedicated place in the employee file | Documents tab, with Expiration Date and email notification |
Employee Standard Documents | Generated from the Employees list or from , visible only in the central list | Standard Documents tab in the file, with generation directly from the tab |
After saving a standard document | You return to the employee's Standard Documents tab |
Where to find it
- → the Employee Details icon (eye) on the employee row → the Documents and Standard Documents tabs.
- , Employees category — who receives the expiration emails.
- — the email template Employee document expiration notification.
Before you start
- Grant the new Employee Documents right (Resources → Employees) to the access levels that need to work with documents. The right is not granted automatically: until you grant it, only administrators see the Documents tab.
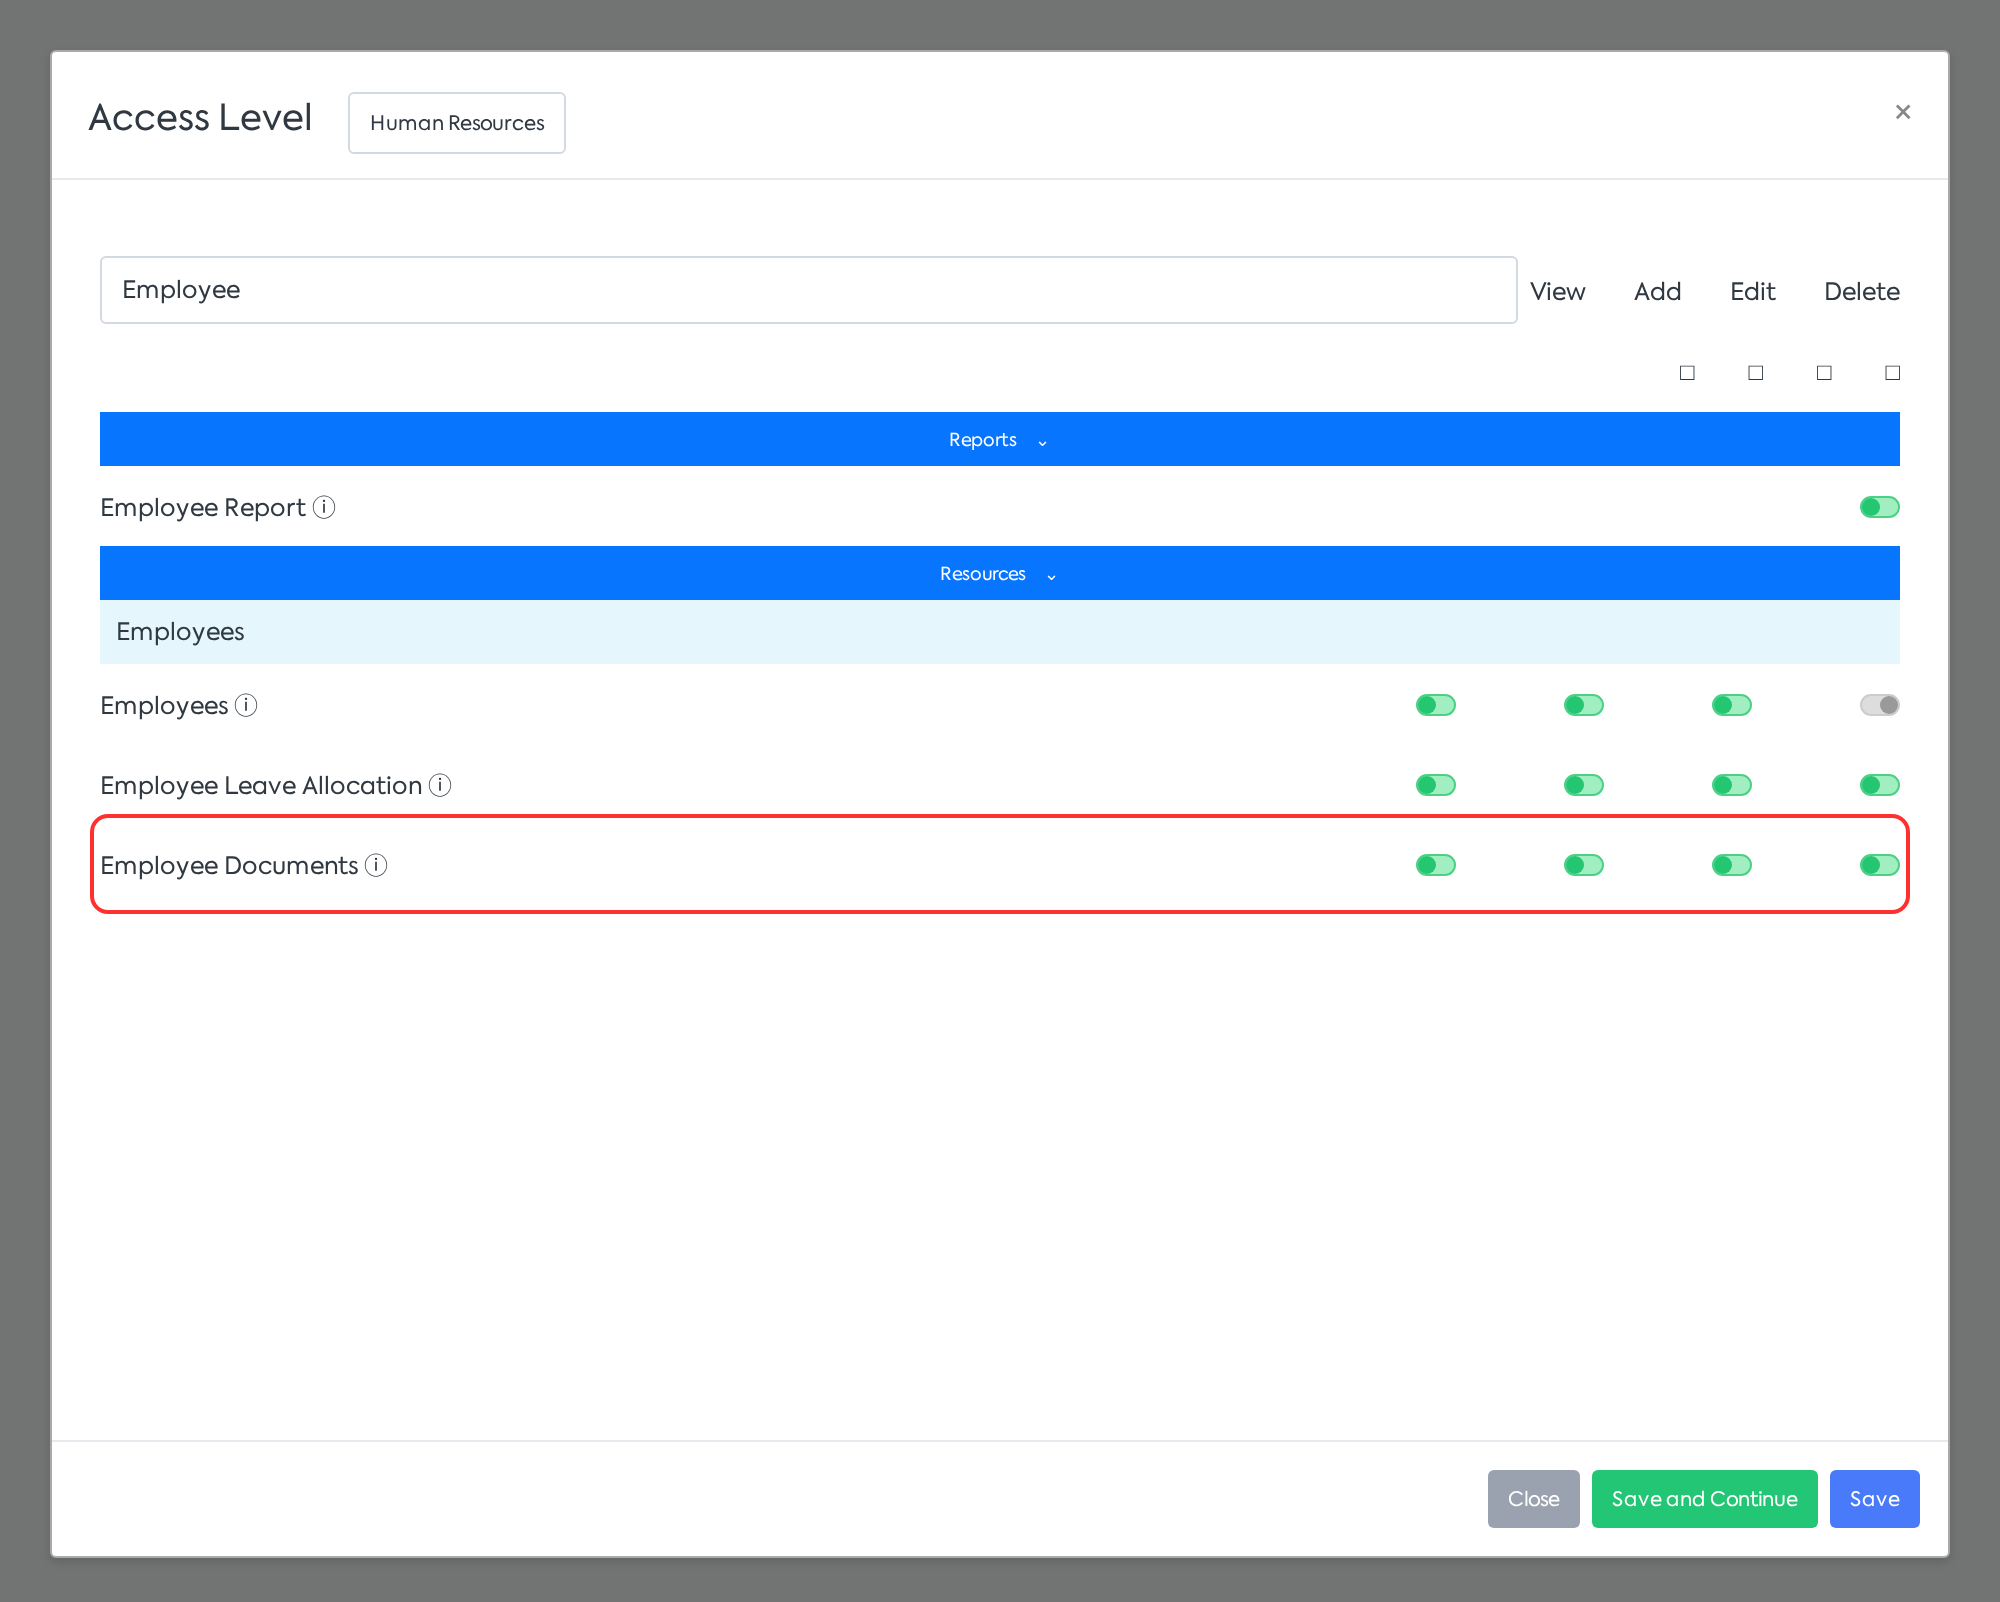
Employee Documents right checked in the access level.
- For the Standard Documents tab, existing rights on Documents - Standard Documents are required.
- Check who receives expiration notifications (see the "Expiration Notification" section). Upon update, the default recipient is the company email address from Global Settings; if this is not filled in, no email is sent until you set the recipients.
- For standard documents, create templates in with the Associated Section "Employees".
Adding a document with expiration
Step 1. Open and press Employee Details (eye) on the employee row. Open the Documents tab and press Add Document.
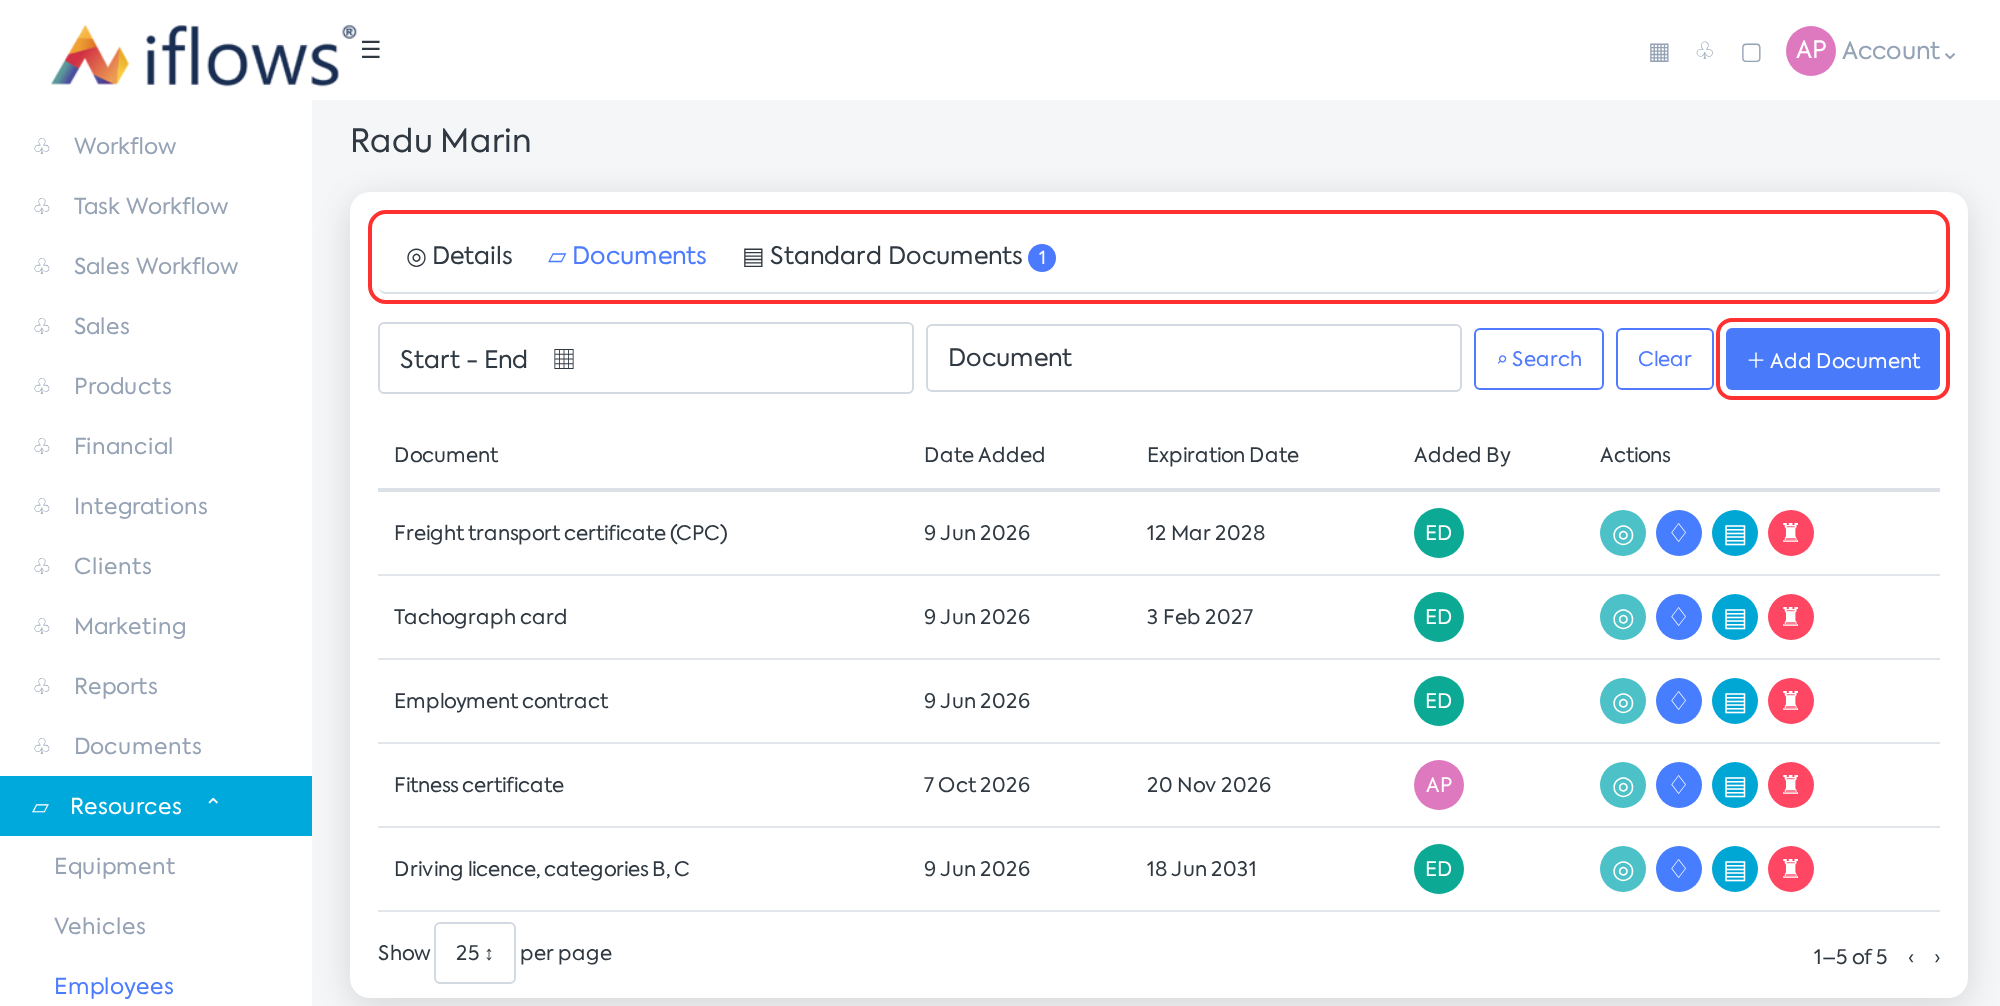
Documents tab in the employee file and the Add Document button.
Step 2. Upload the file: drag it into the "Drag documents here" area or press Browse…. PDF, DOC, DOCX, JPG, JPEG, and TIFF are accepted, maximum 10 files at a time.
Step 3. Fill in Name — the name of the document, for example "Employment contract" or "Fitness certificate".
Step 4. If the document expires, turn on Expiration Notification and choose the Expiration Date. Past dates cannot be chosen. The email is sent on the day of expiration.
Step 5. If you would like to be notified earlier, turn on Additional Notification and type how many days before expiration the email is sent (e.g., 14).
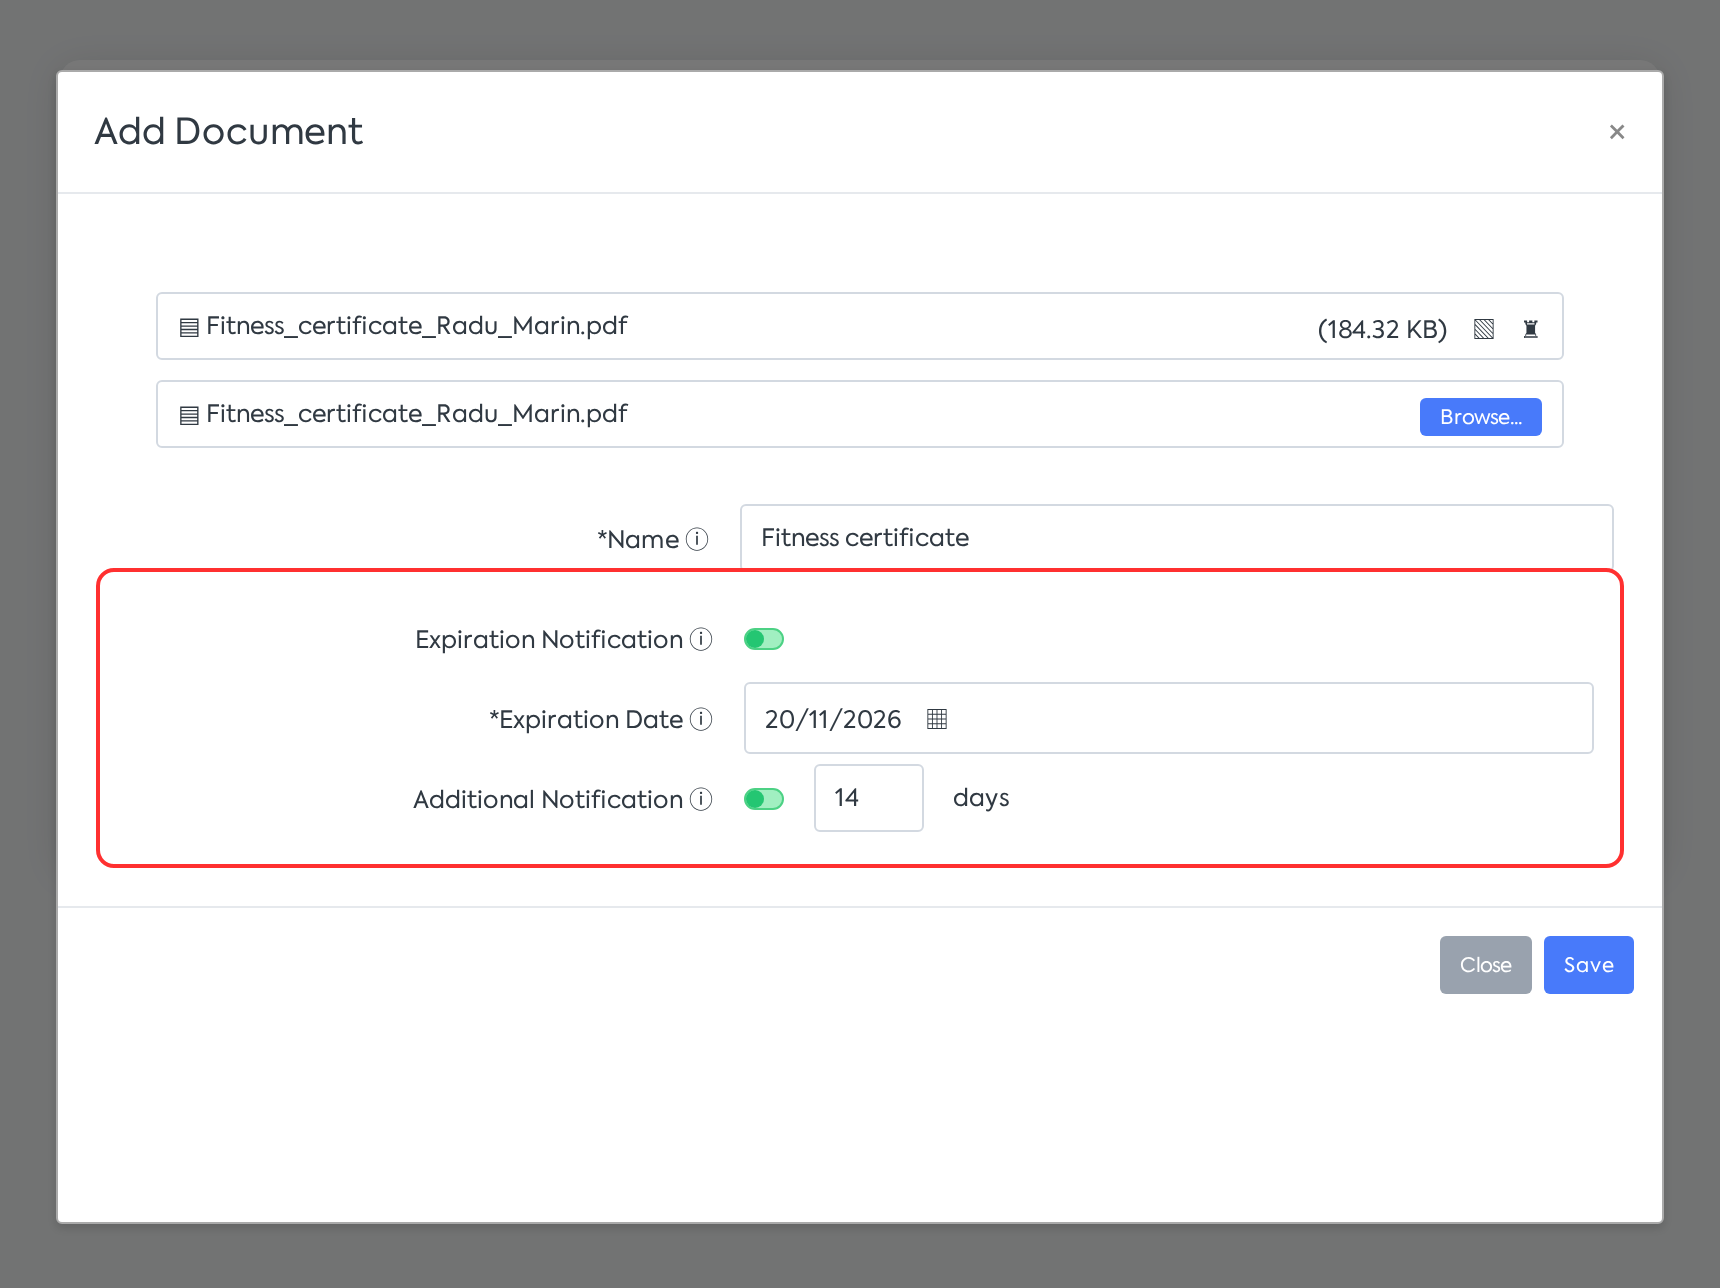
Fitness certificate expires on 20/11/2026, with an additional email 14 days before.
Step 6. Press Save. The document appears in the list, with the addition date, the expiration date, and the user who added it.
Step 7. To check what you have set, press Document Details (eye) on the row. The window shows the expiration date, the date the additional email is sent, who added the document, and the files, which open in a new tab.
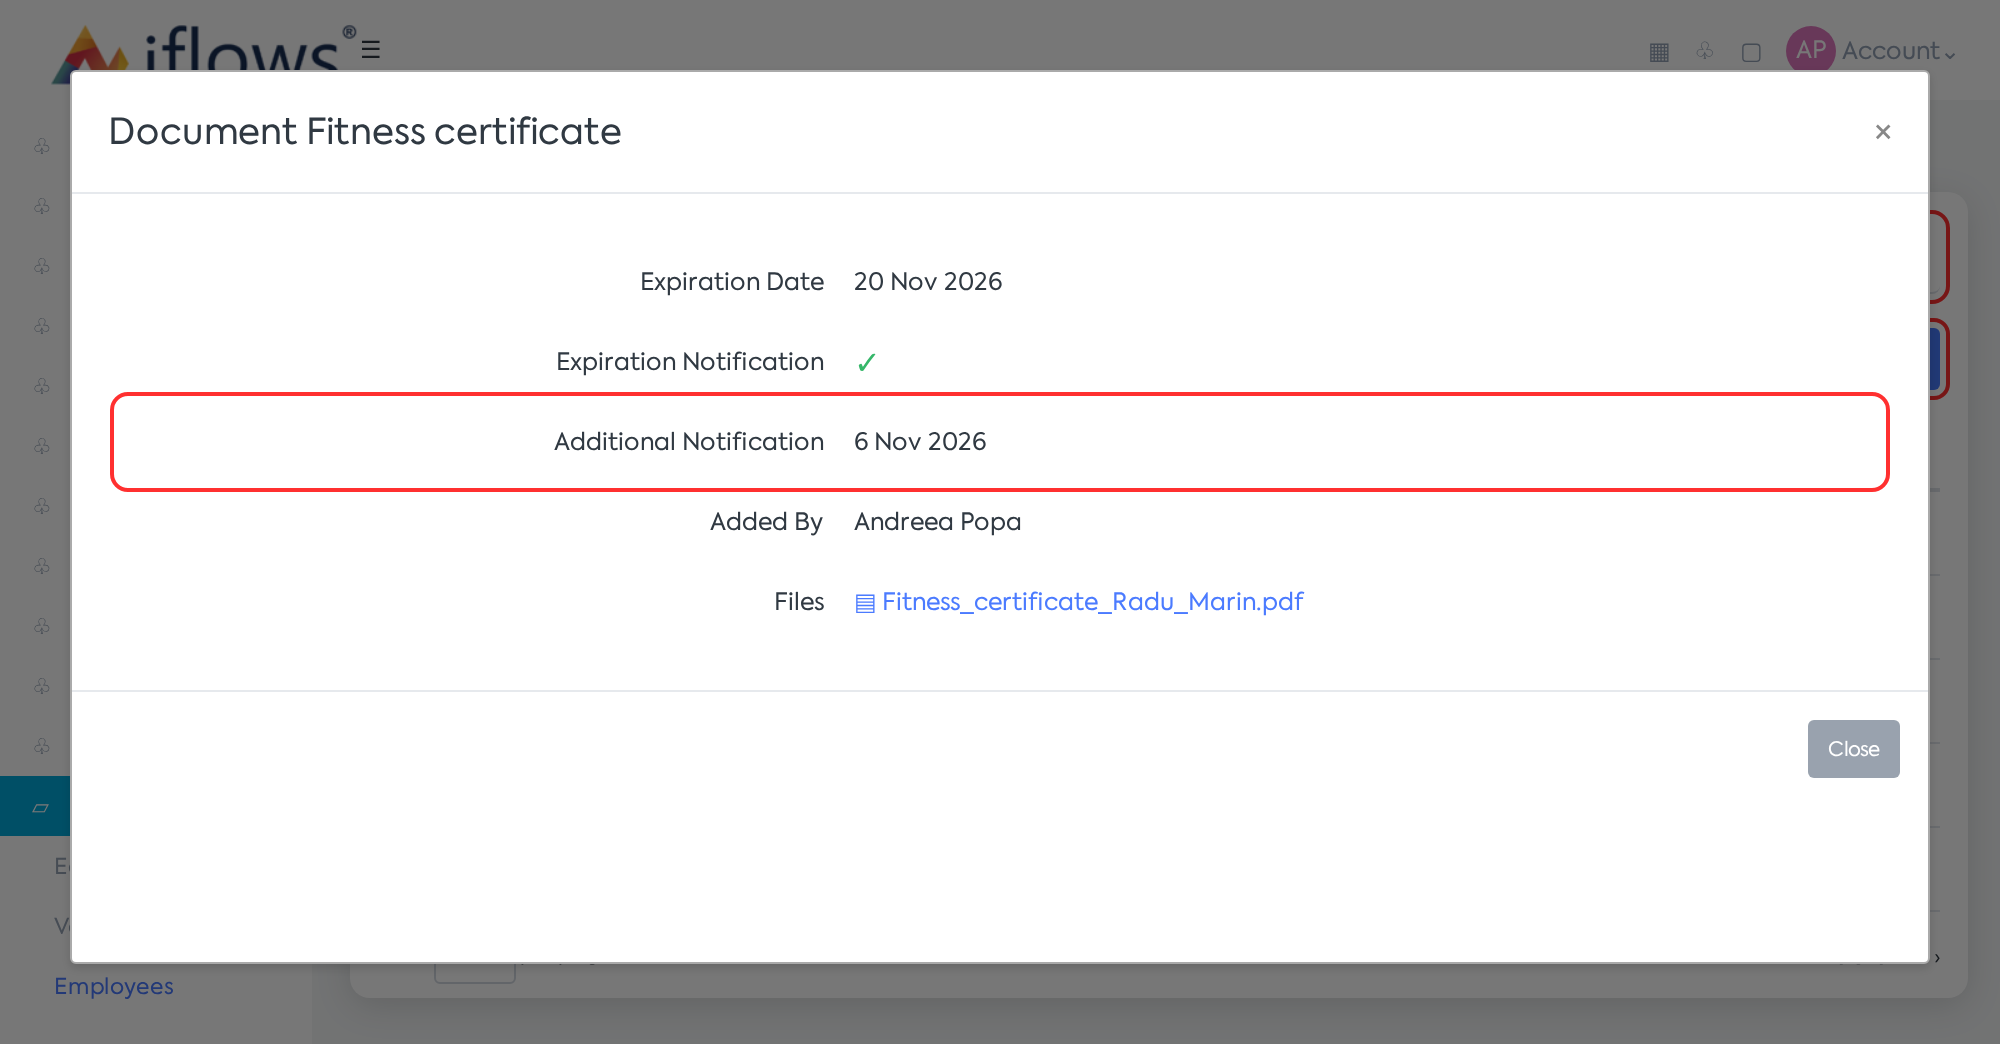
Document details: the additional email is sent on November 6, 14 days before expiration.
Note: documents with no expiration date (e.g., employment contract) are saved with Expiration Notification off and have no expiration date.
Working with the document list
- Start - End filters by expiration date (documents without a date do not appear when using the filter). The Document field searches by name. Search applies the filters; Clear resets them.
- Documents are ordered alphabetically, 25 per page.
Row action | What it does |
|---|---|
Document Details | Displays expiration, notifications, who added the document and the files |
Edit Document | Opens the same window as when adding; existing files can be deleted individually |
Download Document | Downloads an archive with all the document's files |
Delete Document | After confirmation, permanently deletes the document and its files |
Expiration Notification
Step 1. Open and the Company tab (available to administrators).
Step 2. In the Employees category, on the Employee document expiration notification row, choose the recipients: active employees with an account, the company email address, or manually entered addresses. At least one recipient is mandatory.
Step 3. Press Save.
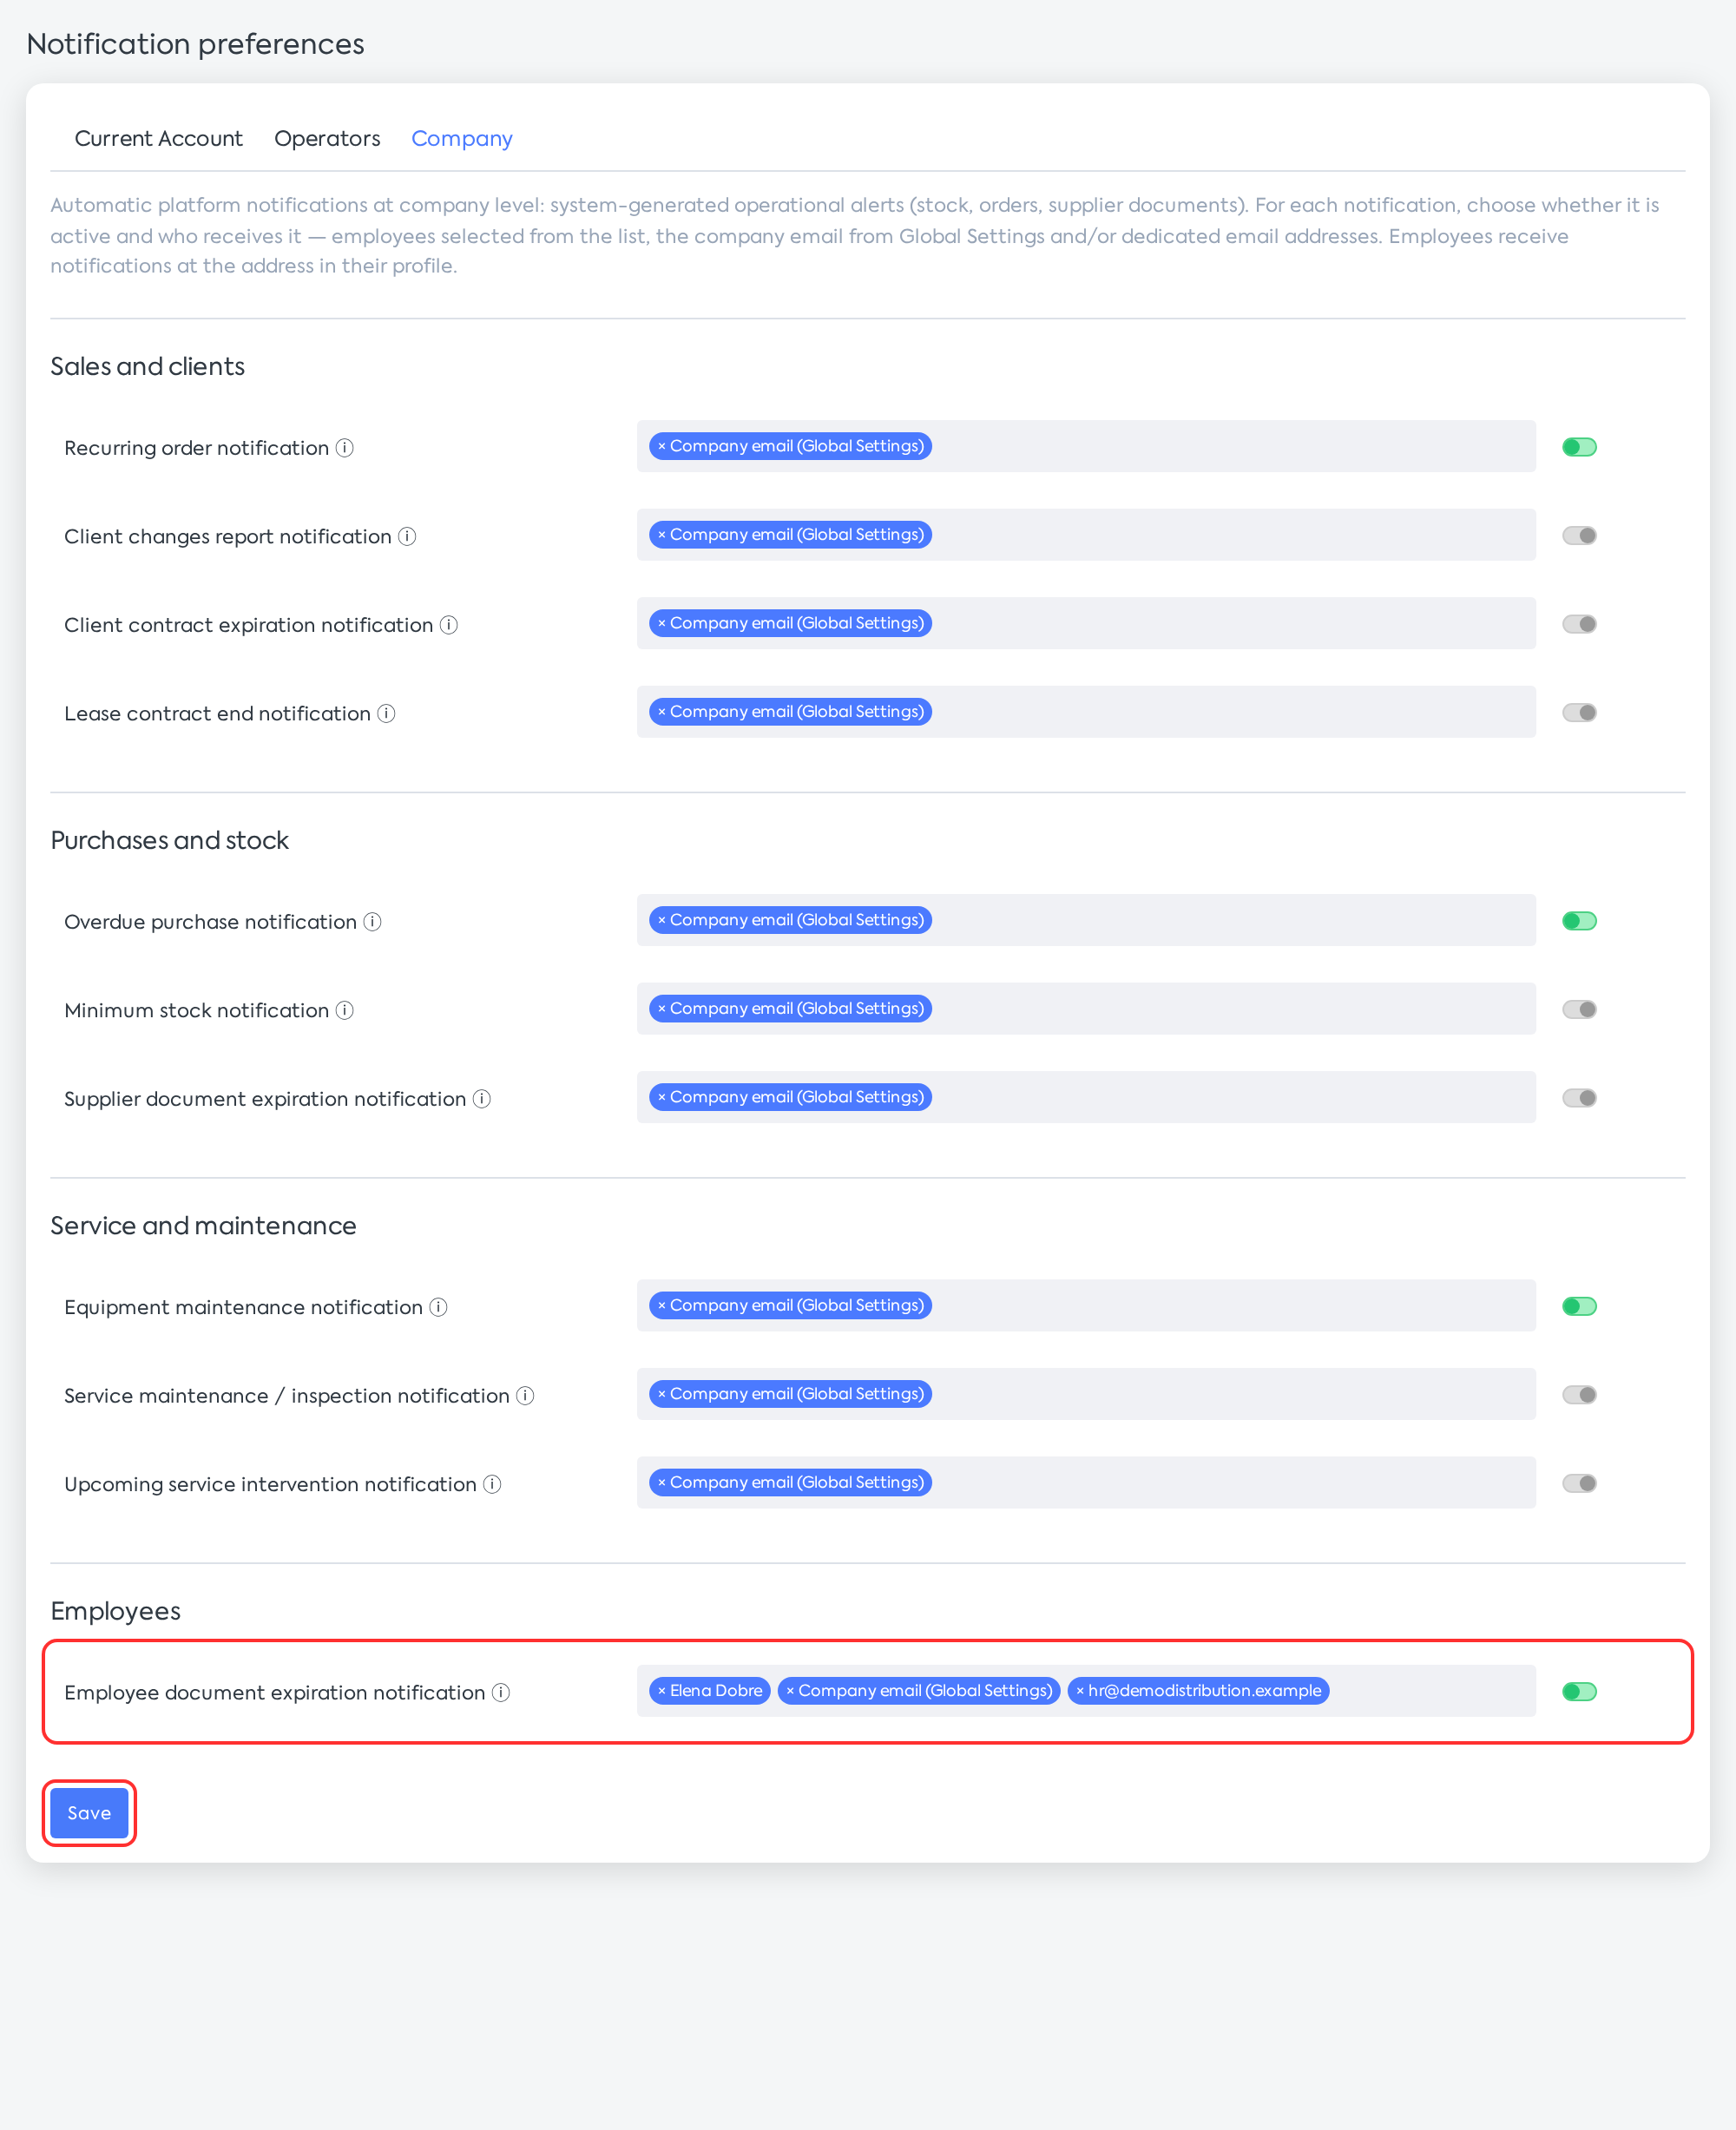
Recipients of the employee document expiration notification.
- The email is sent once a day, during the night: on the day of expiration and, if you set the additional notification, the chosen number of days before.
- The employee and the user who added the document do not automatically receive the email. Add them as recipients if applicable.
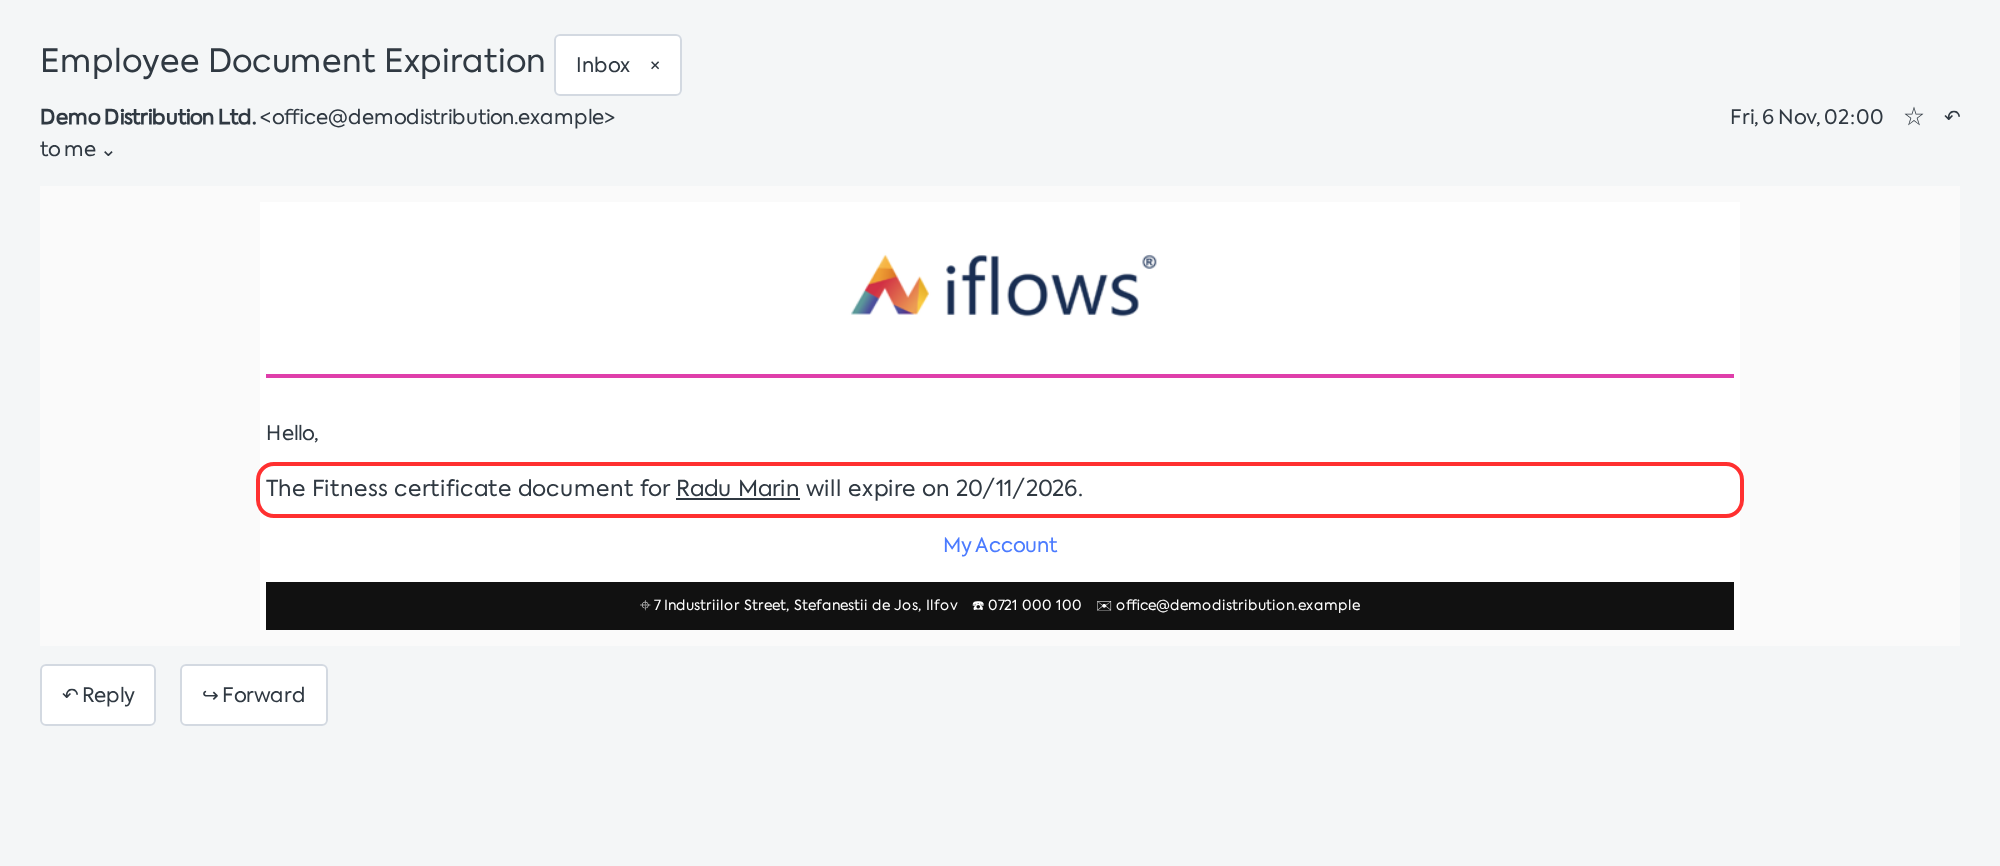
Email received by recipients; the employee's name is a link to their file.
- The email has the subject "Employee Document Expiration" and the text "The document ... for ... will expire on ...". The employee's name in the email is a direct link to the Documents tab in their file. The text can be customized in , the Employee document expiration notification template.
Generating a standard document from the employee file
Step 1. In the employee file, open the Standard Documents tab and press Add Standard Document.
Step 2. In the "Generate Standard Document" window, choose the template in the Choose Standard Document field. Only templates associated with the Employees section appear. Press Generate.
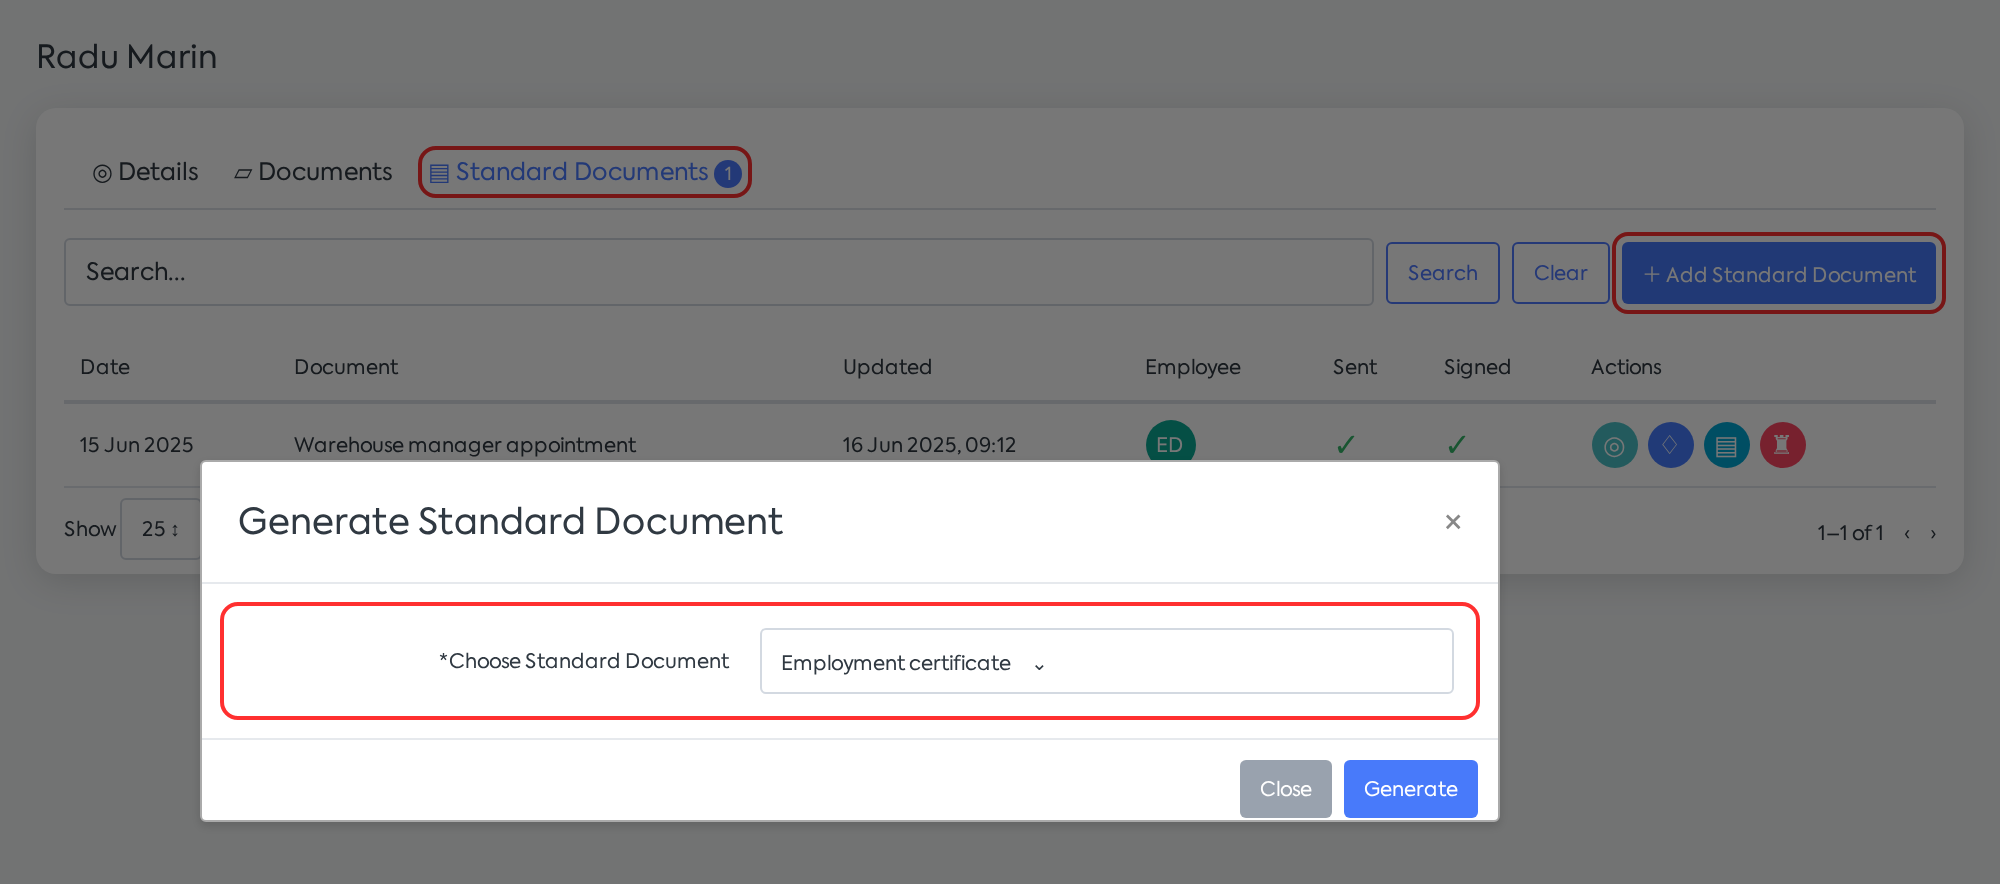
Choosing the template from the employee's Standard Documents tab.
Step 3. The document opens in the editor, and the Document Tag Values window is automatically filled with the employee's data (last name, first name, position, department, employment date, etc.) and company data, according to the fields used in the template. Check the values and press Apply.
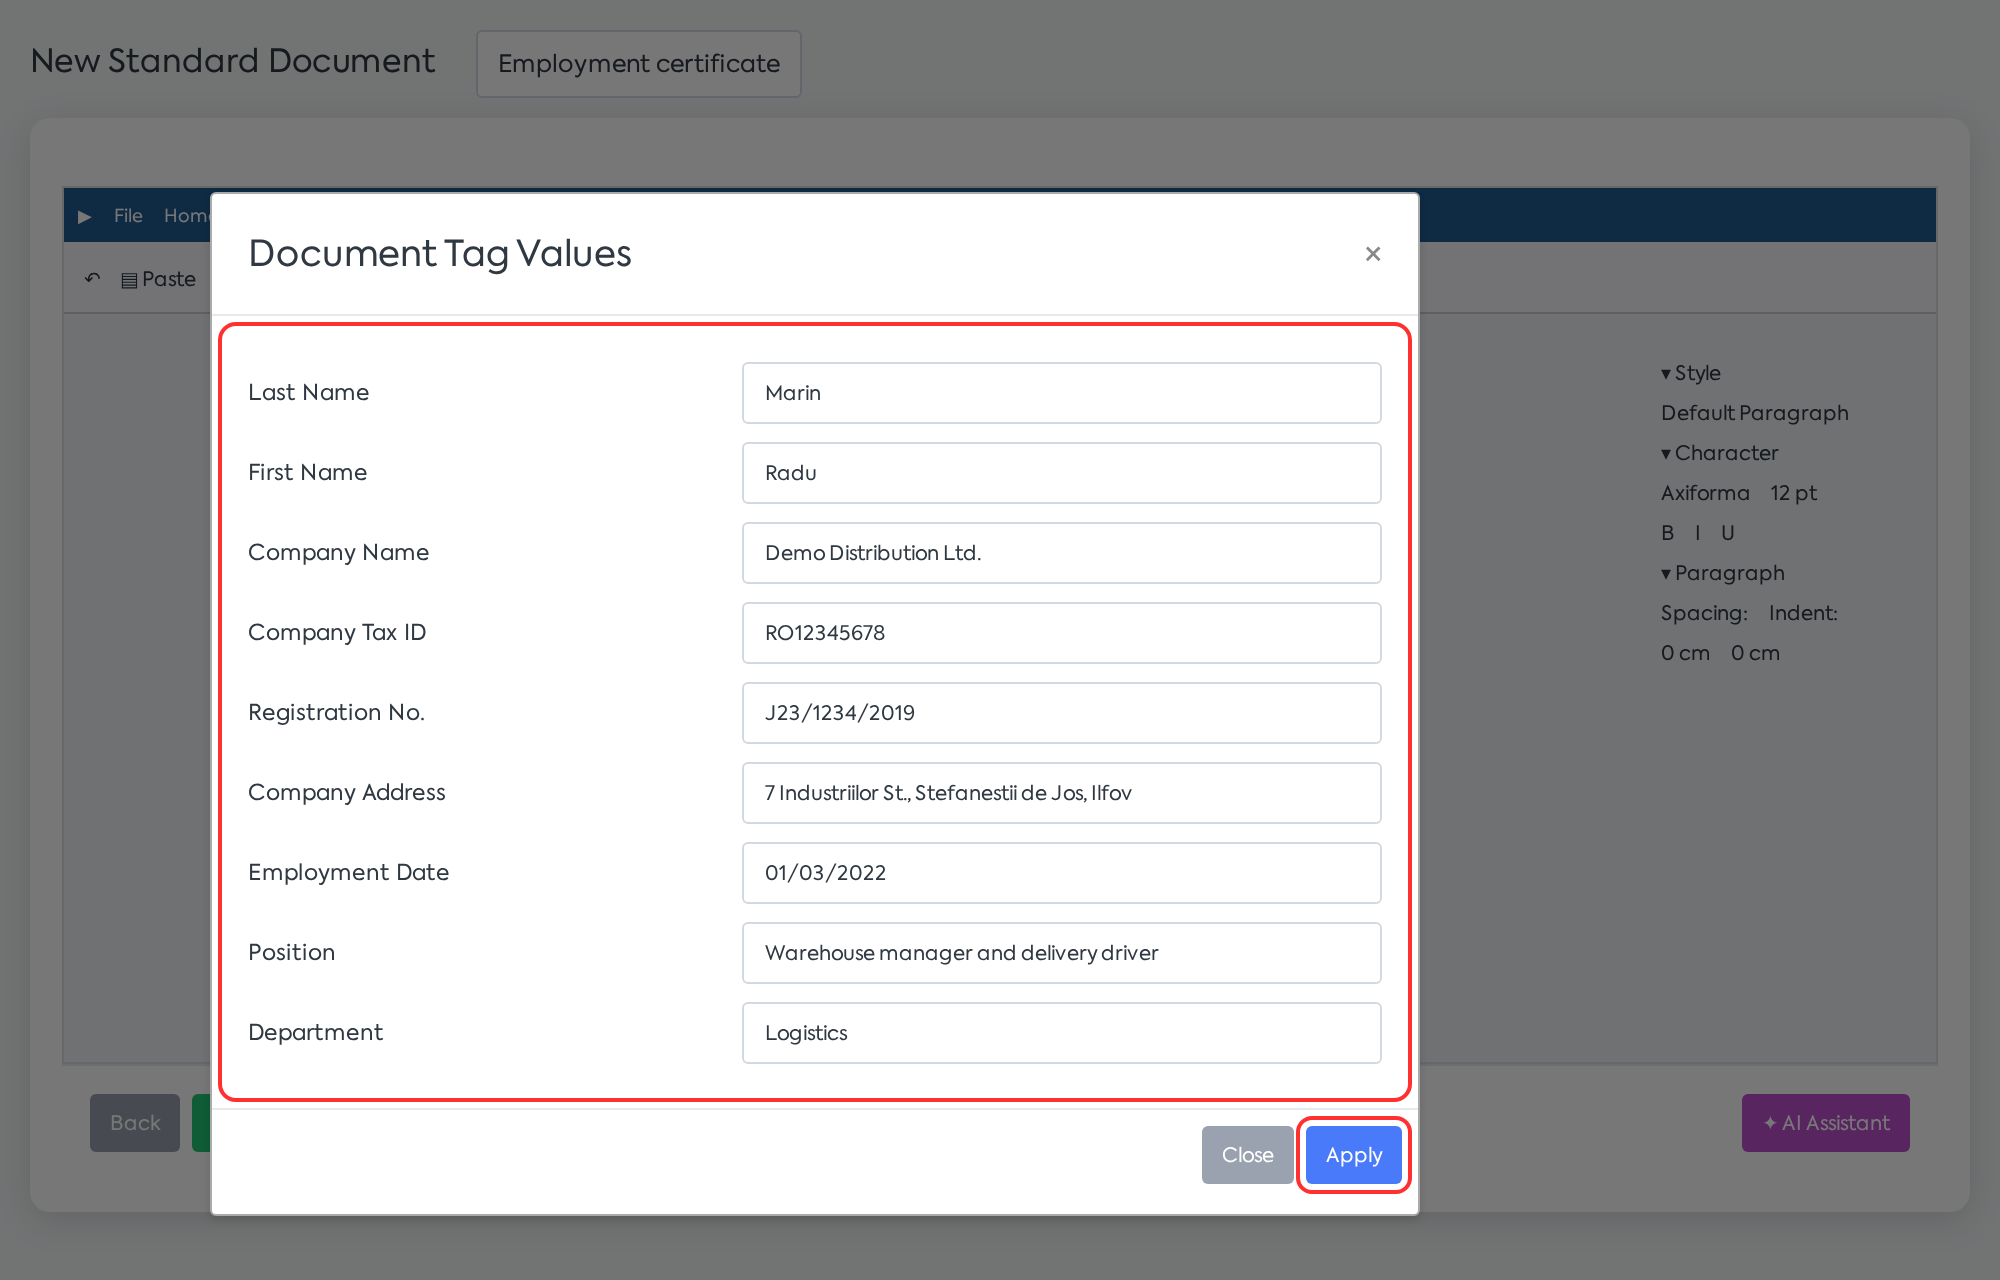
Field values, automatically taken from the employee file and company data.
Step 4. The document is filled with the employee's data. If you wish, change the document title (the template name by default) in the top field, for example by adding the employee's name.
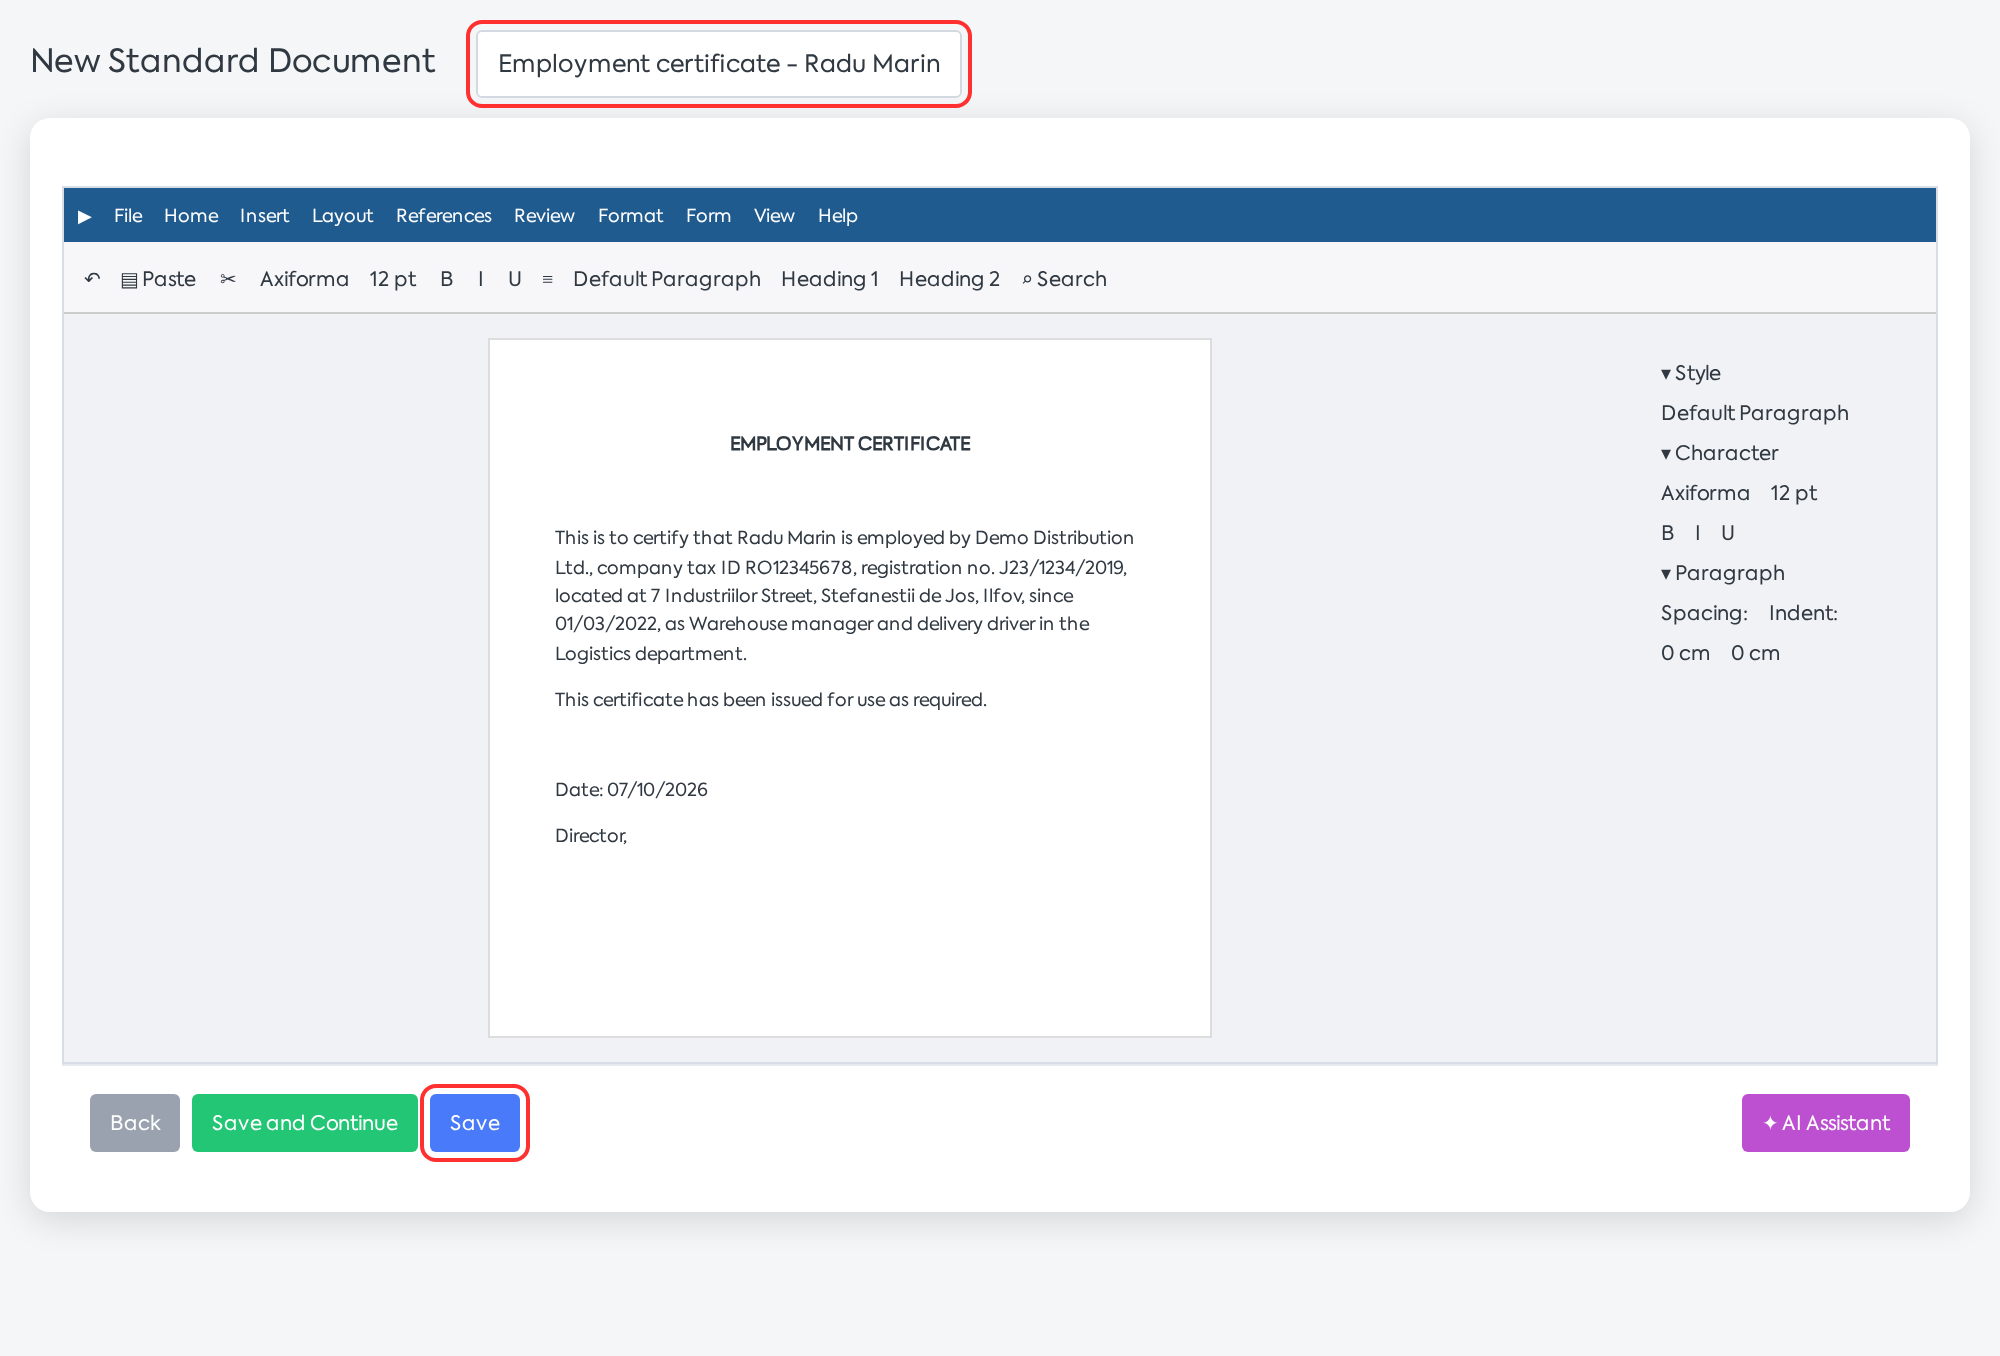
Filled certificate, modified title, and the Save button.
Step 5. Press Save. You are returned to the employee's Standard Documents tab, where the new document appears. The number on the tab shows how many standard documents the employee has.
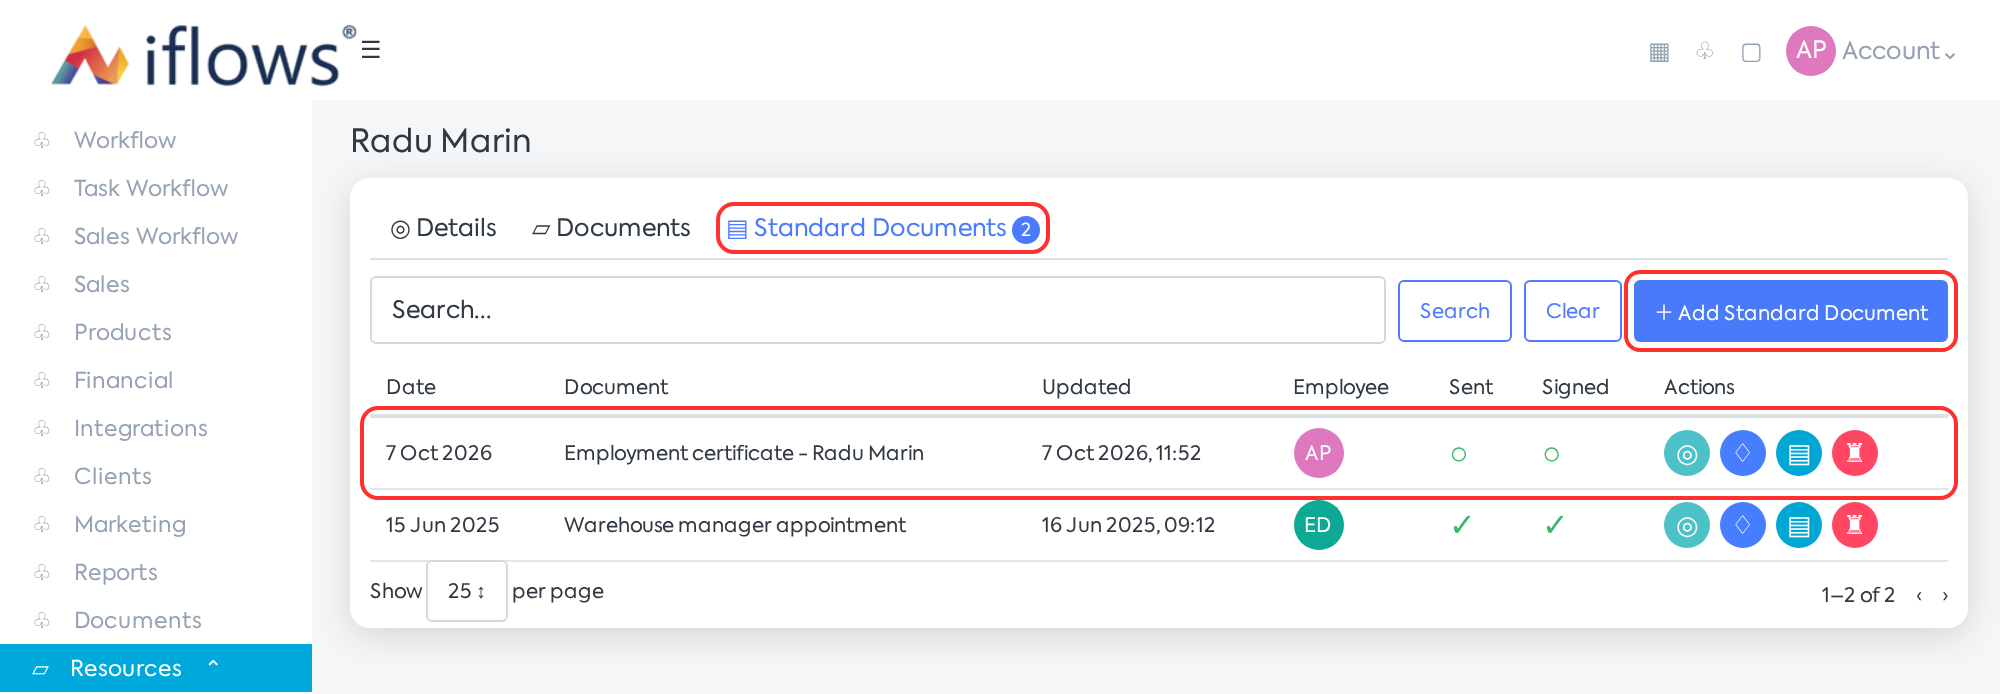
The saved certificate appears in the employee's Standard Documents tab.
From the Standard Documents tab, you can view, edit (only unsigned documents), export or print PDF, send via email or WhatsApp, and delete documents. In , employee documents have the employee's name as a link to their file.
Rules and limits
- The expiration date is filled in only along with the notification. If you turn off Expiration Notification, the date and additional notification are cleared.
- If you change the expiration date or the number of days, the emails are rescheduled for the new dates.
- An expired document, with the notification turned on, can only be saved with a new expiration date or with the notification turned off.
- The date of the additional email cannot be in the past. If the expiration is very close, decrease the number of days or turn off the additional notification.
- The check is performed every night. A document saved on the very day of expiration (or on the day of the additional email) no longer receives an email for that day.
- When editing, deleting a file is done immediately, even if you close the window without saving.
- The Documents and Standard Documents tabs are available in employee profiles of the Employee type, not for Administrator accounts.
- Deleting or deactivating an employee is not blocked by their documents; the documents remain saved.
Rights
Right | What it allows |
|---|---|
Employee Documents — View | Documents tab, list, details, and download |
Employee Documents — Add | Add Document button |
Employee Documents — Edit | Modifying documents, including adding and deleting files |
Employee Documents — Delete | Deleting documents |
Documents - Standard Documents (existing) | Standard Documents tab: viewing, generating, editing, deleting |
All the above rights also require the view right on Employees.