
Super-products Within Super-products: Complex Products
The new functionality now allows the inclusion of a super-product (composed product/product bundles/services) within the recipe of another super-product.
Usage Scenarios:
- Complex projects with multiple sub-assemblies: For large projects, such as an "Exhibition Stand", it is necessary to group complex sub-assemblies. For example, within the stand, there can be two distinct super-products: "Electrical Component" (which includes "LED Spot", "Cables", and "Sockets") and "Furniture Component" (which includes "Chairs" and "Tables"). This structure allows for clearer organization and easier management of sub-assemblies.
- Managing production stages with semi-finished goods: In industrial production, there are situations where a finished product is built from successive semi-finished goods. Now, each semi-finished item can be created as a separate super-product, and these can be integrated into a main super-product, reflecting the multi-stage production structure.
Step-by-Step Usage:
The process of creating a super-product remains similar to before. The difference is that you can now include super-products in the recipe of another super-product.
- Adding Base Products: Add the base products/services or raw materials.
- Building each Super-product: Create each super-product by selecting the component products during its configuration.
- Including Super-products in the Main Super-product: Once the super-products have been configured, they can be added to a main super-product.
Important: a super-product cannot contain another super-product which, in turn, includes a third super-product. The structure must remain at two hierarchical levels.
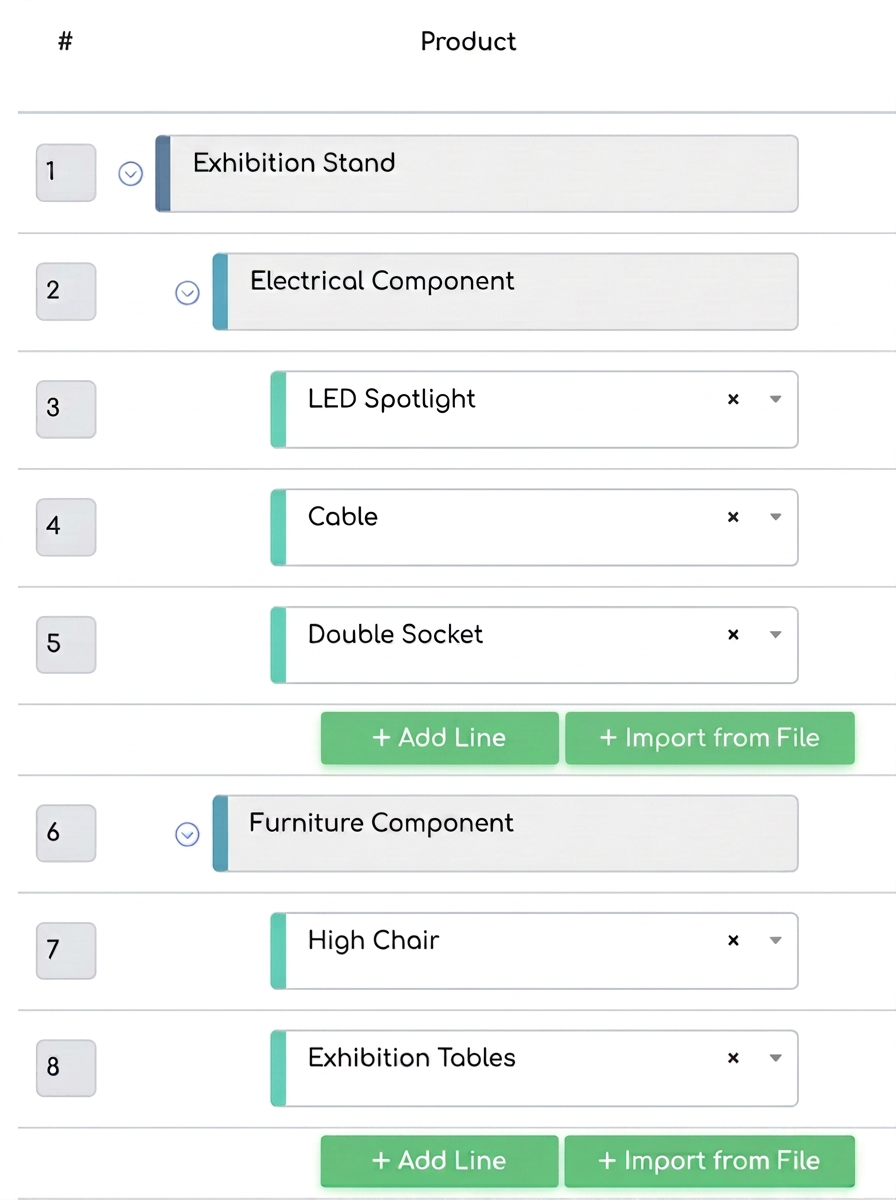
Color Code Explanation
The color code is used to provide a clear picture of the hierarchical relationships and dependencies between products. It allows for the rapid identification of independent products, super-products, and subordinate components.
- Main Super-product:
- Dark Blue: A super-product that represents the main element and contains other products or super-products is marked with dark blue. For example, an "Exhibition Stand" will appear this way, highlighting that it is the base element including other products.
- Secondary Super-product (within a Main Super-product):
- Light Blue: When a super-product is included in another super-product, it will be marked with light blue. This shows it is a subordinate super-product. For example, within the "Exhibition Stand", an "Electrical Component" super-product will have this color.
- Component Products of a Secondary Super-product:
- Green: Products that are part of a secondary super-product are marked with green. This indicates they are simple products, subordinate within a super-product. For example, within the "Electrical Component", products such as "LED Spot" and "Cables" will be displayed with this color.
- Independent Product:
- Dark Blue: Any product added independently (not part of a super-product or having no other subordinate products) will be marked with this color.
Administrative Documents
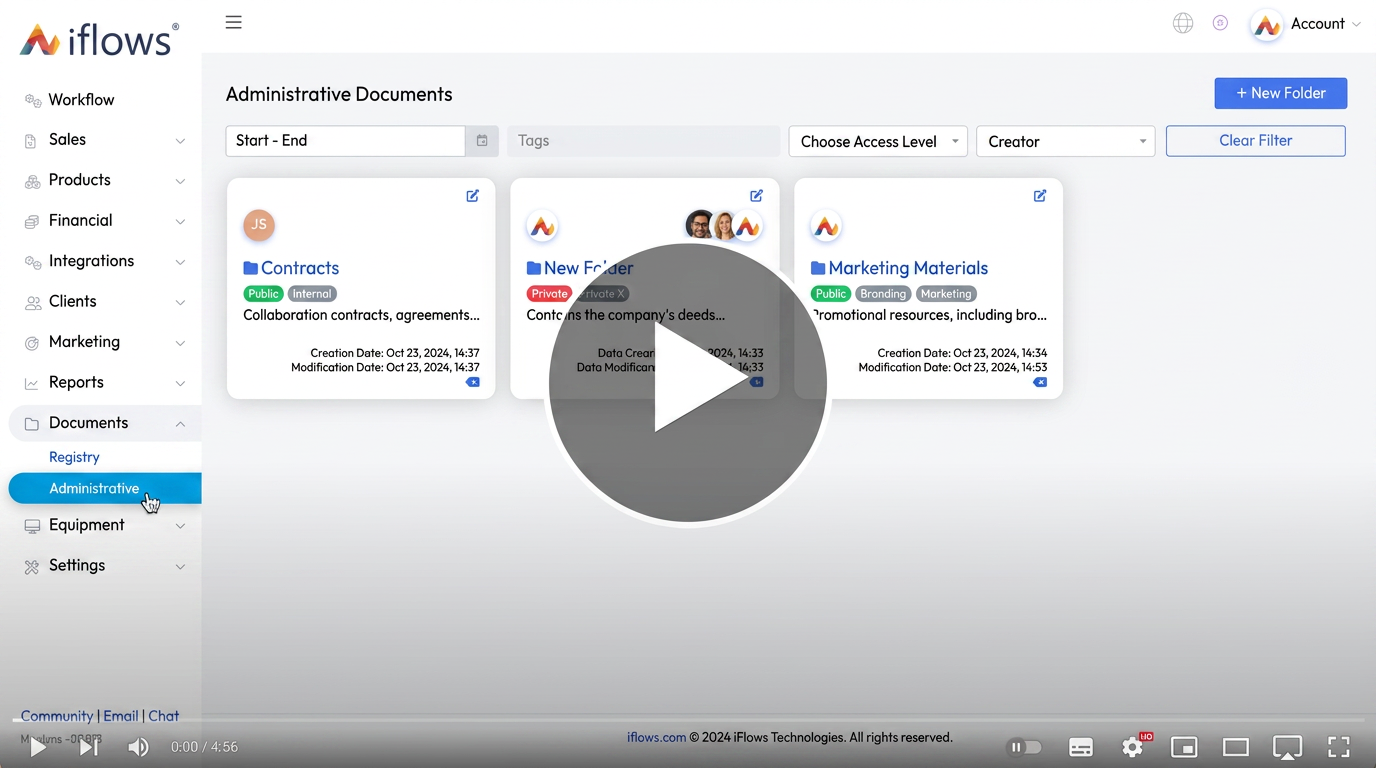
The function offers a centralized space where all the company's internal documents are stored. This function ensures that all critical information is organized and accessible to the team with access.
Examples of documents:
- Company Documents: Unique Registration Certificate (CUI - Certificat unic de înregistrare), Licenses and certifications, Articles of Incorporation.
- Contracts: Bank contracts, Lease agreements, Utility contracts, Leasing contracts.
- Images: Company logo, Branding images (banners, logos).
- Presentations: Company presentation, Offer start sheet, PowerPoint for meetings, Presentations for internal trainings, Event materials.
- Budgets and Financial Documents: Annual expense budgets, Quarterly financial statements, Projected cash flow.
Location:
The new function is integrated into the Documents – Administrative section.
Access:
Any user with access previously set (in the Financial - Employees – SEE value permissions section) will be able to view the "Administrative" category.
Creating and Modifying Folders
- Creating a new folder
- On the Documents - Administrative page, users will see an add folder button. Clicking this button will open a pop-up requesting the following information:
- Folder Title: The name of the folder, displayed in the center, below the image of the user who created it.
- Label
- Folder Description: A short description of the purpose or content of the folder, displayed under the title.
- Access Status (Public/Private): The user can choose between the Public option (visible to all users with permissions) and Private (visible only to the creator and manually chosen persons). If Private is chosen, a column will be available to enter the persons with access.
- On the Documents - Administrative page, users will see an add folder button. Clicking this button will open a pop-up requesting the following information:
- Modifying existing folders
- If a user wants to modify an already created folder, they will click on the pencil symbol displayed in the top right corner of the folder card.
- Upon clicking this symbol, the same pop-up as for folder creation will open, allowing the modification of all elements.
- After a modification is made, a short message will appear under the card: "Modification Date" to inform users about recent updates.
Folder Types
The folder creator will decide the access type for each individual folder as follows:
- Public Folder: Visible to all users who have category-level permissions.
- Private Folder (confidential): Visible only to the folder creator, but they have the option to manually choose the persons who can access that folder.
Also, users who have access to that folder also have the option to later edit the folder type.
Important: Permissions can only be set at the folder level, not at the individual file level. This means that all files within a folder will inherit the same access rights, depending on the permission type set for that folder (Public or Private).
Downloading Files
Users who have the "see" permission can view and download files from that folder. By default, any user with viewing rights also has the option to download documents.
Important: Documents are not editable directly in the platform. Users can only view the documents or download them for personal use, without being able to make changes to the original file.
Deleting Files
- Deleted files will be completely removed from the system and will not be stored in a trash can or other temporary location. Once deleted, these files can no longer be recovered, so it is important for users to confirm the deletion action before continuing.
Archiving Files
- Instead of deleting, users can opt to archive files that are no longer current but need to be kept for future reference.
- Archived files will be moved to a separate tab called Archived and will no longer appear in the active document view. These files cannot be downloaded without being first restored to the Active tab.
- Archived files will remain accessible only for viewing in the Archived tab, and their restoration to the Active tab can be done by users with corresponding permissions.
Important: The maximum size for an uploaded file is 50 MB.