Attention: Product Identification and Correlation Rule
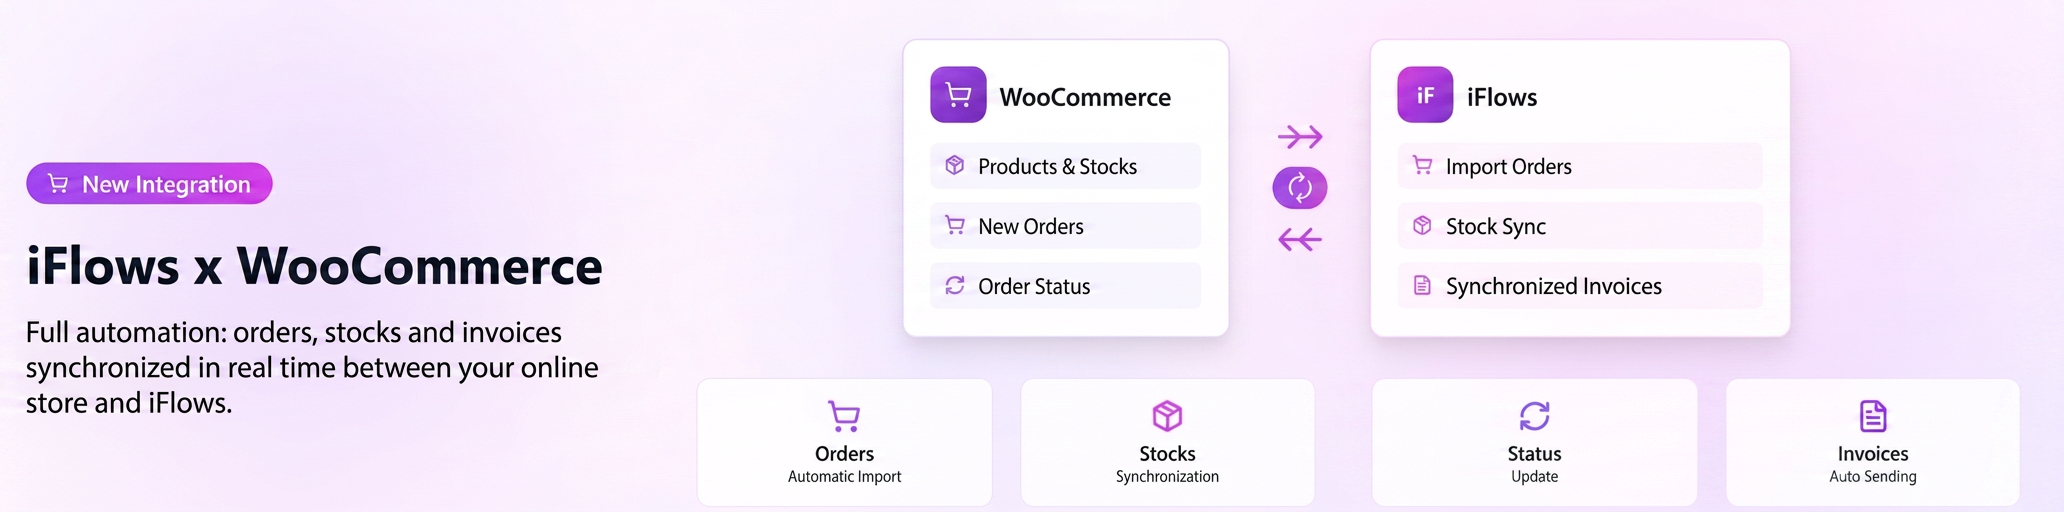
The iFlows x WooCommerce integration performs product correlation exclusively based on the product code. This is the only criterion used by the system to identify the product in WooCommerce and correctly associate it with the existing product in iFlows.
Basic Rule
- The product code in WooCommerce must be identical to the product code in iFlows.
- Only in this situation can iFlows:
- recognize the product;
- add the product to the order;
- update the corresponding stocks.
Operational Implications
- If a product has no code in WooCommerce, it cannot be correlated.
- If codes exist but are not identical between platforms, the product:
- will be marked as unsynced;
- will not be added to the order;
Recommendation
Before activating the integration and exporting orders, ensure that:
- all products in WooCommerce have completed product codes;
- the product codes in WooCommerce and iFlows are perfectly matching.
Part I: Connection Installation and Configuration
The configuration process requires actions performed alternatively in the WordPress panel and the iFlows account.
1. Installing the plugin in WordPress
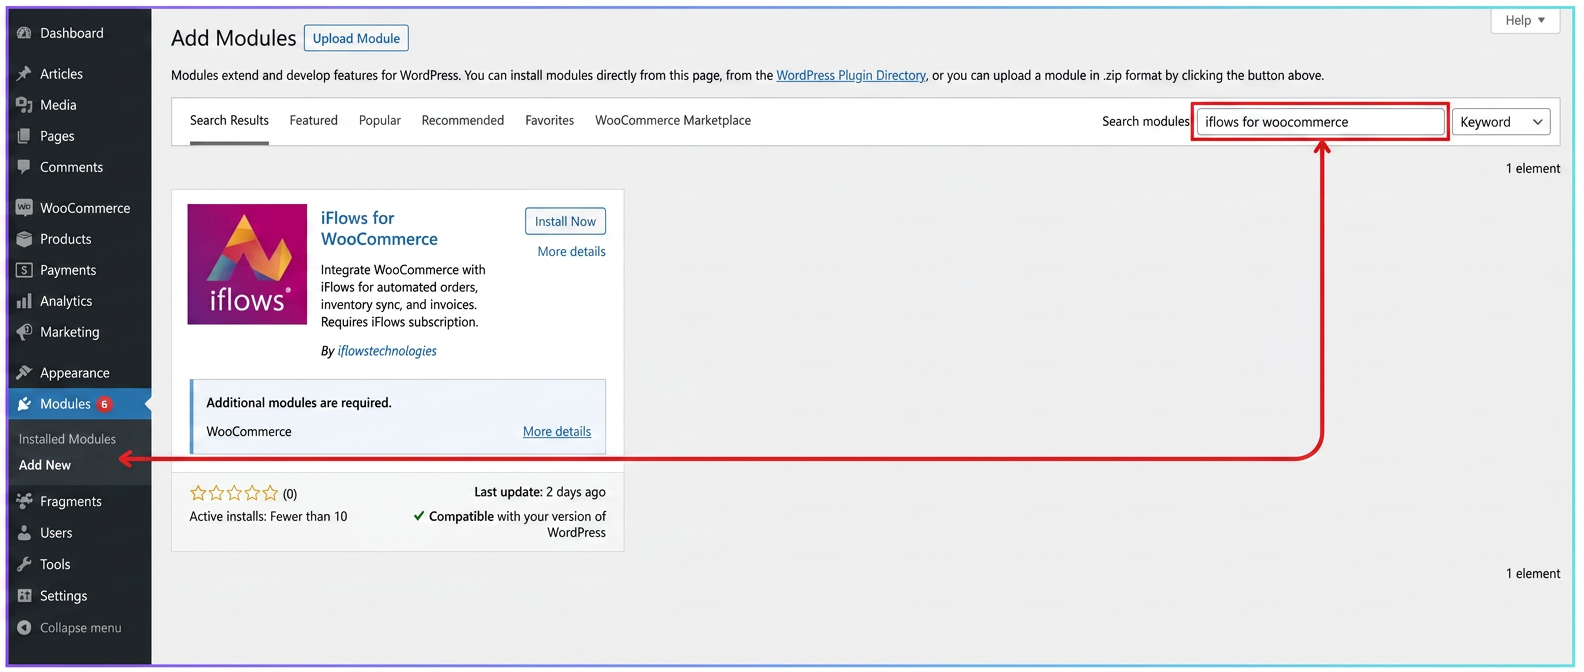
- Navigate in the WordPress administration panel to the Plugins (Module) → Add New (Adaugă modul) section.
- In the top right search bar, type "iFlows for WooCommerce".
- Find the "iFlows for WooCommerce" plugin in the results and press "Install Now".
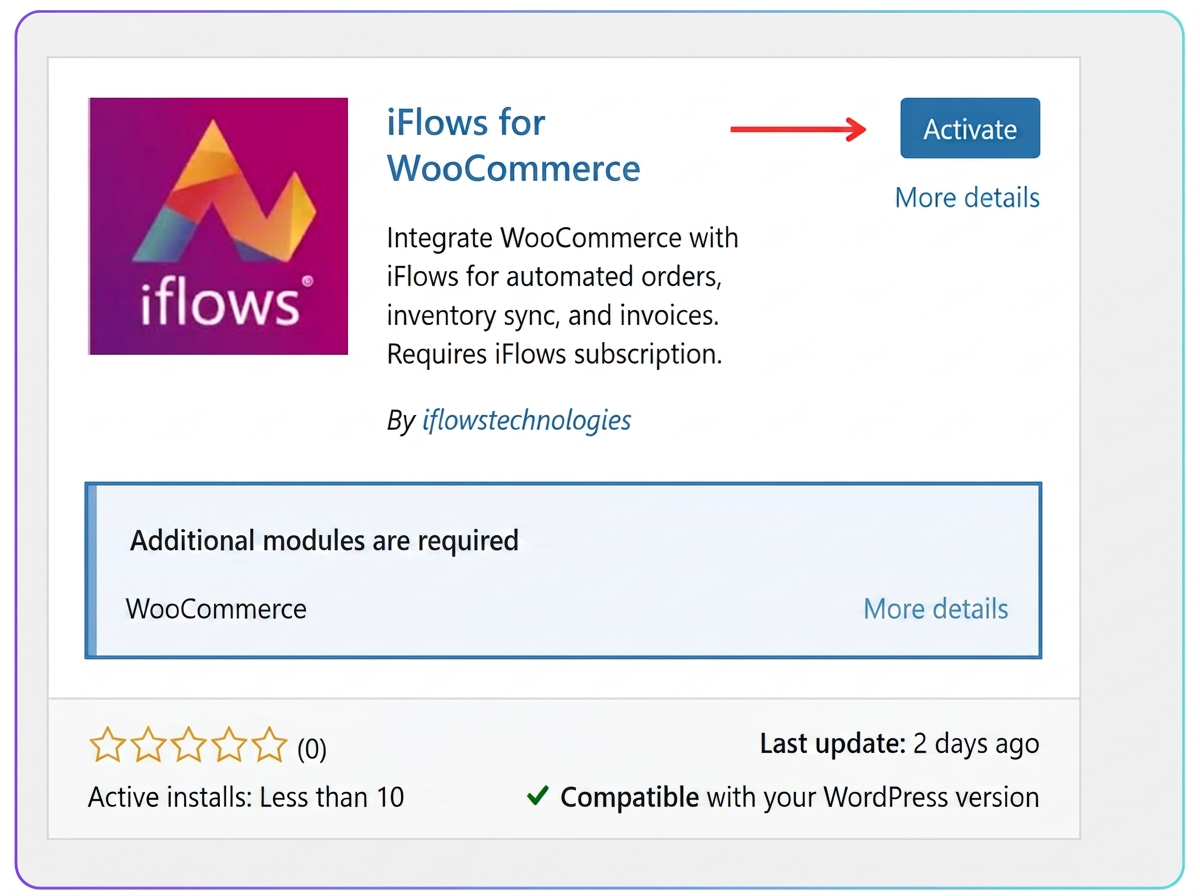
- After the installation is complete, click on "Activate".
2. Starting the configuration and obtaining data from iFlows
- Immediately after activation, you will be redirected to the plugin configuration wizard. It will request an API Endpoint URL and an API Token.
- To obtain this data, go to your iFlows account and navigate to Settings → Integrations.
- Access the "Available" tab, find WooCommerce in the list, and click the "+" icon to create a new integration configuration.
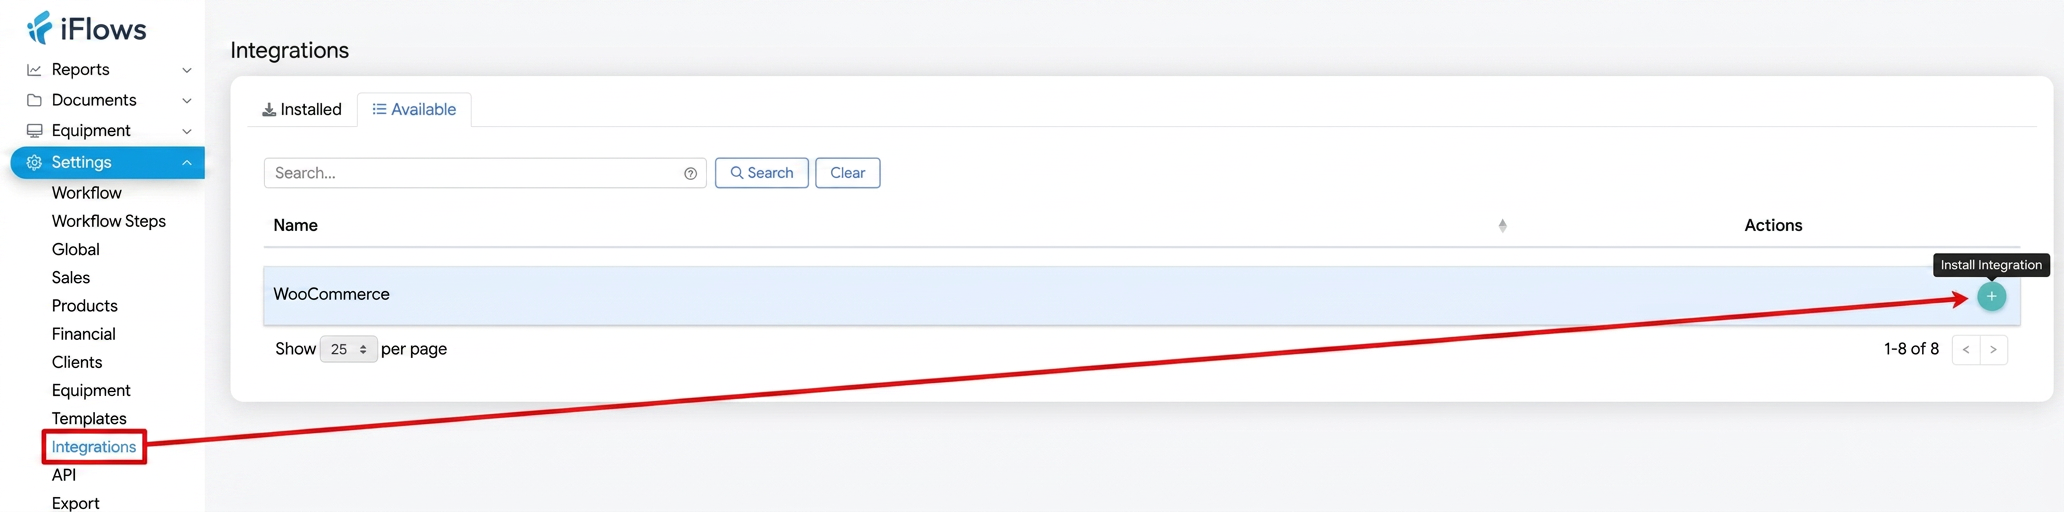
- On the new page, first fill in the required fields:
- Name: A recognizable name for the integration (e.g., "Main Store")
- Flow: Choose the workflow in iFlows where orders will enter
- Shipping Product: Select a generic product for the shipping cost
- Completion Stage: Choose the stage that will mark the order as "Completed"
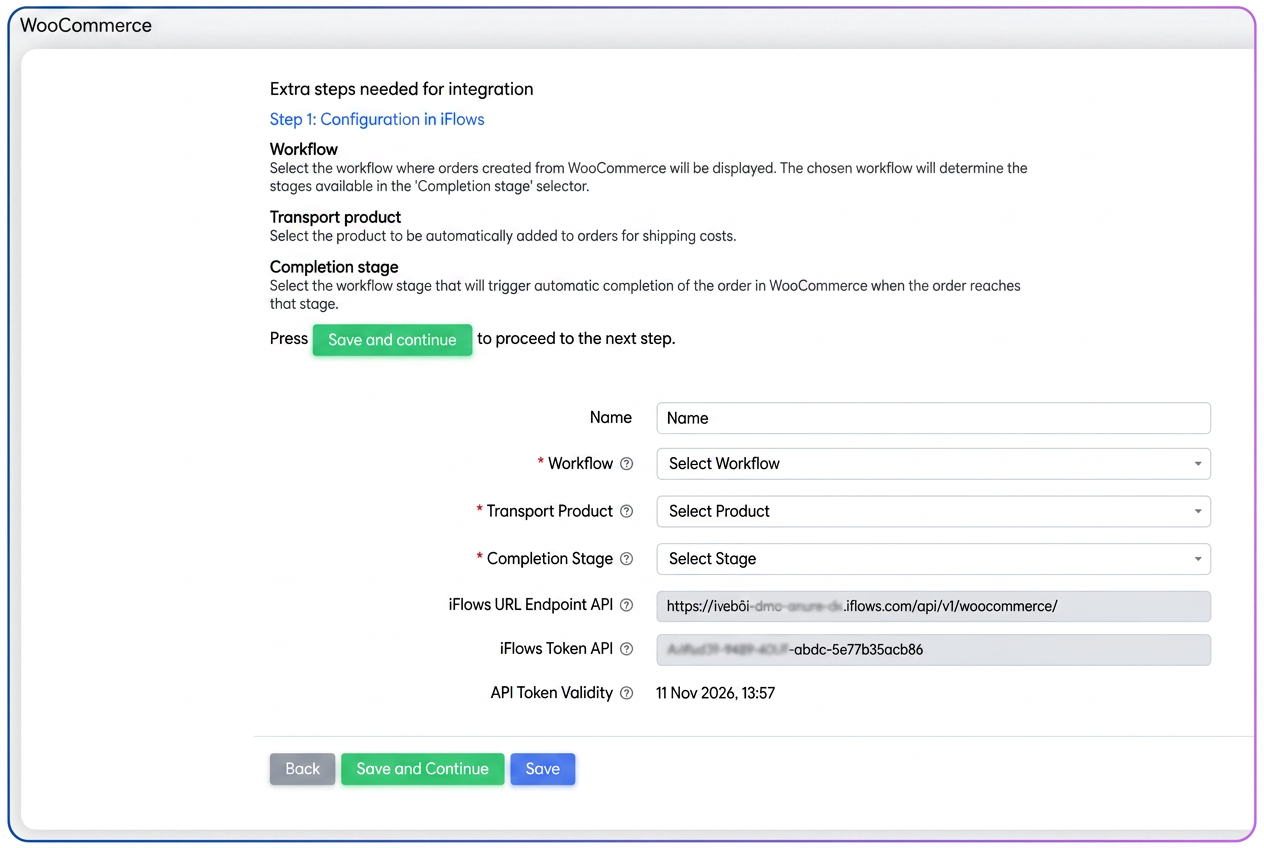
- Click the "Save and continue" button to activate the configuration in iFlows.
- The page will reload, displaying the saved configuration. Now, copy the values from the iFlows API Endpoint URL and iFlows API Token fields.
3. Completing the connection in WordPress
- Return to the configuration wizard in WordPress and enter the previously copied values into the corresponding fields.
- Check the desired initial options: "Activate automatic export for new orders" and "Allow automatic stock updates".
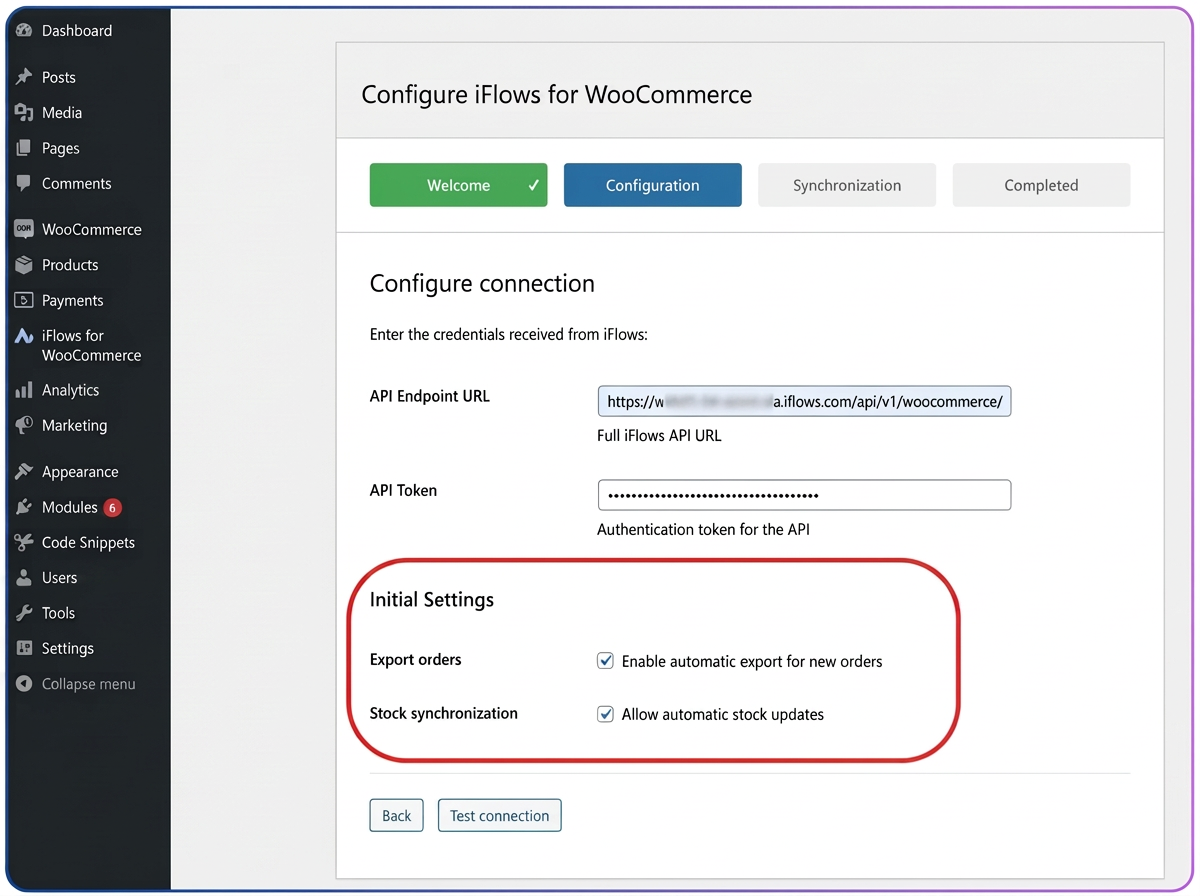
- Click "Test connection". If the data is correct, you will receive a success message.
After testing the connection, the initial data synchronization between platforms will take place automatically.
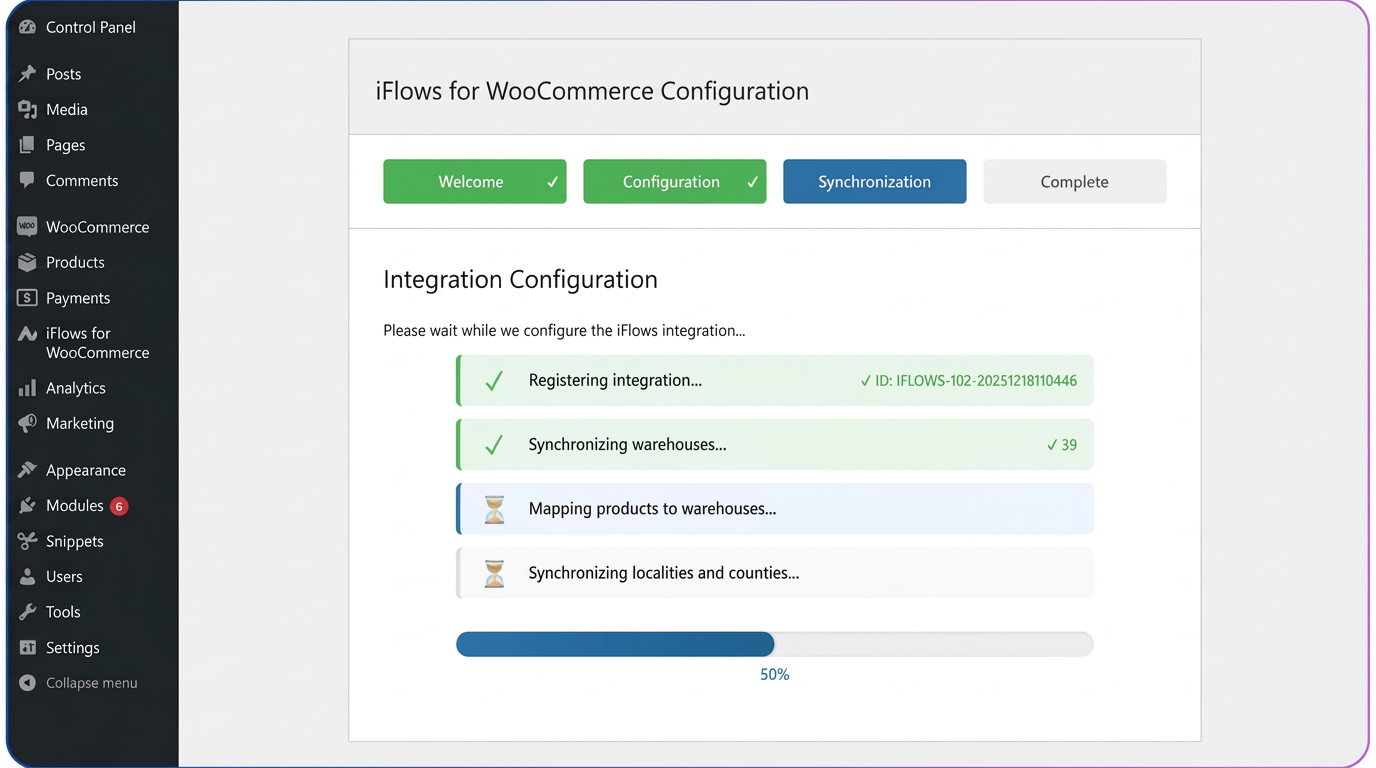
- Finish the process by clicking "Save and continue". The integration is now active.
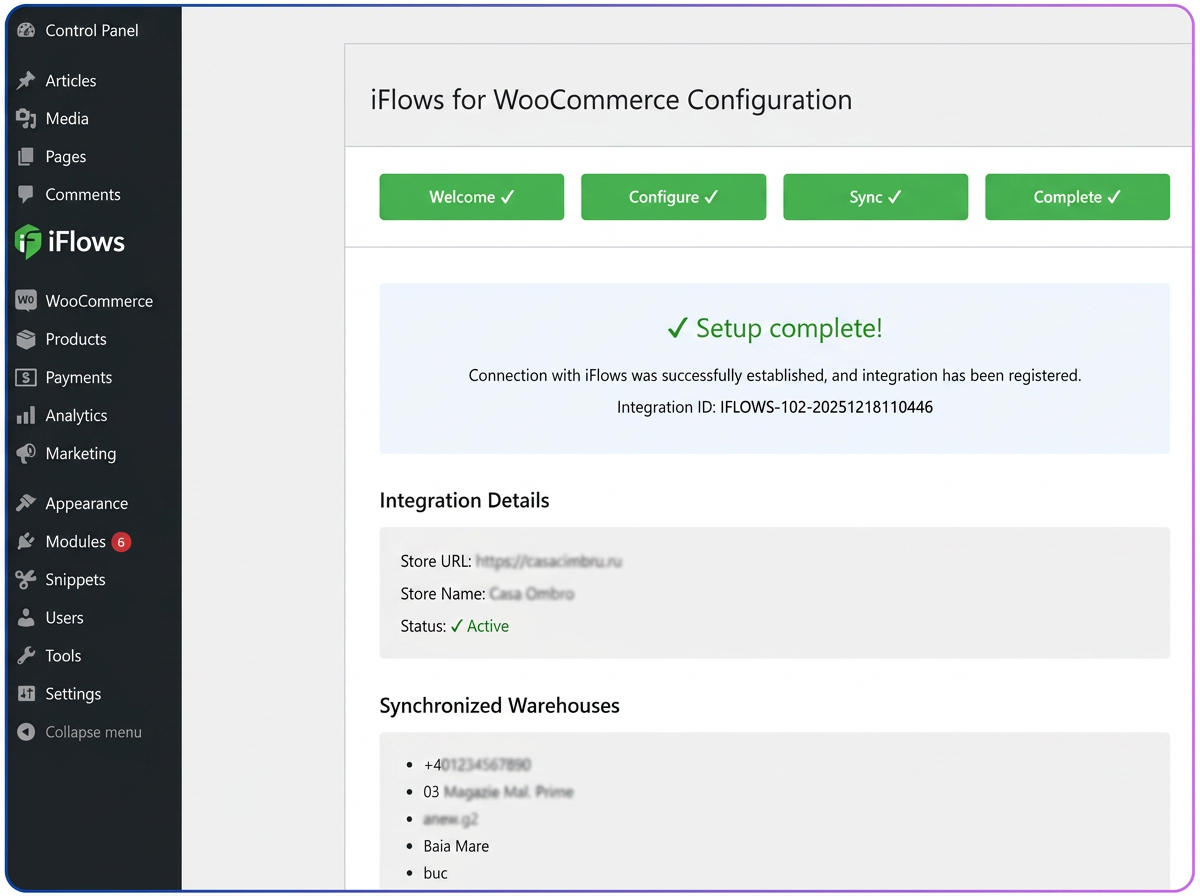
✓ Success! The integration is now configured and functional.
Part II: Features and Usage
Discover all the advanced features available after configuration.
A. Features in WordPress/WooCommerce
The plugin adds a new "iFlows for WooCommerce" menu with the following functionalities:
1. Control Panel (Dashboard)
Provides an overview of the connection status, the number of exported orders, and synced/unsynced products.
- Real-time statistics
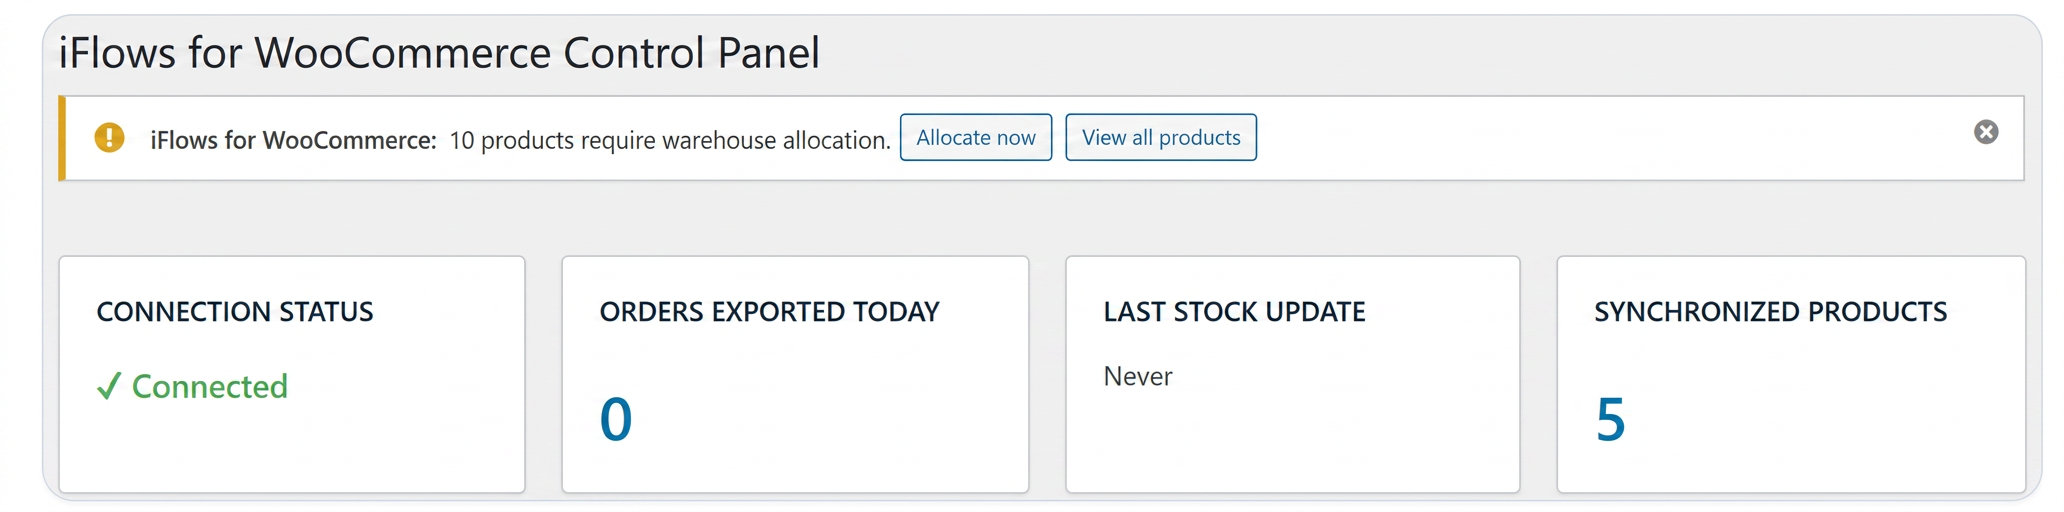
- Manual synchronizations for stock, warehouses, and products

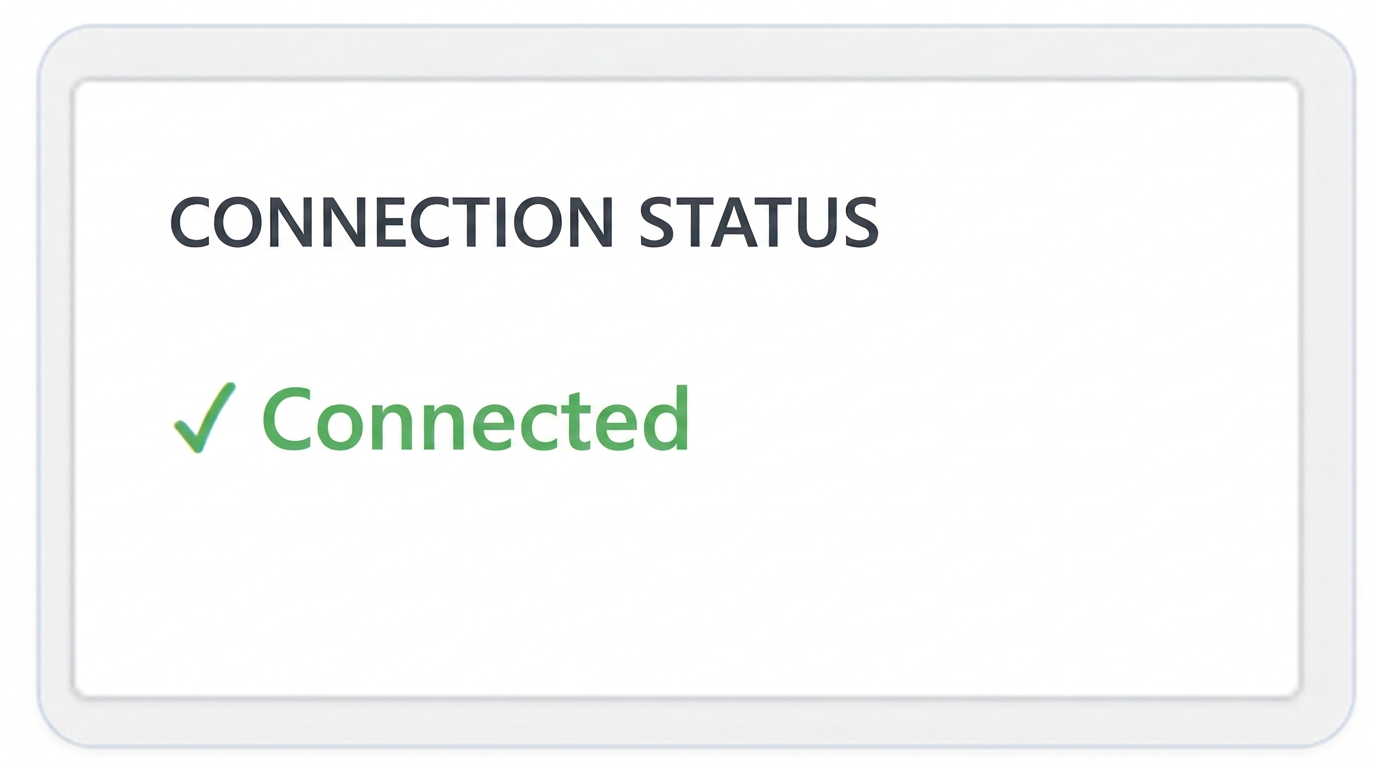
- Connection monitoring
2. Product Management
Dedicated page for resolving synchronization issues.
- Identification of products with missing SKU
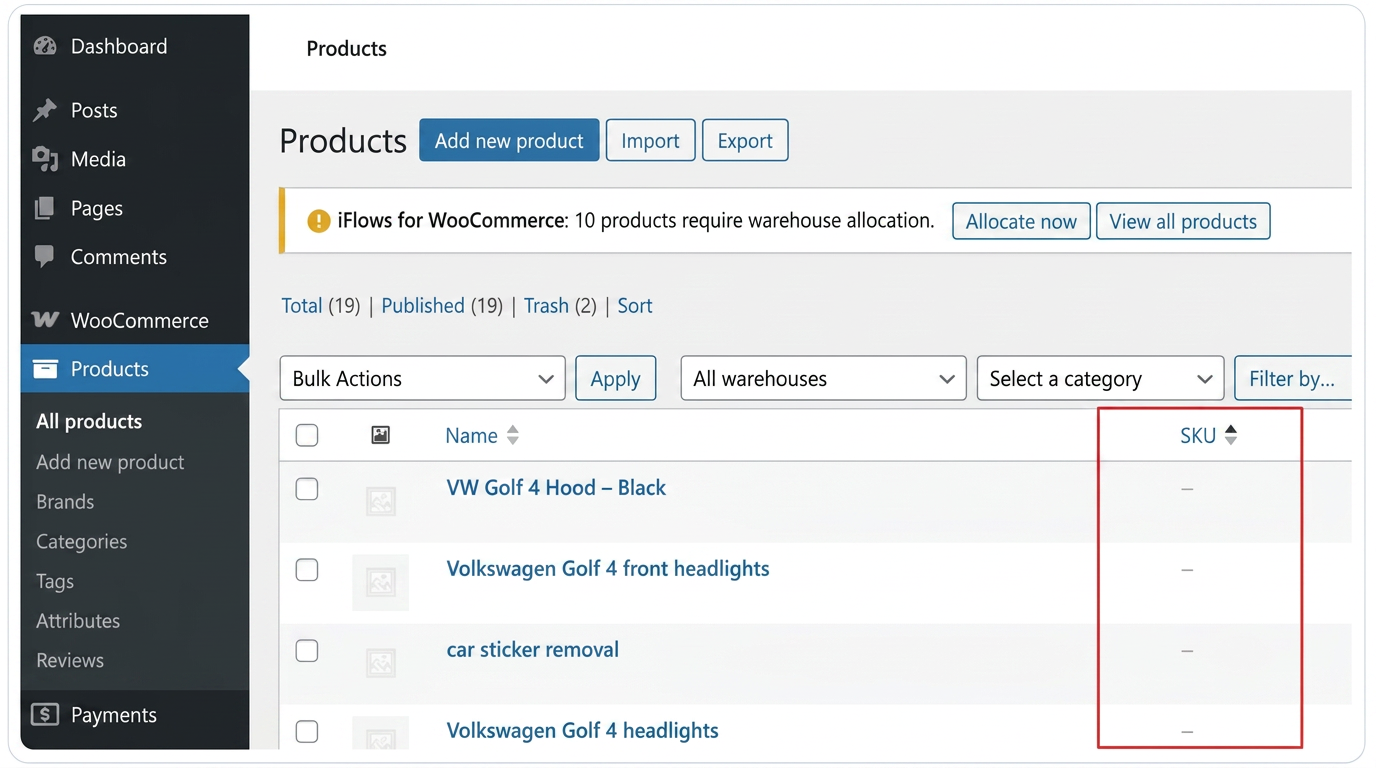
- Inventory association for duplicate products
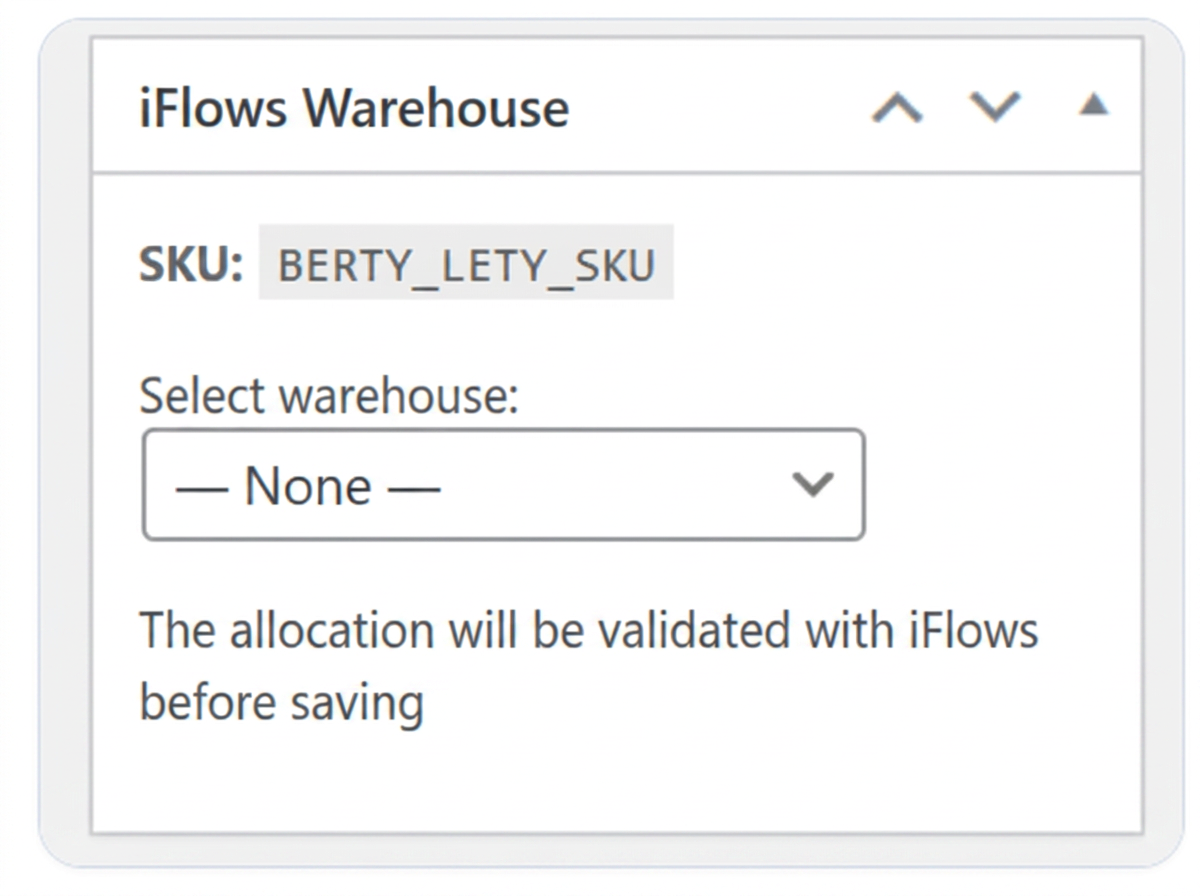
When a product with the same SKU exists in multiple inventories within iFlows (e.g., "pen" with code "mumutata" in 2 different inventories), during automatic synchronization WooCommerce will not know which inventory to place it in. This function allows for manual selection of the correct inventory.
- Selective synchronization
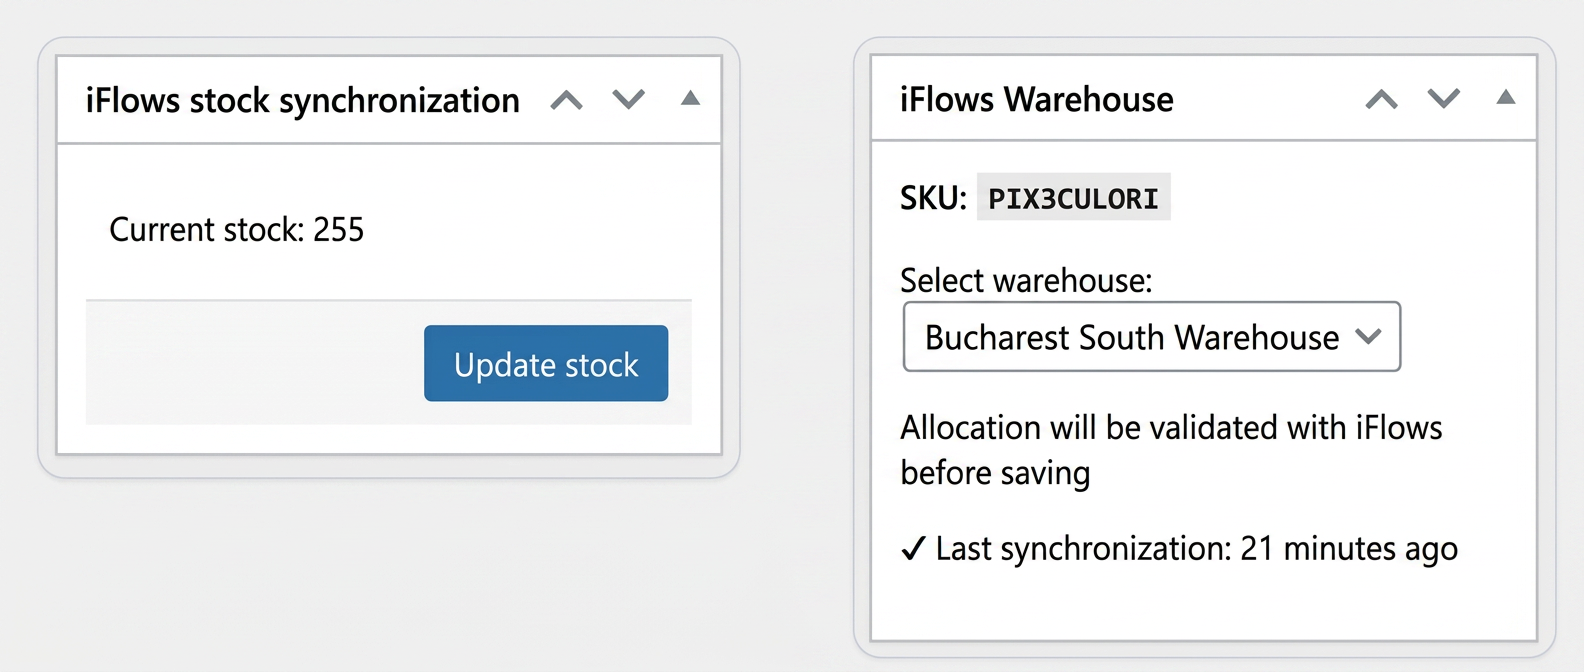
Allows updating the stock for a specific individual product, not just mass synchronizations.
3. Settings
Detailed configuration of the integration:
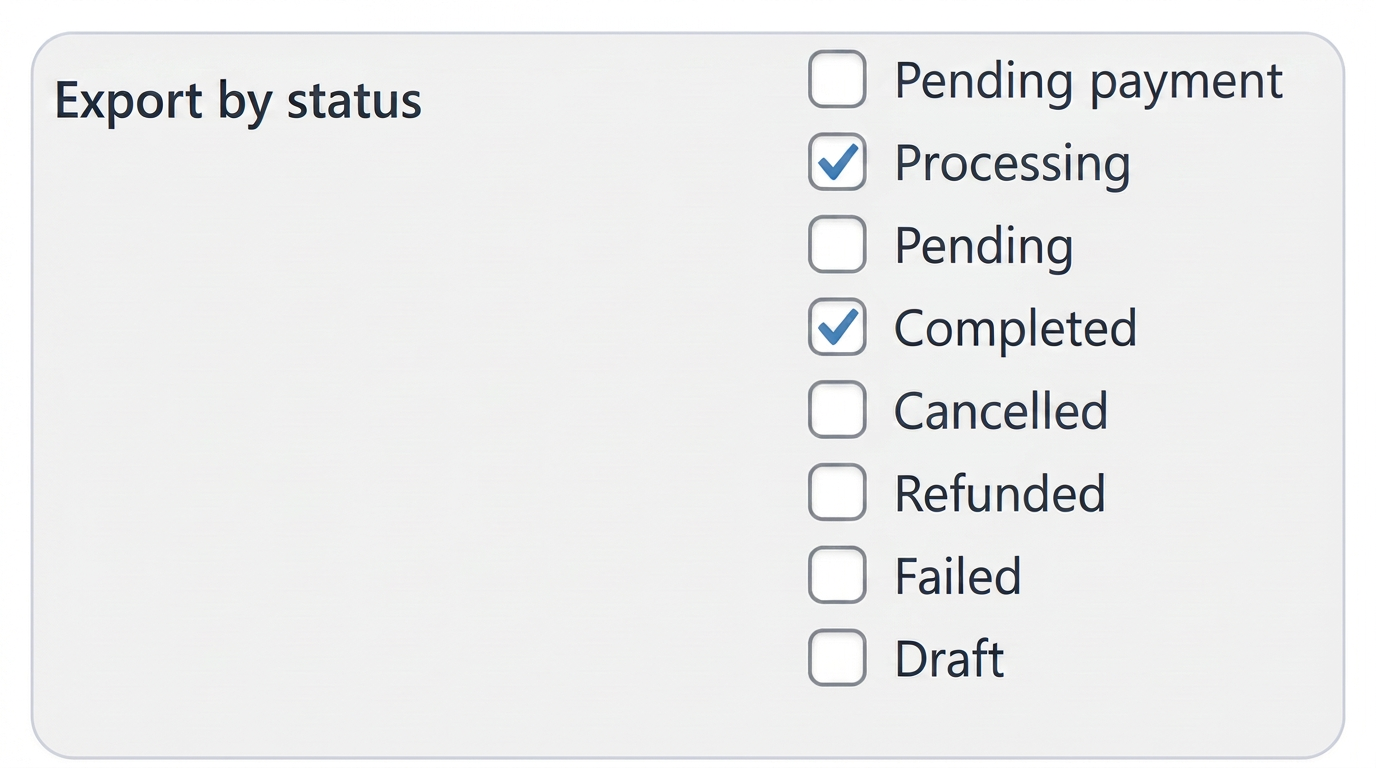
- Export at status: Choose when to receive orders in iFlows by selecting one or more statuses (e.g., both at "Pending payment" and "Processing")
- Scheduled synchronization: Activate daily automatic synchronization

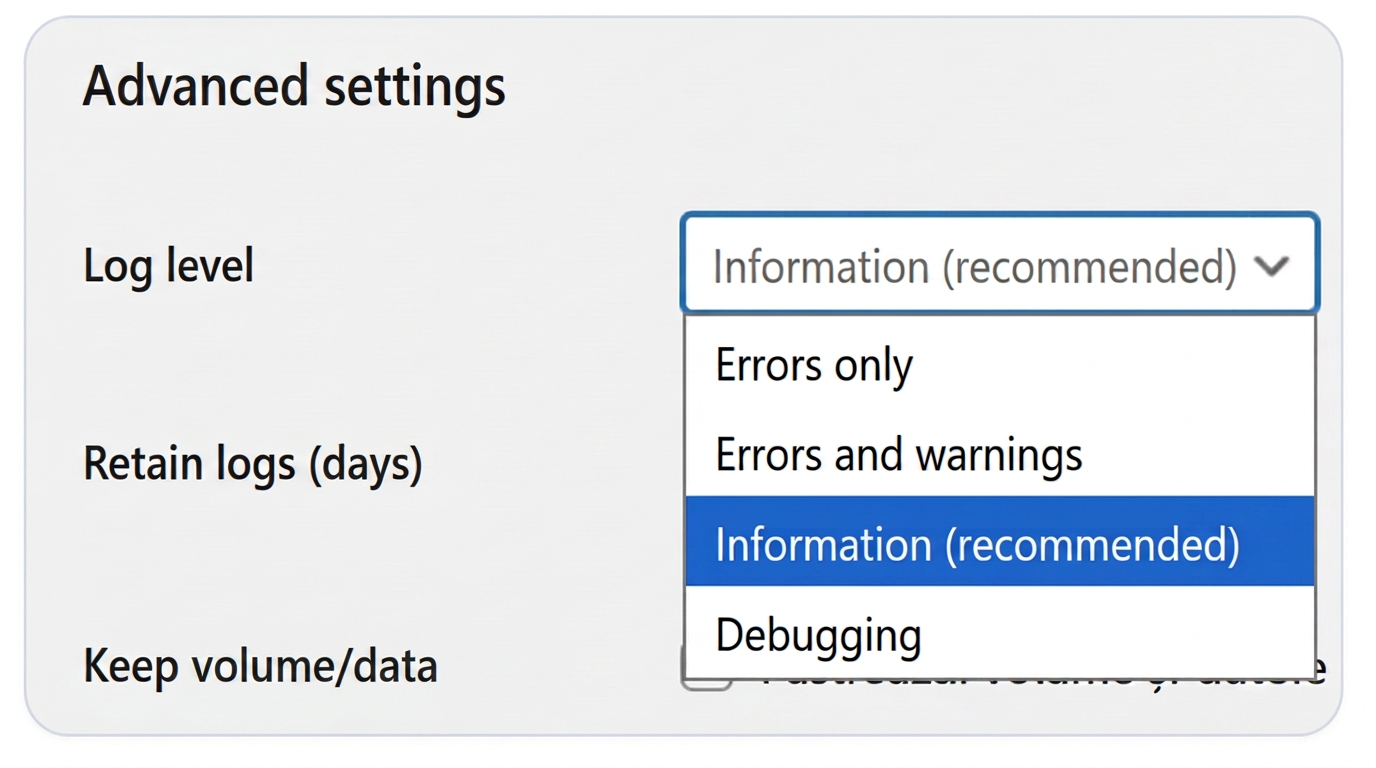
- Log management: Set the detail level for diagnostics
Logs show if there are synchronization issues, being essential for diagnostics.
B. Order Management in iFlows
Manage WooCommerce orders directly from the iFlows interface.
1. Enhanced Visibility and Filtering
- "WooCommerce status" column: Displays the order status in real-time
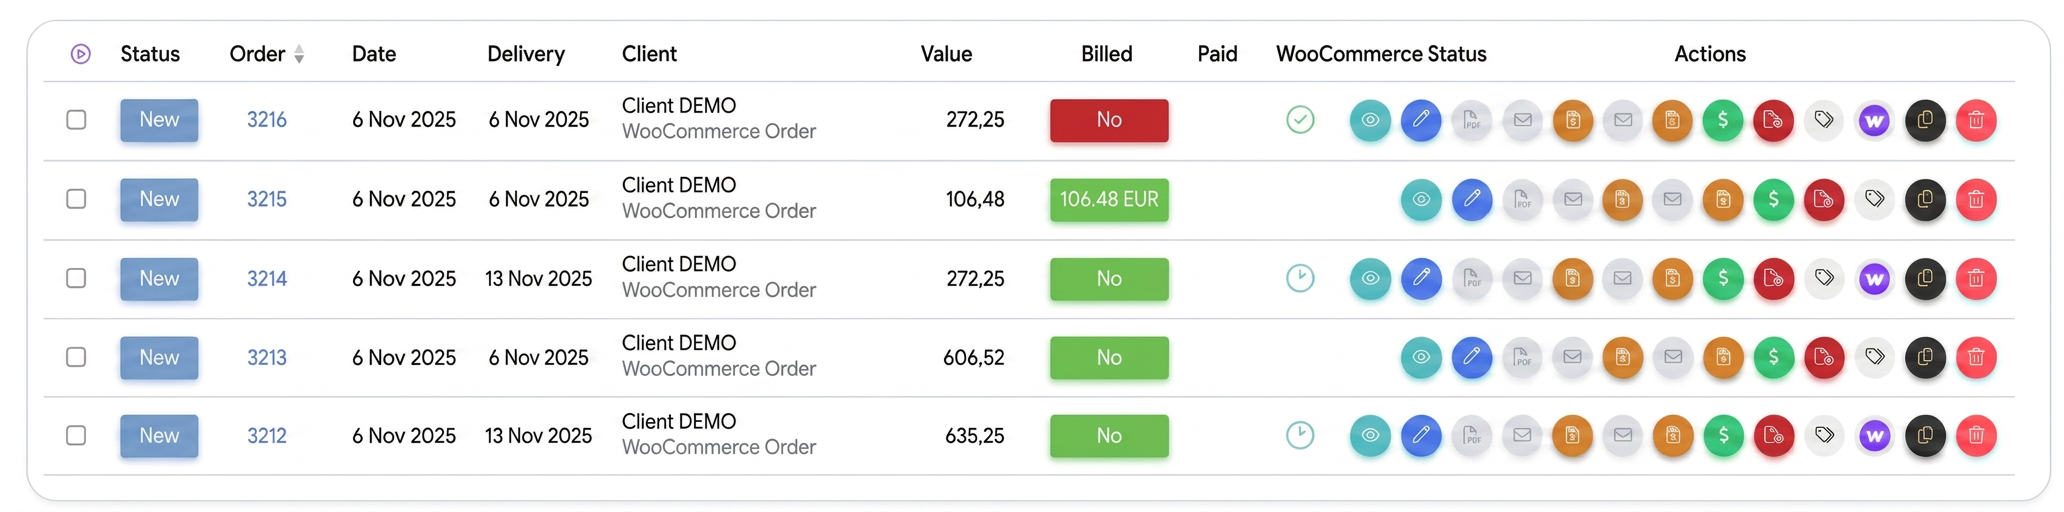
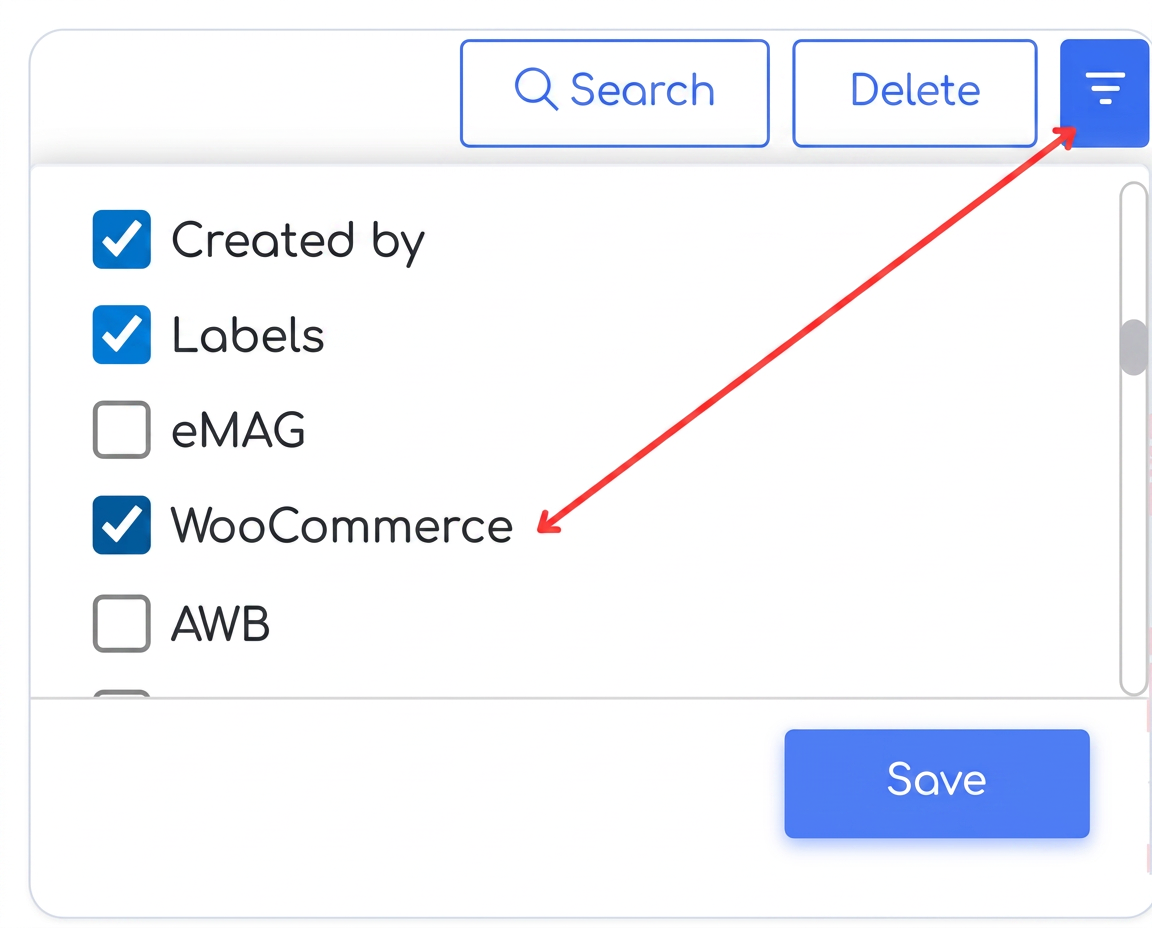
- "WooCommerce" filter: Exclusive display of store orders
- Activation from the column customization menu
2. Direct Actions on Orders
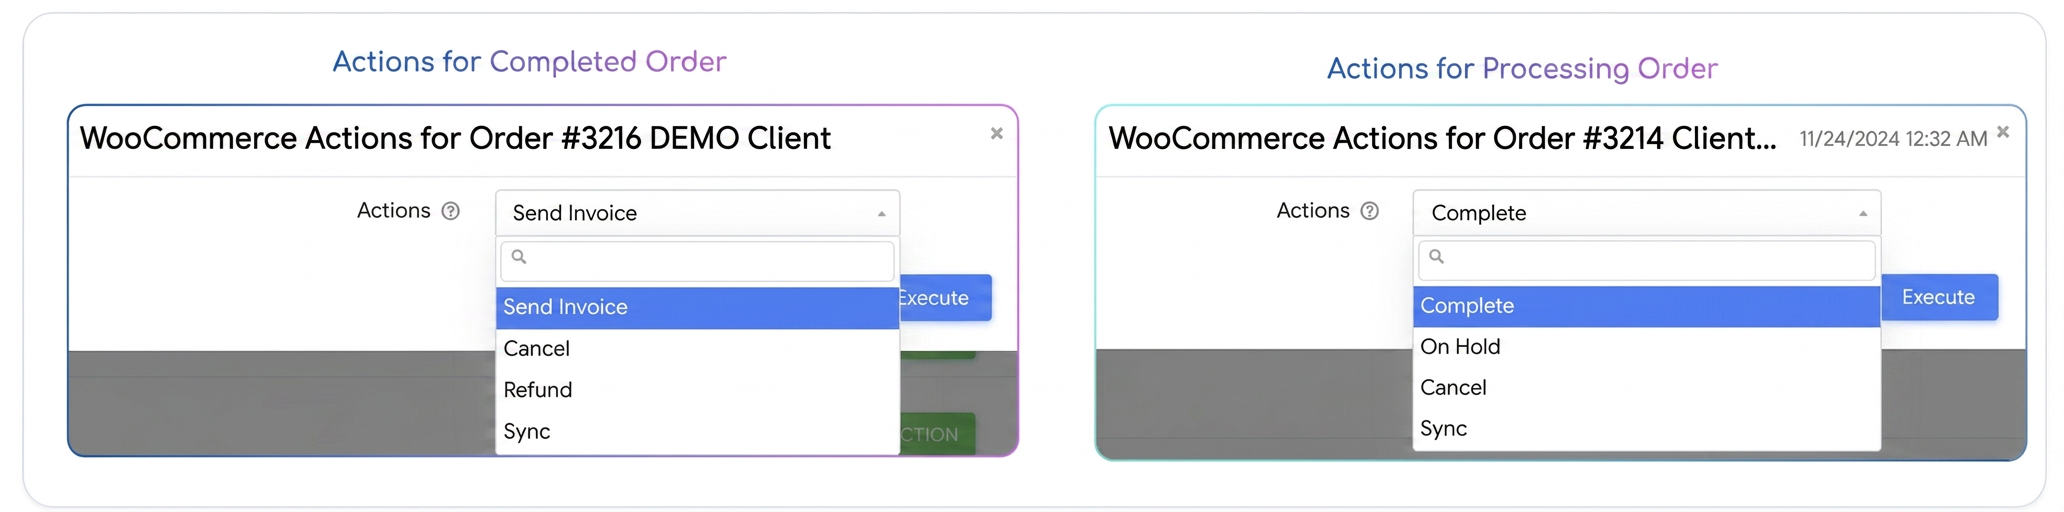
Each WooCommerce order has a quick actions button that allows:
- Changing the order status directly from iFlows (Complete, Pending, Cancel)
- Forced manual data synchronization
- Sending the invoice to the customer
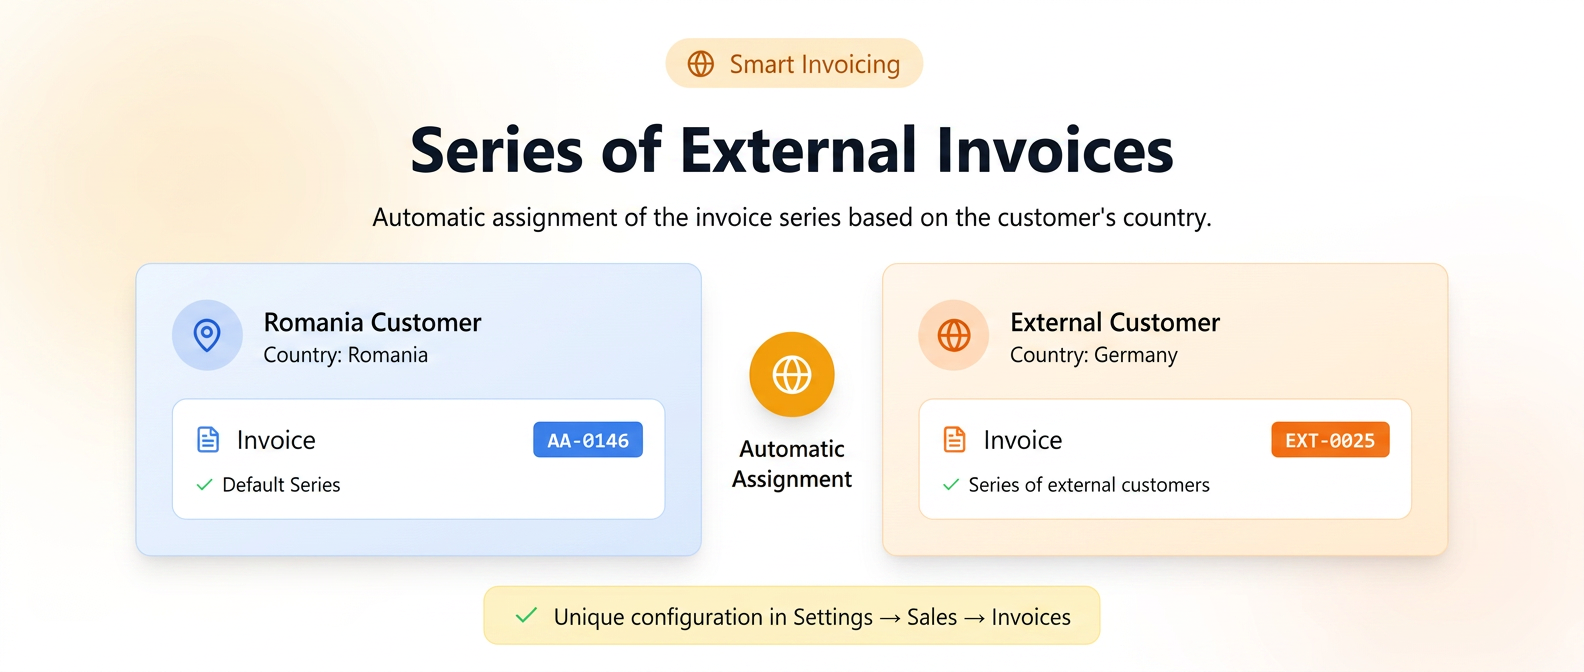
In iFlows, invoices can be issued using different series and numbering, and the system automatically assigns the correct series based on the country set in the customer file.
When issuing an invoice, the user does not manually select the series. iFlows automatically checks the customer's country and applies the corresponding series:
- if the customer's country is Romania, the default series is used;
- if the customer's country is other than Romania, a different series, configured in settings, is used.
How to activate and configure
Configuration is done in the settings area and is required only once.
Configuration Steps
- Go to .
- Identify the existing default series.
- Select the Add series option.
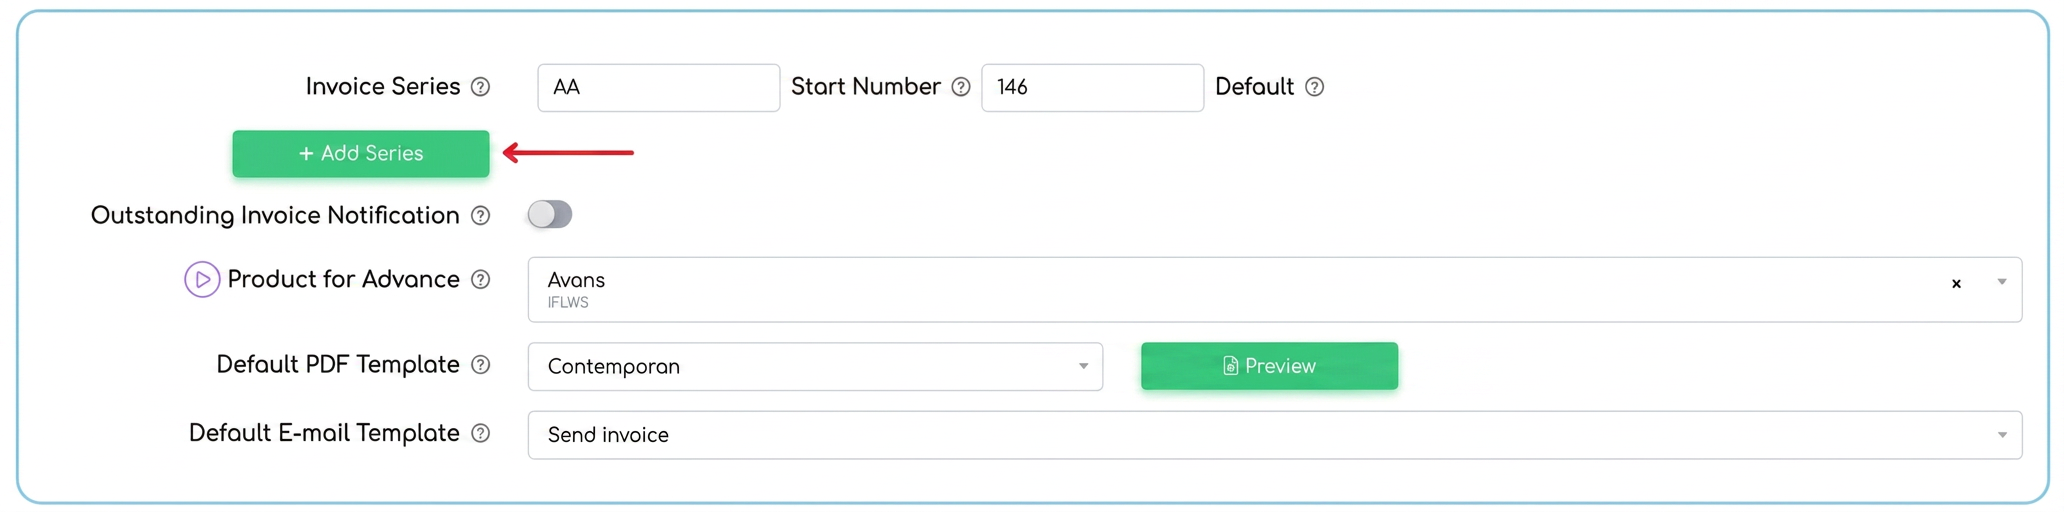
- Complete the series parameters (name, prefix, initial numbering).

- Save the configuration.
The configured series becomes active and is automatically used according to the allocation rule.
Issuing invoices
In the issuance process:
- the user generates the invoice without manually selecting the series;
- the system identifies the customer's country;
- the invoice series and number are automatically assigned according to the defined rule.
Operational Constraints
- Immutability of the series
After saving the invoice, the series and numbering cannot be modified. - Dependency on customer data
The "Country" field in the customer file must be correctly filled in before issuing the invoice.
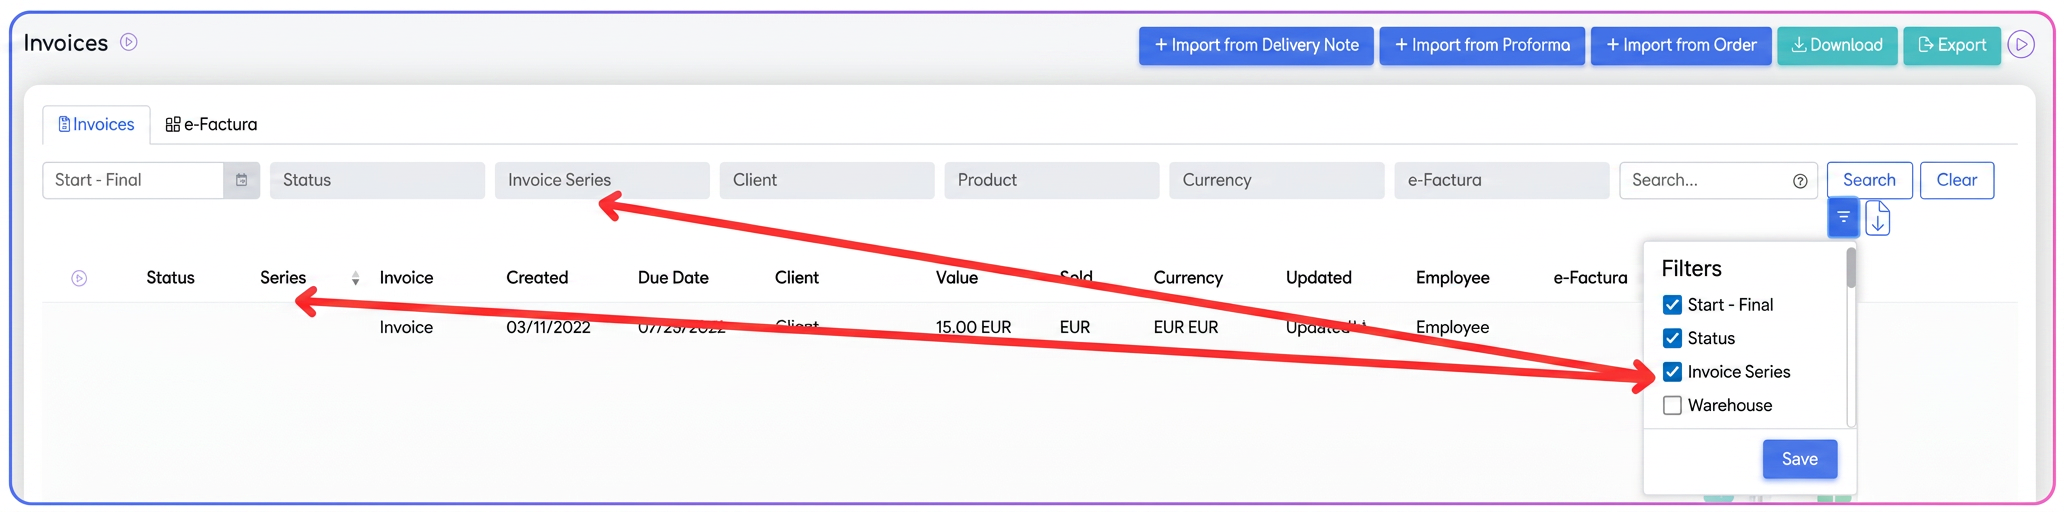
iFlows allows filtering invoices by billing series, directly from the invoice list, if this option is activated from the "Filters" button:
- the "Invoice Series" column is displayed in the invoice table;
- the "Invoice Series" field can be activated from the column selector;
- the user can filter the list to view exclusively:
- invoices issued on the default series (Romania customers);
- invoices issued on series dedicated to external customers.
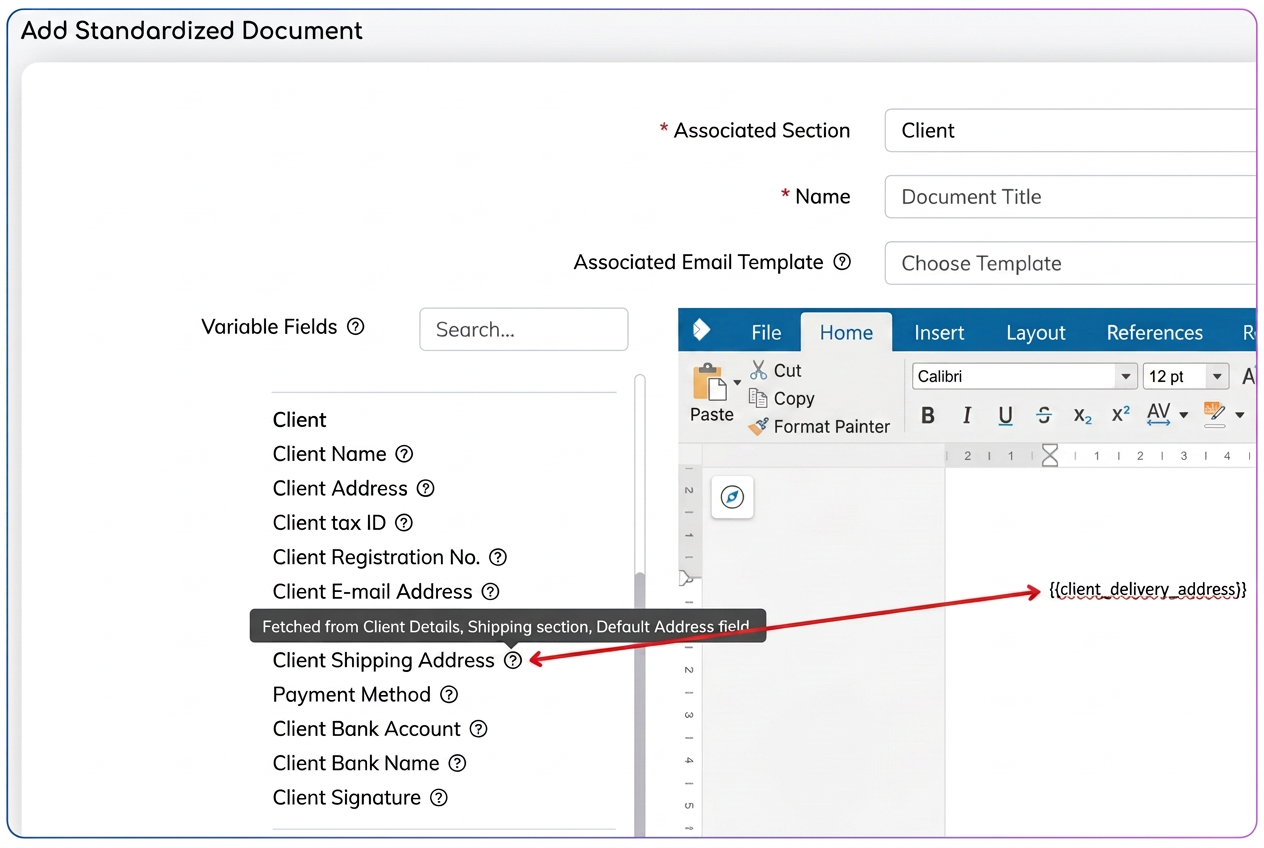
In the Documents – Templates (Documente – Tipizate) section, when creating a new template, two new variables have been introduced:
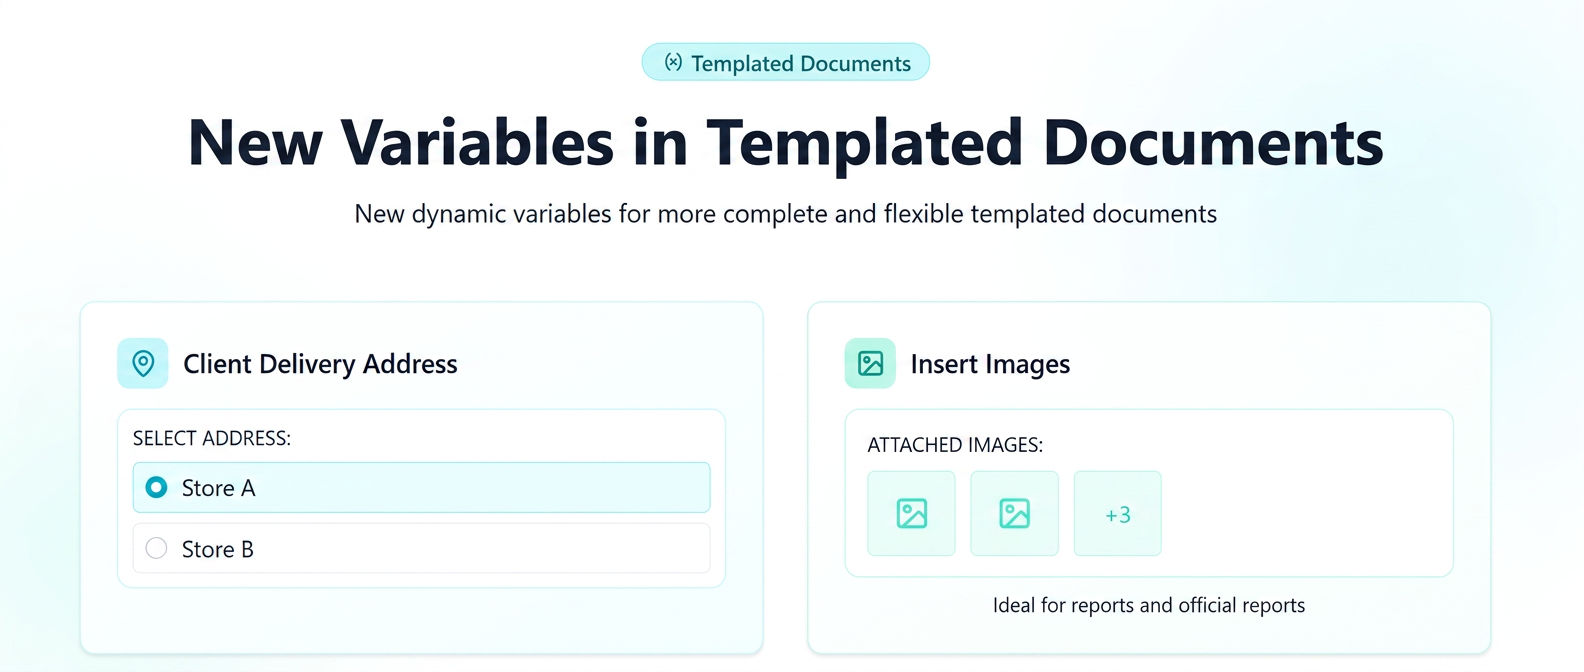
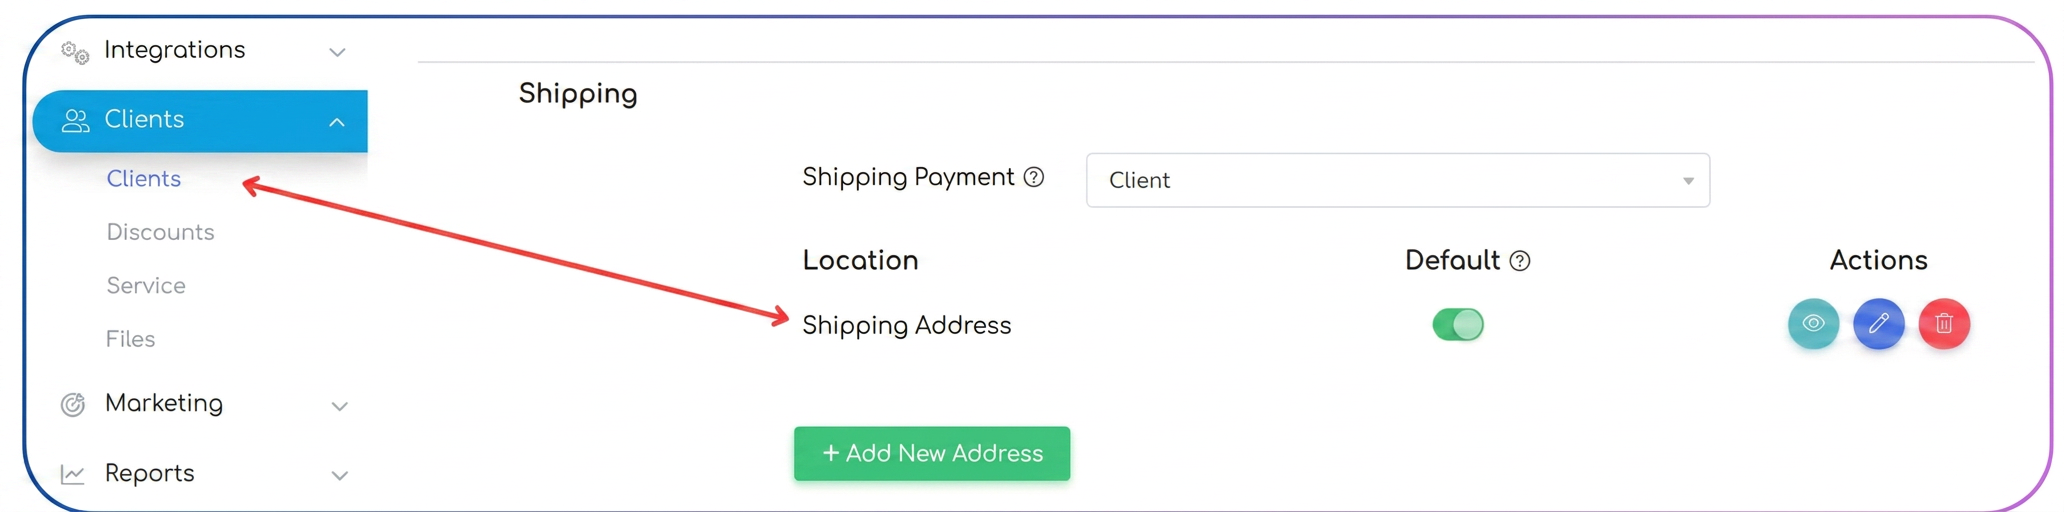
1. New variable: Customer delivery address
A dynamic variable intended for standardized documents has been introduced, allowing the automatic display of the customer's delivery address directly in the generated document.
Operating Mode
This variable extracts information directly from the customer profile.
- Default behavior: the system automatically pre-fills the variable with the delivery address set as default in the customer file.
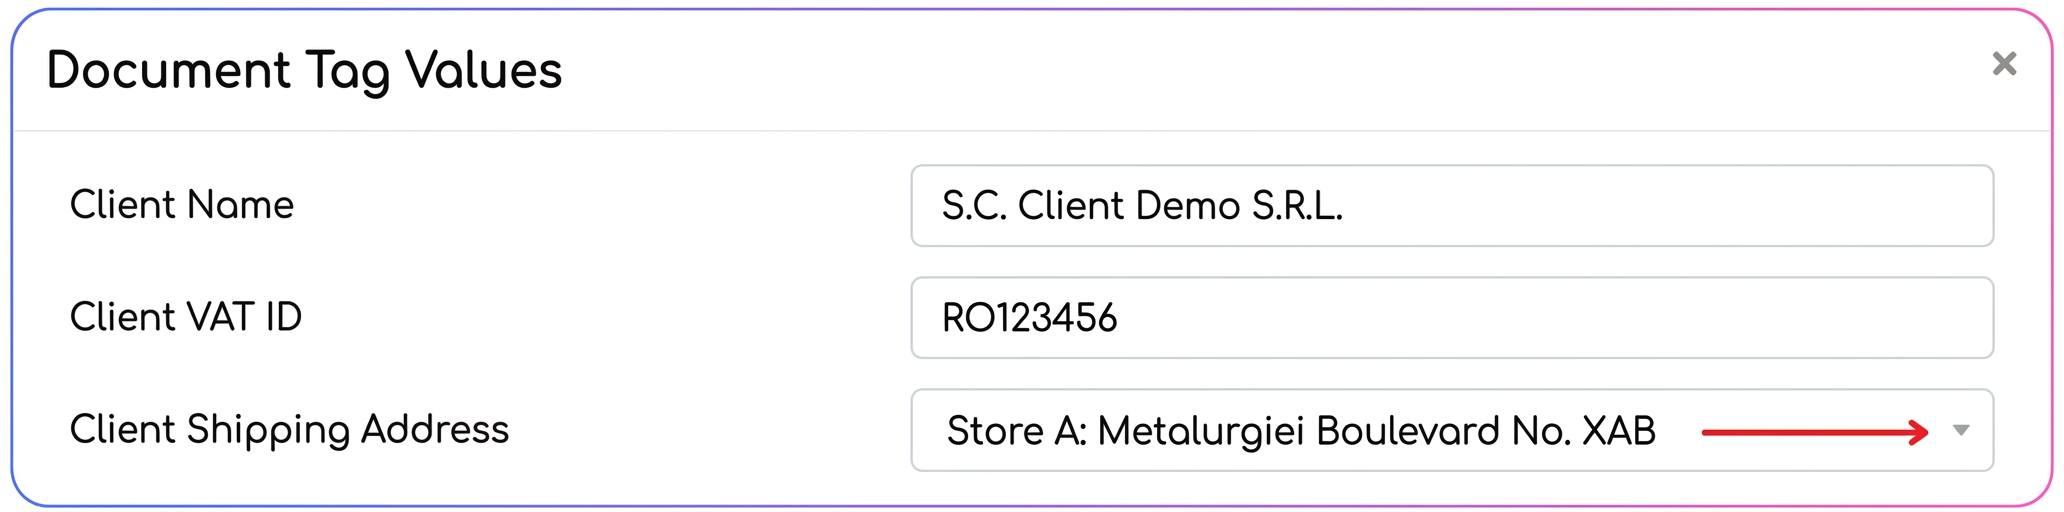
- Flexibility during generation: at the time of document generation, the user can modify the automatically selected address.
If a customer has multiple associated delivery addresses, these are displayed in a selection list, allowing the choice of the correct address for that specific order.
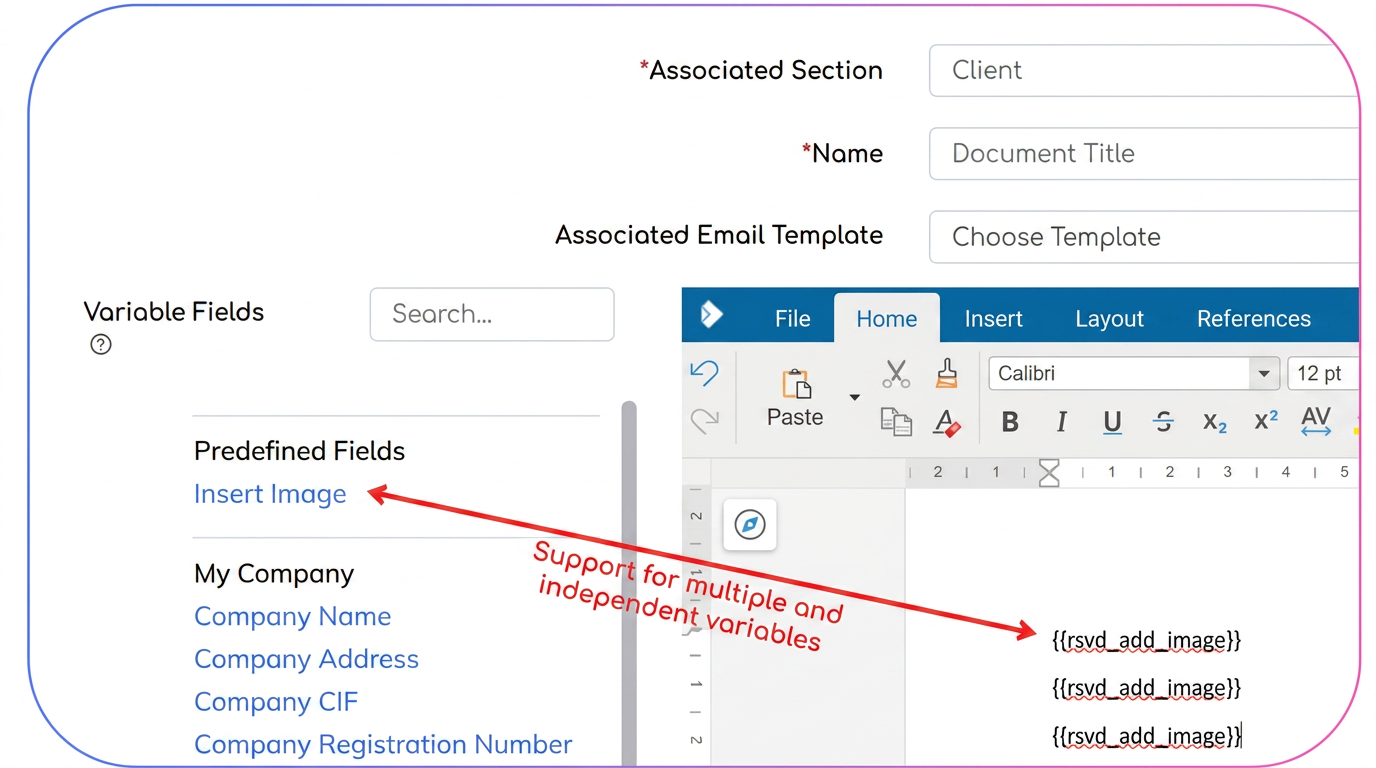
2. New variable: Image insertion (multiple)
This functionality allows the insertion of images directly into the body of standardized documents via a dedicated variable.
It is especially intended for reports and minutes (procese-verbale) that require visual support.
Operating Mode
- Dynamic replacement: upon detecting the variable in the template, the system requests uploading an image, which will replace the variable text in the final document.
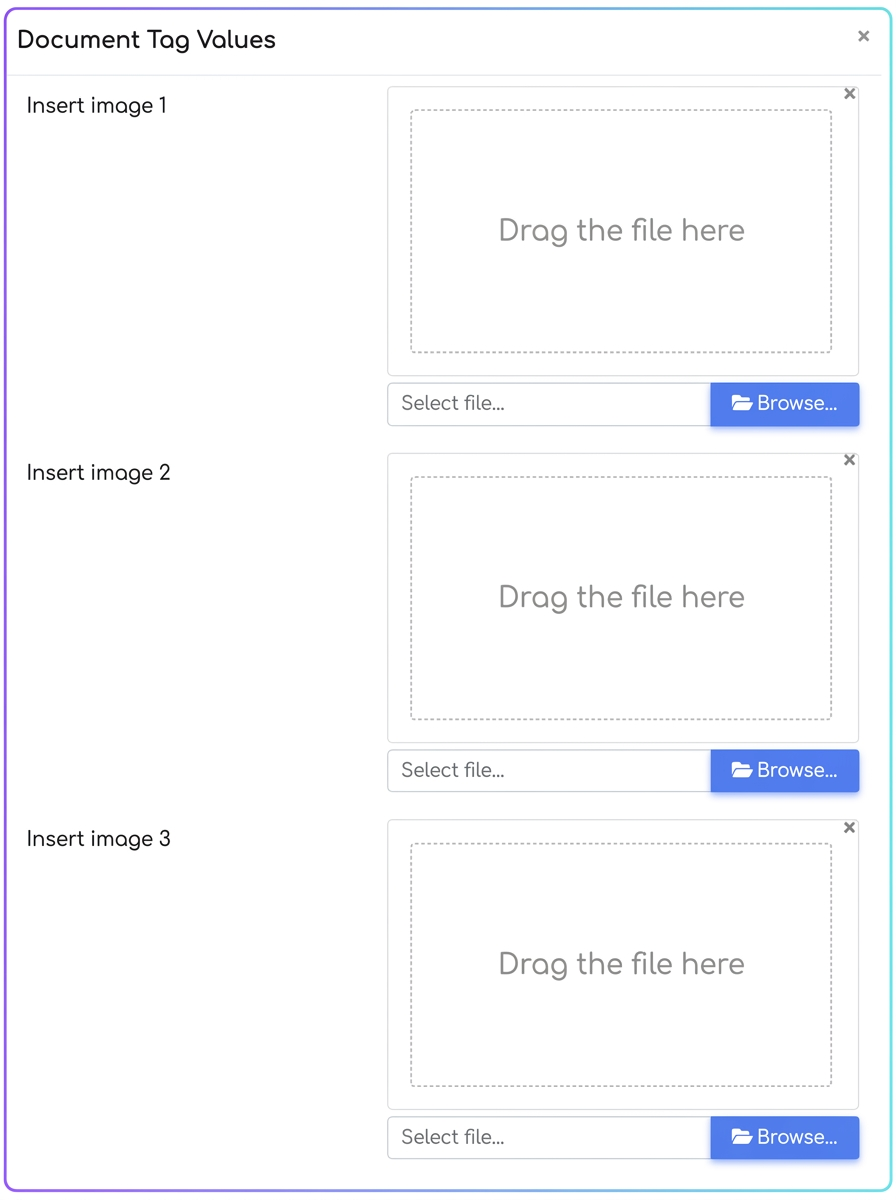
- Automatic resizing: the image is automatically resized (fit-to-page / fit-to-container), ensuring correct fitting on the page without affecting the document layout.
- IMPORTANT: Multiple independent instances: unlike standard variables (which repeat the same information), the image variable works independently for each occurrence in the document.
Example:
if the variable is inserted 4 times in a template, the system generates 4 distinct slots, allowing the upload of 4 different images, each associated with its position in the document.
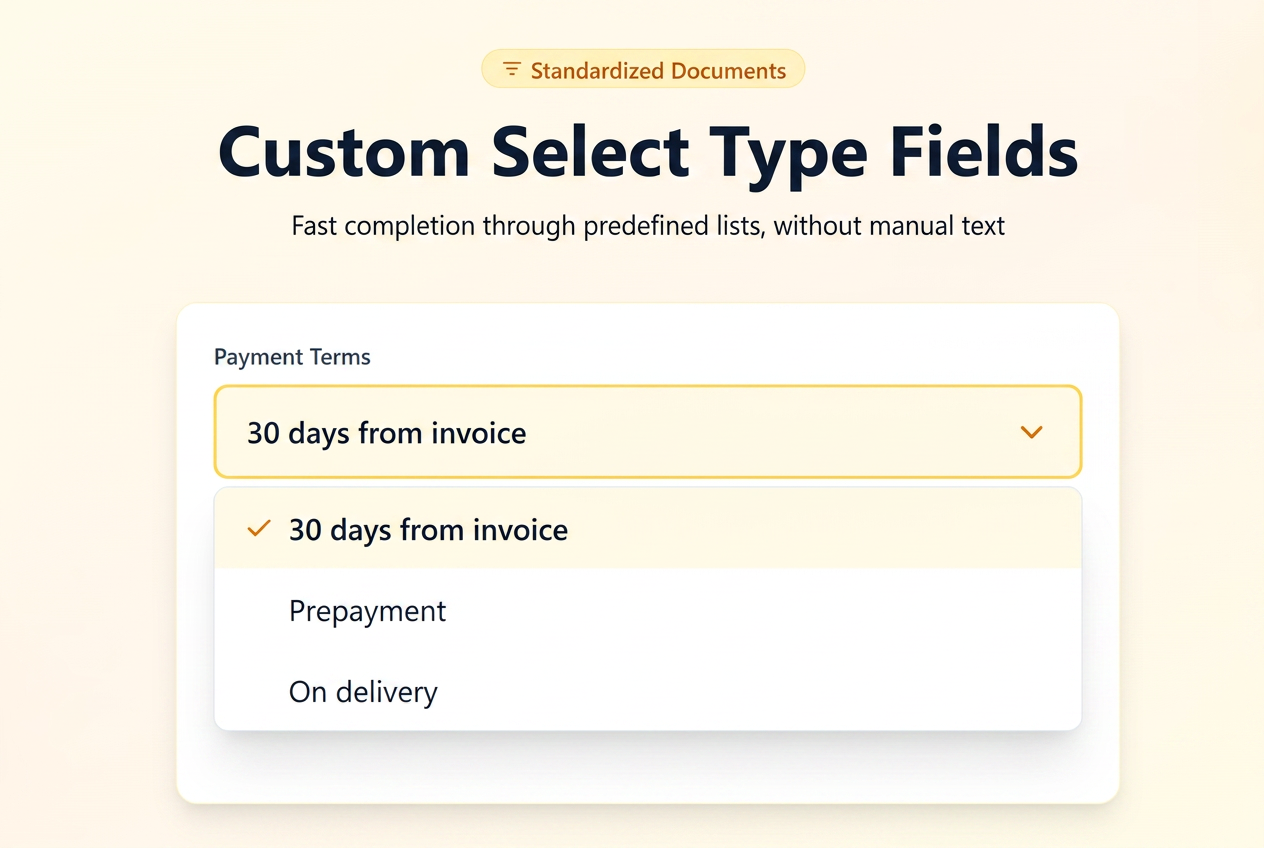
For standardized documents generated from iFlows (offers, orders, invoices, contracts, reports, etc.), custom fields are used as variables insertable into templates.
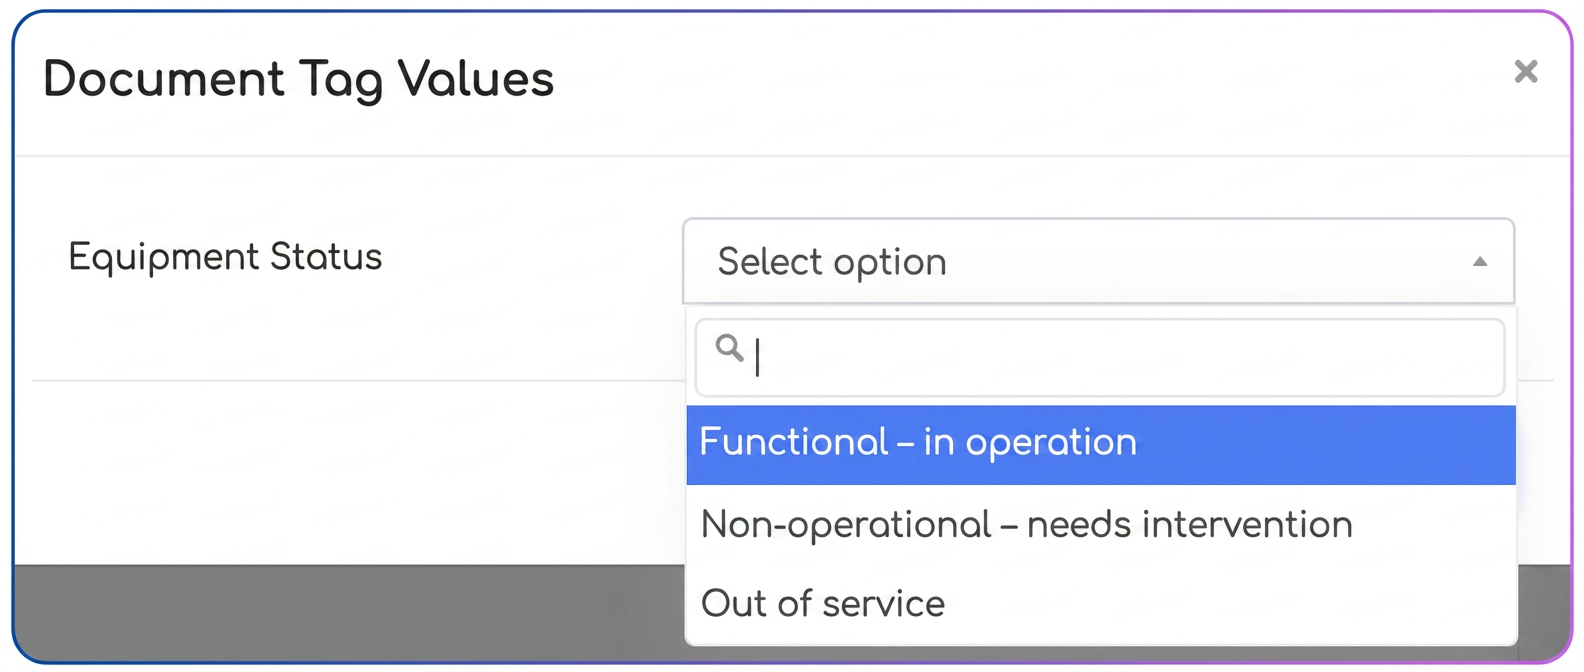
The new optimization allows these variables to be fed not only by free text but also by predefined value lists (Select), simplifying completion and standardizing the content of generated documents.
Currently, custom fields in standardized documents can be:
- Text – free completion (classic behavior);
- Select – completion by choosing a preset value, subsequently used as a variable in the standardized documents.
Configuration Steps:
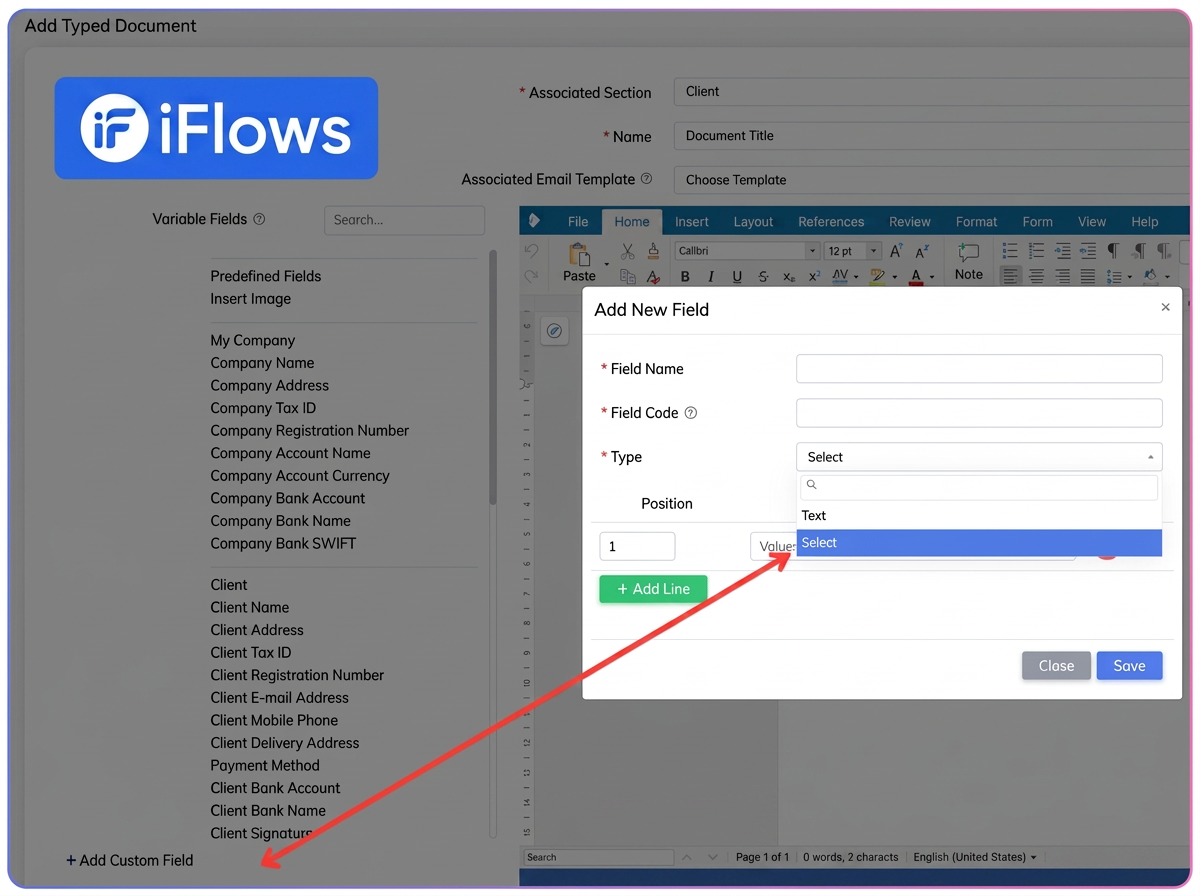
Option 1: Adding a custom field directly from the standardized document editor
- Go to (Tipizate).
- Create a new template or edit an existing one.
- In the document editor, select the Add custom field option.
- Complete:
- Field Name (displayed to users);
- Field Code (the identifier for the variable used in the document);
- Type → select Select;
- Define the possible values (the options in the list).
- Save the field and the document.
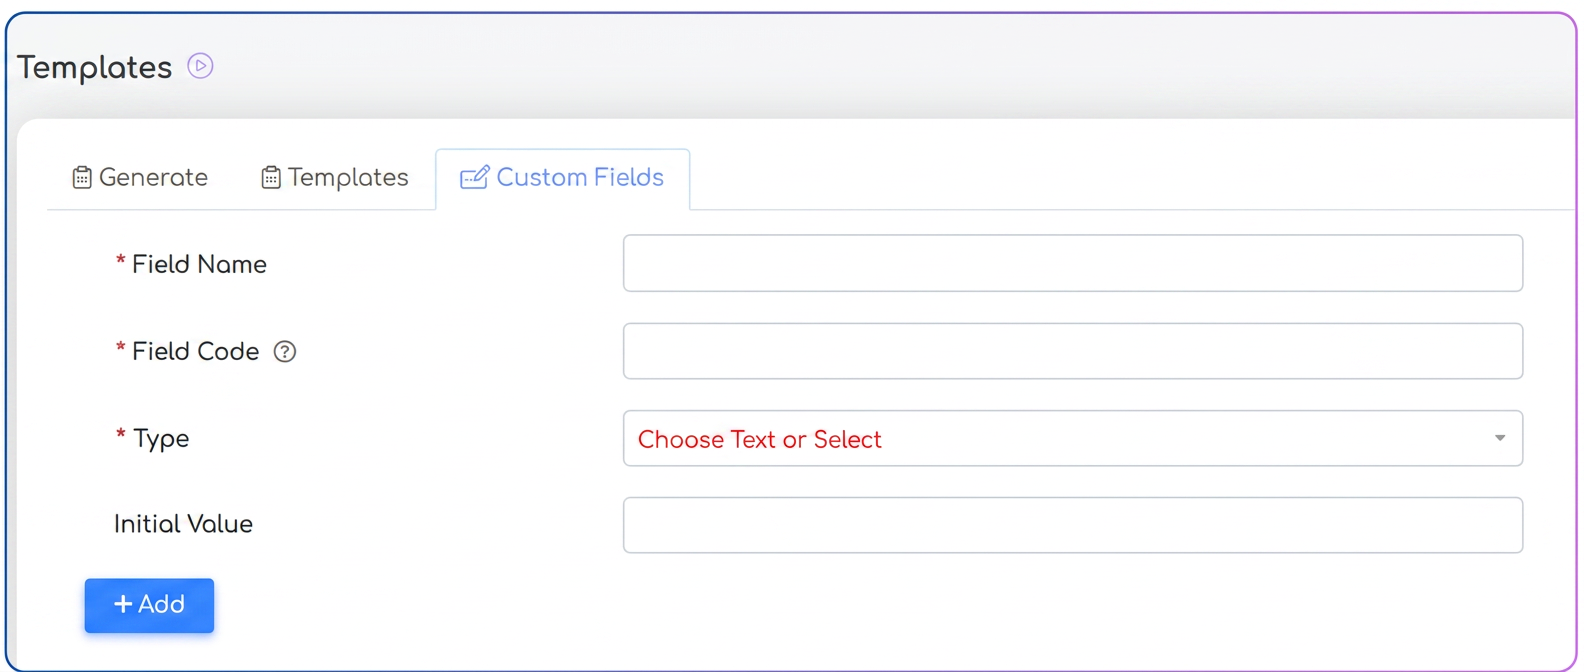
Option 2: Editing or defining existing fields from the "Custom fields" tab
- Go to (Tipizate).
- Open the Custom fields tab.
- Select an existing field or add a new one.
- Configure:
- Field Name;
- Field Code;
- Type → Select;
- Available values (predefined options).
Practical use in documents
Regardless of the chosen option:
- the operator does not enter text manually;
- selects a value from the list;
- the chosen value is automatically inserted into the generated document.
Key Benefits
- complete standardization of document content;
- elimination of wording variations;
- reduction of human errors;
- consistent, professional, and easy-to-audit documents;