
(Available only for the Professional Package)
The Multiple workflow feature gives you the possibility to simultaneously create and manage several completely separate workflows within the same company, adapted to the specific needs of each type of activity. This function is useful for companies that offer multiple types of services, where each activity can have a different set of steps.
Example: In the case of a company that manages both equipment trade activities and service interventions, the Multiple workflow feature facilitates the parallel administration of these distinct processes. For example, the trade workflow can include stages such as procurement, packaging, and delivery, while the workflow dedicated to service interventions includes diagnostics, repair, and equipment testing. These workflows are completely separate and operate simultaneously, allowing teams to efficiently manage specific processes without interference between activities.
Workflow Visibility: Public/Private
In the Settings - Workflow section, when creating or editing a workflow, there is the possibility to choose whether the workflow will be Public or Private. This setting determines who can see and access that specific workflow.
- Public Workflow: If the "Public" button is activated, the workflow will be visible and accessible to all employees in the company. This is the default setting for workflows that do not require access restriction.
- Private Workflow: If you deactivate the "Public" button, the workflow becomes private, which means that only selected employees will have access to it. In this case, a new option, "User", will appear, allowing the addition of one or more employees who will have access to the private workflow.
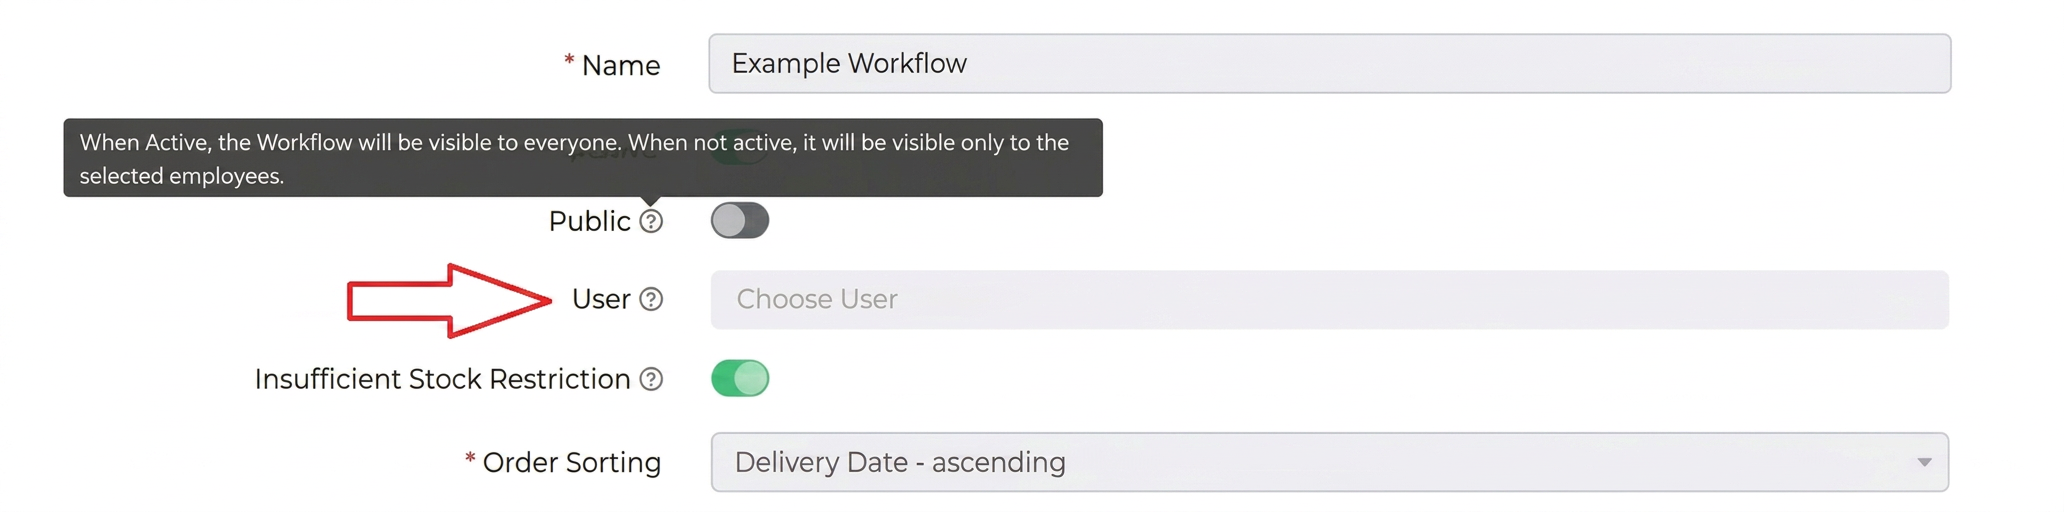
How to assign an employee to a private workflow:
- After deactivating the "Public" button, in the "User" field, enter the name of the employee you wish to add.
- Select the employee from the list that appears after entering the name.
- After selecting an employee, repeat the process to add other users if necessary.
Note: Employees who have not been assigned to a private workflow will not have visibility over it in the Workflow section. *However, even if a workflow is set as private, this restriction only applies within the Workflow section. The rest of the information related to orders, reports, and other data associated with the workflow will remain visible to all users in the platform, depending on their access level. Thus, transparency over general activities and critical information is maintained, ensuring that only the workflow itself remains private.
The option to set a workflow as Public or Private serves to simplify the work process, allowing the filtering of workflows based on their relevance to each employee. Thus, employees will be able to view and access only the workflows that are relevant to their activities, allowing them to focus only on the processes and tasks assigned to them.
Allocating Users in Private Workflows
If you try to allocate a user to a stage in a private workflow using the Allocate User function within the workflow, and they do not have access to the workflow, the system will notify the impossibility of this action. This is because the user is not included in the access list for that workflow. To allow allocation, go to Settings -> Workflow, select the desired workflow, press Edit and add the user to the access list. After completing this step, the user can be allocated without restrictions within the private workflow, directly from the Allocate User tab.
Deactivating or Deleting a Workflow
To deactivate a workflow, go to the Settings -> Workflow section, press the Edit button next to the workflow you want to deactivate and uncheck the Active option. Attention: The system will not allow deactivating a workflow if it contains active or recurring orders.
If you want to delete a workflow, go to the Settings -> Workflow section and select the Delete Workflow button next to the desired workflow. Attention: This option will not be available for workflows where orders have been processed. The reason for this restriction is to preserve the history of orders associated with that workflow. Therefore, in such cases, it is recommended to deactivate the workflow instead of deleting it.
Step-by-Step Guide for Using the Multiple Workflow Feature
- Accessing the "Multiple Workflow" feature
- From the main menu, navigate to the Workflow section. At the top of the page, a dropdown list will appear from which you can select the workflow in which you want to perform operations.
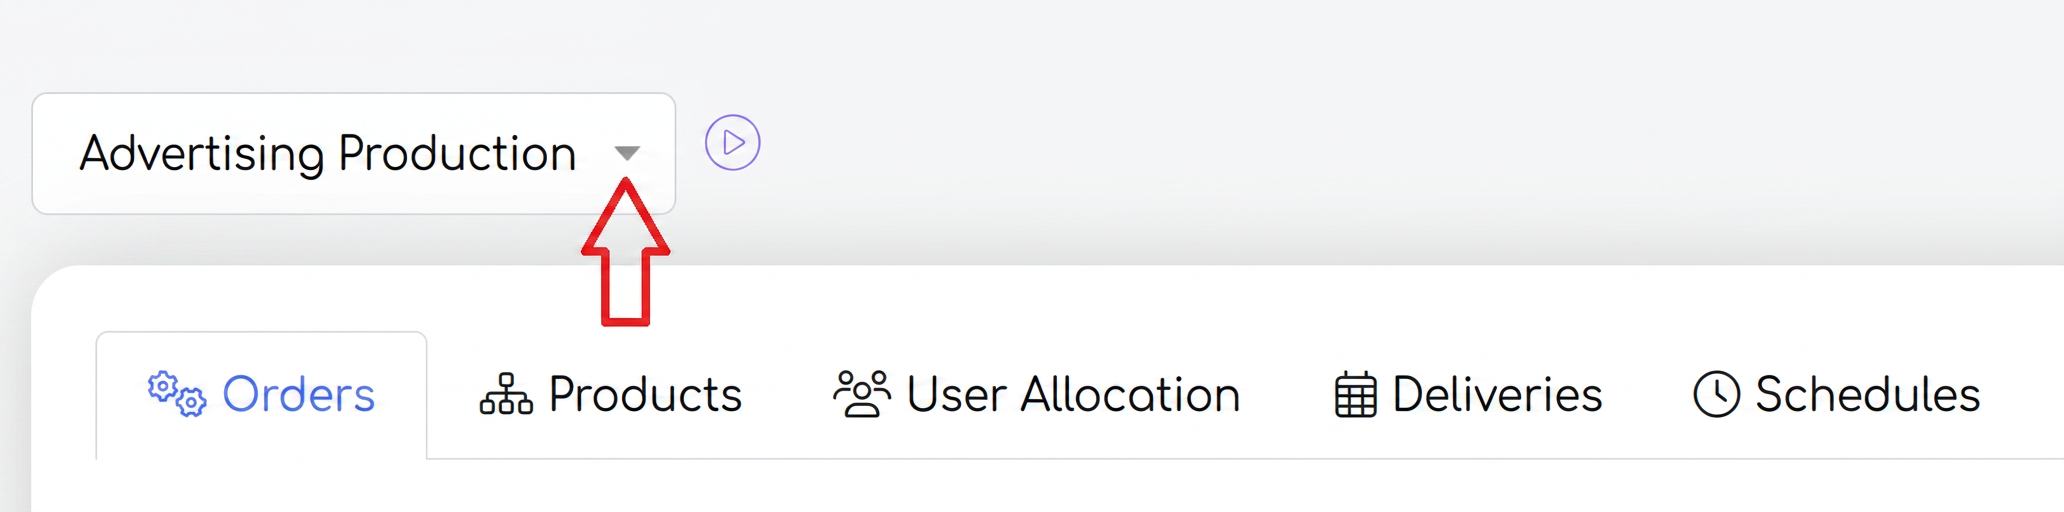
- Important: In the Orders, Products, and User Allocation tabs, only information associated with the selected workflow will be displayed, facilitating the exclusive management of data relevant to the current workflow.
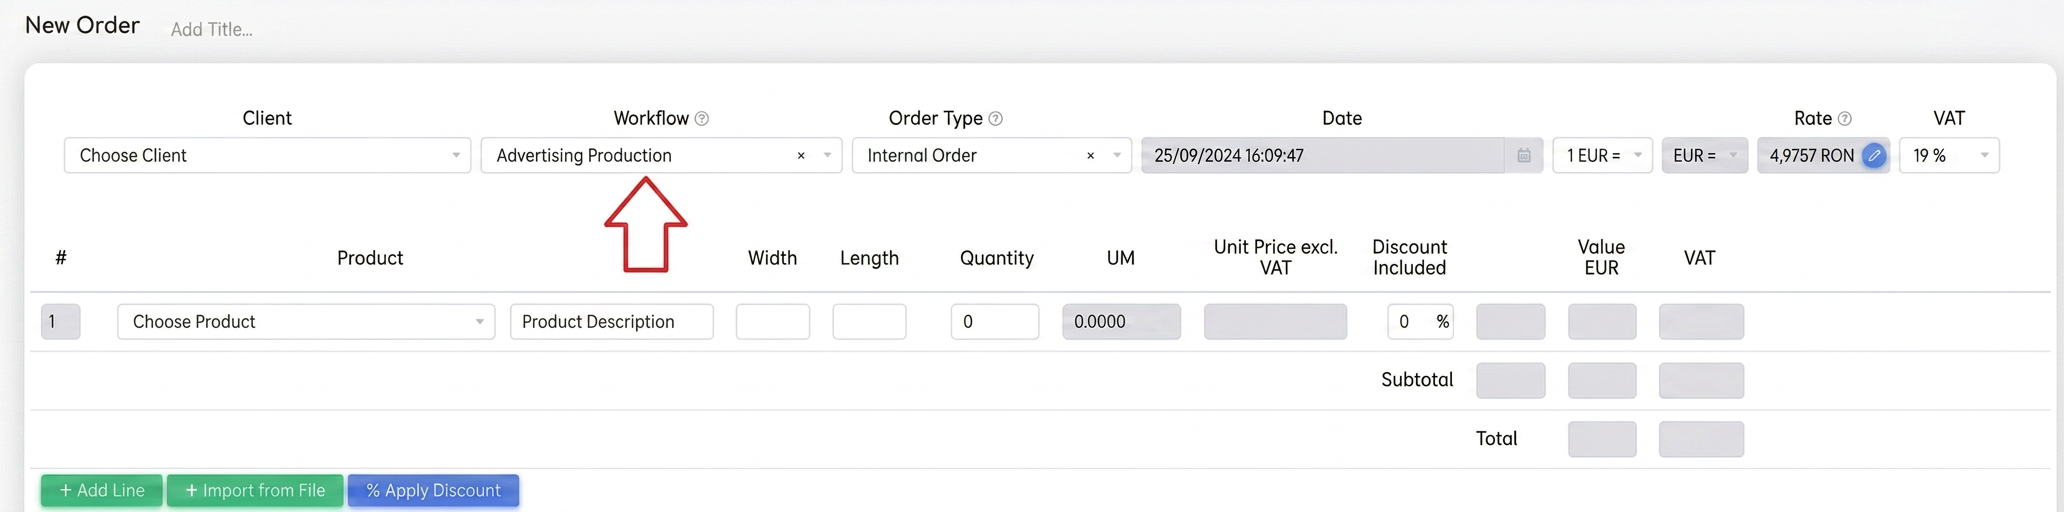
- New feature: At the top of the order creation page, you will notice a new field named Workflow, which will be preset with the previously active workflow. If, before creating the order, the user was working in workflow X, the same workflow will be automatically selected in the order. However, the workflow can be easily changed by clicking on the dropdown list and choosing the desired workflow.
- In the Sales -> Orders section, at the top of the page, there is a new filter named Workflow. From here, you can select the desired workflow to view only the orders processed within that specific workflow.
- In the Reports -> Orders and Reports -> Customers sections, you will find the same Workflow filter at the top. This filter allows generating and viewing reports based on the selected workflow.