
The iflows platform is regularly updated for improvements and new functionalities.
Add Employees as Recipients in Emails Sent to Clients
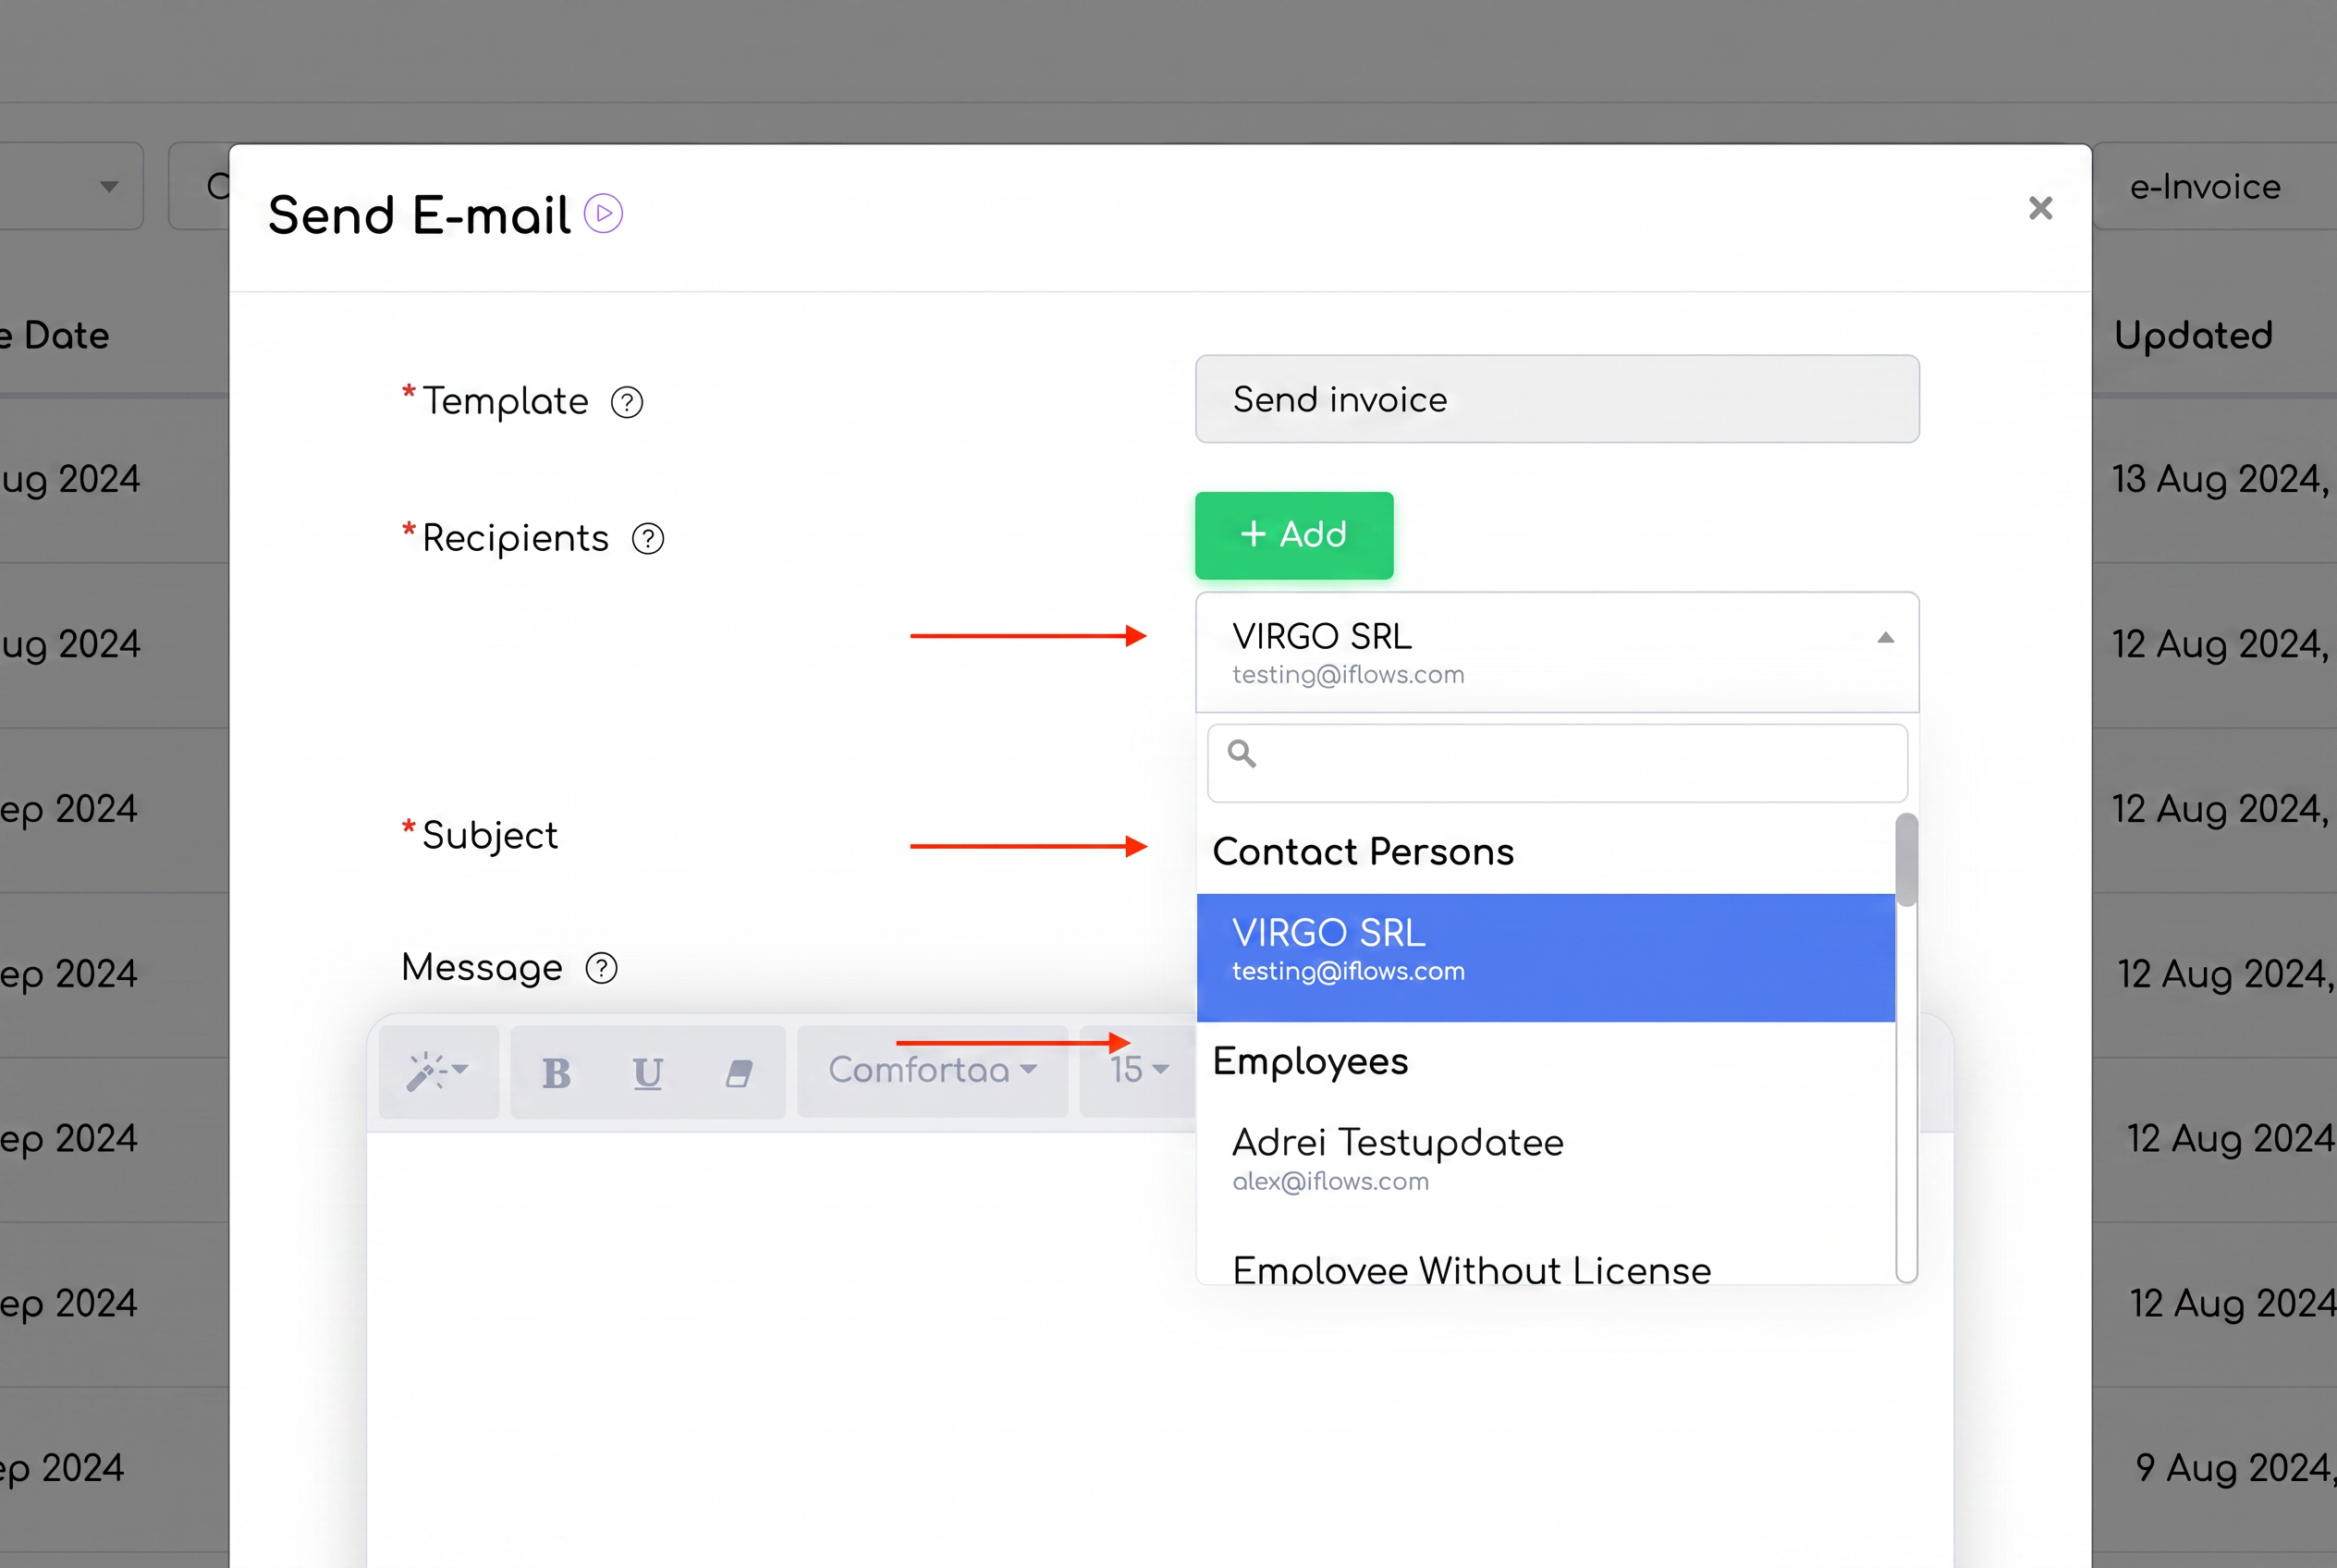
With this update, iflows allows you to send emails to clients and simultaneously add employees of your company as recipients. This functionality brings more flexibility to both internal and external communication, directly from the platform.
- Selection of internal and external recipients:
- When you send an email from the platform, whether from the workflow or other sections, you can add recipients from the client's contact list and, at the same time, include employees from your own company.
- Clear organization of recipients:
- In the email sending window, employees' email addresses are grouped under the heading "Employees", being distinct from those of the clients.
- More flexibility in sending emails:
- Previously, including employees in emails was managed only via the BCC field in the email template. Now, you can manually choose which employees should receive the email alongside the client, giving you the possibility to customize each communication according to the situation.
Orders PDF Template: Advanced Customization of PDF Orders
iflows now allows advanced customization of orders in PDF format, offering users the possibility to create personalized templates that meet the specific needs of the company, just as with quote and invoice templates.
How to Use:
- Navigate to Settings -> Templates -> PDF:
- Access the Settings section from the main menu. Select the Templates option.
- Choose PDF to access the order customization options.
- Click the „New PDF Template” button to start creating a new template.
- Configure the Template:
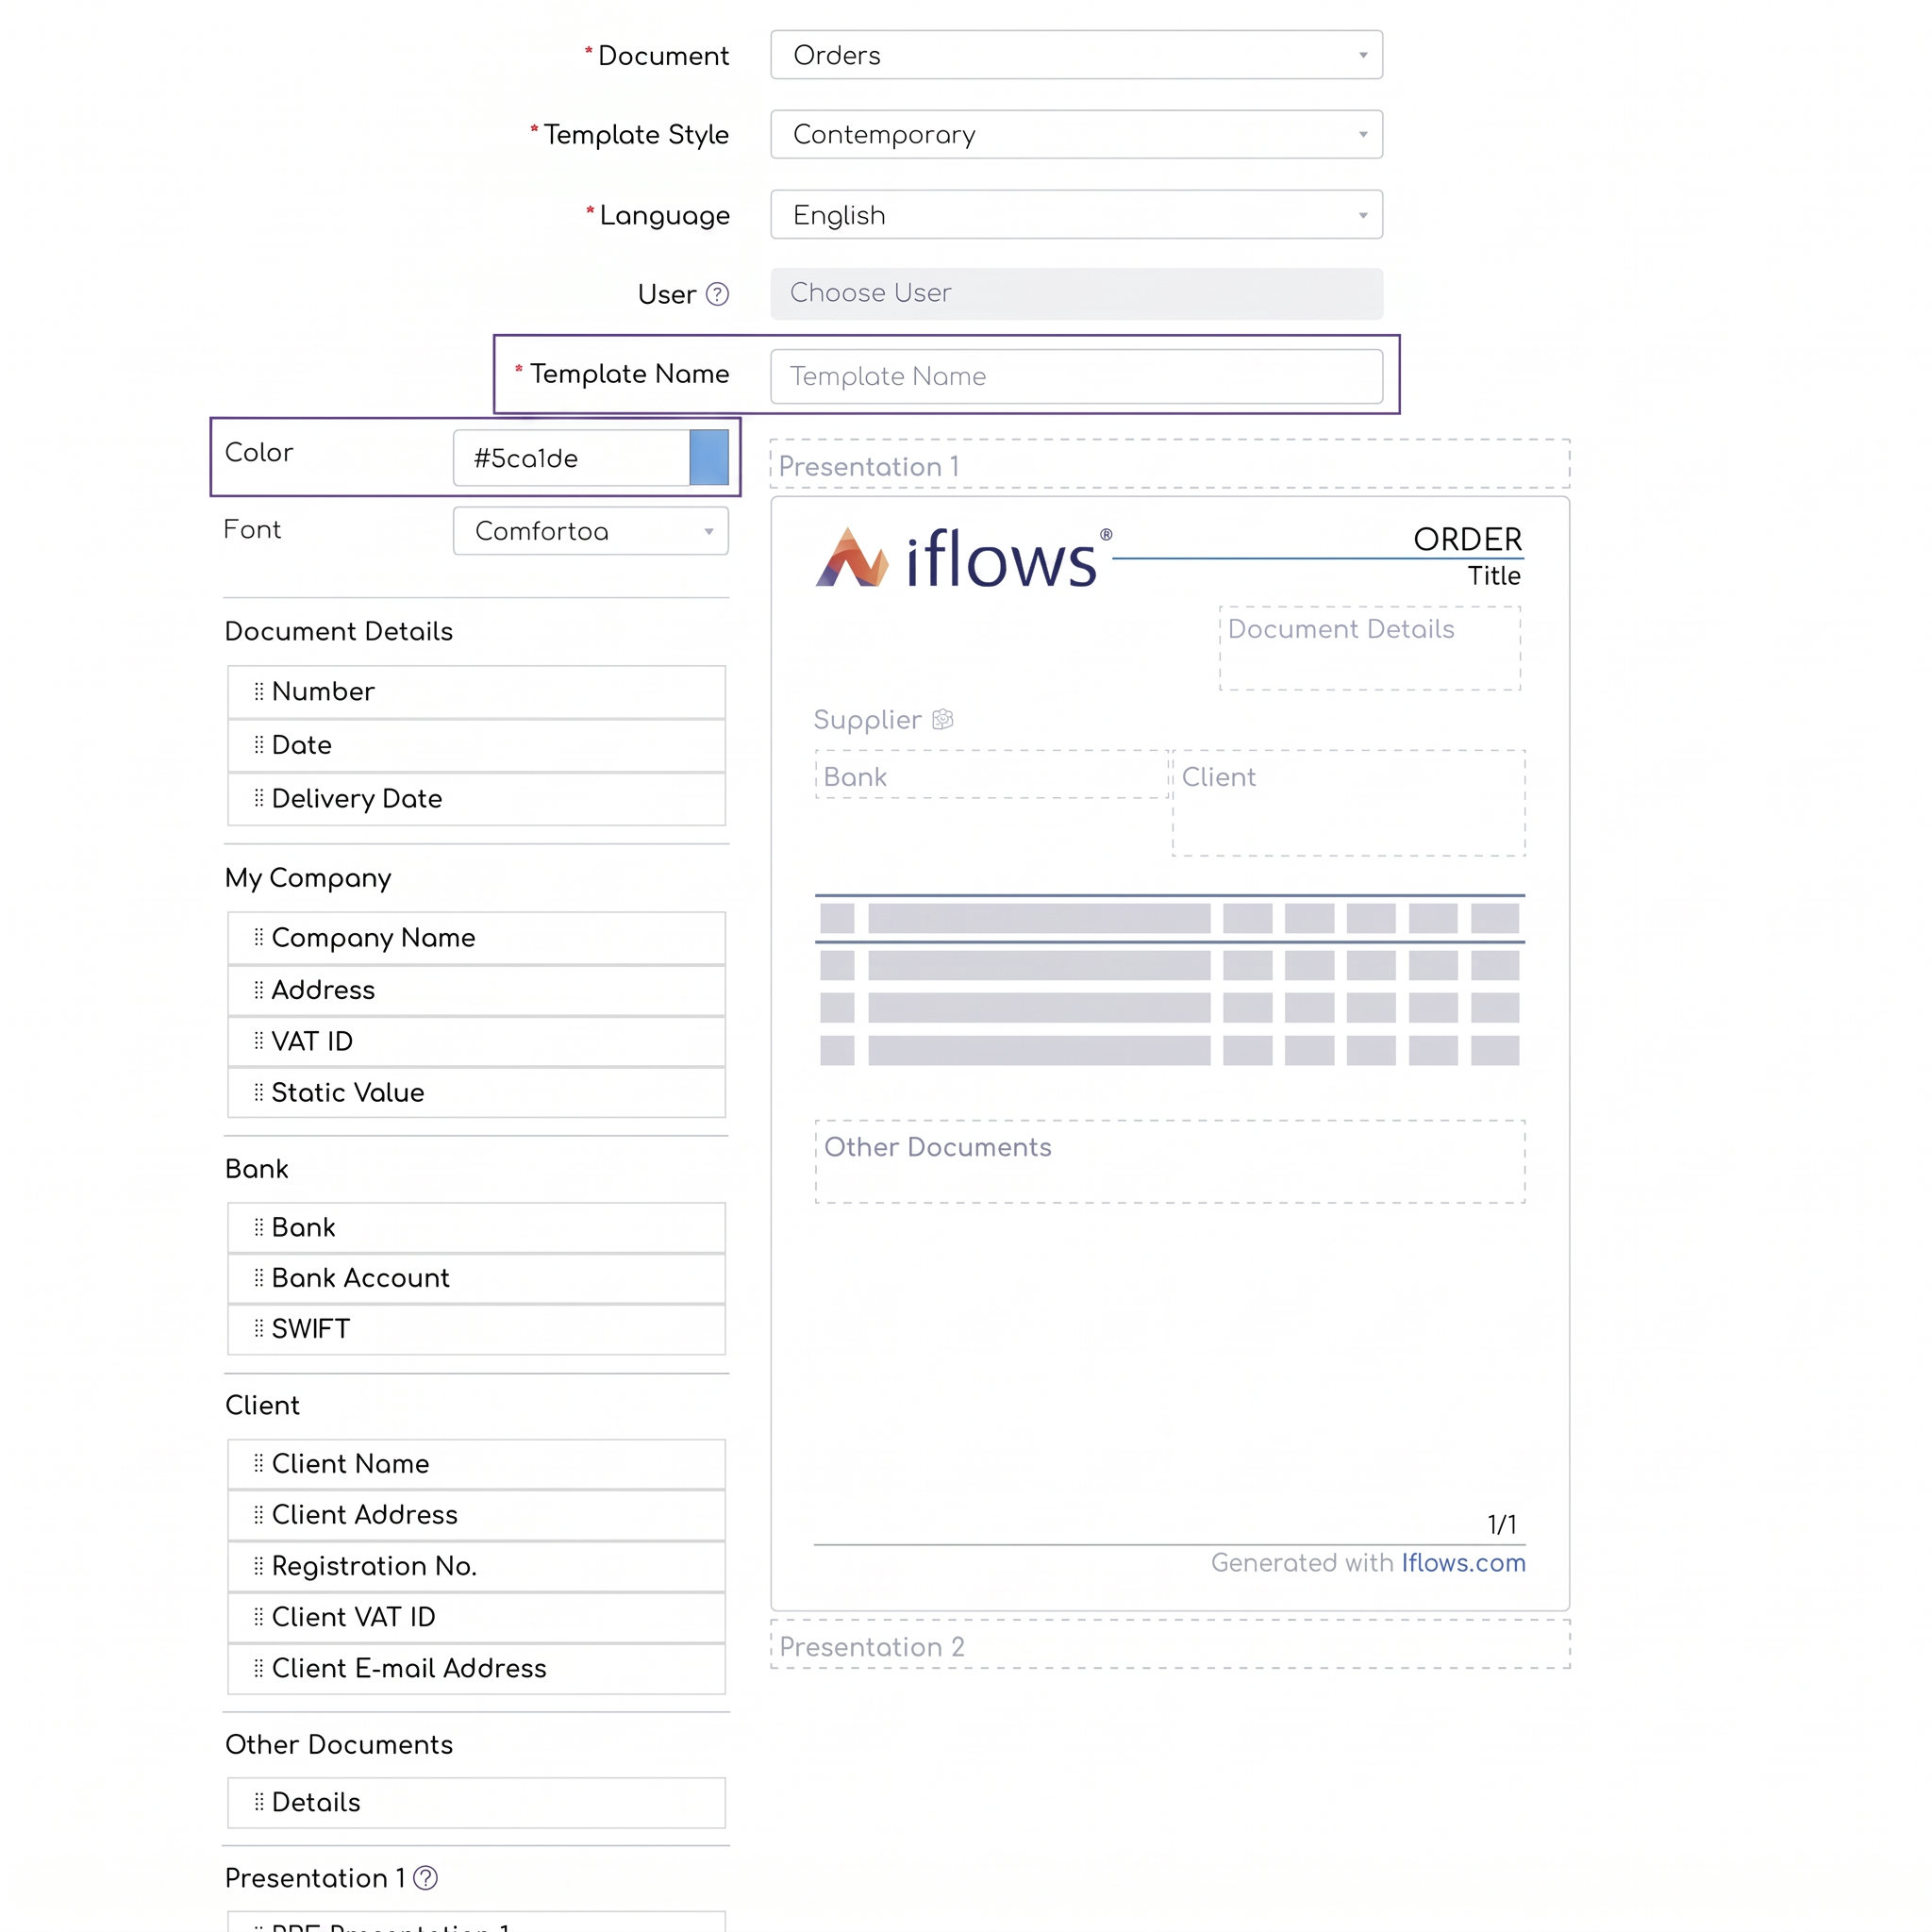
- Choose Document Type: In the „Document” section, select „Orders” from the dropdown list.
- Template Style: Select between Contemporary or Modern styles, depending on your preferences.
- Language: Choose the language in which you want the PDF to be generated.
- Template Name: Enter a name for the newly created template to organize and identify it quickly.
- Customize Color and Font:
- Click on the colored box next to the „Color” section to open the color picker. Choose the desired tone and shade for the PDF document.
- Select the desired font for the text in the PDF.
- Add Fields to the Order:
- The order is initially empty, without any fields included.
- Choose the desired fields from the following categories:
- Document Details:
- Number: The order number.
- Date: The order issuance date.
- Delivery Date: The estimated date for order delivery.
- My Company:
- Company Name: The name of the company issuing the order.
- Address: The company address.
- CIF: The Tax Identification Code (Codul de Identificare Fiscală).
- Static Value: Additional information about the company not covered by standard fields.
- Bank:
- Bank: The name of the bank used by the company.
- Bank Account: Bank account details.
- SWIFT: The bank's SWIFT code.
- Client:
- Client Name: The name of the client for whom the order is issued.
- Client Address: The client's full address.
- Registration No.: The client's registration number.
- Client CIF: The client's Tax Identification Code.
- Client Email Address: The client's email address.
- Other Documents:
- Details: Additional information that can be added to the order.
- Presentation:
- PDF Presentation 1: A presentation PDF file that can be included before the order.
- PDF Presentation 2: A presentation PDF file that can be included after the actual order.
- Document Details:
- Customize the Order and Naming of Fields:
- Drag and drop fields from the boxes on the left into the PDF order. The field where they can be placed will be highlighted in green to indicate available areas.
- After placing a field, click on the gear icon next to it to give it a custom name that will appear in the order. If you do not provide a name, only the field value will appear.
- Using the Static Value:
- The „Static Value” option allows you to enter any other company information not found in the existing options. Enter the static value, click on the gear icon, and rename it as you wish.
- Export Customization Options:
- At the bottom of the page, you have PDF export options for order information that you are already familiar with. These options can be saved as defaults in relation to the created template.
- Set the Default Template:
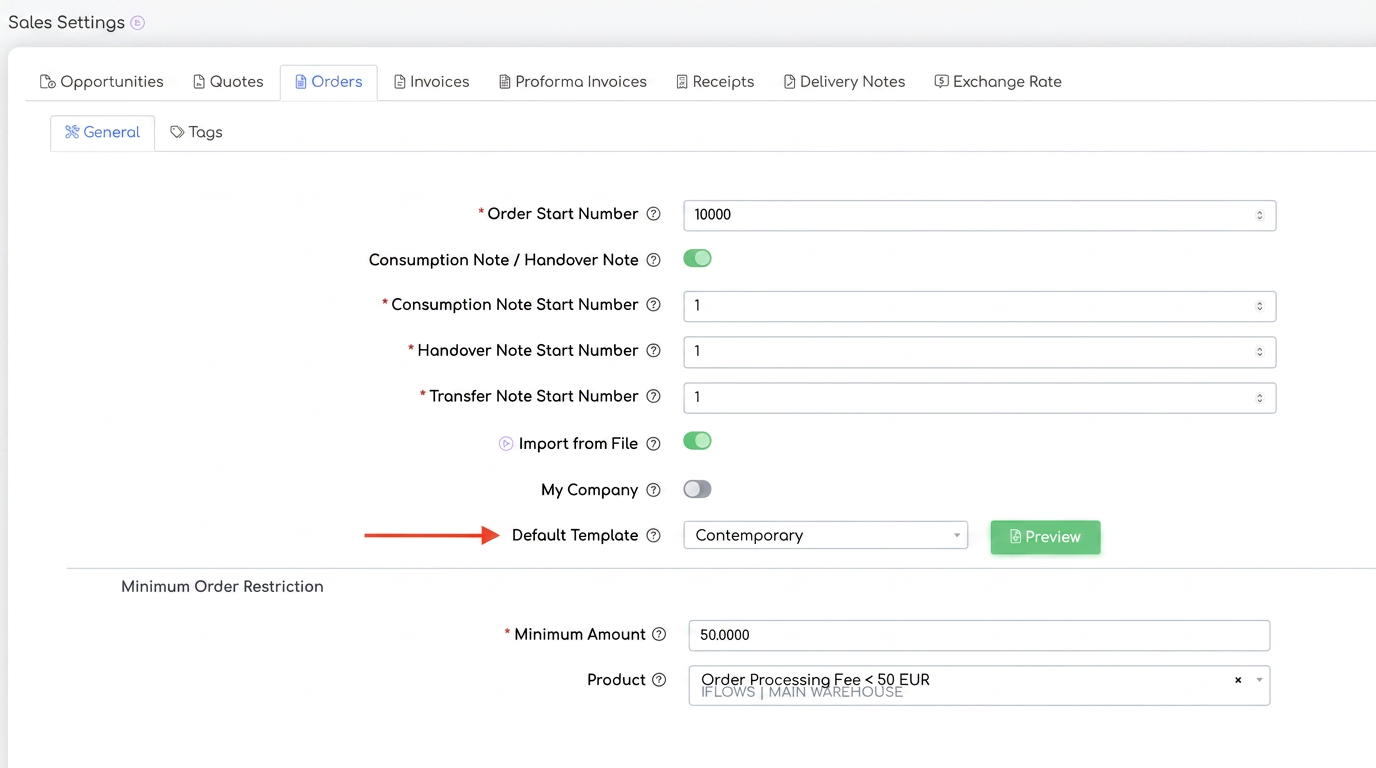
- You can set the created template as default by going to the Settings -> Sales -> Orders , Default Template column. Choose the template you will use most often to set it as default.
- Using the Template when Creating a New Order:
- When creating a new order, you will find the „PDF Template” field filled with the default template, but this can be changed if necessary. After creating and saving the order, you can download the PDF.
Proforma Invoices PDF Template
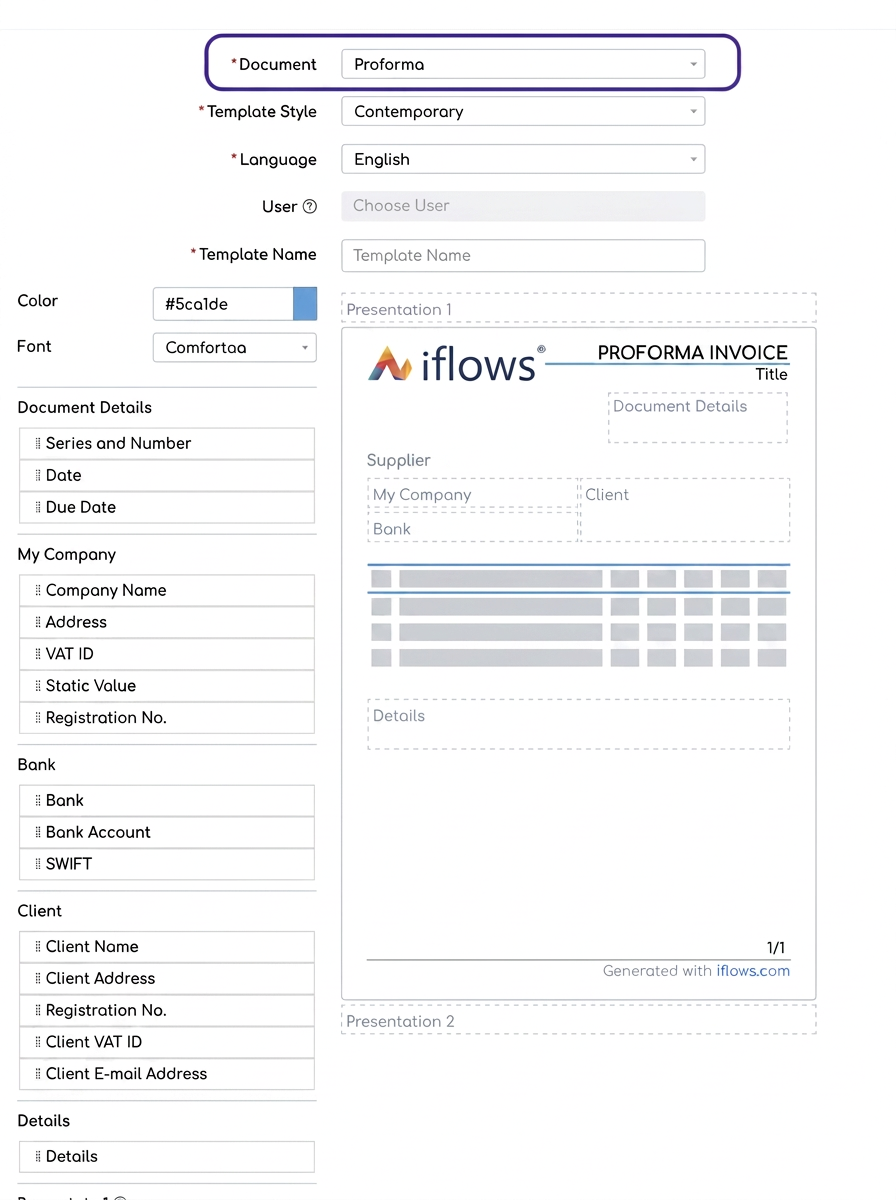
iflows users now have the possibility to customize PDF templates for proforma invoices as well. The configuration process is identical to the one described for PDF orders. The only difference is the document type selection, where, instead of „Orders”, you will choose „Proforma Invoices” from the dropdown list. This new template offers the same flexibility and advanced customization options, ensuring brand image continuity and the professionalism of issued documents.
If you have suggestions or ideas that could bring improvements to the iflows platform, we encourage you to send us feedback. We are dedicated to continuous improvement and assure you that all suggestions will be carefully evaluated.