
The iflows platform is regularly updated for improvements and new functionalities.
Appointment Calendar
The appointment calendar module is a tool used for planning and organizing appointments related to specific orders. It allows users to create, view, and manage appointments in an integrated calendar, thus ensuring clear resource allocation and efficient activity coordination.
Usage Examples:
- Installation for an Order
Schedule the installation of an order. This allows you to allocate the installation team, set the day and hours for installation, and add details about the location and necessary equipment. - Material Quality Check for an Order
Another example of use is scheduling a material quality check before starting the production of an order. Here, you can designate the quality inspector, set the date and time of the check, and add information about the materials to be verified. - Meeting with the Client for Design Approval
Schedule a meeting with the client for design approval before the production of an order. You can allocate the designer and project manager, set the date and time of the meeting, and add discussion topics.
How to use:
- Accessing the Module:
- The appointments module is available in the workflow interface, under the "Appointments" tab.
- Adding an Appointment:
- Selecting the Day:
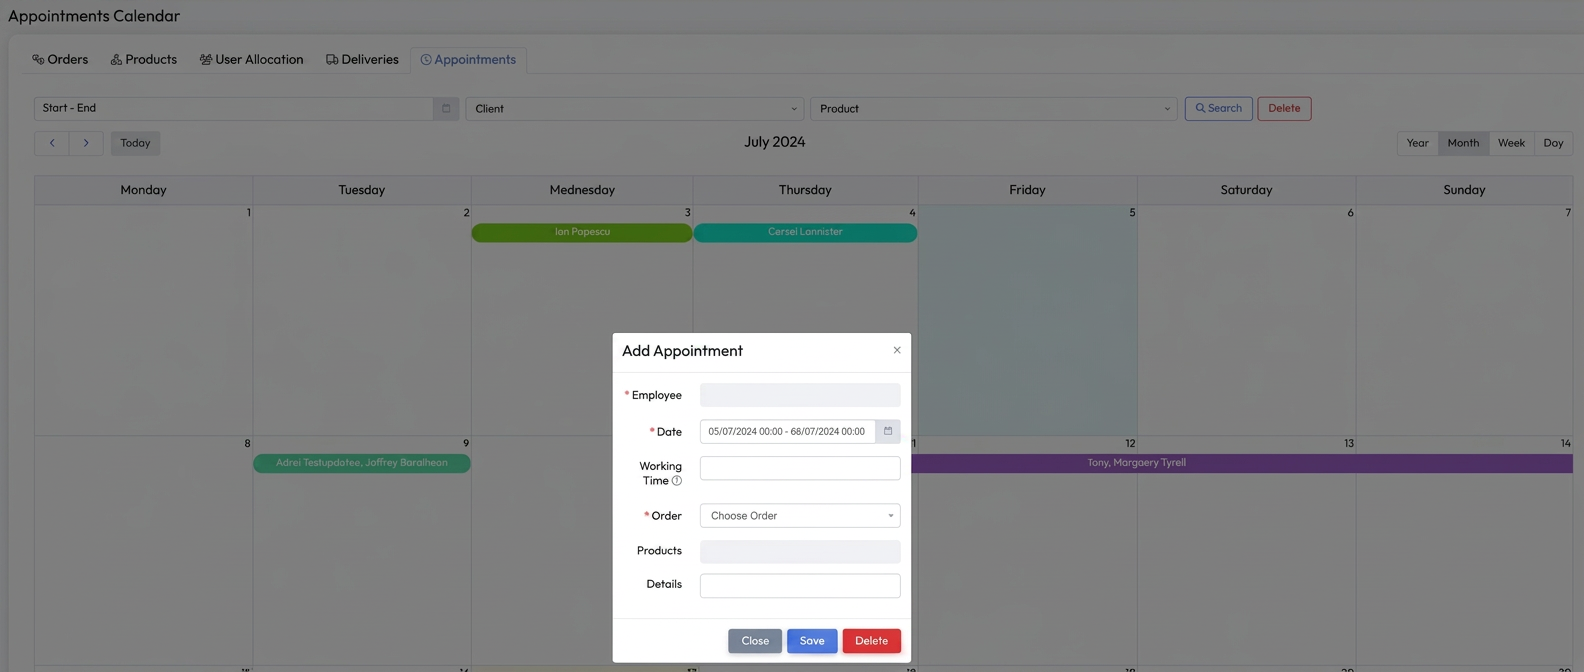
To add a new appointment, click on the desired day in the calendar, or on any day. - Filling in Details:
A window will open where the following information must be completed:- Employee: Select one or more employees from a dropdown list. You can search by name and add multiple employees one by one.
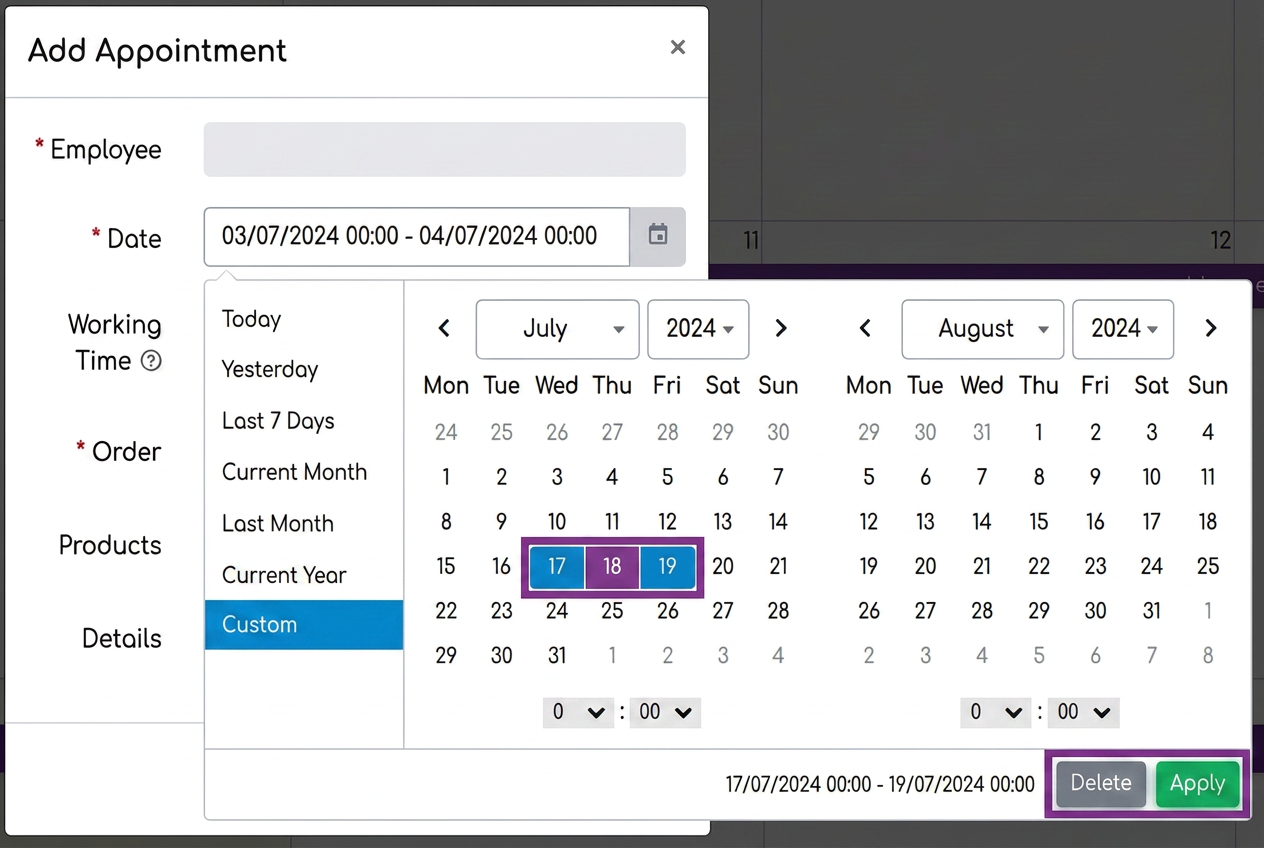
- Date: Choose either a single day or a period of time. You must also set both the start and end times.
- Working Time: The estimated number of hours required to complete the task.
- Order: Enter the order number associated with that specific activity.
- Products: If applicable, specify the products/services related to the appointment.
- Details
- Selecting the Day:
- Viewing Appointments:
- After completion, the appointment will be marked in the calendar with a line spanning the set period, and the name of the designated employee will be visible.
- By clicking on this line, you can see the appointment details.
- At the bottom of the page, a summary of appointments is available, providing an overview of all planned activities.
Possibility to Add Specifications to Offers - per template
This functionality allows for extensive customization of offers by including additional information specific to each template.
How to Use:
- Accessing the Module:
- Navigate to Settings -> Templates -> PDF to access customization options.
- Editing or Creating a New Template:
- Select an Existing Template or Create a New One: Click on "New PDF Template" to create a new template or select the edit button of an existing template.
- Adding Specifications:
- Other Documents Section: On the left side of the template configuration page, you will find the "Other documents" section.
- Adding Specifications:
- Drag the "Specifications" option into the dedicated area within the template. The area where you need to place the option will be marked in green when you start moving "Specifications".
- After placing "Specifications" in the template, a gear icon will appear next to this section.
- Editing Specifications:
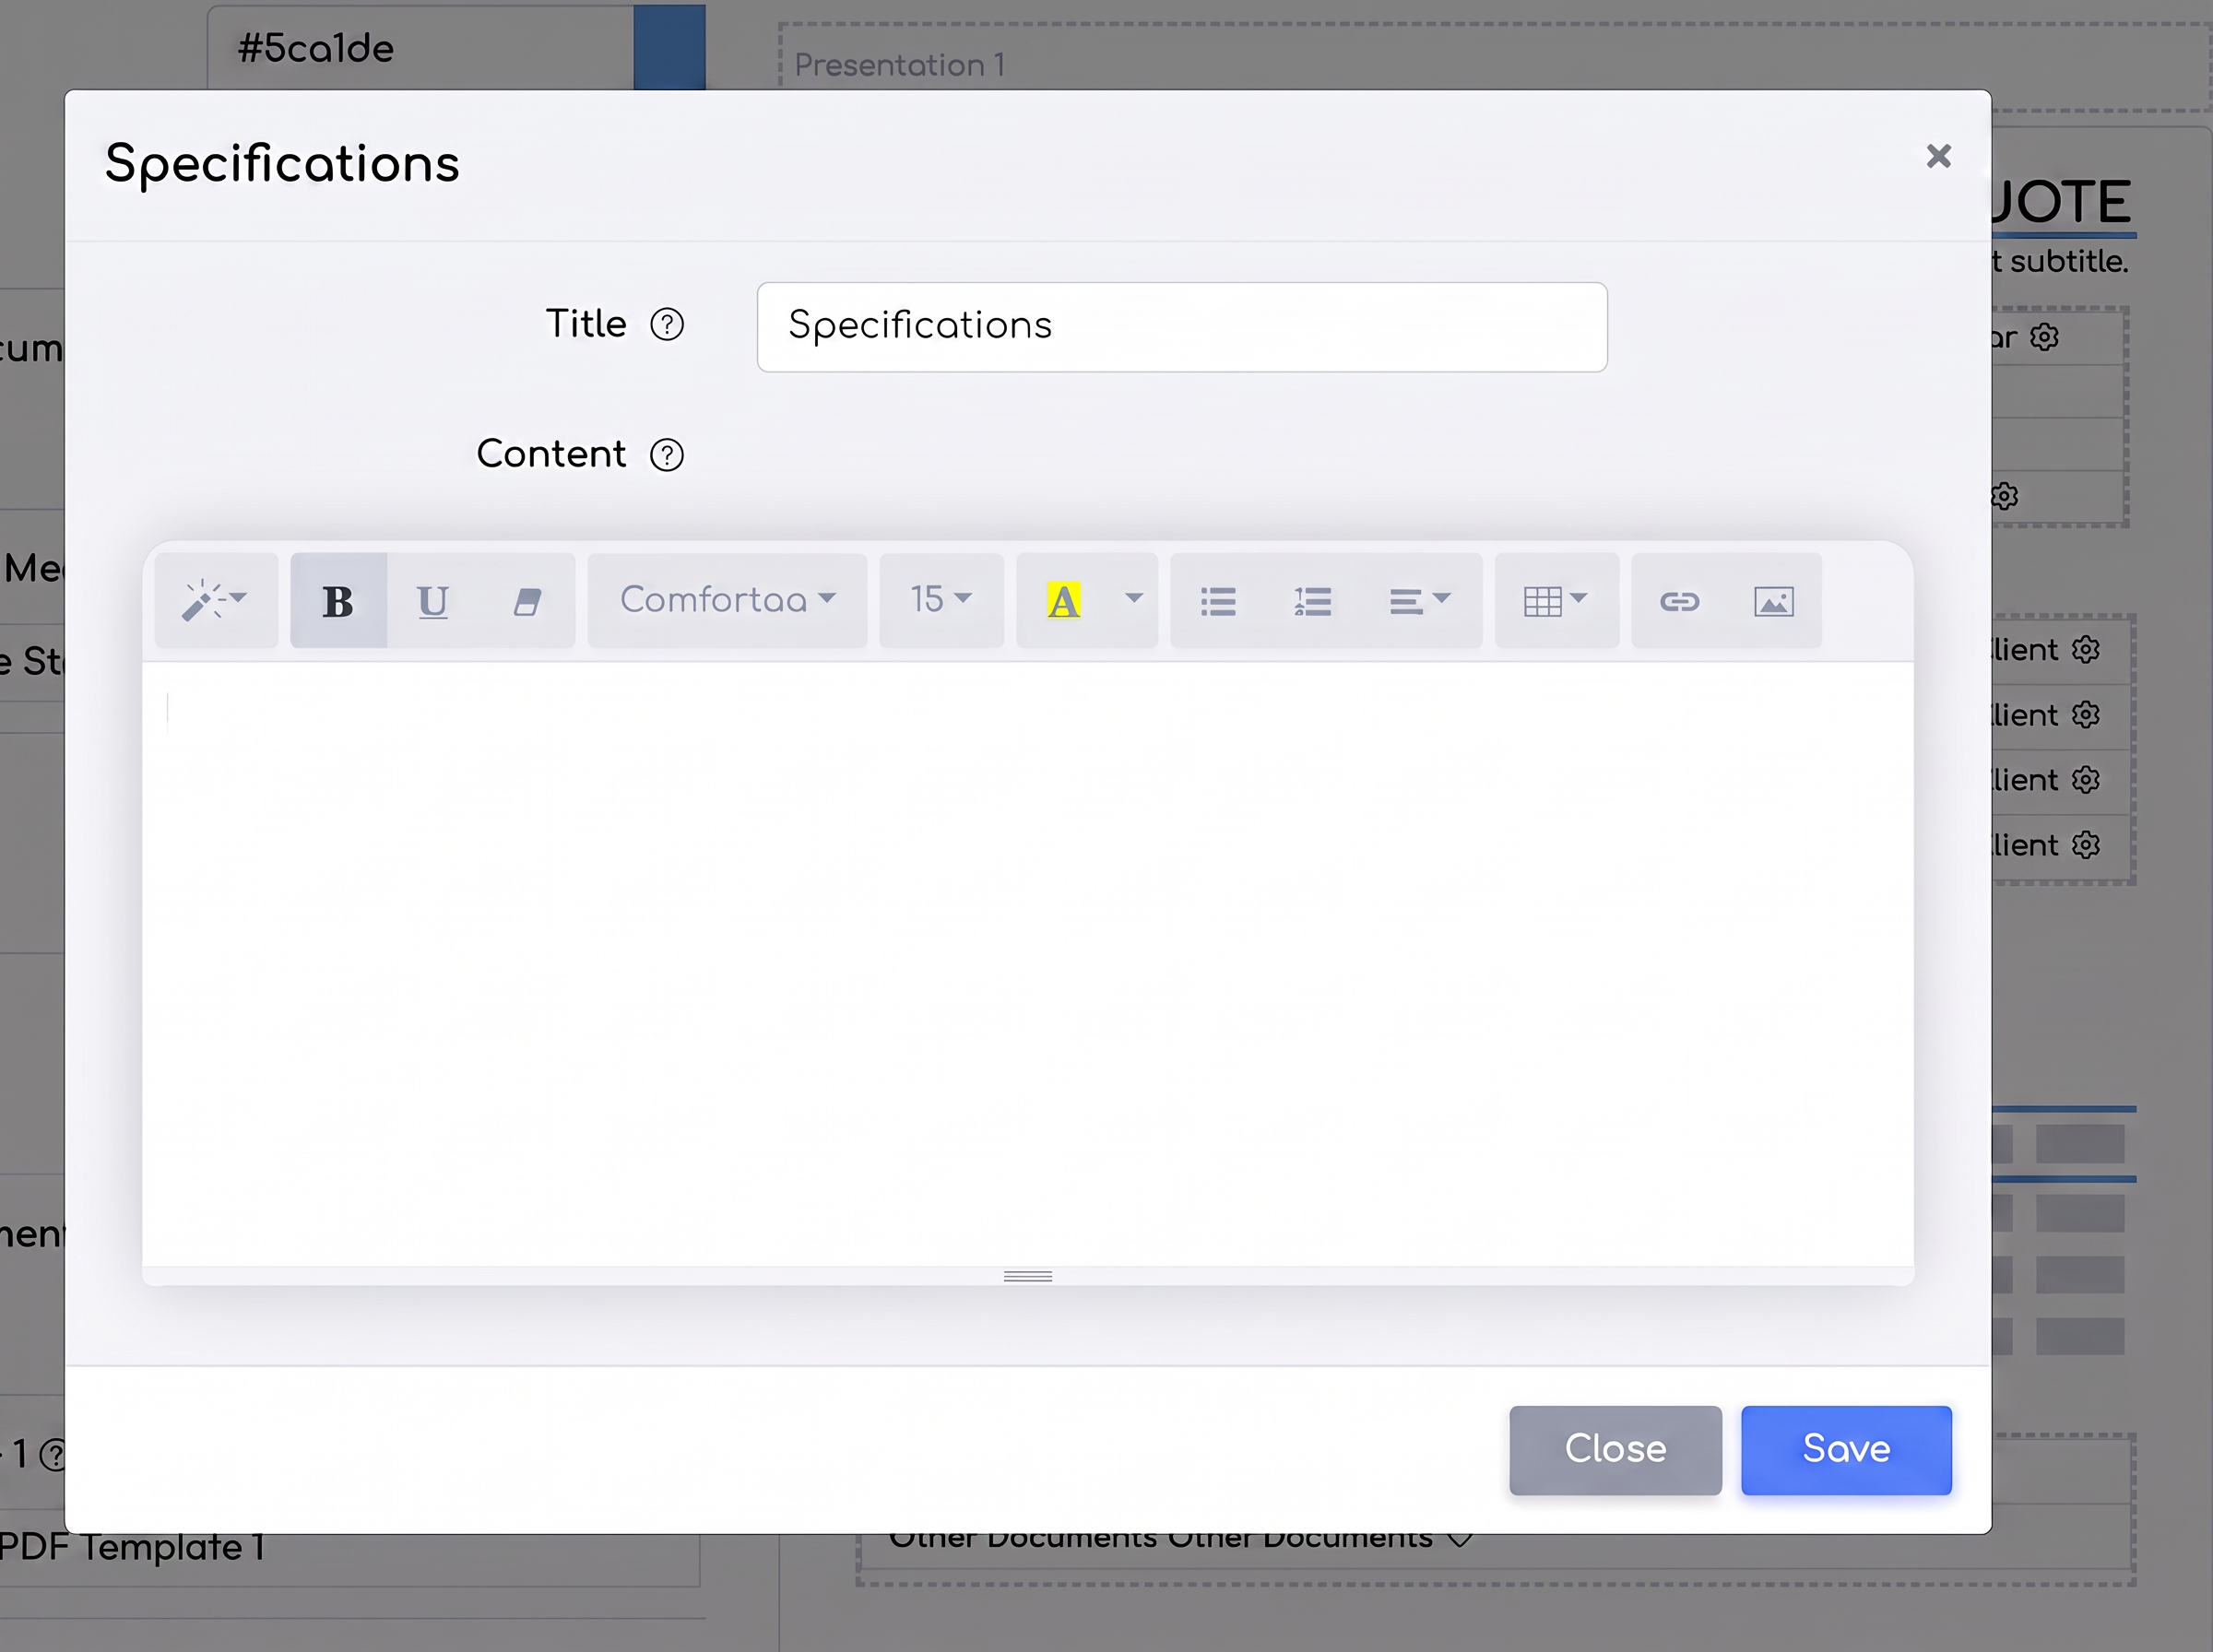
- Click on the gear icon to open the editing window.
- Enter the desired content in the "Content" field.
- (Optional) Enter a title in the "Title" field. If used, the title will appear before the actual content in the PDF offer.
- Click "Save" to finish adding specifications.
Usage Example:
- Adding Terms and Conditions
- Enter the sales terms and conditions in the specifications section, ensuring all legal information is clearly presented and easily accessible in the offer.
Possibility to Configure Default Template per User
The functionality to configure default templates per user allows for the personalization of PDF offers so that each user can have a specific predefined template.
How to Use:
- Accessing the Module:
- Navigate to Settings -> Templates -> PDF.
- Edit an existing template or create a new one.
- Assigning the Template to a Specific User:
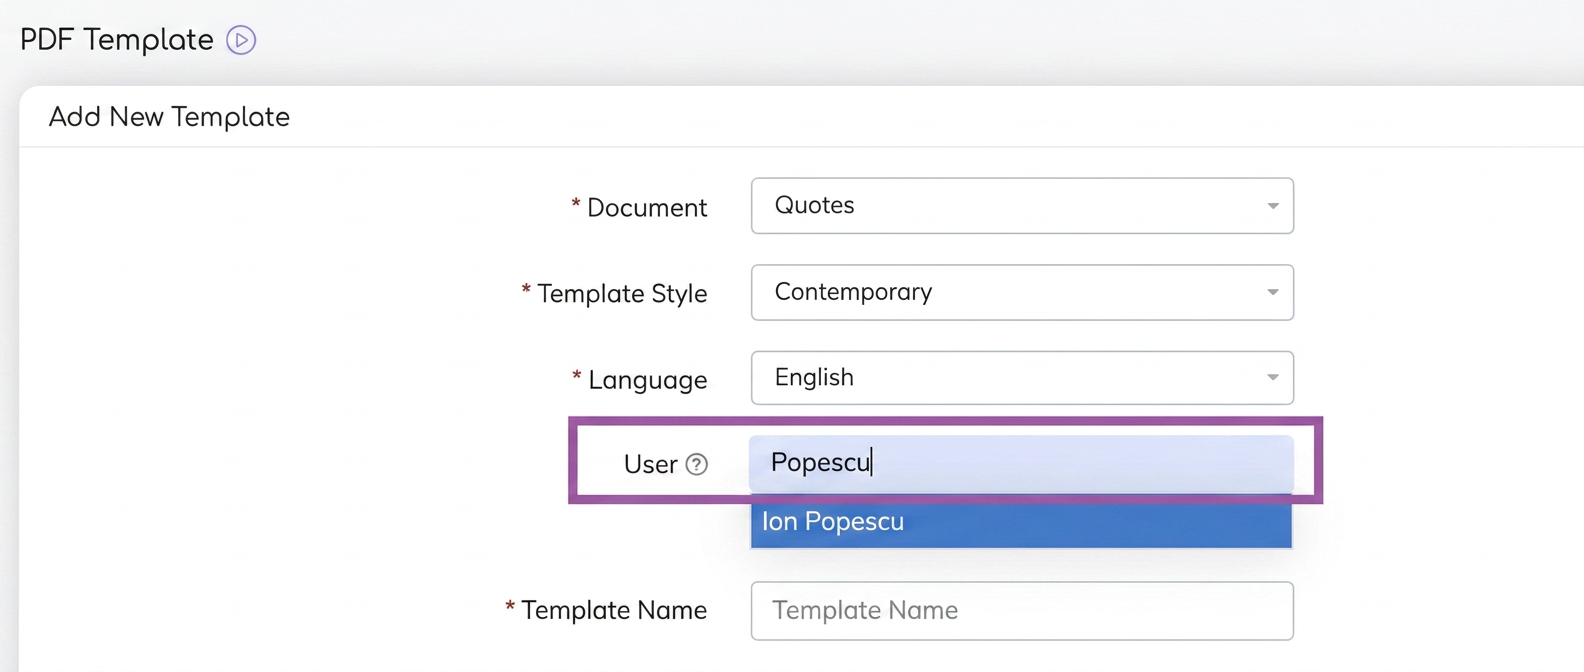
- User: In the template configuration section, you will see the "User" field.
- Choose User: Select the user you want to assign this template to. You can search for the user by name and select from the dropdown list.
- Saving the Template: Once the template is configured and assigned to the user, press the save button.
This functionality allows the template to become default only for the specified user. For example, if a sales employee wants to include their contact details in a presentation attached to the offer, this personalized template will facilitate this automatically.
Configuring the Size of Images Inserted in PDF
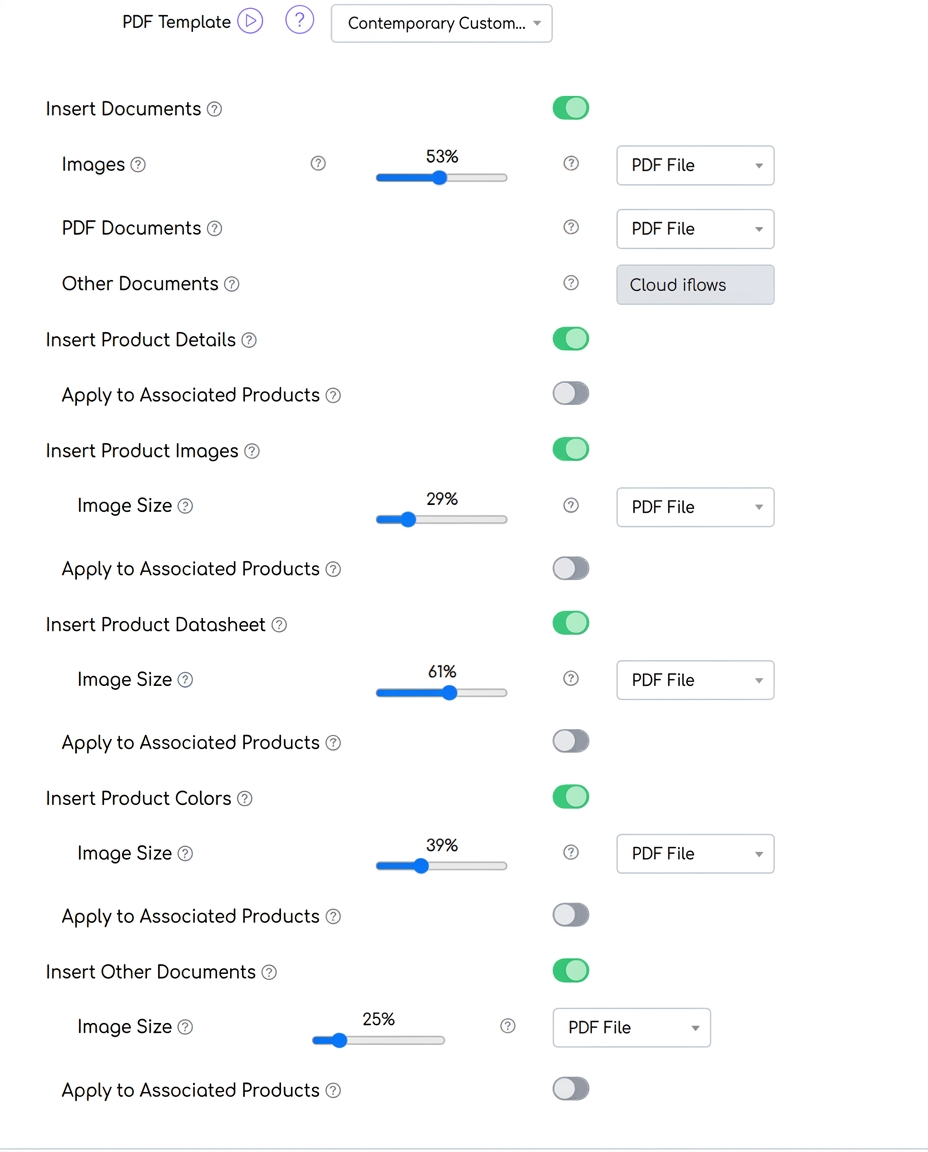
The new functionality allows users to configure the exact size of images inserted into PDF offers using precise percentages. Previously, options were limited to predefined sizes (small, medium, large), but now the exact size can be adjusted to perfectly fit the visual needs of each offer.
How to Use:
- Accessing the Module:
- Navigate to the Sales section of the main menu, select the Offers subsection. Click on the "New Offer" button.
- Configuring Image Size:
- At the bottom of the offer creation page, you will find an adjustment bar for image size.
- The image size can be adjusted in exact percentages, allowing for detailed control over the visual appearance of the offer.
- Conditions for Configuring Image Size:
- The size configurator is only available for images that are set to be displayed in the PDF.
- If the display option is set for cloud, the image size will be maximum.
Possibility to Hide Offer Totals
This functionality offers the possibility of hiding the total price of offers in generated PDF documents. This allows users to precisely control the information presented to clients, displaying only individual product prices without revealing the subtotal and the overall total of the offer.
How to Use:
- Accessing the Module:
- Navigate to the Sales section in the main menu. Select Offers.
- Initiating a New Offer: To create a new offer, click on the "New Offer" button.
- Configuring Export Options:
- On the offer creation page, scroll down to the "Export options" section.
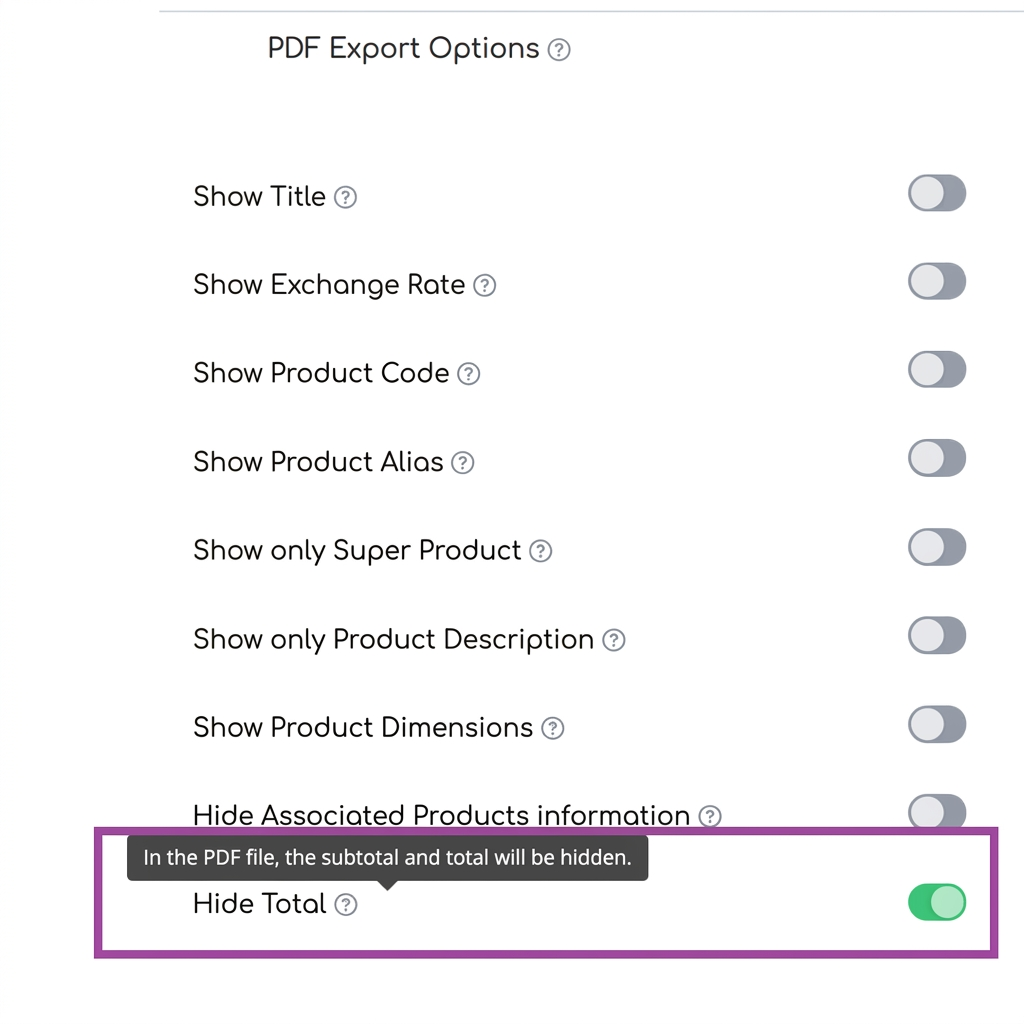
- Locate the "Hide Total" option and activate it by toggling the activation button.
- Effects of Activating the Hide Total Option:
- Once activated, this option will remove the subtotal and the overall total from the PDF offer.
- Clients will only view the individual prices of each product present in the offer, without access to the total order amount.
Using the Real Consumption Instruction in Multiple Stages
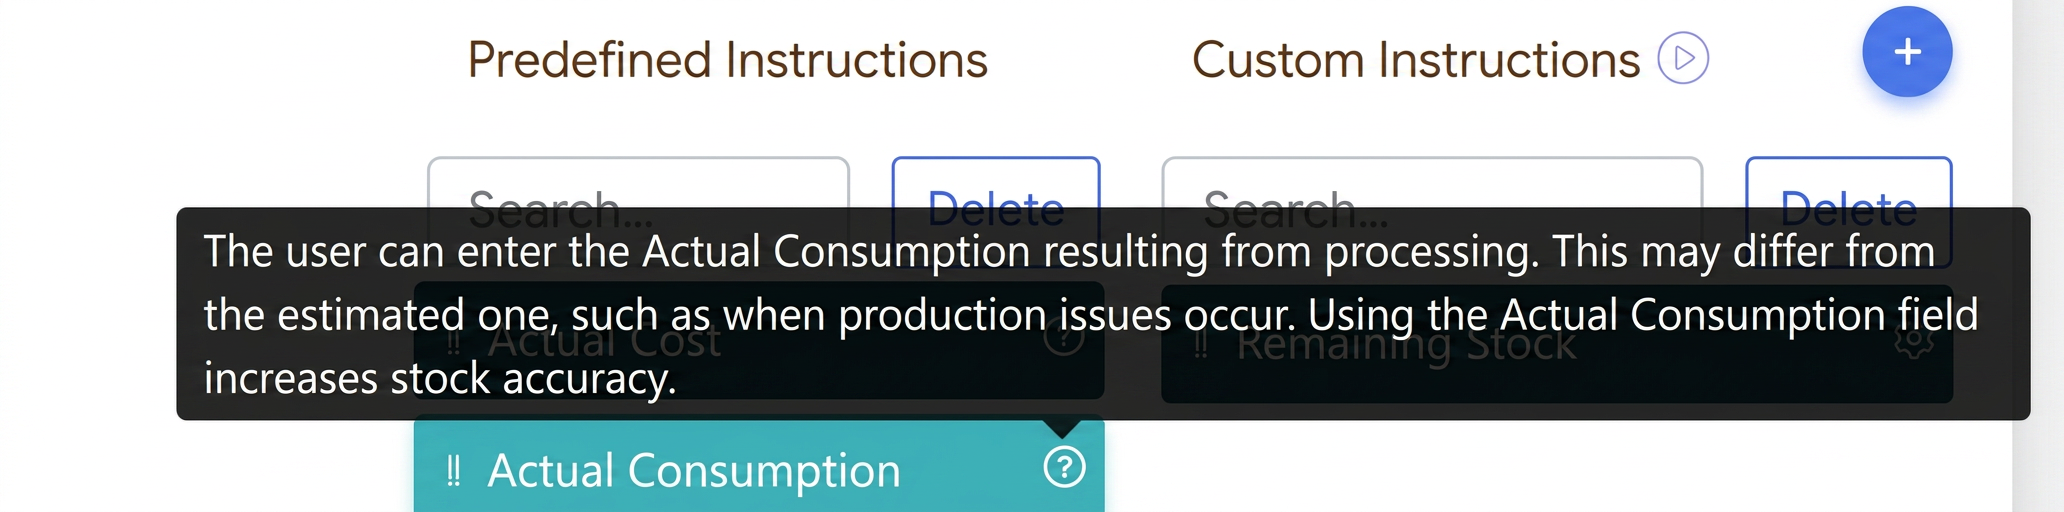
The "Consum Real" (Real Consumption) instruction in iflows allows users to enter the actual consumption of resources after completing each production stage. This functionality, which was previously available only for the "Equipment" stage, can now be used in any stage.
How to Use:
- Accessing the "Real Consumption" Instruction:
- Entering the Instruction: After reaching the specific stage where this instruction was introduced, a line will appear requesting the real resource consumption.
- Pre-filling with Estimated Quantity: The estimated resource quantity (the one entered in the order) will be pre-filled.
- Updating Real Consumption: If the real consumption differs from the estimate, enter the new value in the corresponding field.
- Effects of Using the "Real Consumption" Instruction:
- Updating Stocks: Stocks will be automatically updated to reflect actual material consumption.
- Reflecting Costs: Costs associated with the order will be adjusted based on actual consumption.
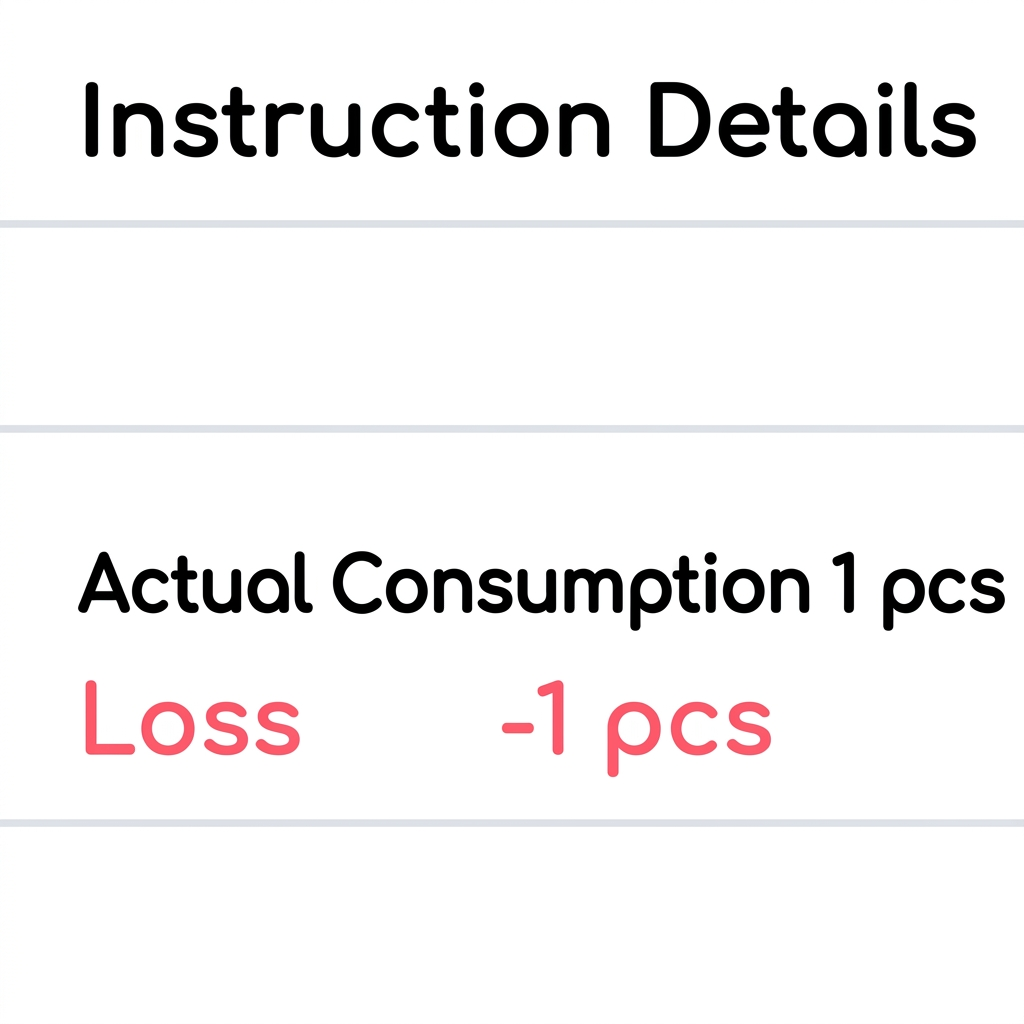
- Viewing Order Details: In the respective order, both real consumption and recorded loss will be visible in the details column.
If you have suggestions or ideas that could bring improvements to the iflows platform, we encourage you to send us feedback. We are dedicated to continuous improvement and assure you that all suggestions will be carefully evaluated.