
The iflows platform is regularly updated with improvements and new functionalities.
Filtering Orders by Delivery Date
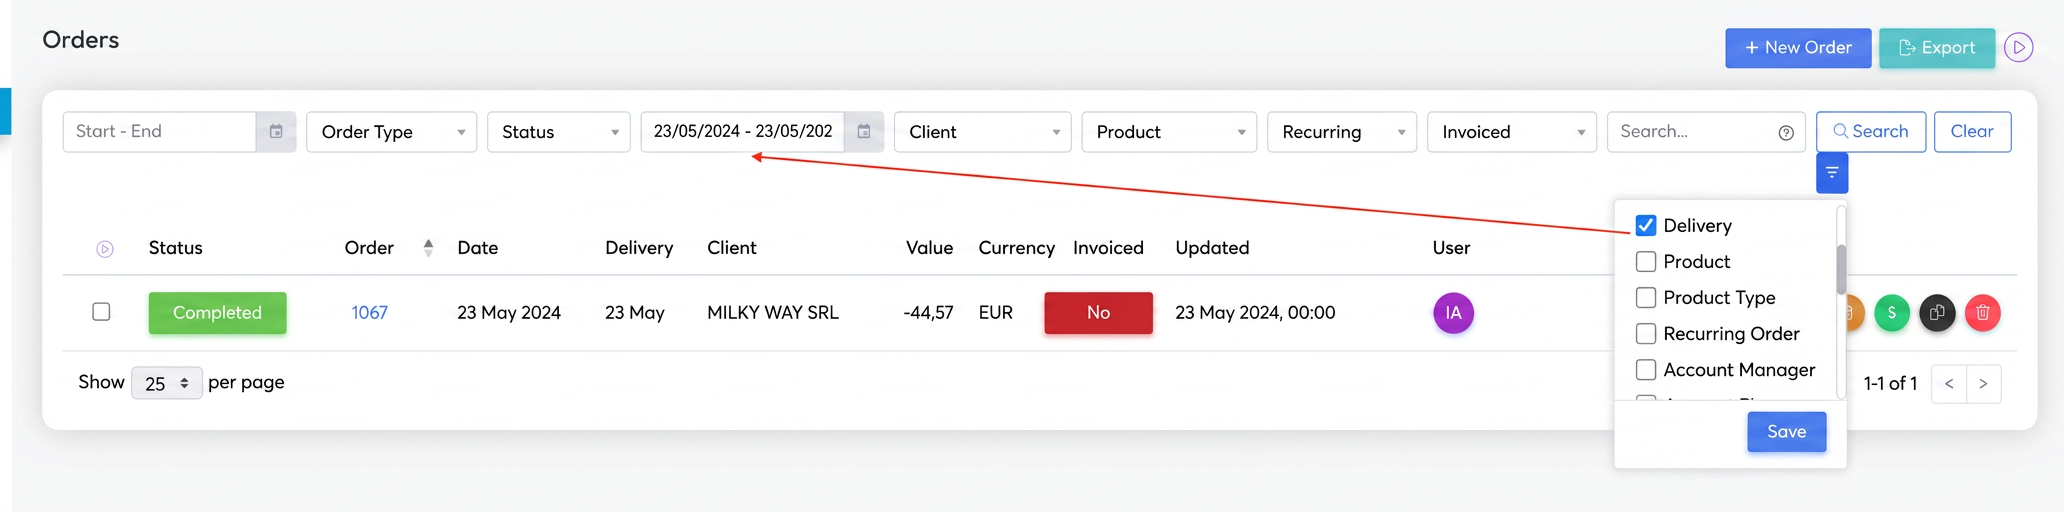
The new functionality in iflows allows filtering orders based on the delivery date, providing a quick view of orders scheduled for delivery within a specific range.
Usage:
- Access the "Sales" section from the main menu and select "Orders".
- Select the desired date range for delivery in the filter field.
- Apply the filter by clicking the "Apply" button.
- Search for filtered orders by clicking the "Search" button.
Status Synchronization between Opportunities and Offers
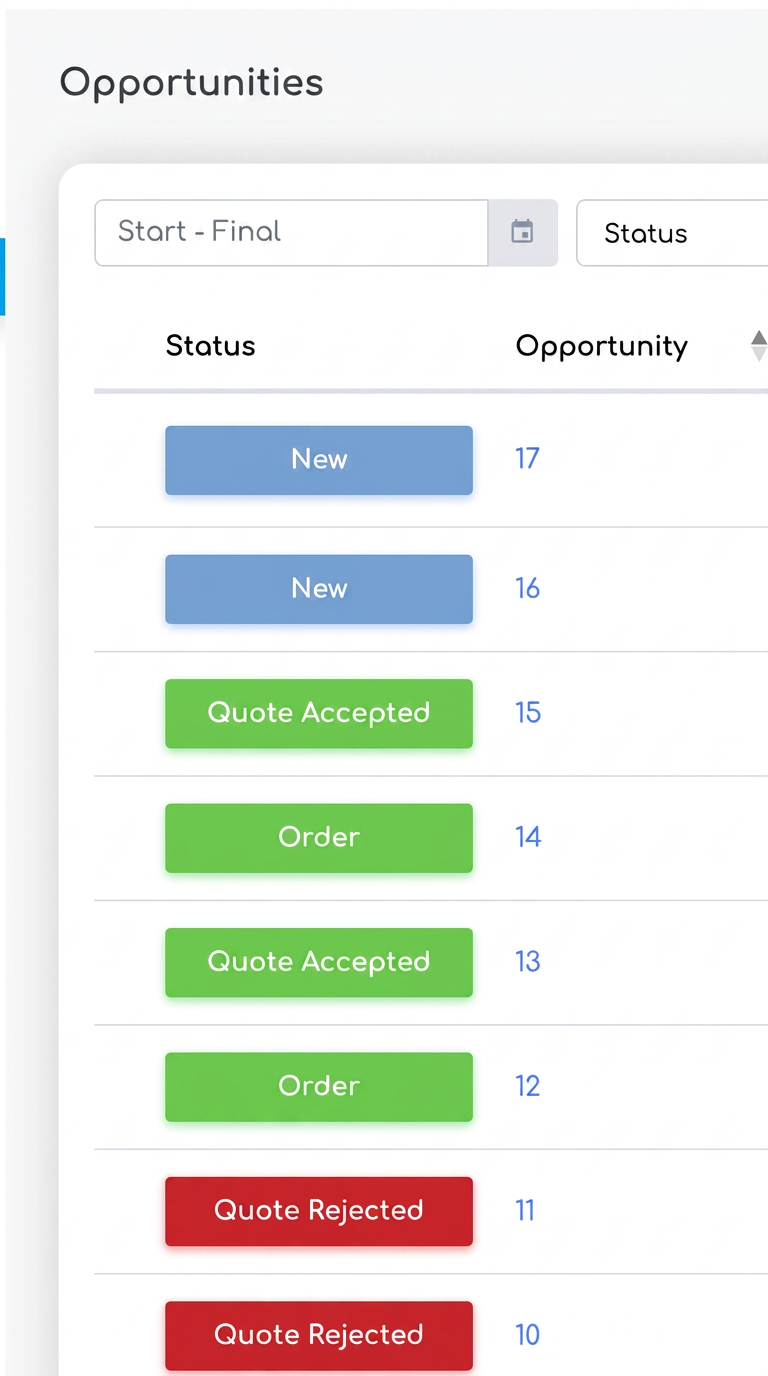
The new functionality in iflows automatically synchronizes the status between opportunities and offers. Now, when you convert an opportunity into an offer, its status will automatically update in the Opportunities section as well, depending on the client's response.
Usage:
- Access the "Sales" - "Opportunities" section from the main menu.
- Select and then convert the opportunity you want into an offer.
- Subsequently:
- If the offer is accepted, the opportunity status will become "Offer Accepted".
- If the offer is rejected, the opportunity status will become "Offer Rejected".
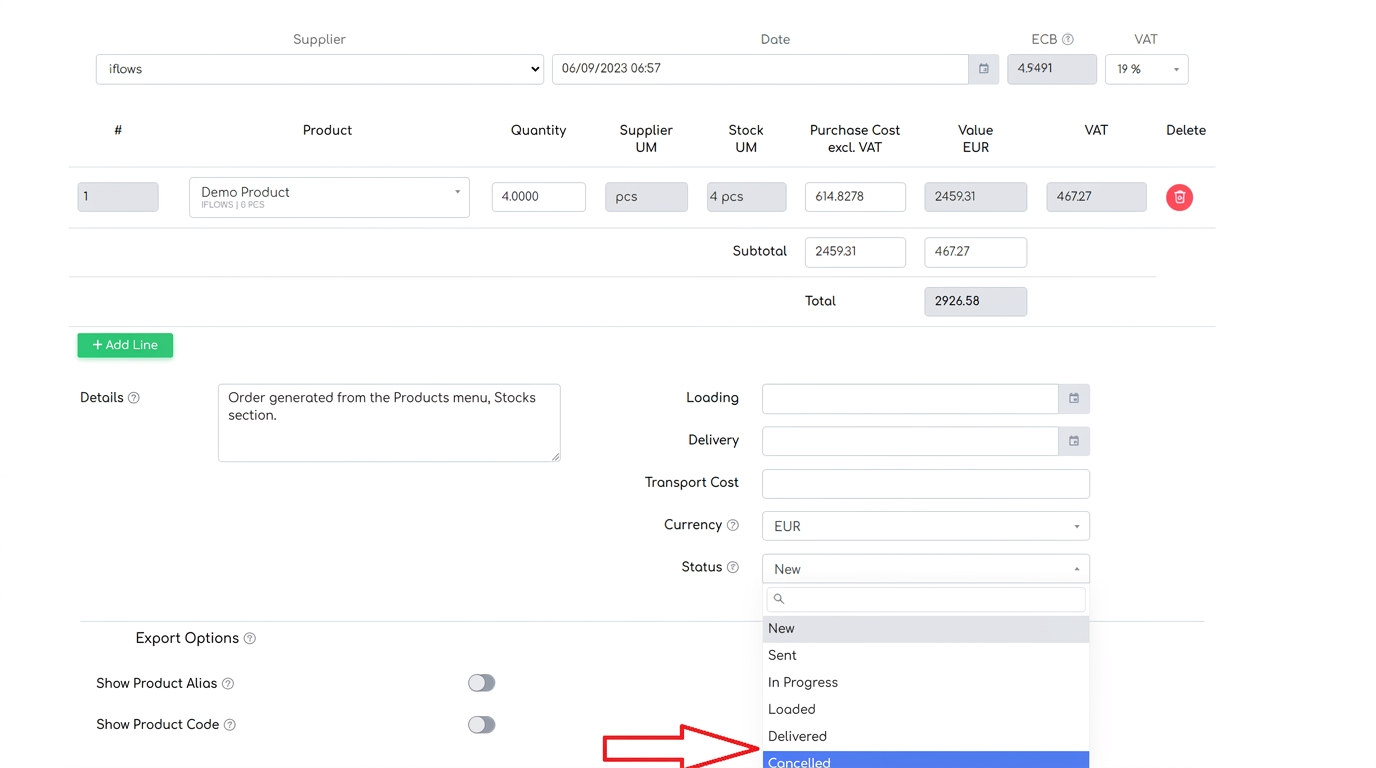
New Status for Supplier Orders: "Canceled"
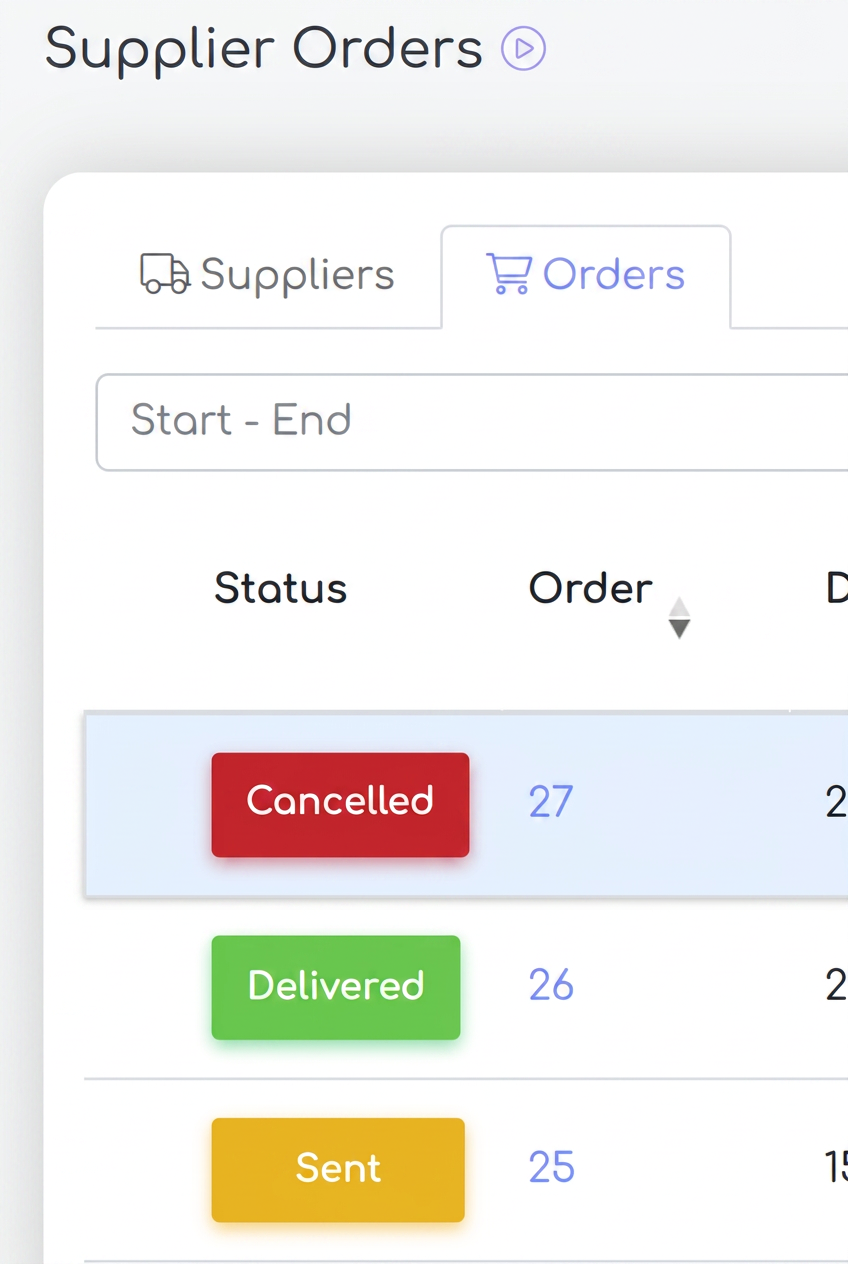
iflows introduces a new status for supplier orders: "Canceled", which allows for quick differentiation of canceled orders from active or completed ones.
How to use:
- Access the "Financial" section from the main menu.
- Navigate to "Suppliers" and then select "Orders".
- Select the order you wish to cancel.
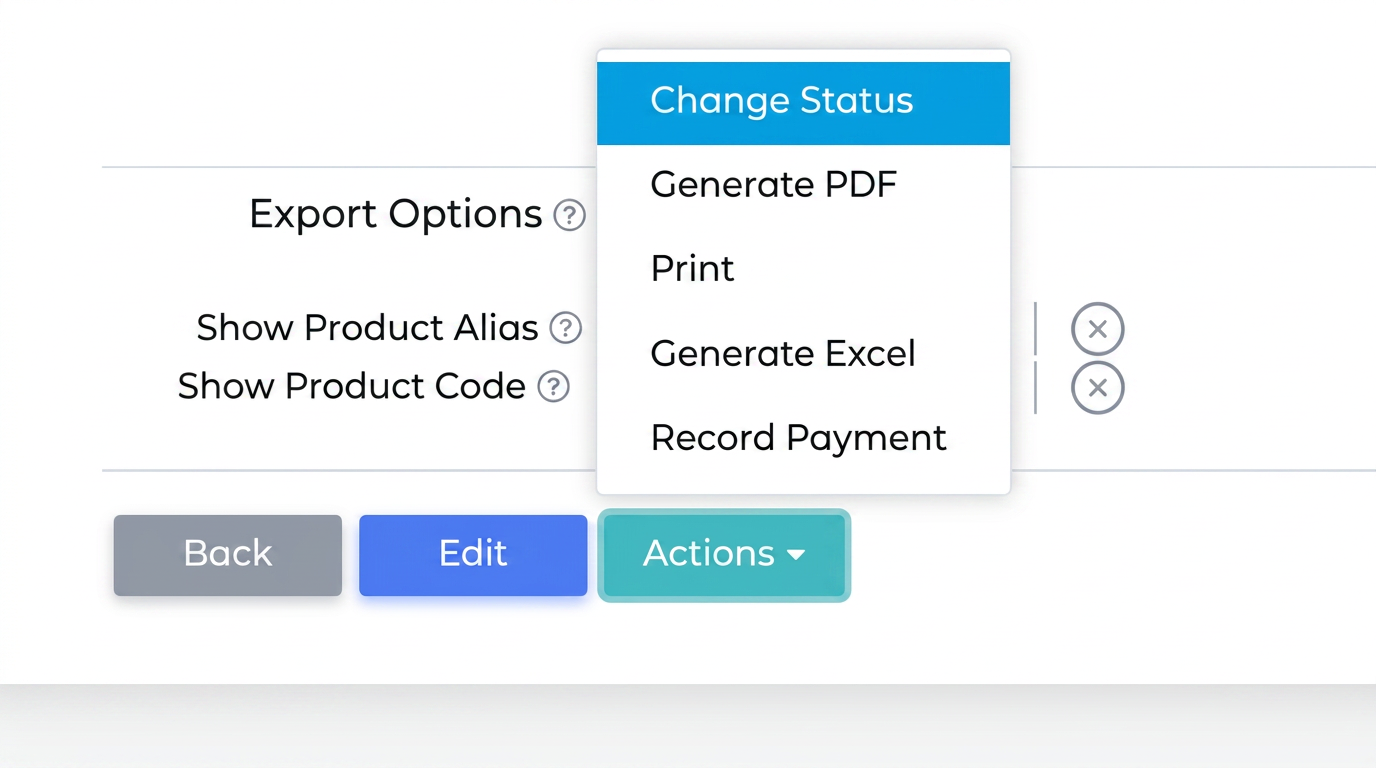
- Edit or view the order and in the actions menu, change the status to "Canceled".
Client Deletion Restriction when Associated Documents Exist
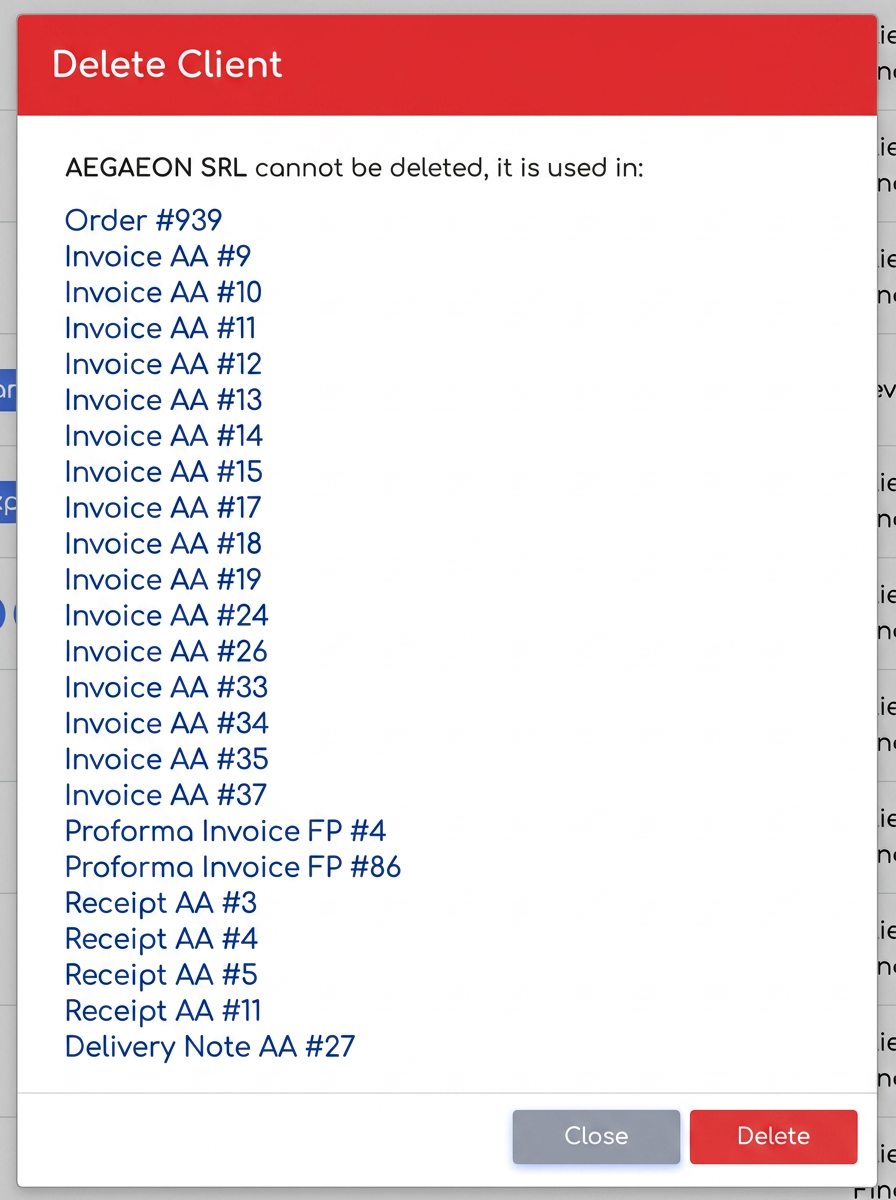
The new functionality in iflows introduces a restriction that prevents deleting a client if there are documents associated with them. This ensures data integrity and avoids accidental deletion of critical information.
How it works:
- If there are documents associated with the client you intend to delete (orders, invoices, receipts, notices), a warning message will appear.
- The warning message will list all associated documents, preventing the deletion of the client until these documents are properly managed.
Ability to Add Emojis in Email Notifications
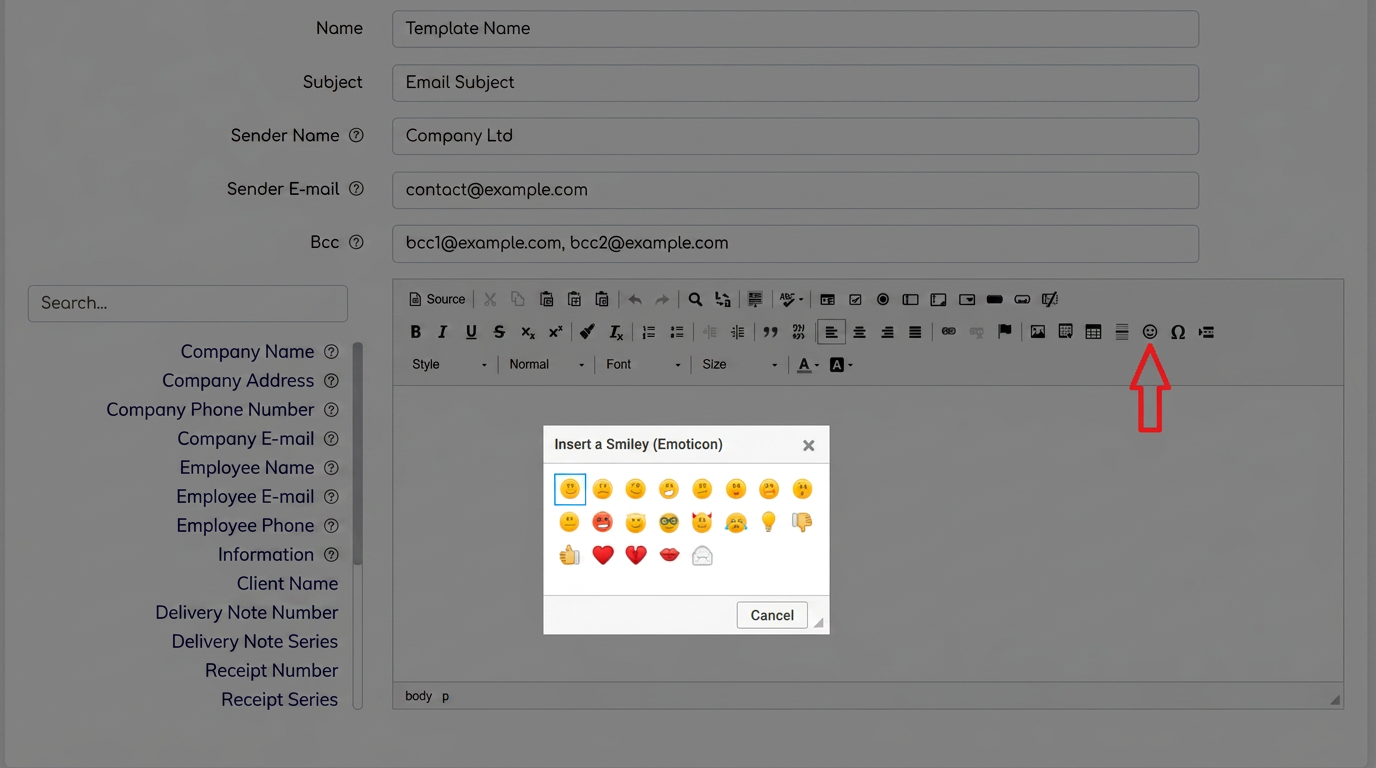
The new functionality in iflows allows adding emojis to email notifications, offering extra expressiveness and personalization to your communications.
How to use:
- Access the "Email Templates" section:
- Navigate to the dedicated email templates section in the main menu.
- Edit or create a new email template.
- Add emojis:
- In the editing toolbar, click on the emoji button (indicated by a smiley symbol).
- Select the desired emojis from the displayed list.
- Alternatively, you can use copy-paste to insert emojis from other sources.
- Use emojis in emails sent from the workflow:
- When sending emails directly from the workflow, you can also insert emojis to personalize the message.
Labels for "Entry" Type Documents
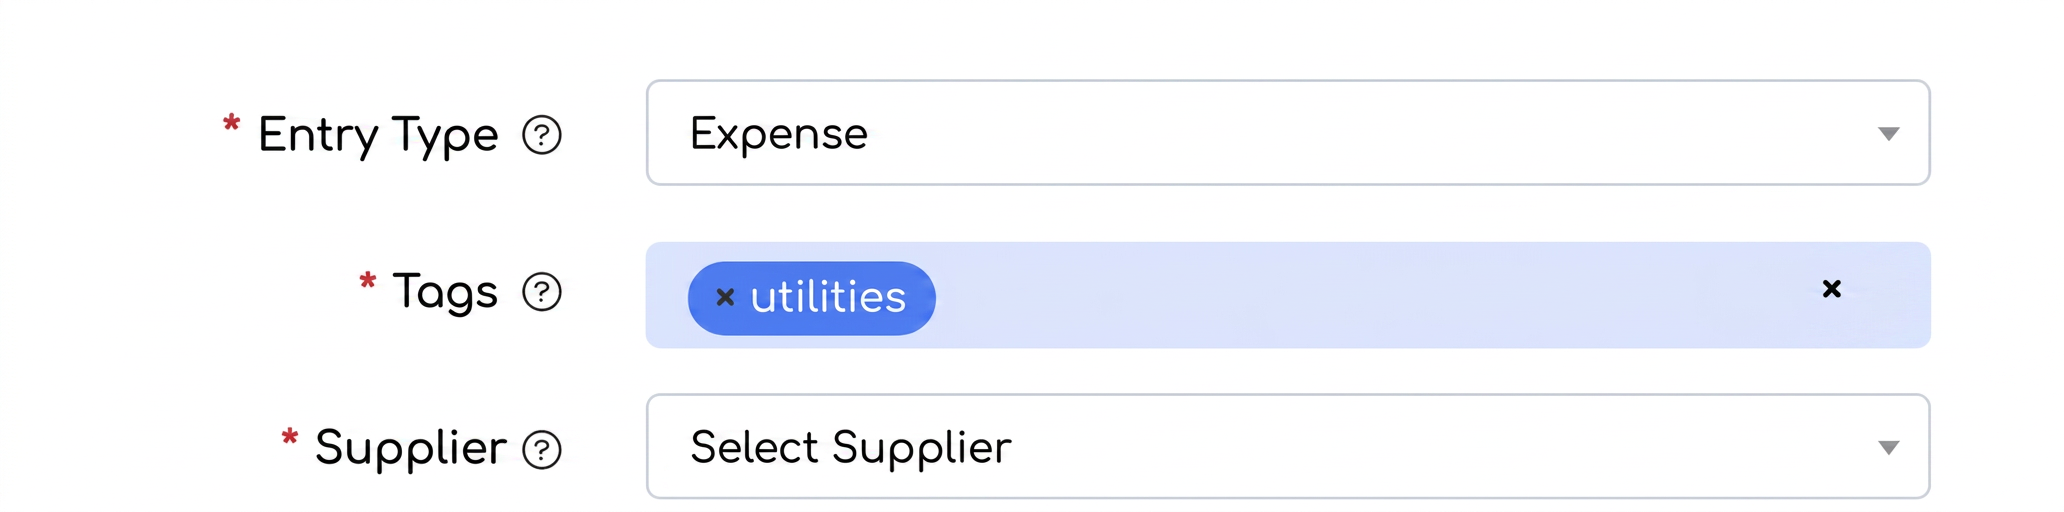
The new functionality in iflows allows adding labels for entry records (Intrări), thus facilitating better management and reporting of expenses, contributing to efficient financial organization.
Label Examples:
To help you get started, here are some examples of labels you can create:
- Utilities: electricity, water, gas, internet.
- Rent and Maintenance: space rentals, building maintenance, equipment repairs.
- Transport and Travel: internal transport, per diems and accommodation, fuel, vehicle maintenance.
- Marketing and Advertising: online advertising, events, promotional materials.
- External Services: consulting, legal services, accounting.
- IT and Telecommunications: software, hardware, telecommunication services.
- Taxes and Fees: profit tax, local taxes.
- Insurance: property insurance, civil liability insurance.
- Financial Expenses: interest, bank fees, exchange rate losses.
- Distribution and Delivery: goods transport, courier services, packaging costs.
How to use:
- Access the "Financial" section from the main menu.
- Navigate to "Entries" (Intrări) and select to edit an existing entry or create a new one.
- Add labels:
- In the "Labels" field, you can choose from the list of existing labels.
- To create a new label, type its name in the field. If it is not already in the list, a green "Add" button will appear, allowing the instant creation of the new label.
- Viewing labels:
- Labels will appear in the "Labels" column on the entries page.
- If you do not see this column, go to the right side of the page, near the "Delete" button, and click on the three-line symbol to set which filters appear on the page.
Multiple Label Filtering for Clients
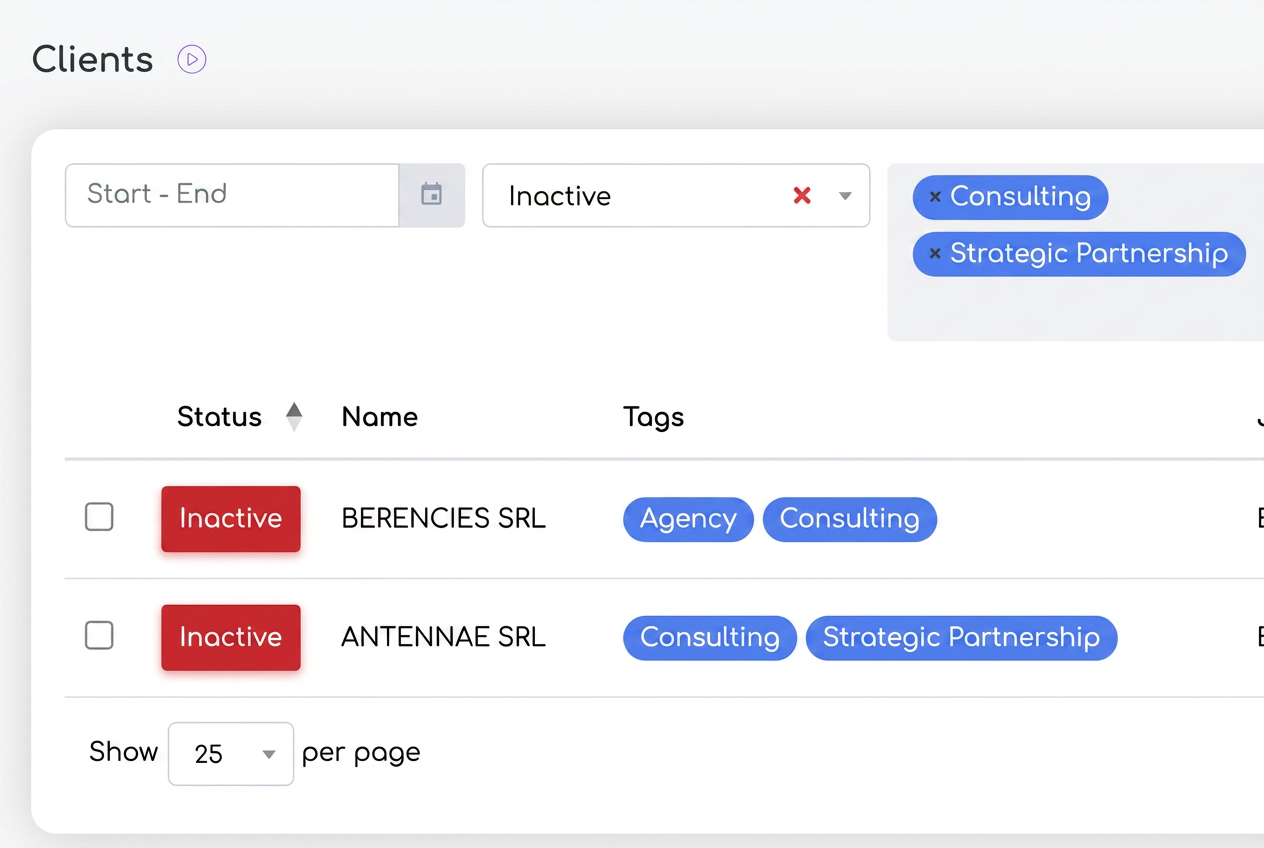
The optimization now allows multiple filtering of clients based on labels, providing a more precise and efficient search. Unlike the previous version where you could only use a single filter, you can now apply multiple filters simultaneously for better organization.
How to use:
- Access the "Clients" section from the main menu.
- Add multiple filters:
- In the dedicated labels field, select one or more labels from the existing list.
- Apply the filter:
- Once the desired labels are selected, the client list will be automatically filtered to show only clients that match the selected labeling criteria.
Ability to Add Documents for Suppliers
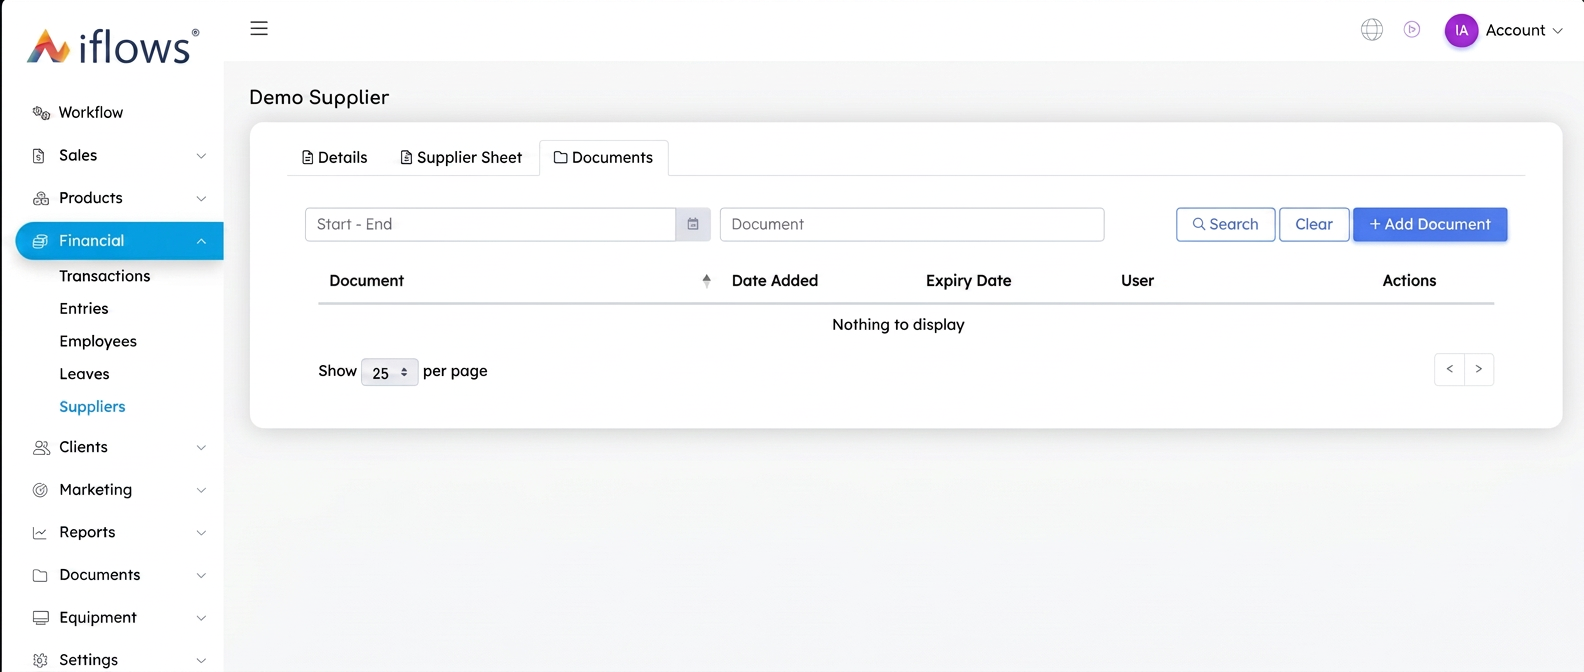
The new functionality allows adding documents for each supplier. This feature helps you keep all important documents in one place, ensuring efficient and organized management of supplier relationships.
How to use:
- Access the "Financial" section from the main menu.
- Navigate to "Suppliers" and select the desired supplier by clicking on the view symbol (eye icon).
- Access the "Documents" tab:
- You will see three tabs: Details, Supplier Sheet, and Documents.
- Select the "Documents" tab.
- Add documents:
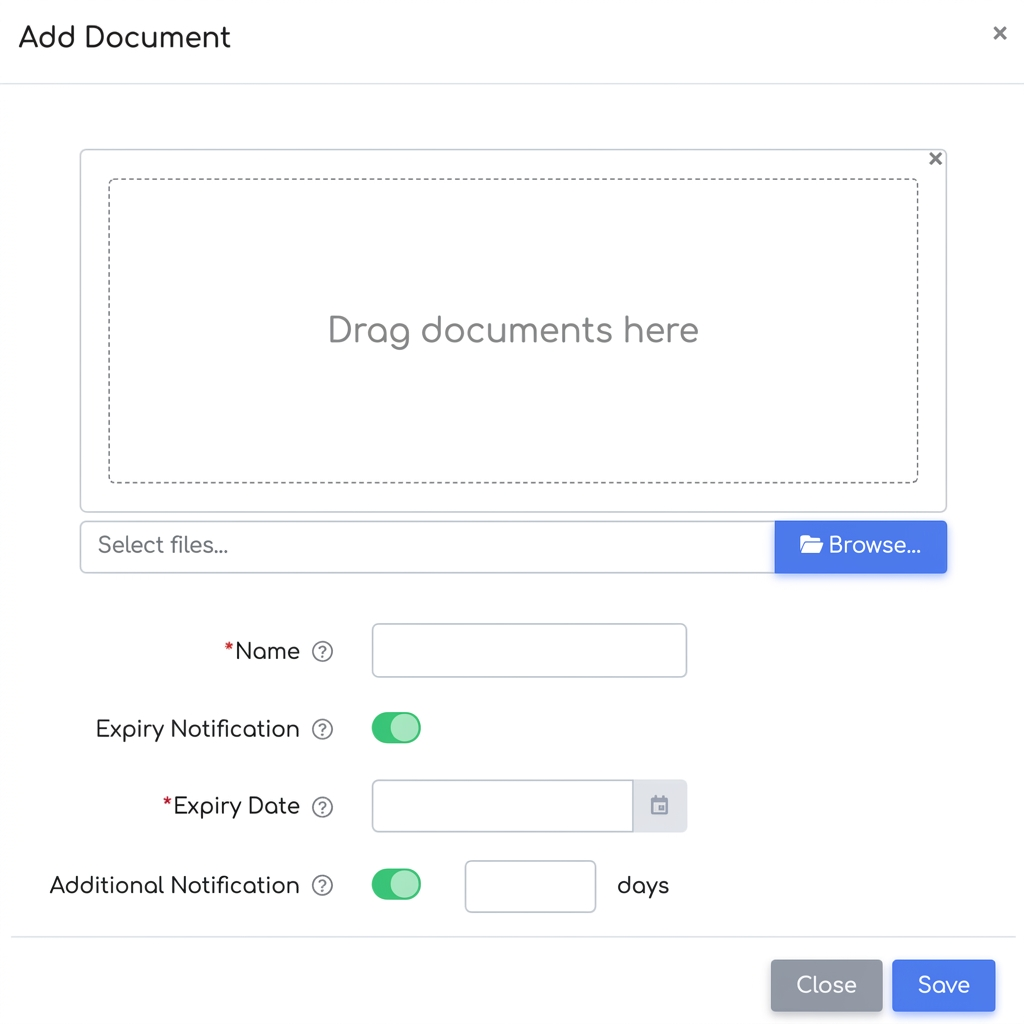
- Click the "Add Document" button.
- Drag and drop files or use the "Browse..." button to select the desired files from your device.
- Fill in the necessary fields, such as document name and expiration date.
- Enable expiration notifications if you want to receive alerts before the expiration date.
- Click "Save" to add the document.
Examples of documents that can be added:
- Contracts: Agreements and contracts signed with the supplier.
- Product catalogs: Lists and descriptions of products offered by the supplier.
- Other documents: Any other documents relevant to the supplier relationship, such as certifications, audit reports, etc.
Opportunities - Labels Button in List
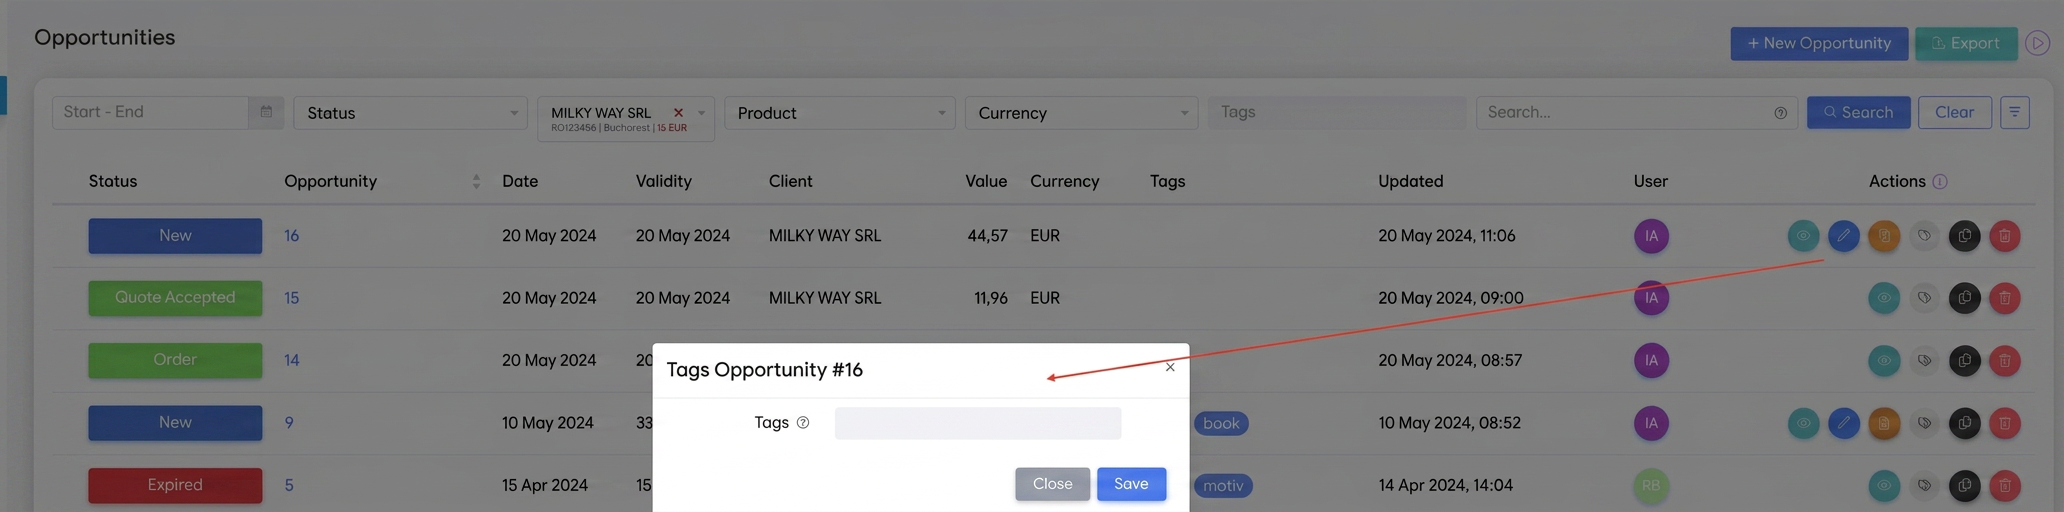
The new functionality introduces a labels button directly in the opportunities list, facilitating the addition or modification of labels without needing to access each opportunity's details.
How to use:
- Access the "Sales" section from the main menu.
- Navigate to "Opportunities".
- Add or modify labels:
- Next to each opportunity, find the label symbol.
- Click the label symbol to open the label editing window.
- Add new labels by typing in the dedicated field and pressing "Save".
- Delete existing labels by clicking the "x" next to each label.
Restocking Super Products from Credit Note Orders
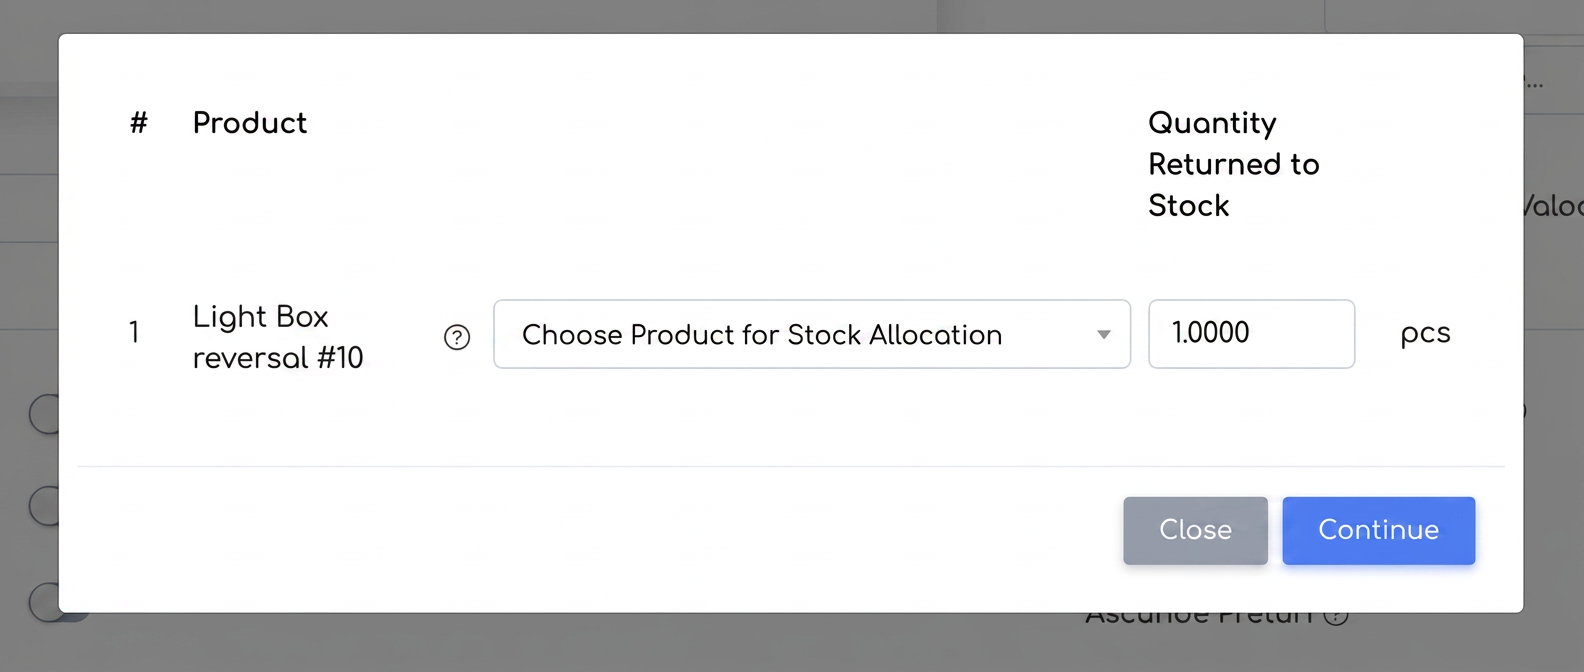
The new functionality allows adding super products back into stock directly from credit note (storno) orders, facilitating efficient management of stocks and returns.
How to use:
- Access the "Sales" section from the main menu.
- Navigate to "Orders" and select the order you wish to credit (storno).
- Generate the credit note document:
- Next to the order, click the generate document button and choose "Credit Note Order" (Comanda Storno).
- Allocate the super product to stock:
- If the credit note order contains a super product, a window will appear upon saving the order asking which product you wish to allocate the stock to.
- You can specify the quantity to be returned to stock. If you do not wish to return the product to stock, set the quantity to 0, in which case the product will be considered a loss.
Offers - Adding Comments
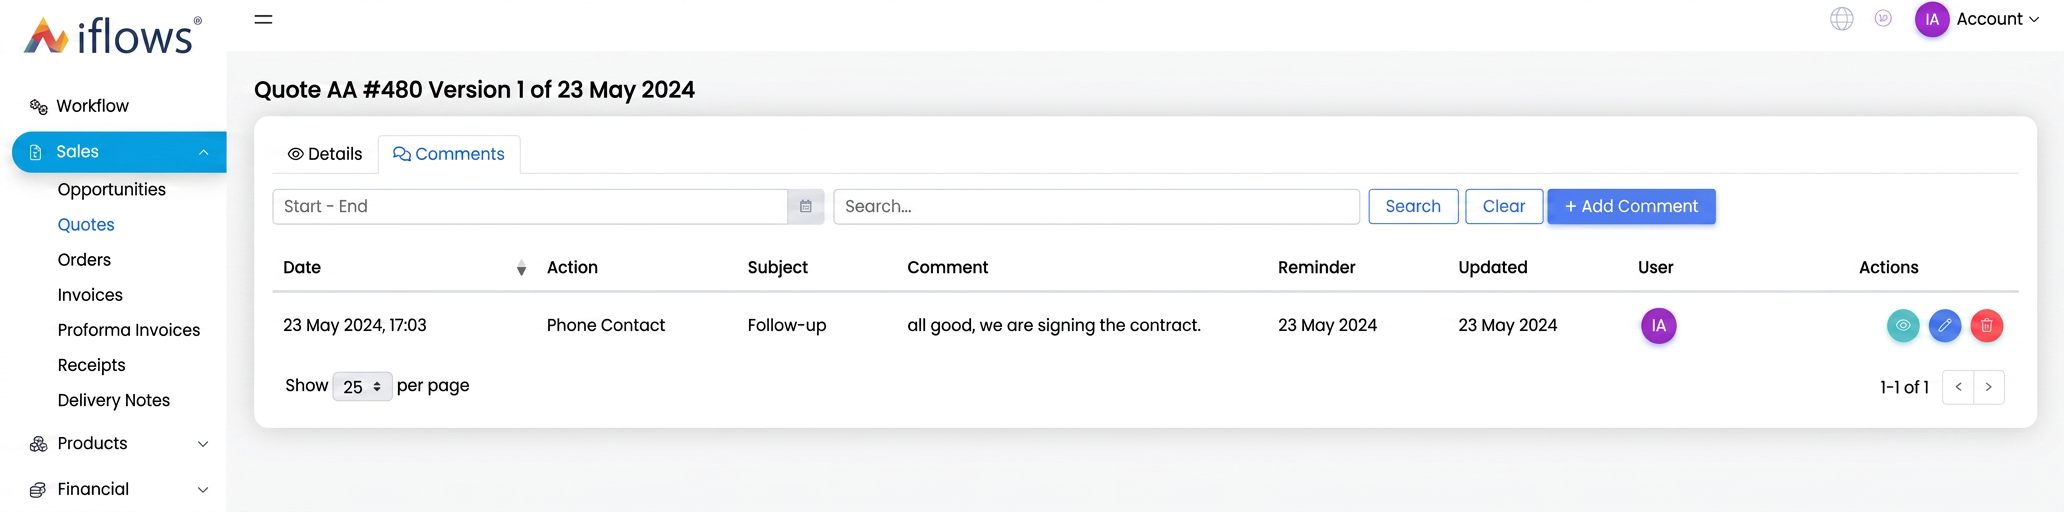
The new functionality in iflows allows adding comments directly in the offer view mode, facilitating the tracking of details and important notes associated with each offer.
How to use:
- Access the "Sales" section from the main menu.
- Navigate to "Offers" and select the desired offer by clicking the view symbol.
- Add comments:
- In the offer view mode, access the "Comments" tab.
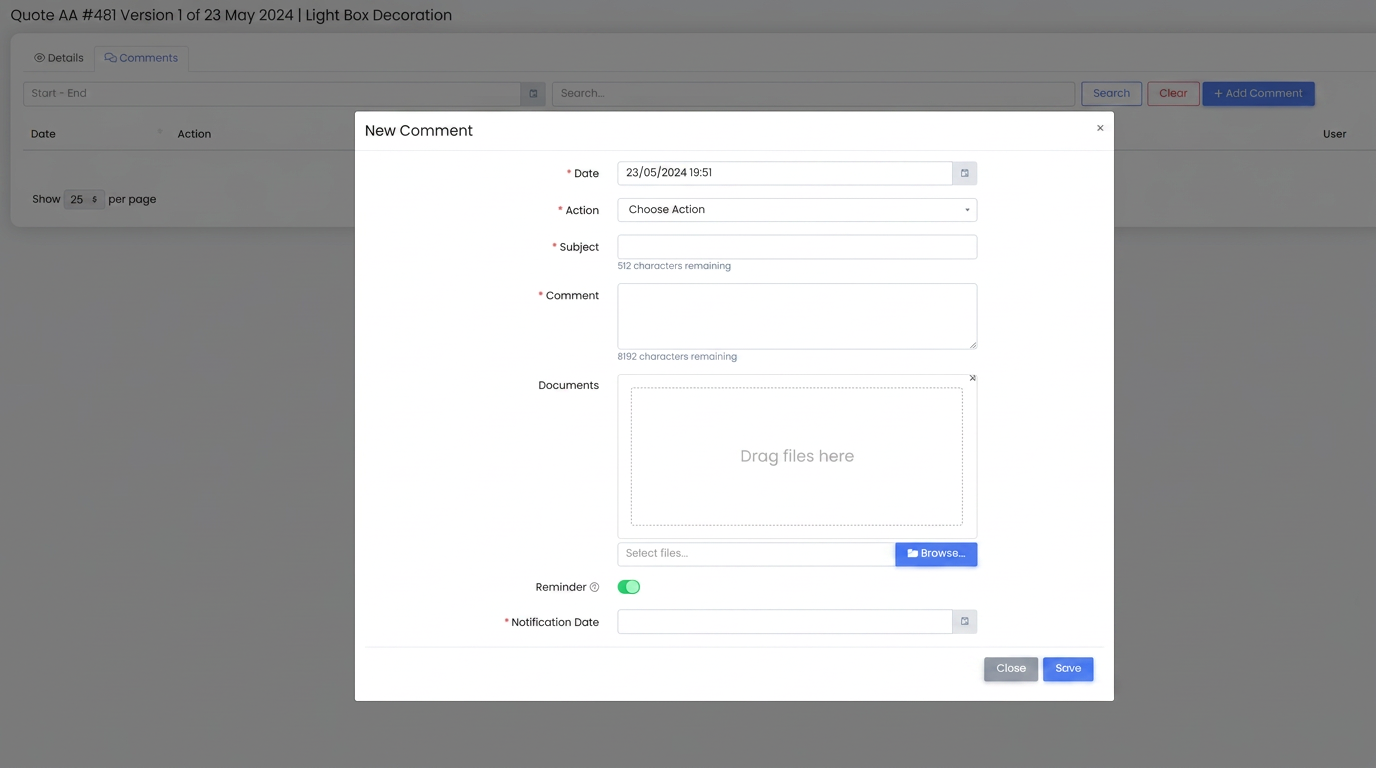
- Click the "Add Comment" button.
- Fill in the required fields: Date, Action, Subject, Comment, and optionally, Documents.
- If necessary, enable the reminder notification and set the notification date.
- Click "Save" to add the comment.
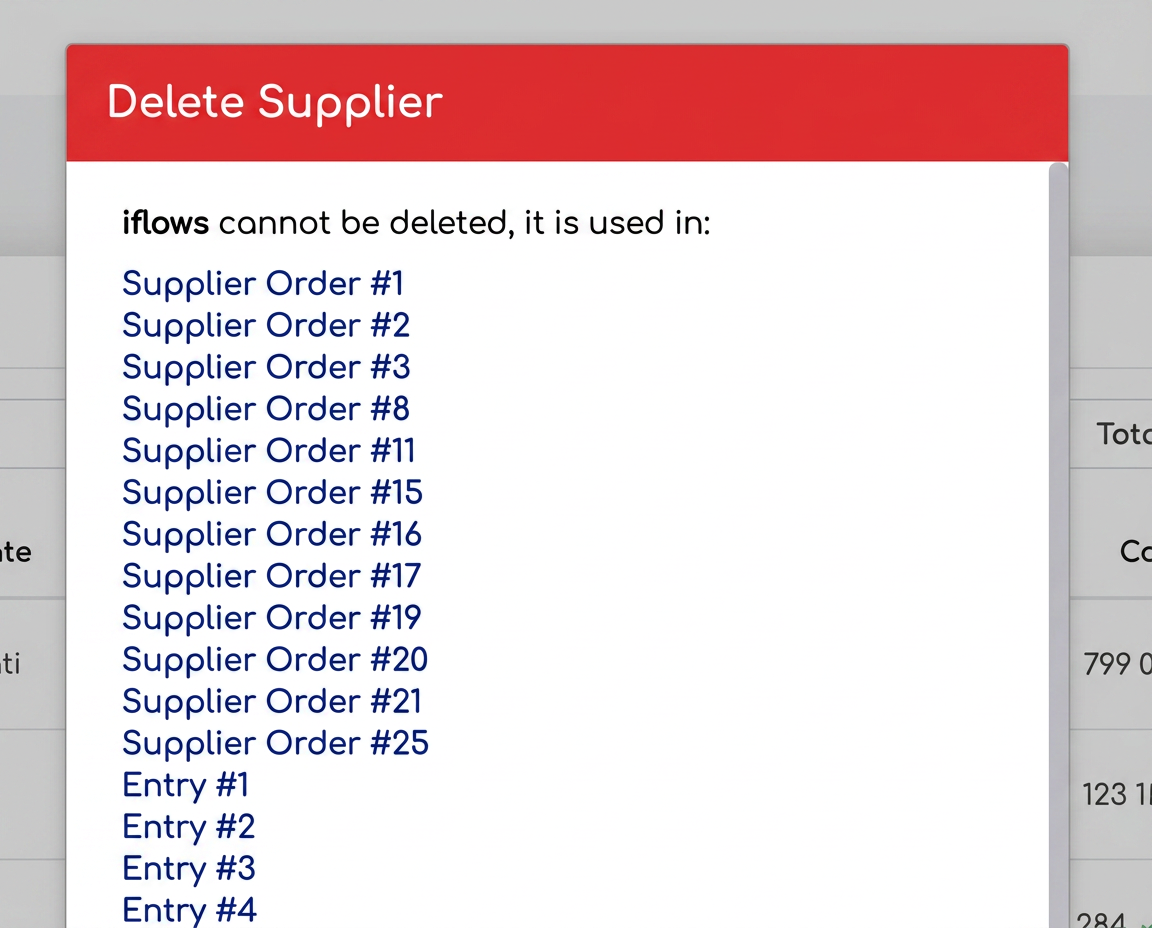
Supplier Deletion Restriction when Associated Documents Exist
The new restriction prevents deleting a supplier if there are documents associated with them. This ensures data integrity and avoids accidental deletion of critical information.
How it works:
- Access the "Financial" section from the main menu.
- Navigate to "Suppliers" and select the supplier you wish to delete.
- Start the deletion process:
- If there are documents associated with the supplier (orders, entries), a warning message will appear.
- The warning message will list all associated documents, preventing the deletion of the supplier until these documents are properly managed.
If you have suggestions or ideas that could bring improvements to the iflows platform, we encourage you to send us feedback. We are dedicated to continuous improvement and assure you that all suggestions will be carefully evaluated.