
The iflows platform is updated regularly for improvements and new functionalities.
Opportunity Tags
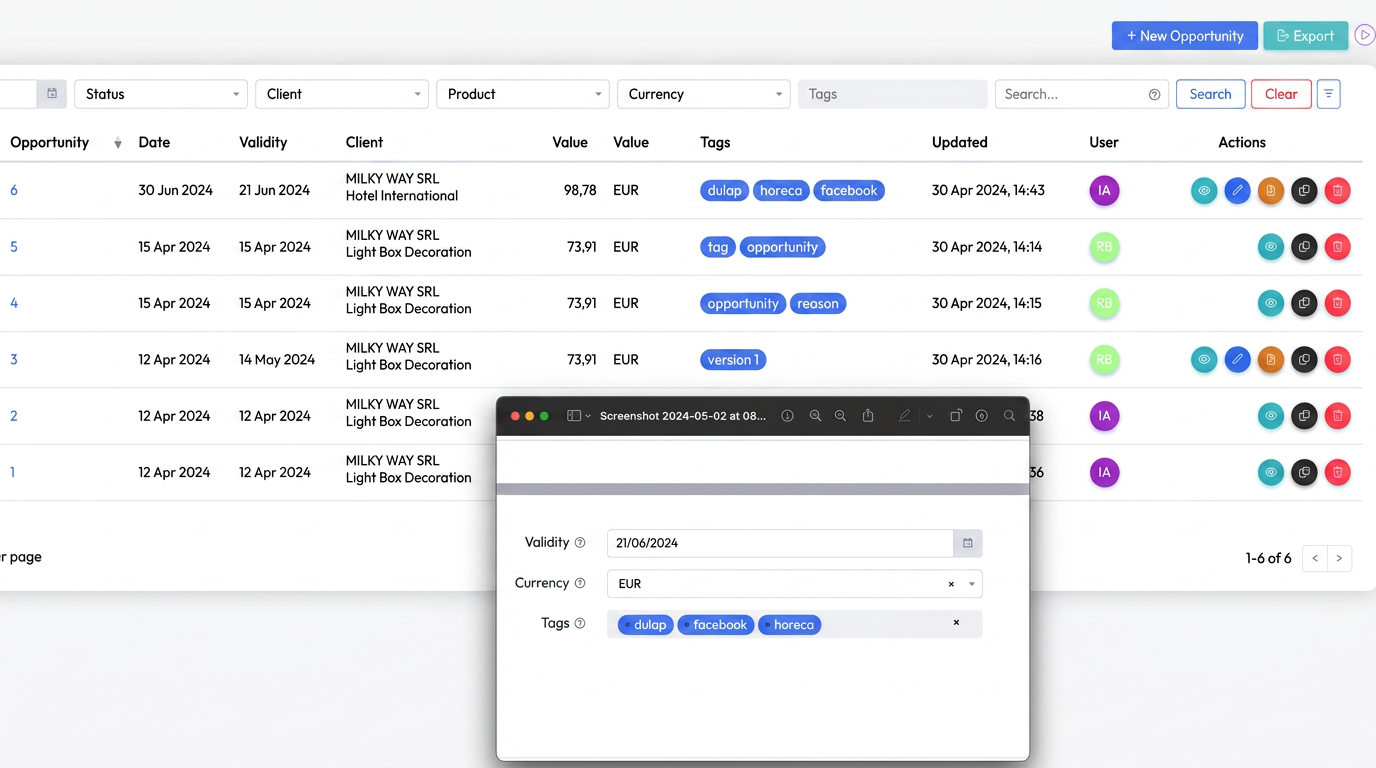
Tagging opportunities in iflows is a newly introduced feature that allows users to add custom tags to each sales opportunity recorded in the system. This feature helps in the quick and efficient classification of opportunities, facilitating their filtering and identification based on specific criteria. Tags can range from the lead stage (e.g., "qualified", "unqualified", "with potential") to specific information related to campaigns or events (e.g., "Facebook", "horeca").
Utility:
- Quick Identification: Using tags allows for the rapid identification of opportunities based on defining characteristics, optimizing customer portfolio management time.
- Efficient Filtering: By tagging, users can filter opportunities based on specific criteria, thus facilitating the management and tracking of sales progress.
- Customization: Tags offer the possibility to customize the way opportunities are classified according to specific business needs, contributing to better organization and accessibility.
How to use:
- Adding Tags at Opportunity Creation: When creating a new opportunity in the sales section, you will have a field named "Tags" where you can enter one or more tags as needed.
- Editing Tags: For existing opportunities, you can add or modify tags by accessing the opportunity edit option and using the "Tags" field to make the desired adjustments.
- Filtering by Tags: Use the iflows search and filter function to find specific opportunities based on the applied tags, simplifying customer and sales portfolio management. Ensure you have enabled the "Tags" option in the filtering options.
Offer Tags
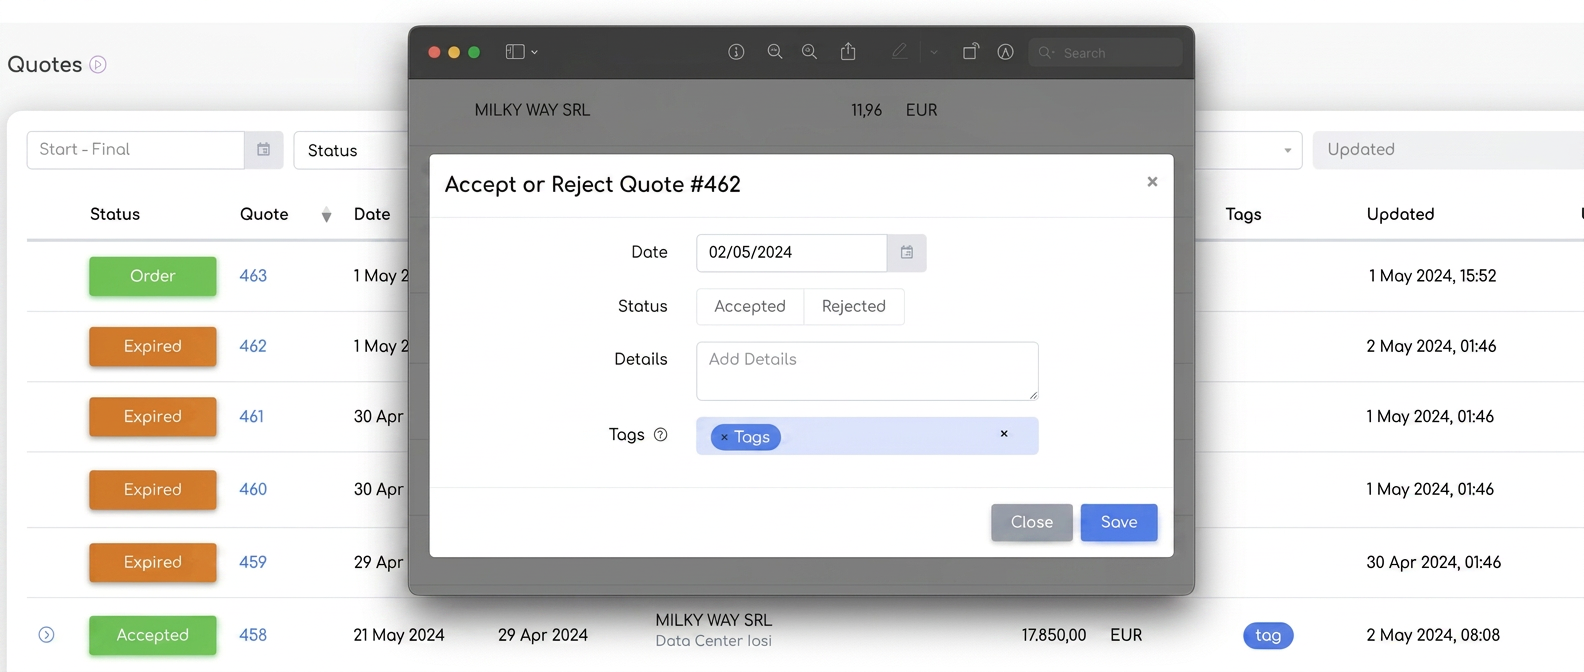
Similar to the opportunity tagging functionality, iflows now allows the application of tags to offers as well.
How to use:
- Adding Tags at Offer Creation or Editing: When creating or editing an offer in the "Offers" section, there is a "Tags" field where users can enter relevant tags for that specific offer.
- Modifying Tags: Tags can be modified at any time by accessing the offer edit option, allowing for quick updates of information in a dynamic way.
- Filtering Offers Based on Tags: Users can use the system filters to search for and display offers based on applied tags, thus facilitating the rapid identification of offers requiring immediate attention or review.
Offer Optimization - Customizing PDF Documents Inserted in the Offer
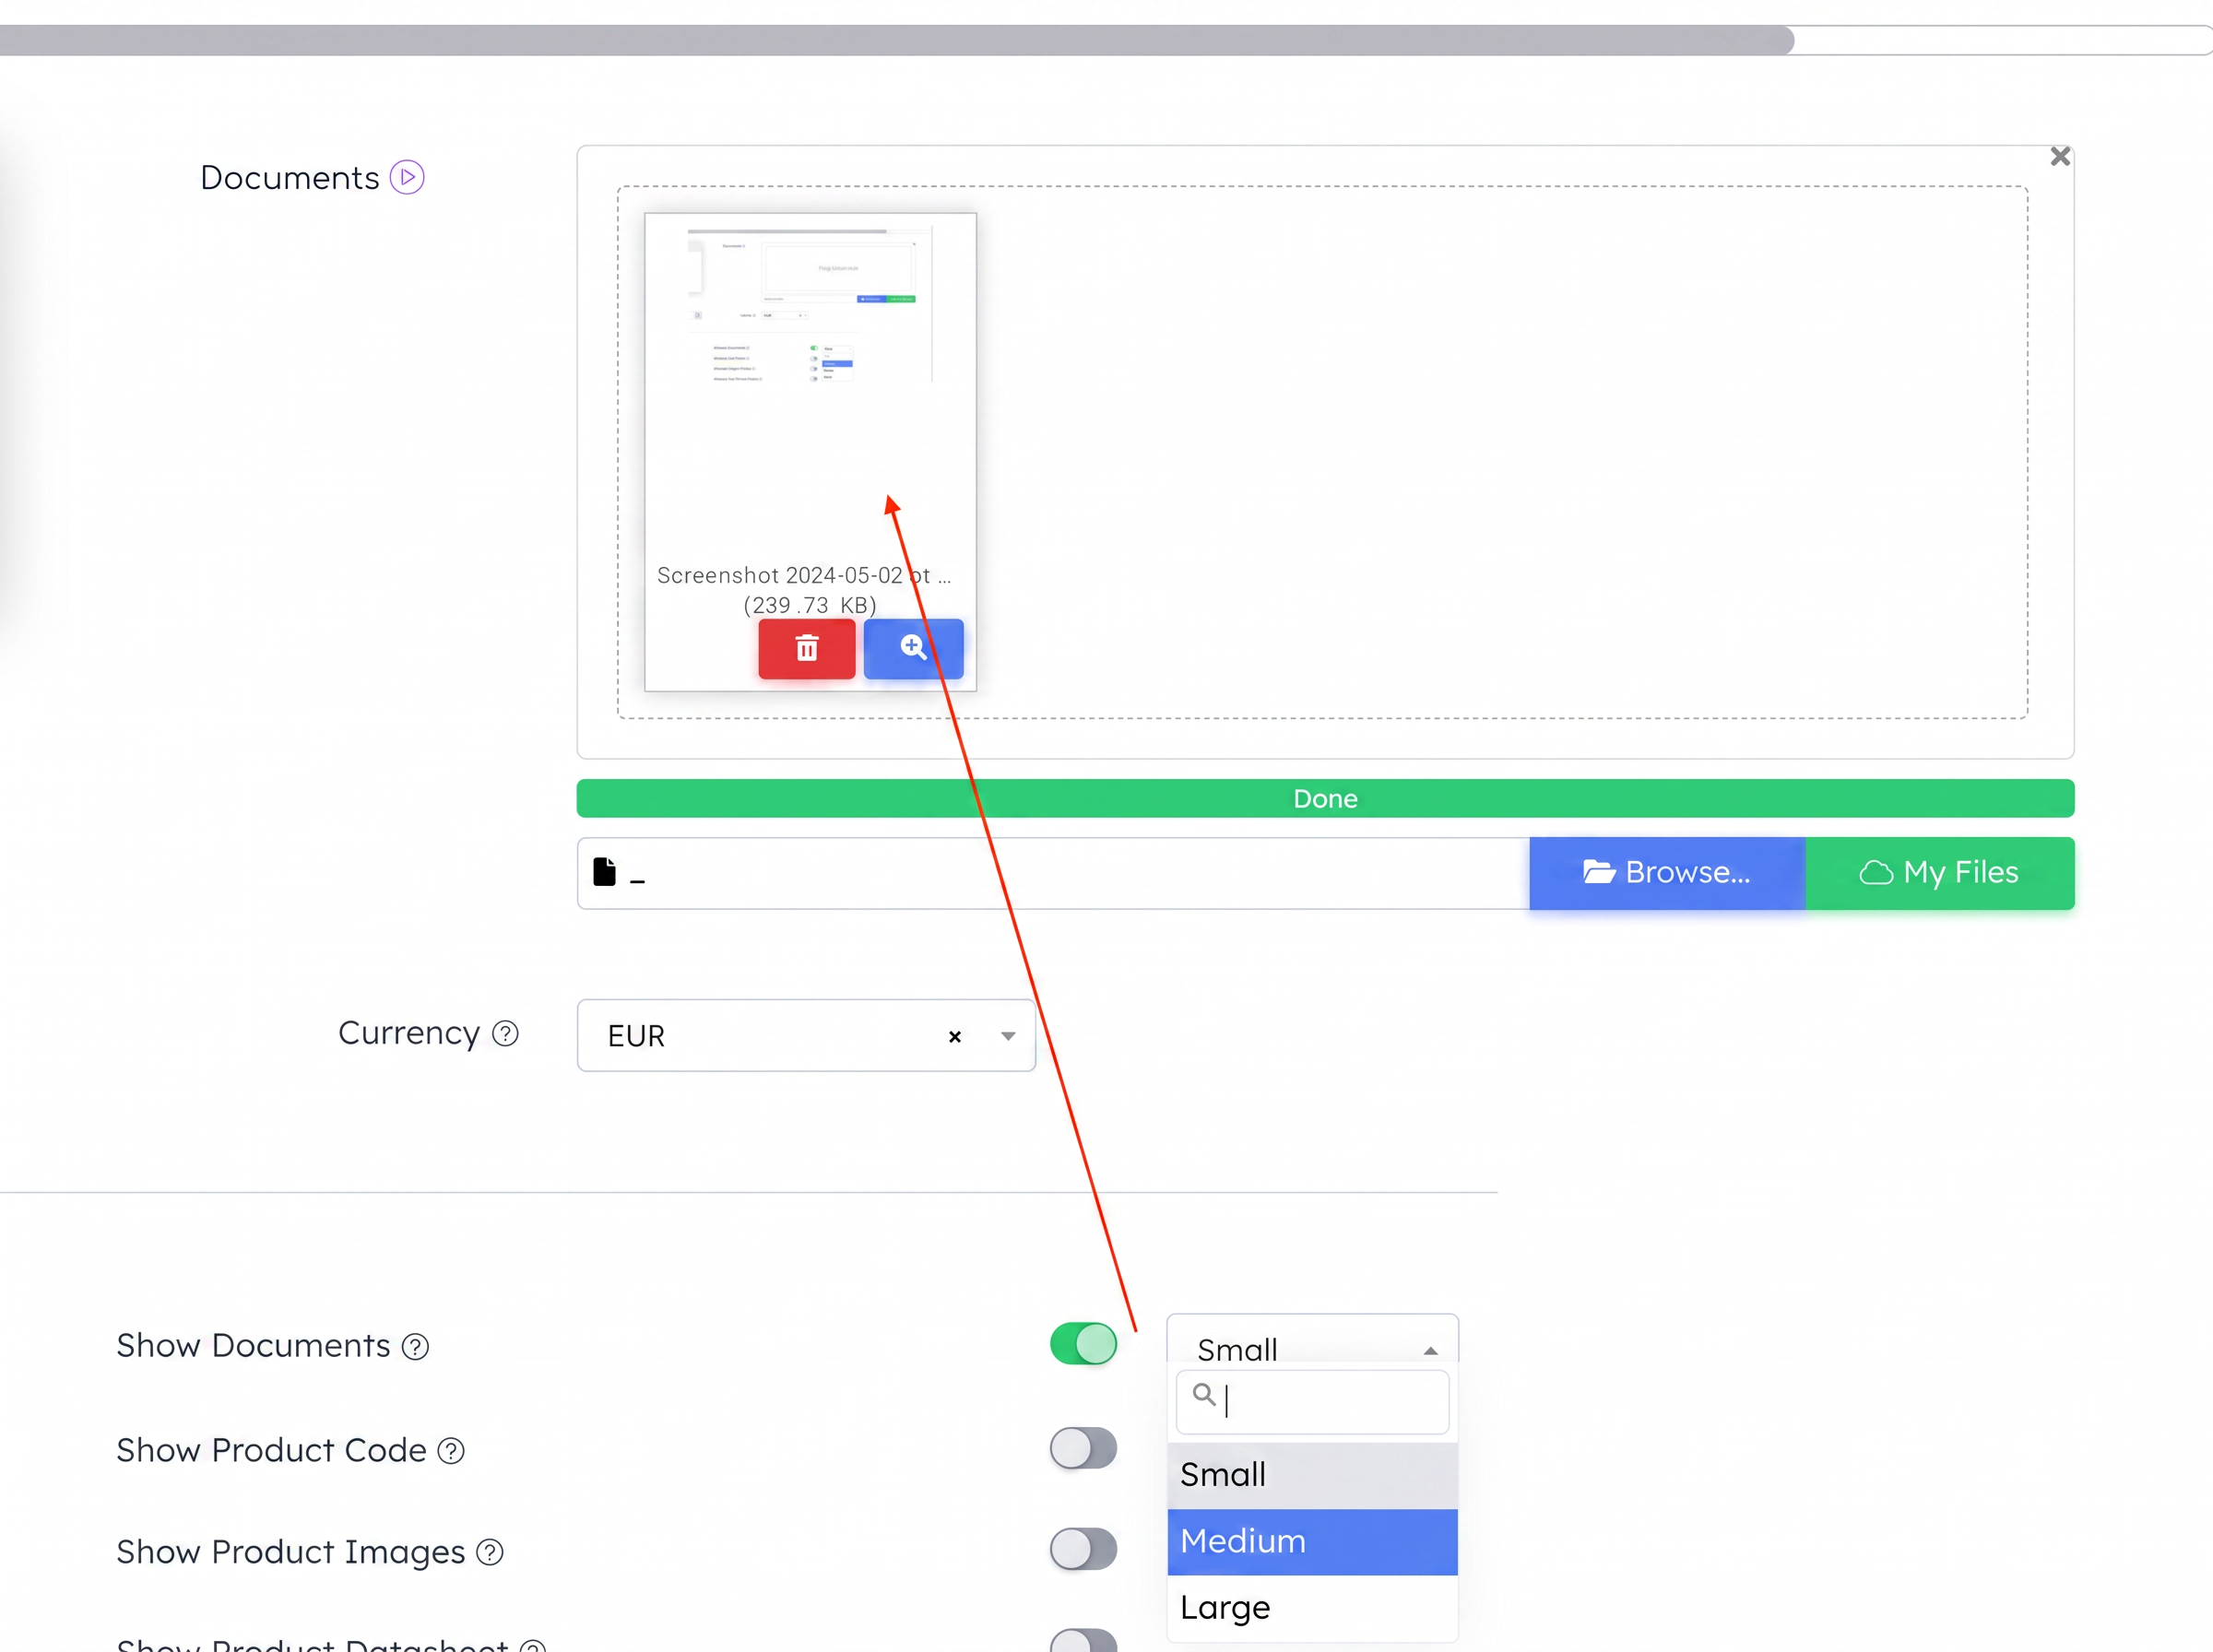
Users can now decide whether or not to include documents in the final PDF of the offer and can adjust the size of included images for a cleaner and more organized presentation.
Additionally, this optimization allows for the creation of seamless documents on a single page without requiring specifications on separate pages, even if the offer contains extensive information.
How to use:
- Choosing Document Inclusion: During offer editing, users can select whether or not to include documents in the final PDF by toggling a button.
- Setting Image Size: In the same offer configuration menu, users can choose the size of images to be included in the PDF (small, medium, large), ensuring they fit specific presentation needs.
- Generating the PDF: After adjusting the settings, the PDF can be generated with all adjustments applied, ensuring an optimized and personalized presentation of the offer.
Attachment Capacity Extension: Sending Emails with up to 20 Files
The limit for email attachments has been increased to 20 files. This change allows for sending multiple documents in a single email, facilitating more efficient and professional communication with clients or partners.
How to use?
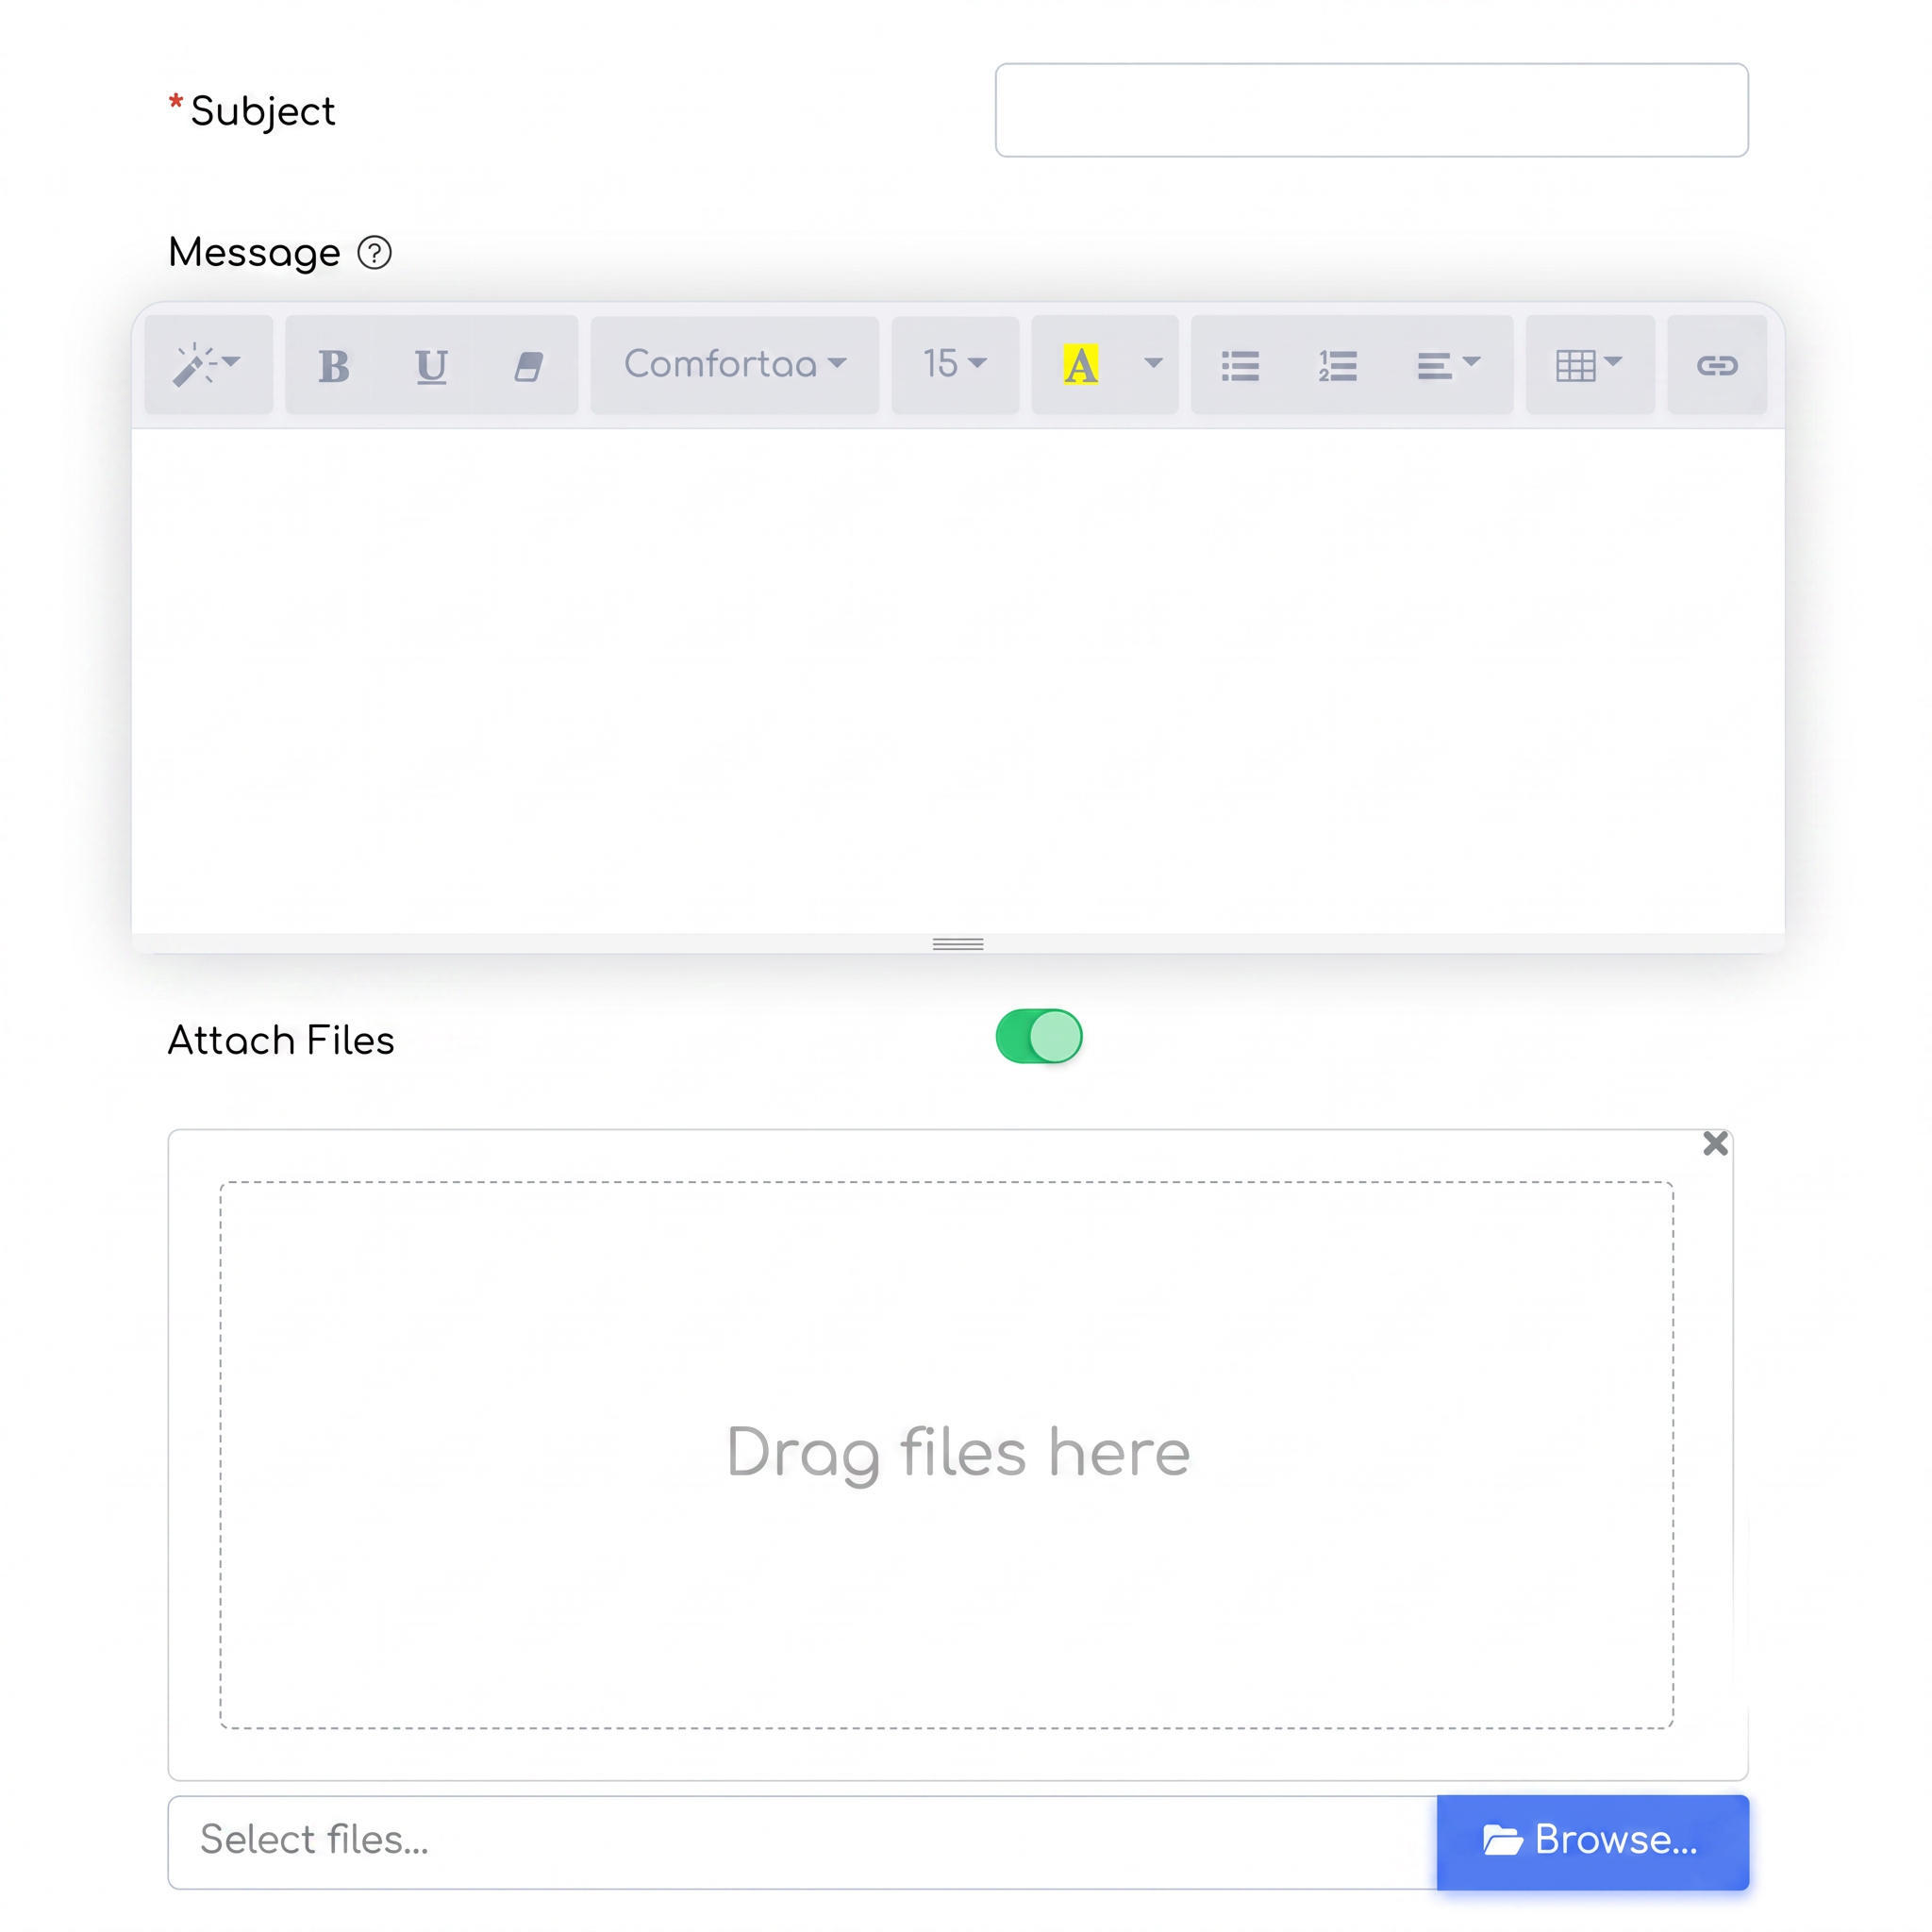
- Adding Files: Users can add up to 20 attachments per email by selecting the desired files from the system or by dragging and dropping them into the dedicated attachment area.
- Sending from the Workflow: Within the workflow (if the "send email" instruction has been configured), emails can be sent with the necessary documents attached.
- Sending from Specific Sections: Emails can also be sent directly from sections such as offers or invoices, where users can quickly select relevant documents for attachment and sending.
Creating Advance Invoices and Advance Reversal Alert
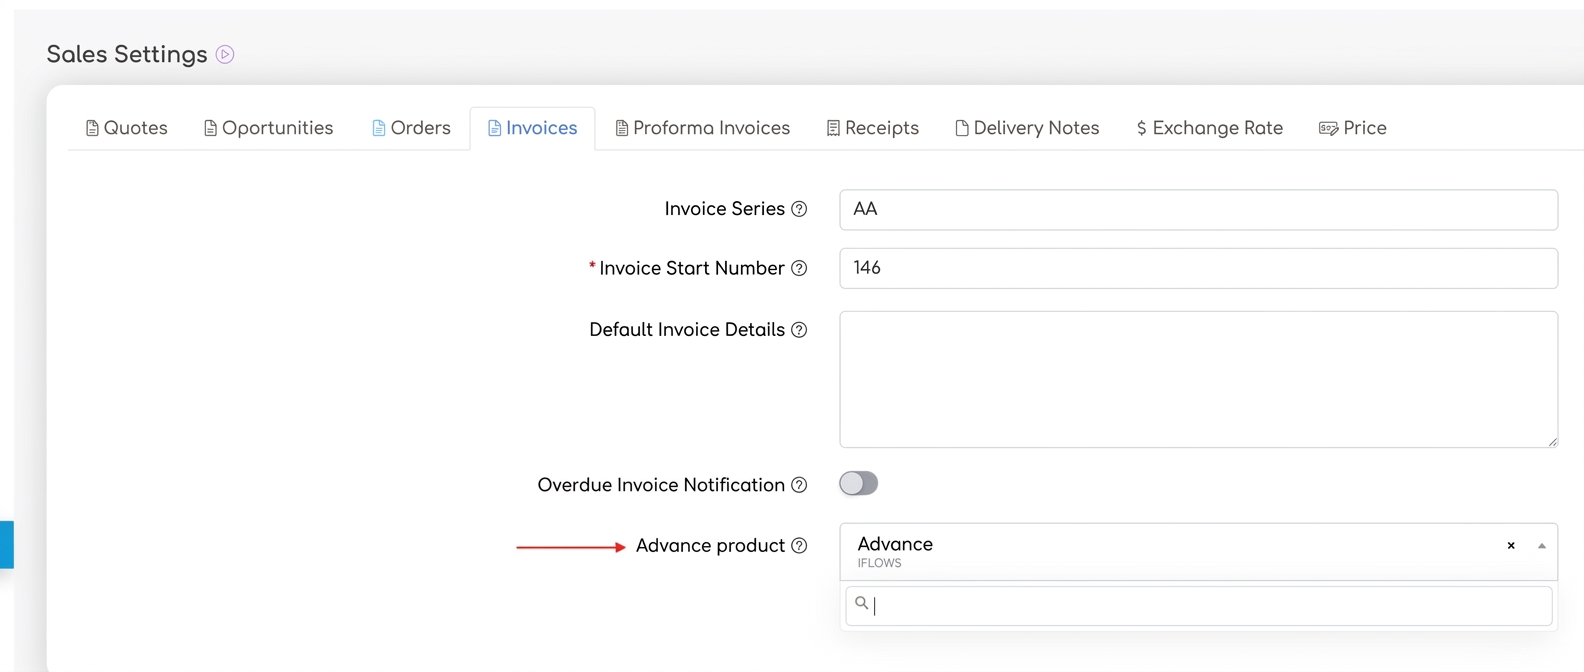
The platform now allows for the simplified configuration and generation of advance invoices. Users must initially configure an "advance" type product in the settings section to be used automatically when generating advance invoices. This configuration allows for the uniform and automated application of advances.
How to use?
- Configuring the Advance Product: Go to the "Settings" - "Sales" - "Invoices" section to add and configure the product dedicated to advances. This setting will allow the use of the product in any advance invoice.
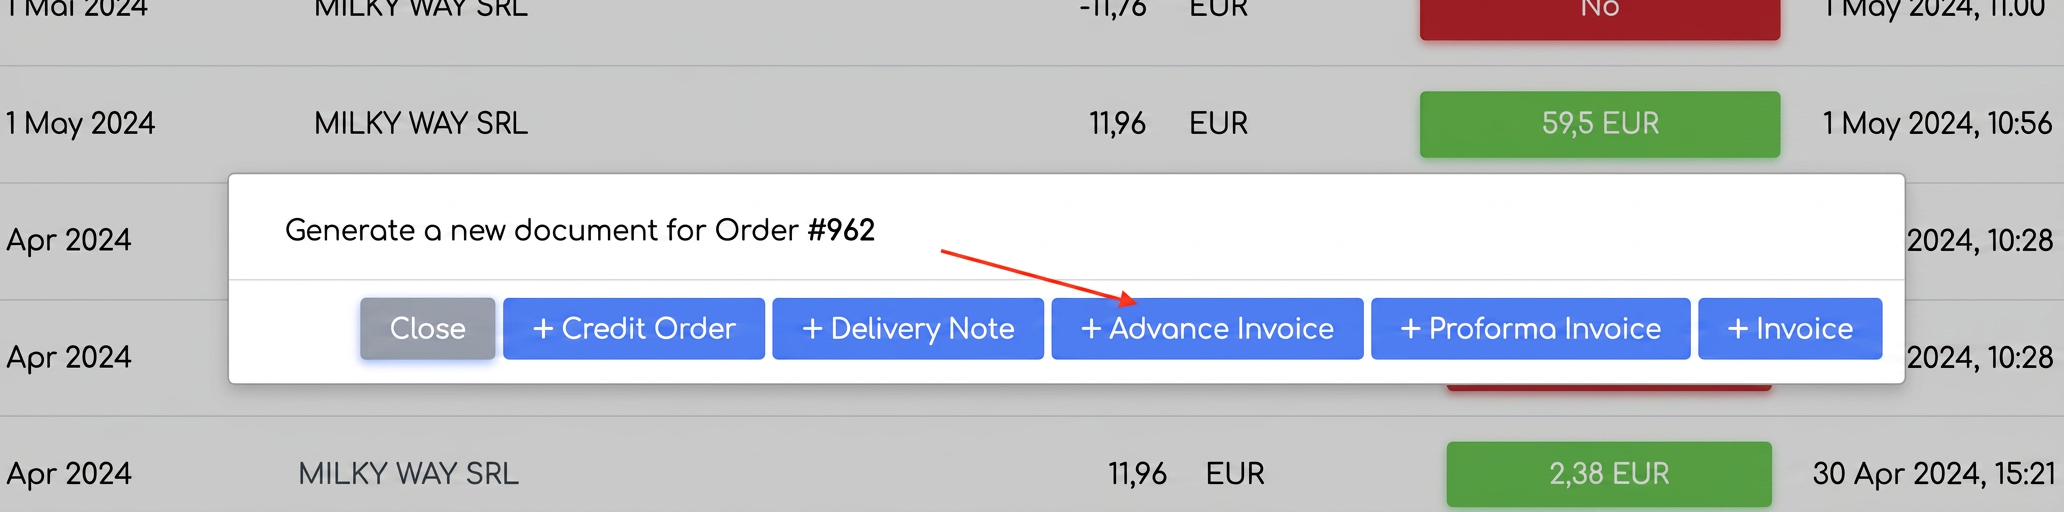
- Generating the Advance Invoice: In the "Orders" section, click on the orange document generation symbol located on the desired order row, and select "Advance Invoice".
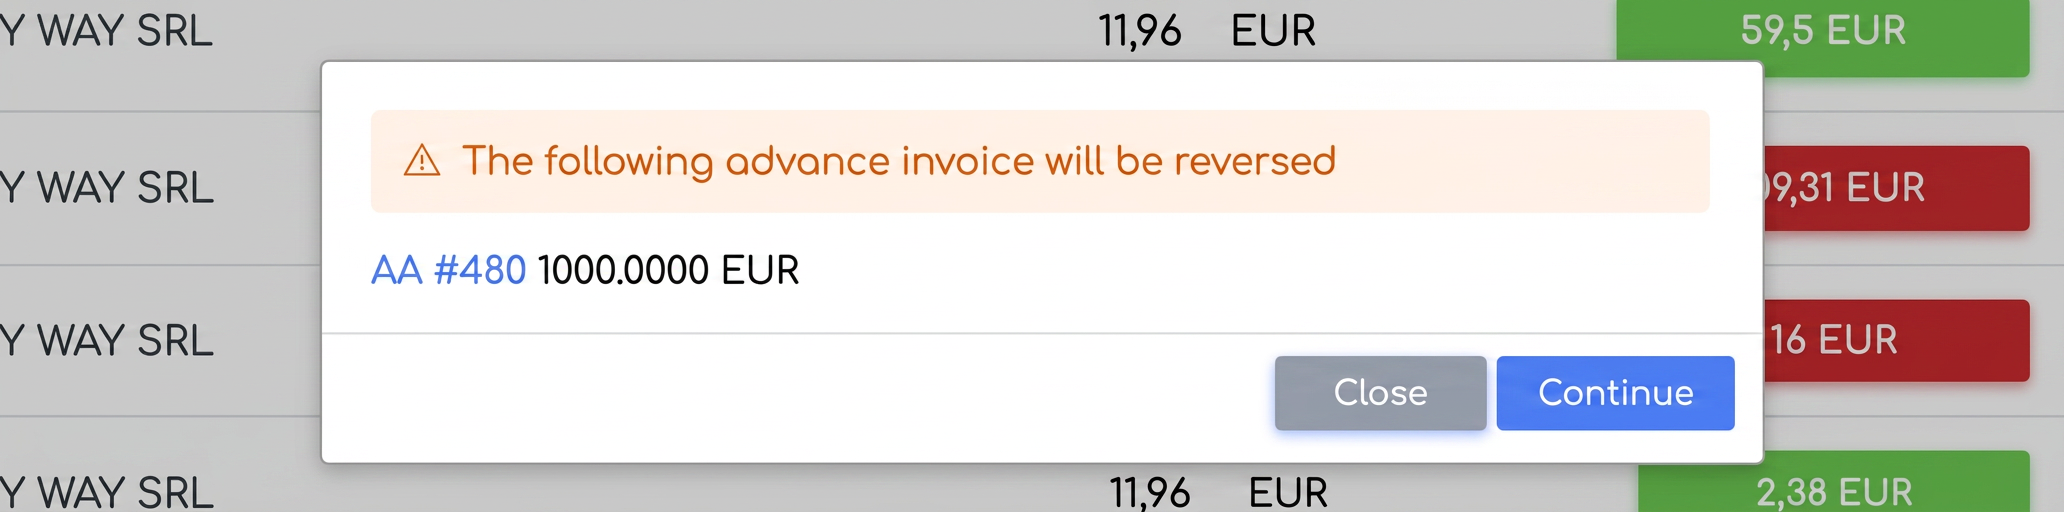
- Automatic Verification and Reversal: Once the advance invoice is created, the system will indicate the invoiced value in the "Invoiced" column. When generating a new invoice on the same order, the system will alert about the need to reverse (storno) the advance. If you proceed with the generation, the system will automatically include all order details and reverse the advance.
Utility:
- Simplified Initial Configuration: Allows for the configuration of a dedicated product for advances, which will be used subsequently in all advance invoices, ensuring consistency in financial documents.
- Efficient Generation of Advance Invoices: Facilitates the rapid creation of advance invoices directly from the orders section, saving time and minimizing errors.
- Automatic Reversal Monitoring: Introduces an alert system that notifies users when an advance invoice requires a reversal (storno) before issuing a new final invoice.
Billing Alert for Quantities Greater than the Order
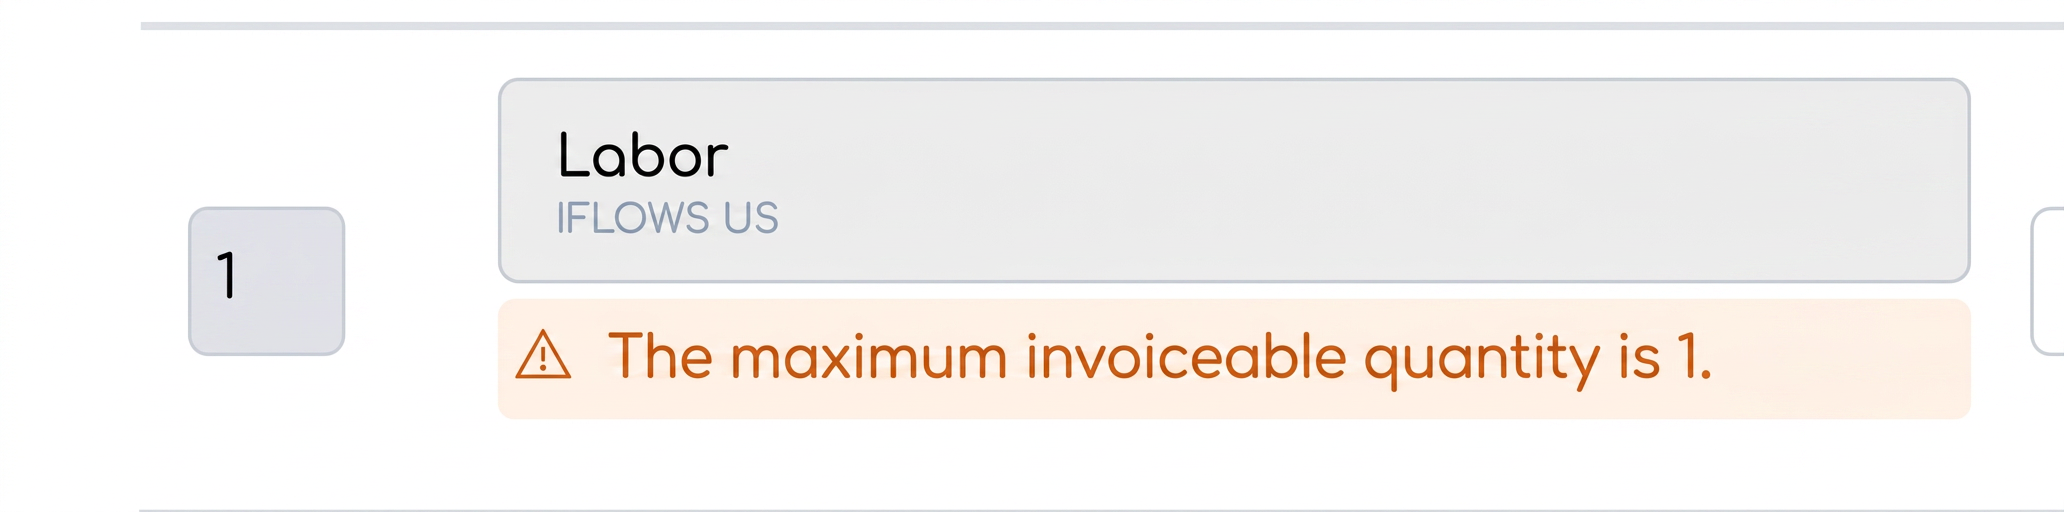
The system now has an alert that prevents billing a quantity greater than the one in the order. This ensures that issued invoices are always in accordance with approved orders, thus preventing accidental overbilling.
How does it work?
- Verification at Billing: When you enter the quantity on the invoice being created, the system will automatically check if the entered quantity is in accordance with the original order.
- Reaction to Alert: If the entered quantity exceeds the ordered quantity, an alert will appear indicating this fact. The user must adjust the quantity according to the order or update the order before proceeding with billing.
- Updating the Order: If it is necessary to bill a larger quantity, return to the original order and modify it to reflect the desired quantity. After updating, you can return and complete the invoice according to the new specifications.
Through this functionality, the system provides an additional guarantee that all invoices are correctly based on verified and approved orders, eliminating discrepancies between order and billing.
Importing Products into Invoices
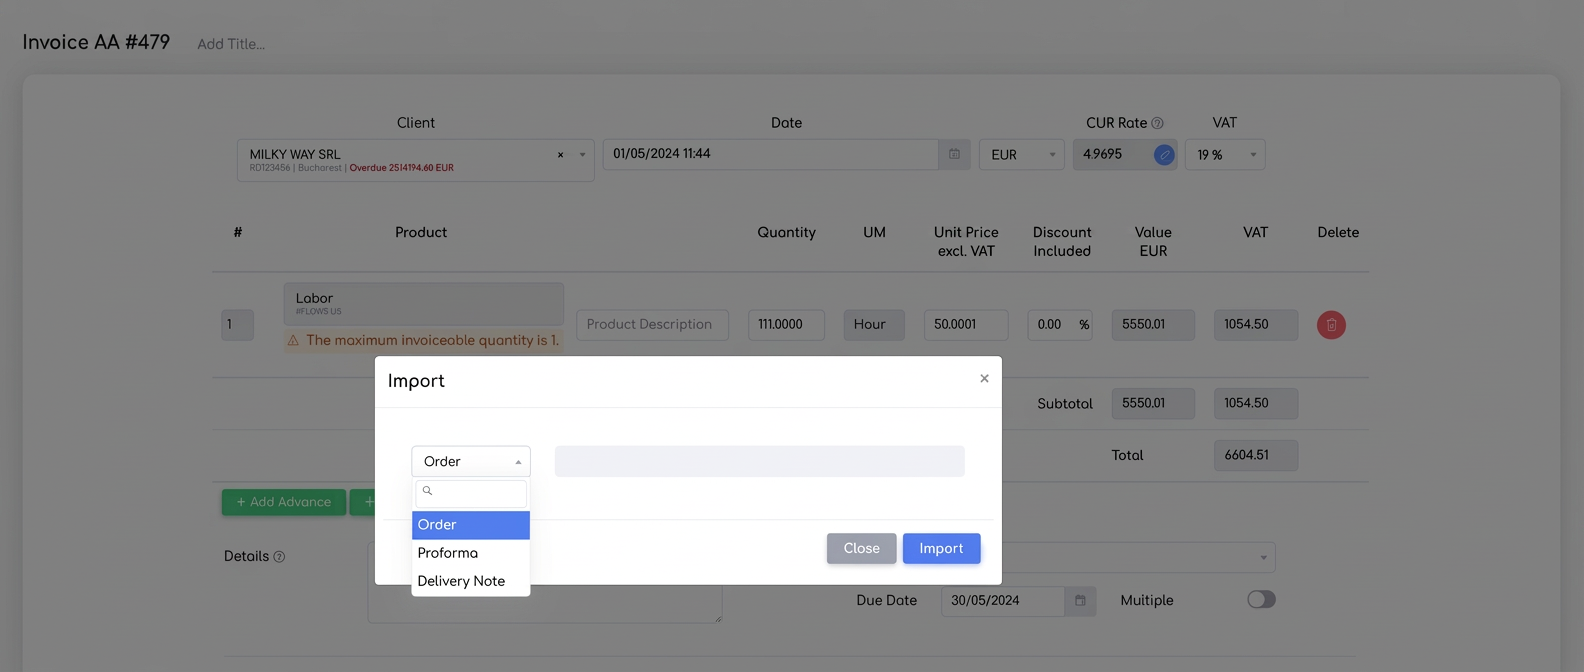
The recent update changes the way products are added to invoices, eliminating the manual addition option and introducing an import function. Products can now be added to invoices exclusively by direct import from existing orders, proforma invoices, or delivery notes (Aviz). This ensures data consistency between associated documents and the invoice.
Quick Reversal Facility for Advance Invoices
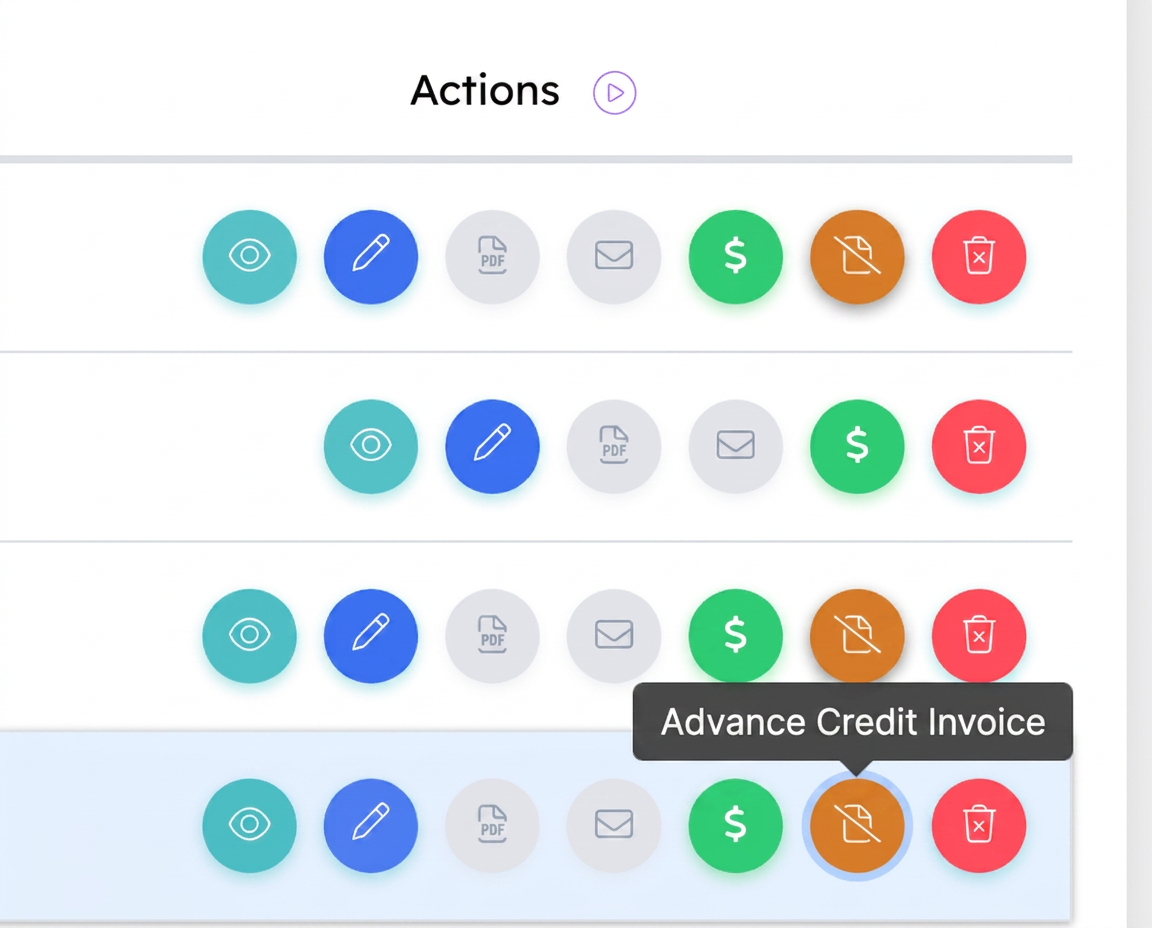
The system introduces an automatic detection function for invoices containing advances, offering the possibility to reverse (storno) these invoices directly from the actions interface.
How does it work?
- Identifying Invoices with Advances: Invoices containing advances are automatically detected by the system and highlighted in the actions interface.
- Reversing the Invoice: Access the reversal (storno) option directly from the actions tab associated with that invoice. This button is enabled only for advance invoices.
Changing the Default Currency for Orders
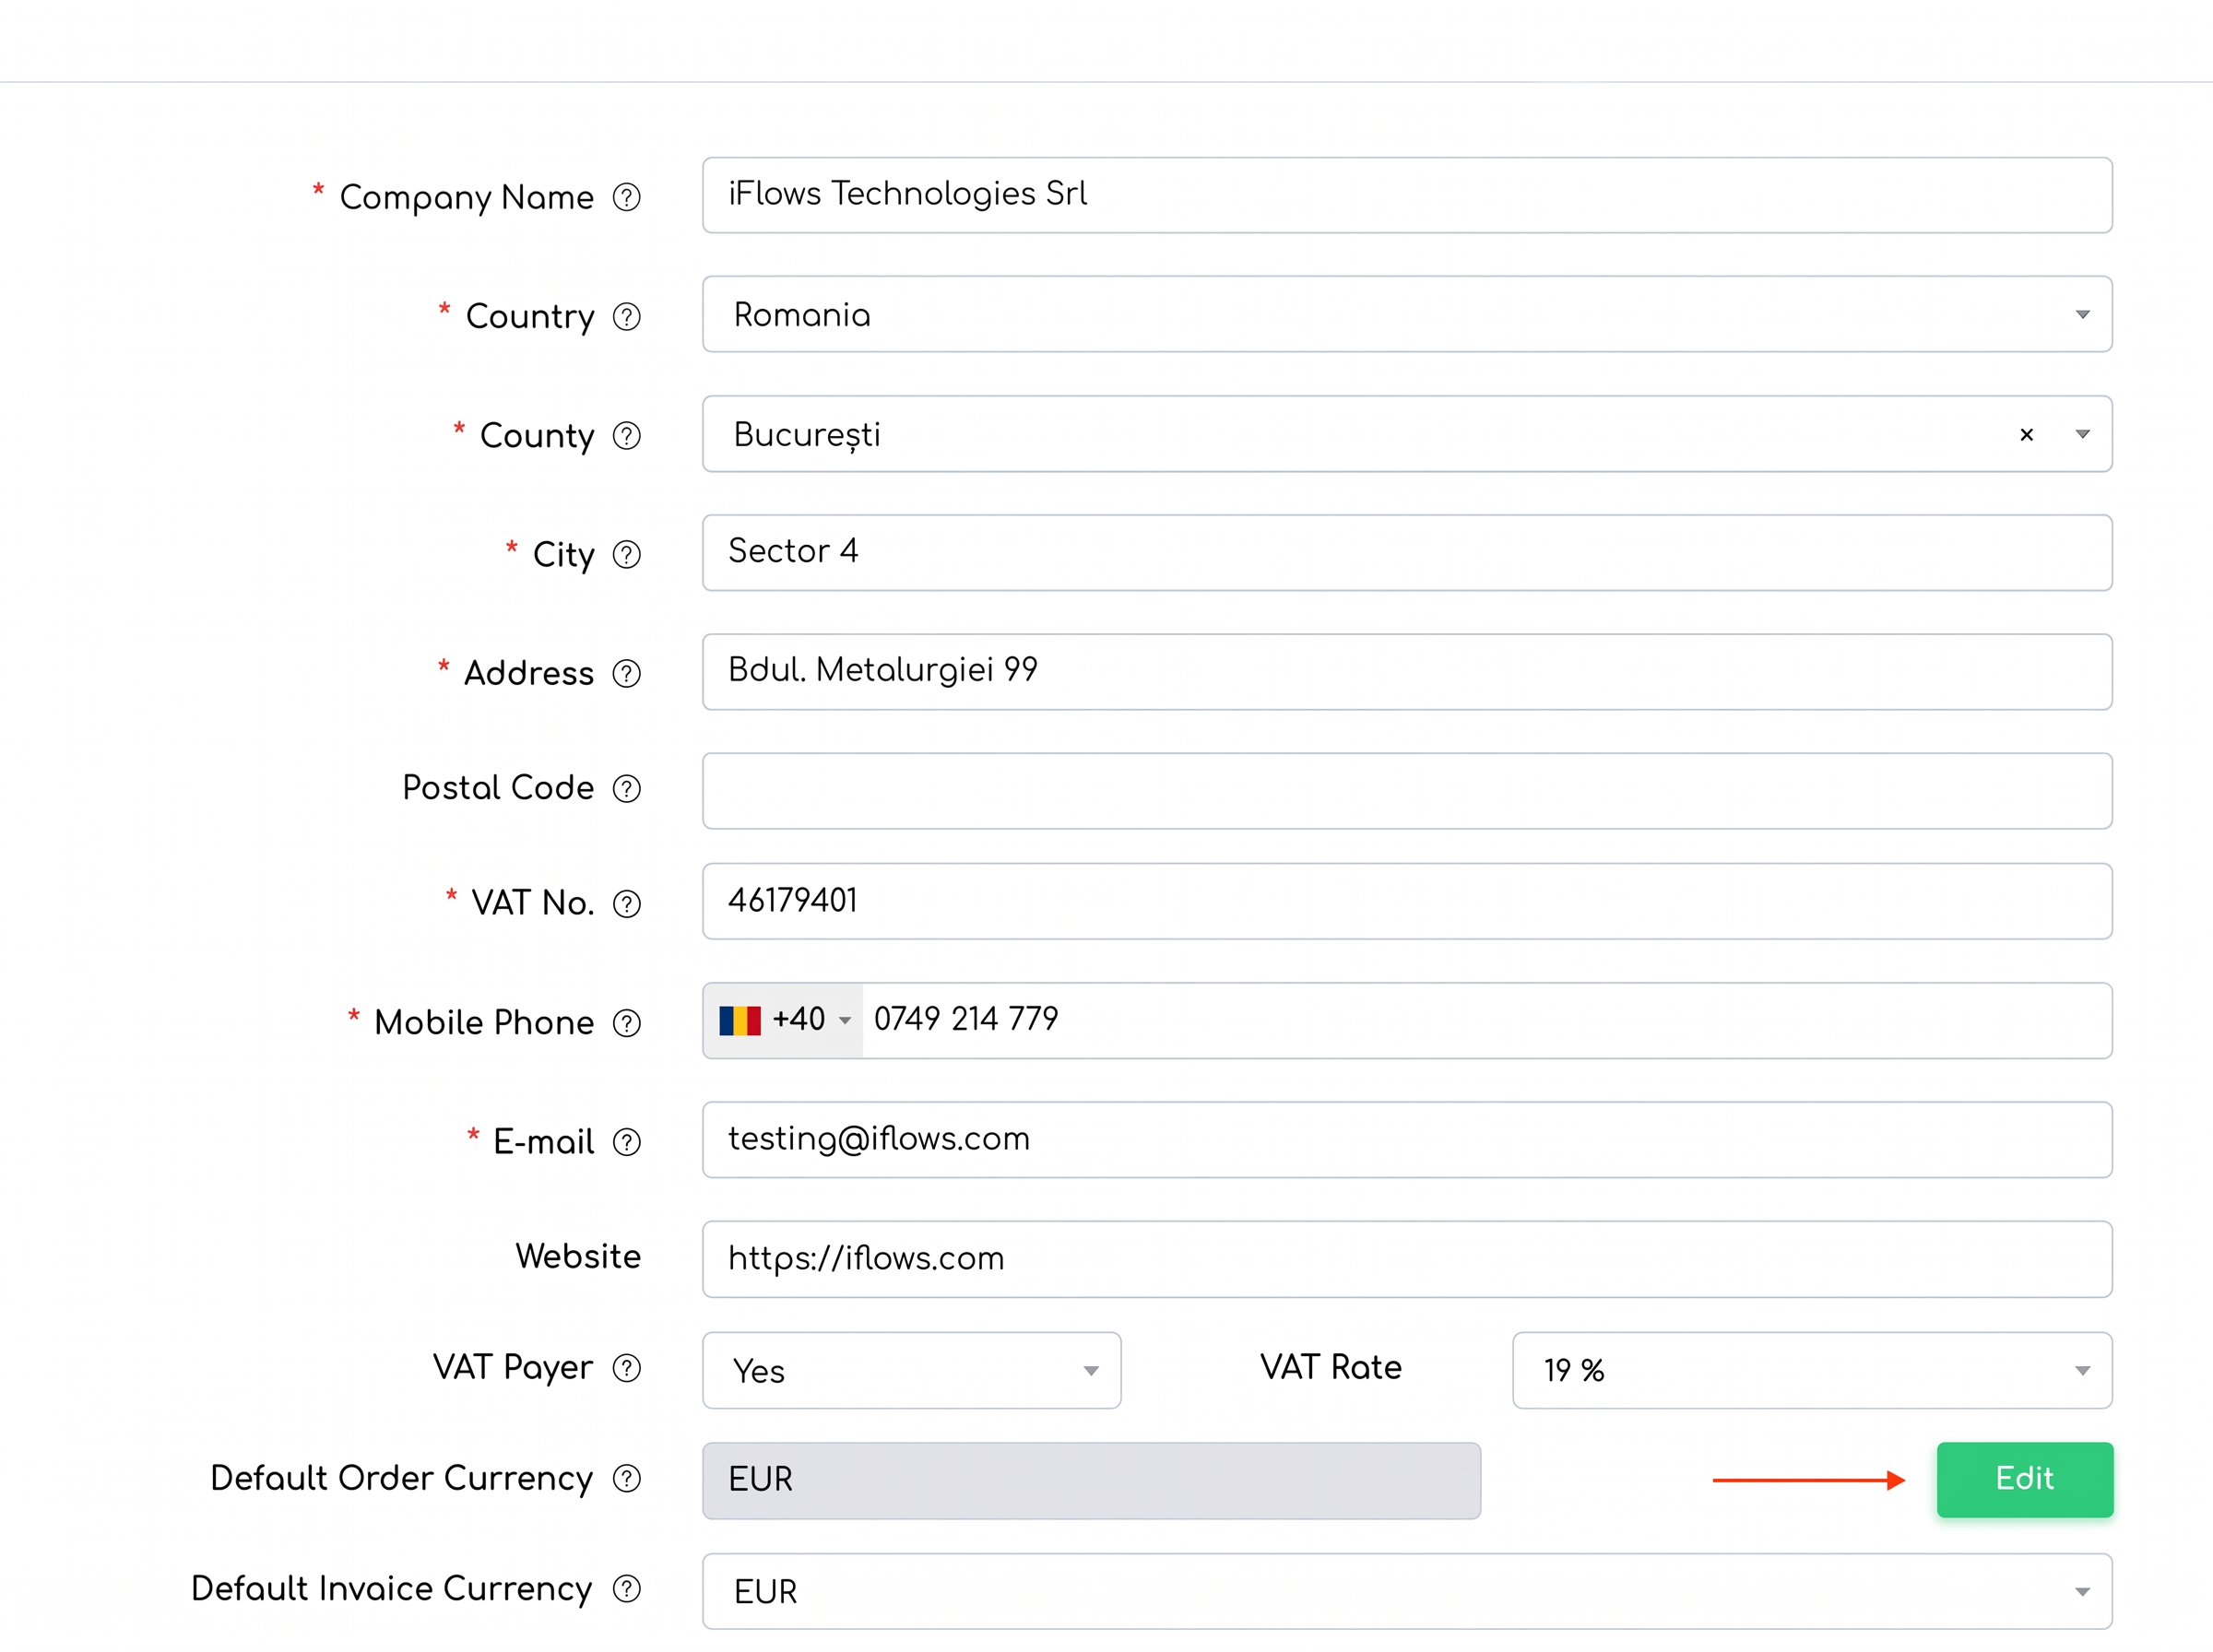
The platform now offers the possibility to adjust the default currency for orders, allowing users to adapt monetary settings to their specific business needs.
How to use:
- Navigating to Global Settings: Access the "Settings - Global" section in the platform.
- Selecting the Default Currency for Orders: In the "Default Order Currency" field, select the desired currency from the drop-down list and press the "Modify" button.
Importing Multiple Contacts for Clients
The platform now offers the capability to add multiple contacts for a single client during the file import process.
How to use:
- Preparing the Import File: Ensure the import file is formatted correctly, including multiple contacts for clients, according to the necessary specifications: First Name Last Name, Position, landline phone number, mobile phone number, email address, and the Yes/No function – which refers to including the client in platform communications in the form of a newsletter.
- Importing the File: In the client import section, upload the prepared file and initiate the import process.

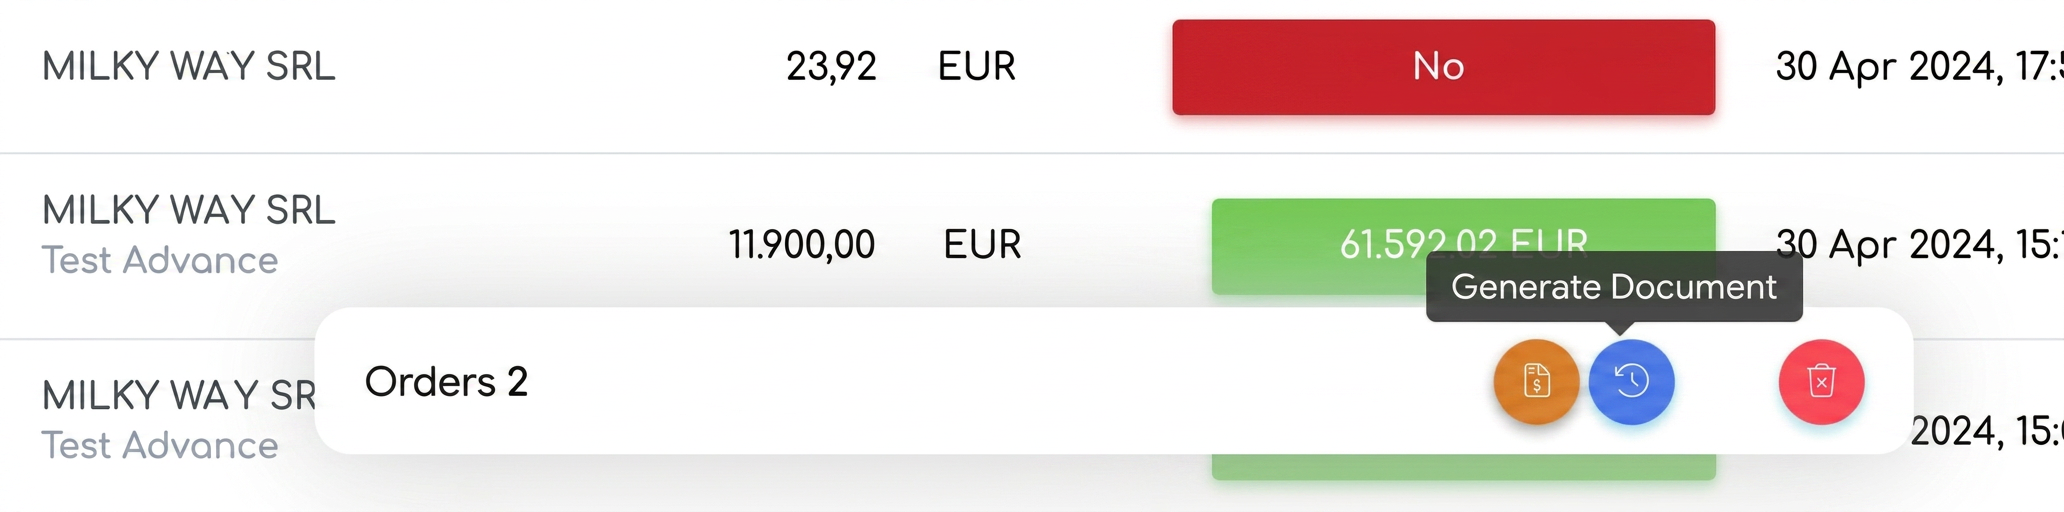
Alternative Method for Generating Documents for Multiple Orders
The platform introduces an alternative method for generating documents associated with multiple orders. This option allows users to select directly from the order list and generate the necessary documentation.
How to use:
- Selecting Orders: Navigate to the "Orders" section and check the desired orders using the boxes in the first column of the order list.
- Using the Action Bar: An action bar will appear at the bottom of the screen after selecting the orders. Here, you can access the "Generate Document" option to choose the type of document required (Proforma Invoice, Fiscal Invoice, Advance Invoice, or Delivery Note/Aviz).
- Confirmation and Generation: Ensure that all selected orders are for the same client to allow for correct consolidation. After confirmation, the document will be generated by integrating the details of all selected orders.
If you have suggestions or ideas that could bring improvements to the iflows platform, we encourage you to send us feedback. We are dedicated to continuous improvement and assure you that all suggestions will be carefully evaluated.