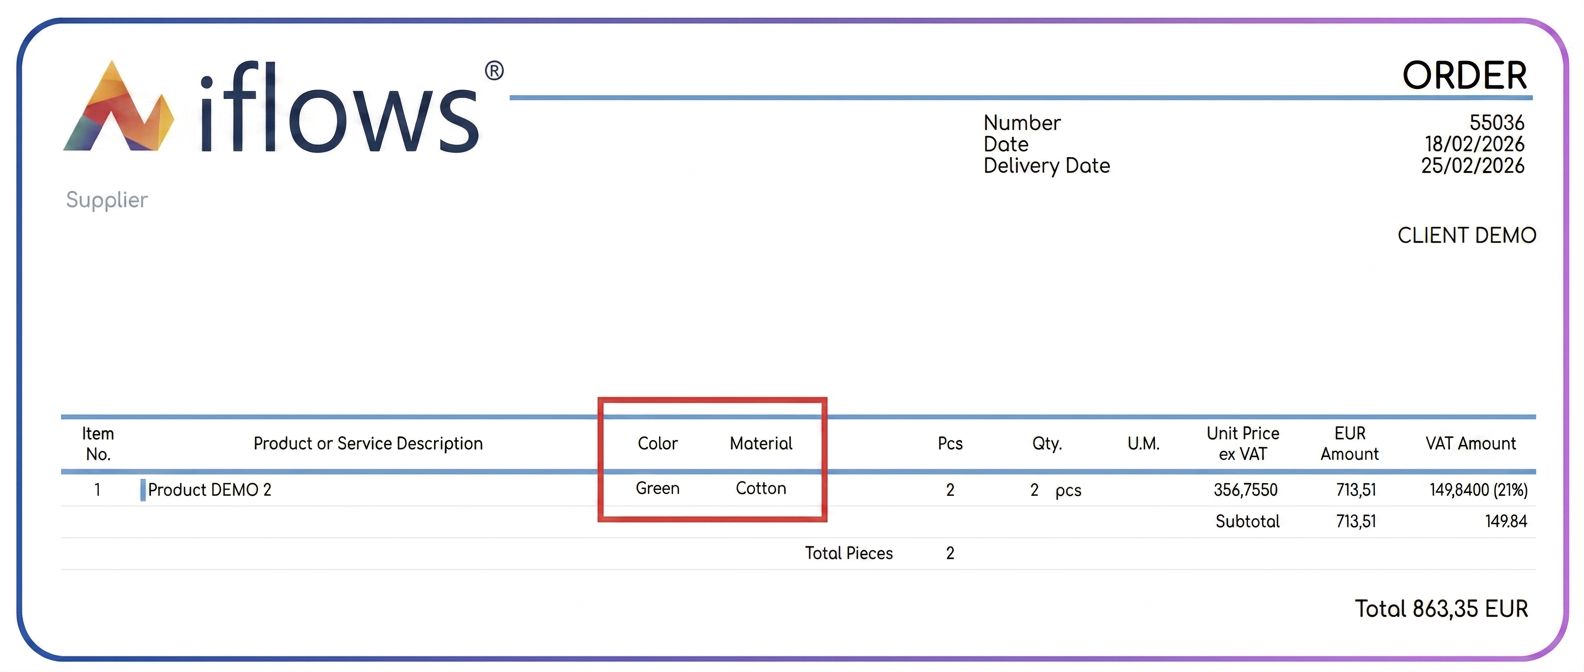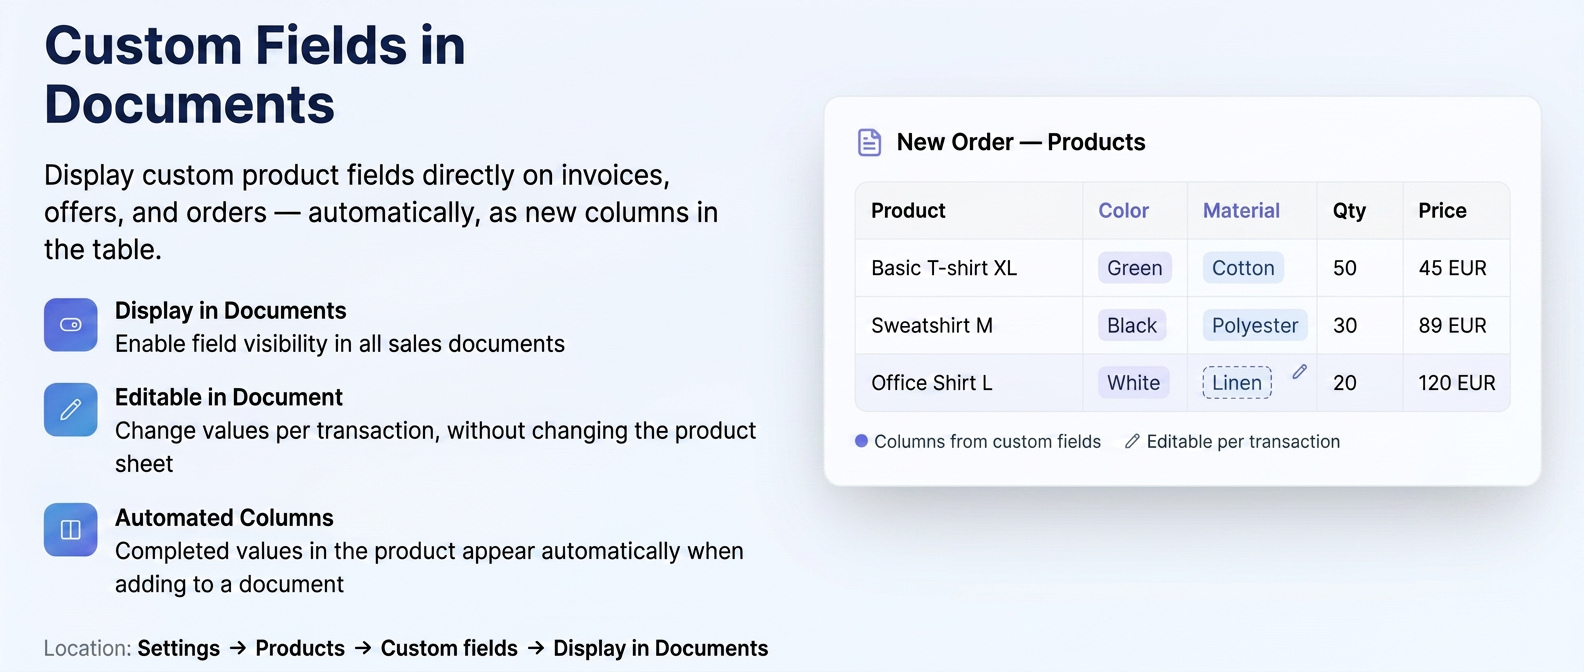
In addition to the functionality for defining custom product fields (detailed in the guide available here: Custom fields for products), the platform allows the use of this data directly in documents.
Have you created custom fields for your products (e.g., "Color", "Manufacturer Code") and want them to appear automatically on invoices, quotes, or orders? Follow the steps below.
Step 1: Activating the display in settings
For a custom field to not remain just "internal" (in the product file), you must allow it access to documents:
- Go to Settings (gear icon) → Products.
- Click on the Custom fields tab.
- If you are adding a new field, click Add field. If you want to modify an existing one, click Edit next to it.
- Check the option: "Display in Documents". This is the key setting that makes the field visible in the sales flow.
- (Optional) Check "Editable in Document" if you want to be able to modify that information directly in the product table of the invoice/order, without changing the product file.
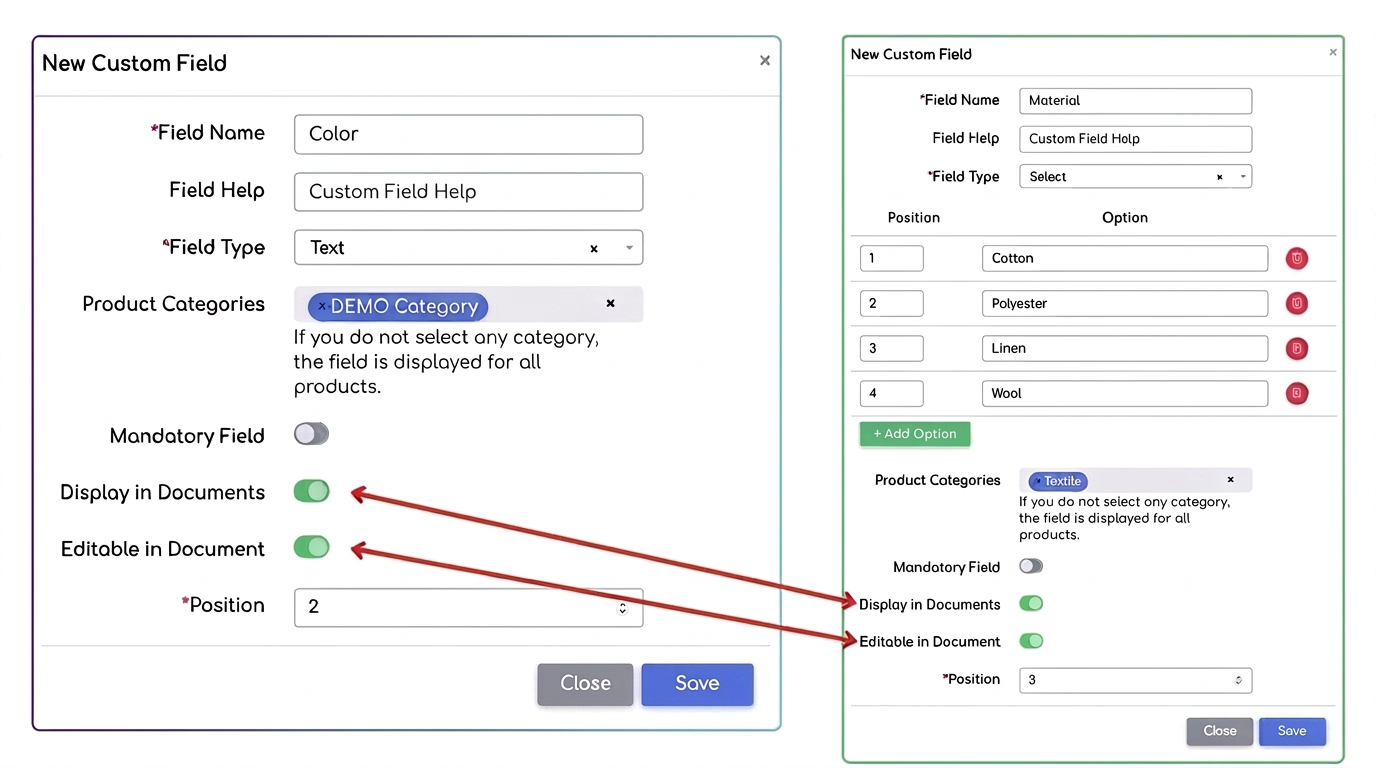
- Press Save.
Step 2: Filling in the information at the Product level
The information that will appear in the documents must first be entered in the product profile:
- Go to the Products menu and open a product (Edit).
- Look for the Custom fields section.
- Complete the desired values (e.g.: for the "Material" field write "Cotton").
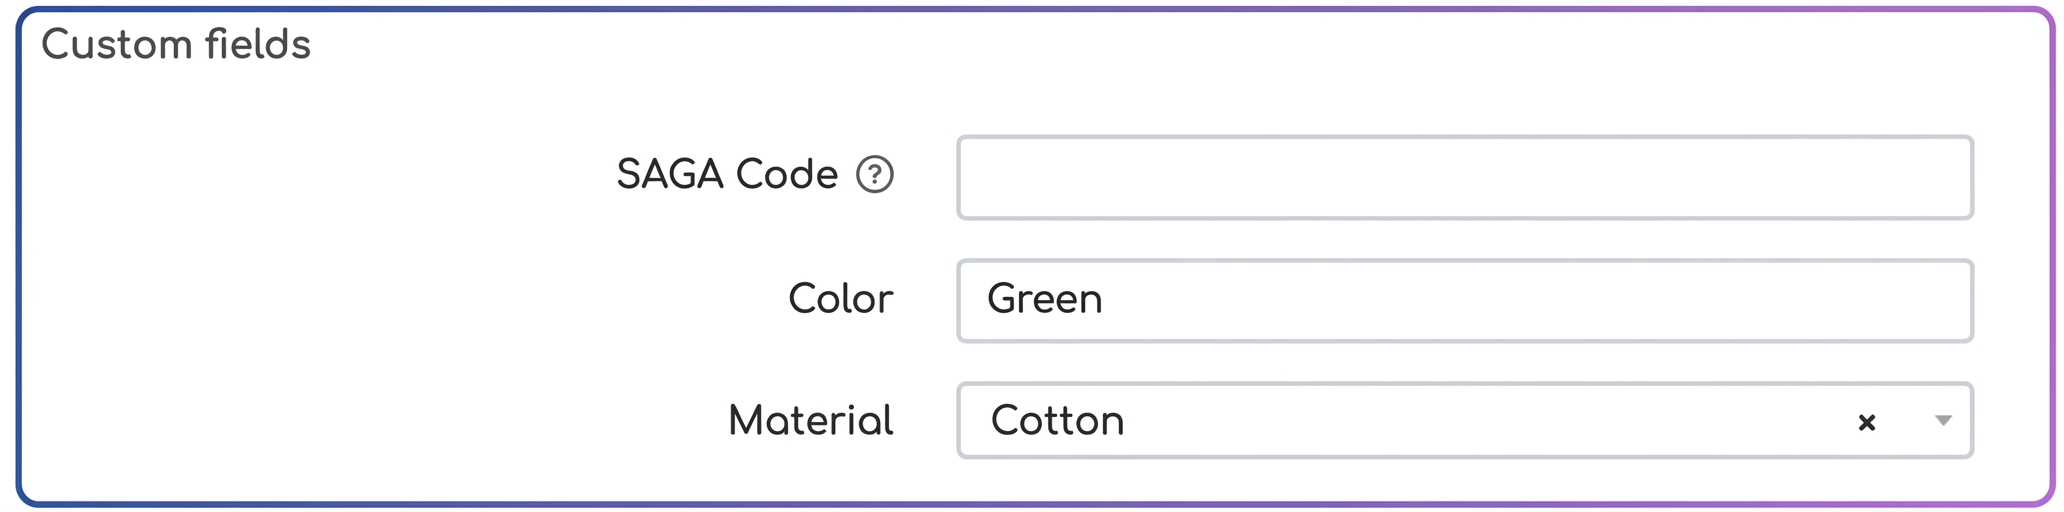
- Save the product.
Step 3: Viewing in documents (Orders, Quotes, Invoices)
Now, when you add this product to a document, the information will transfer automatically:
- Create a new Order, Quote, or Invoice.
- Add the respective product.
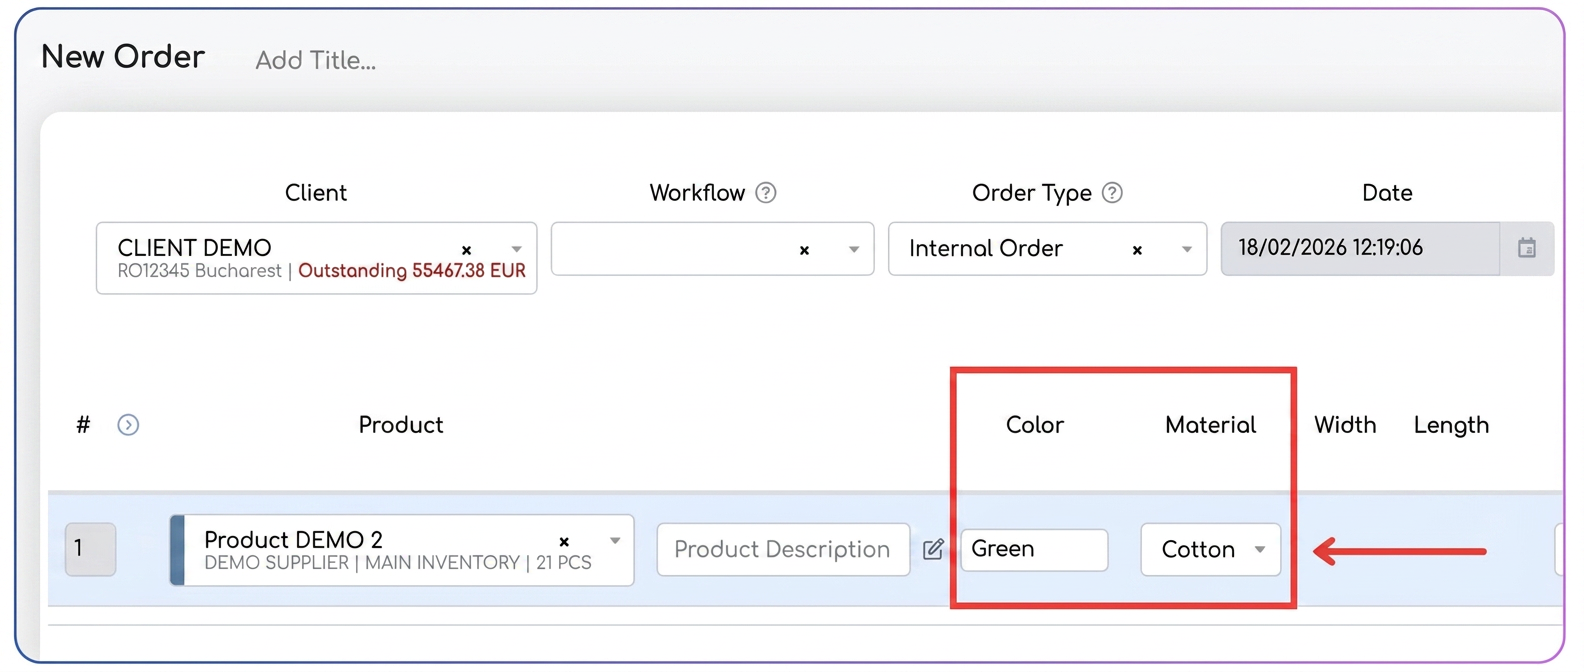
- You will notice that a new column has appeared in the table with the name of your custom field (e.g.: the "Material" column).
- The value ("Cotton") is already filled in. If you previously checked "Editable in document", you can modify this value only for this transaction.
Step 4: Displaying on the document PDF (Print/Export)
So that your customer can also see these details on the downloaded document:
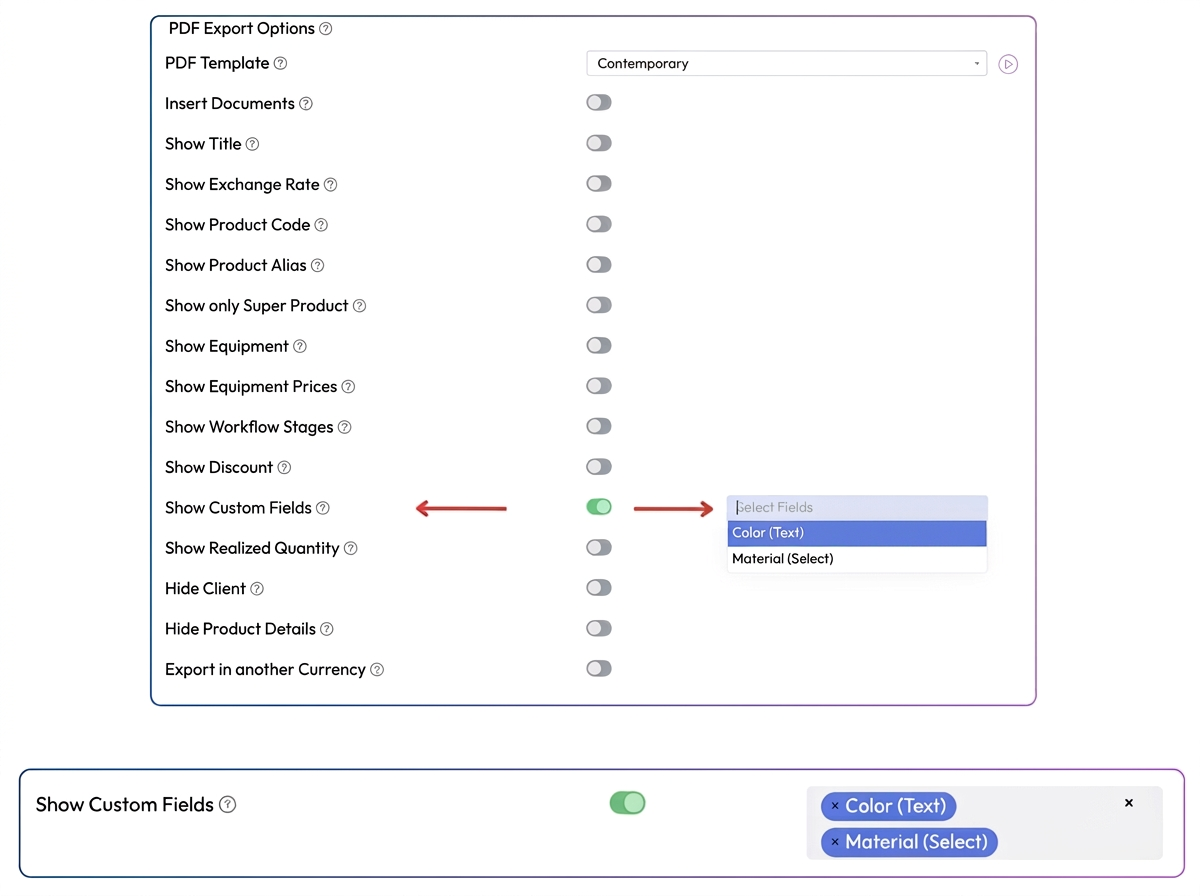
- In the document editing or viewing interface, identify the "PDF Export Options" section.
- Locate and activate the switch for the "Display Custom Fields" option.
- After activation, a list-type selection field will become available. From this list, the user must manually choose the specific fields they wish to include in the document.
- Note: Similar to the tag management system, one or more fields can be selected simultaneously, according to needs.
Impact on document format:
It is important to note that, to allow the display of new columns and to maintain data readability, the system will automatically adjust the page format. Thus, when generating the export, the document orientation will change from Portrait format to Landscape format. This change ensures the necessary space for integrating additional columns into the product table.