
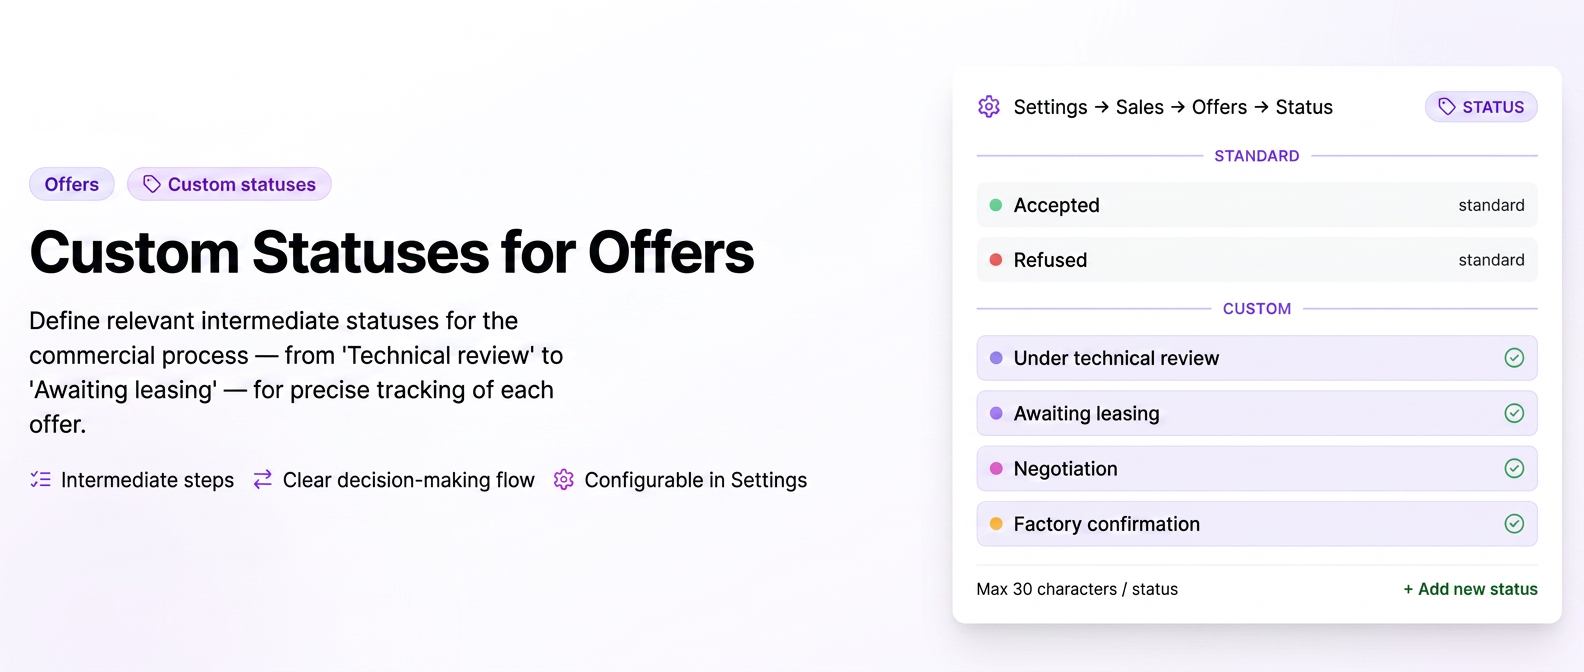
This functionality allows for advanced monitoring of the commercial process, beyond the standard status options of "Accepted" or "Rejected".
When additional statuses are required:
Defining additional statuses becomes necessary when the commercial process includes intermediate stages relevant for decision-making, execution, or financing.
1. Complex or multi-level decision processes
In situations where the final decision involves multiple departments (technical, financial, procurement, management), it is recommended to introduce intermediate statuses such as:
- In technical analysis
- In financial approval
- In management review
These allow for the identification of the stage an offer is at within a decision-making circuit.
2. Extended sales cycle
For high-value investments, the process can take weeks or months. In such cases, additional statuses help to:
- highlight completed stages,
- monitor actual progress,
- separate active opportunities from stagnant ones.
3. Dependency on external factors
When the decision is conditioned by external factors (banks, leasing, European funds, manufacturer, international delivery), dedicated statuses allow for the quantification of business blocked in such stages.
Examples:
- Waiting for leasing/credit file
- Waiting for non-reimbursable funds
- Factory term confirmation
Recommendation: Additional statuses are justified when:
- there are clear and repeatable intermediate stages,
- the decision-making process is long or segmented,
- external factors influencing conversion are involved,
- a rigorous financial forecast is necessary.
ATTENTION: In the absence of these conditions, an excessive number of statuses can unnecessarily complicate the process.
Step-by-step guide for adding custom statuses:
1. Configuring the Status Nomenclature (Administration)
- Navigate to Settings -> Sales.
- Access the Offers tab -> Status.
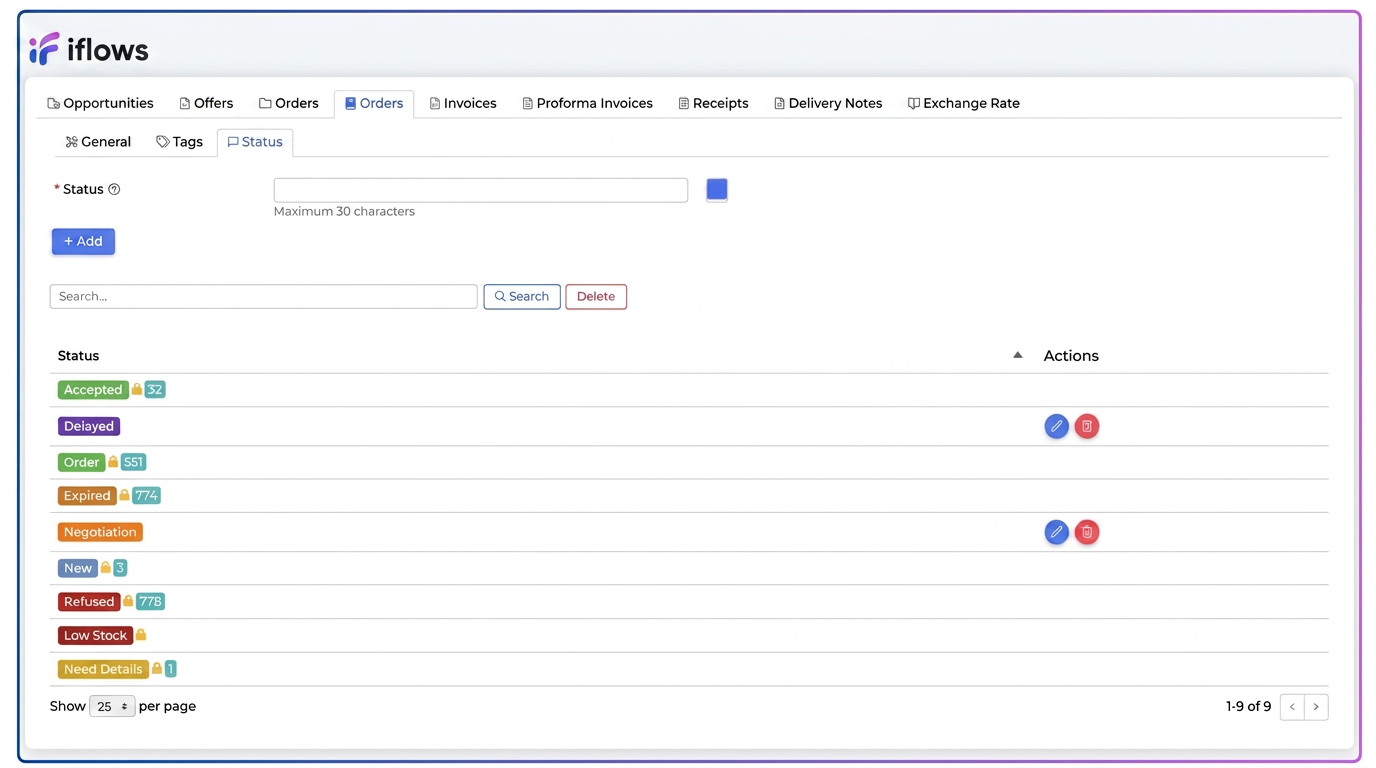
- The complete inventory of statuses available in the system is displayed here.
- Edit: Use the "pencil" icon to change the name or color code of an existing status.
- Delete: The "trash can" icon allows for the removal of manually created statuses.
- Integrity Rule: To maintain the consistency of the sales history, a status that has already been assigned to at least one offer can no longer be deleted, only edited.
2. Defining a New Status
The system allows adding new statuses in two ways:
A. From the Settings menu
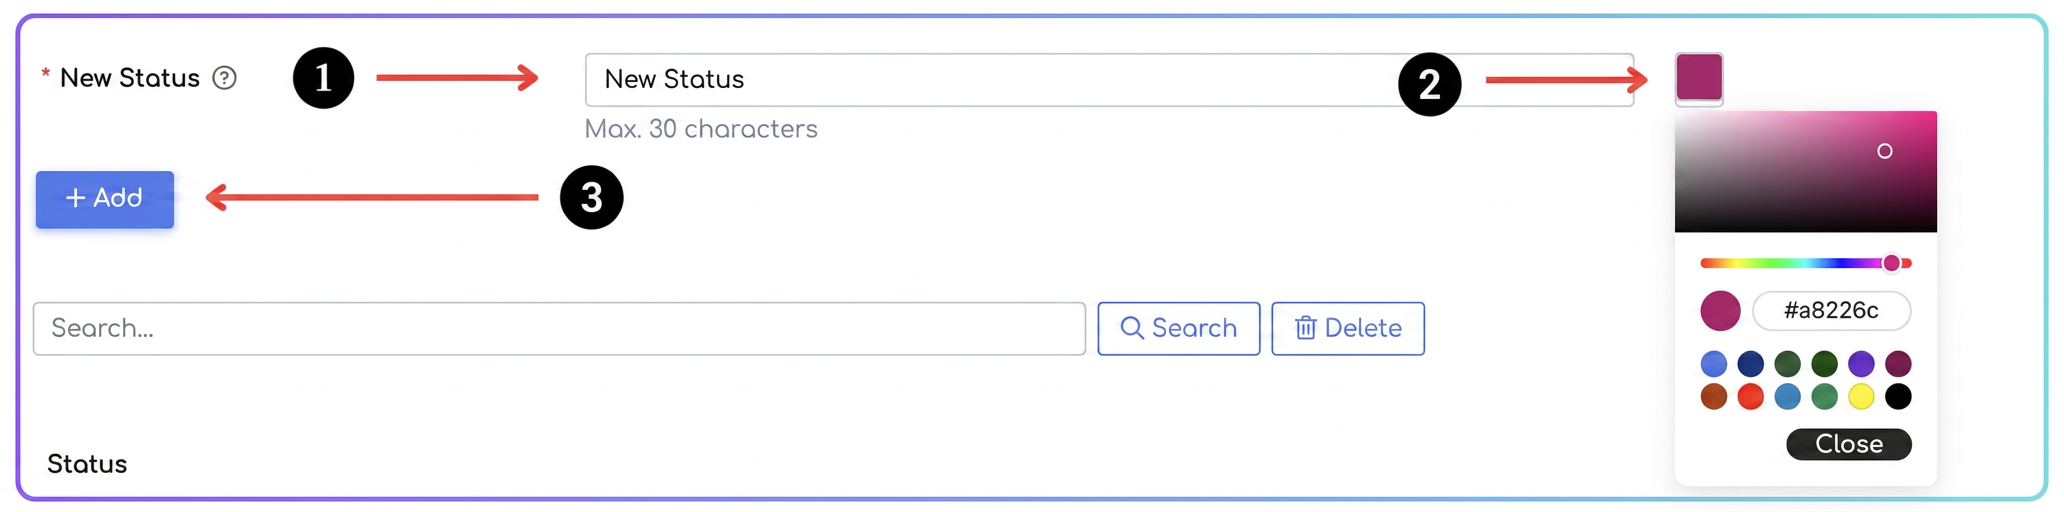
- In the Settings -> Offers -> Status screen, enter the desired name in the top field.
- Assign a representative color for quick identification in the list.
- Click the + Add button.
B. Directly from the Offer edit interface (Ad-hoc)
If while processing an offer you identify the need for a new status:
- In the status selector, enter the name of the new stage.
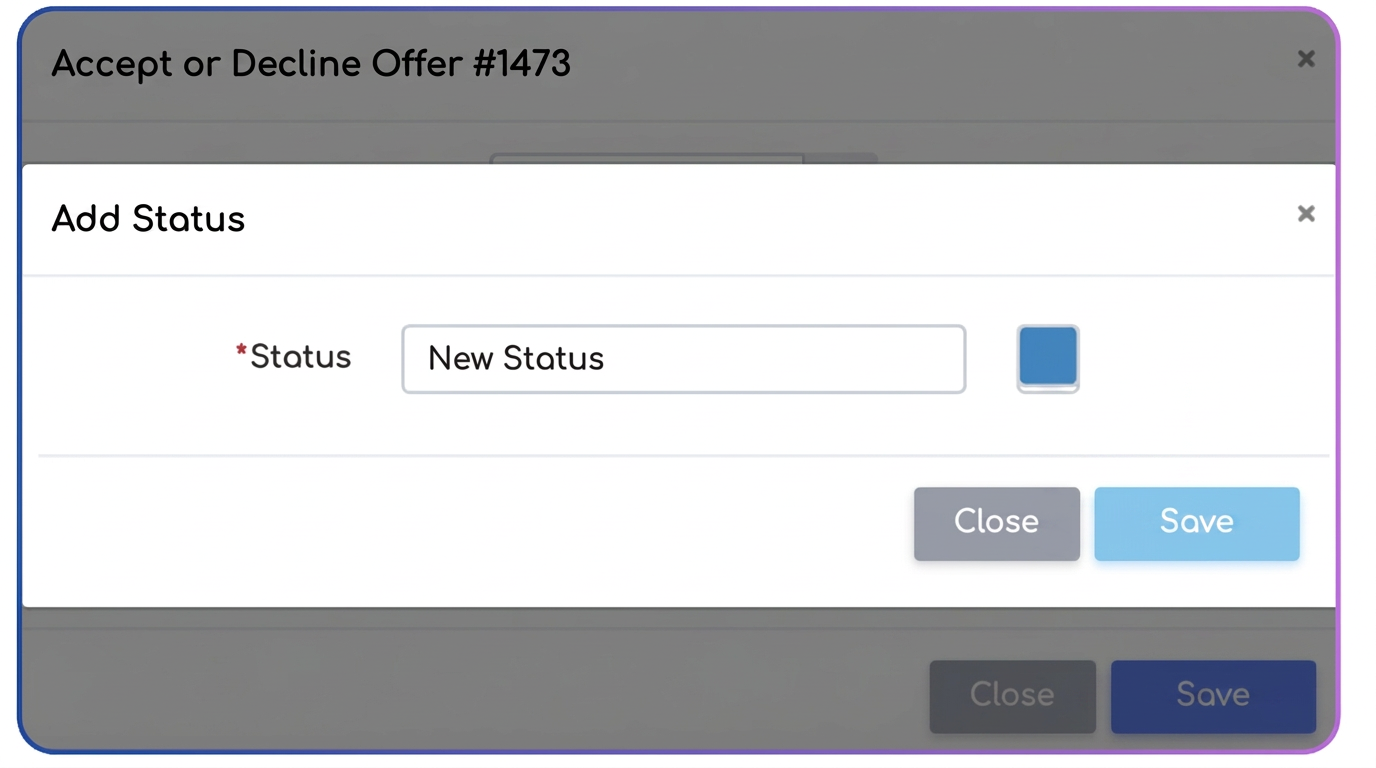
- If it does not exist, the system will display the Add Status button.
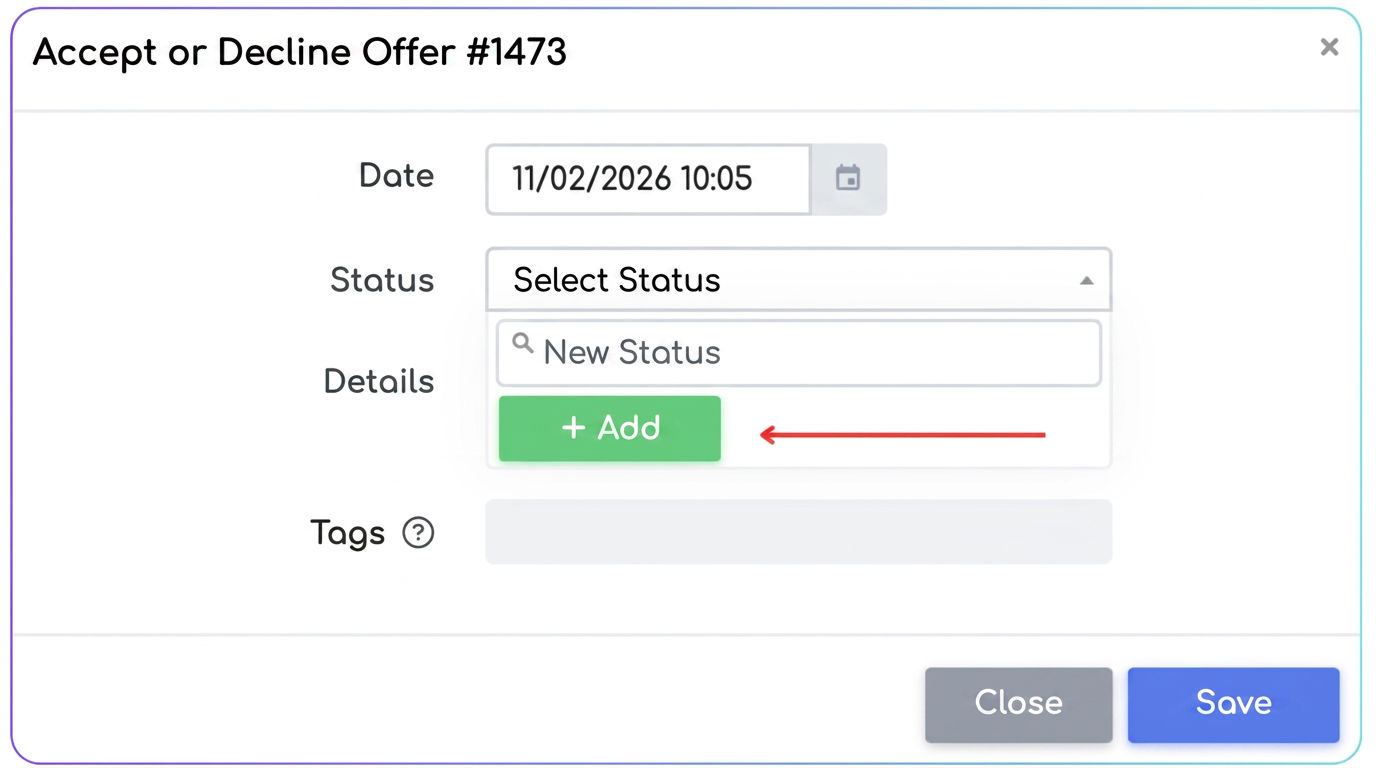
- When clicking it, the configuration window (name and color) will open, allowing for the instantaneous creation of the new status without leaving the current page.
3. Managing Status in the Offer List (Operation)
The status update interface has been optimized to accommodate the expanded number of options:
- Identify the offer in the list and access the status update window from the Actions column.
- Transition to Dropdown: Unlike the previous version where the selection was limited to two fixed options, you now have a list selector (dropdown) that includes all predefined and custom statuses (e.g., Negotiation, Postponed, In analysis).
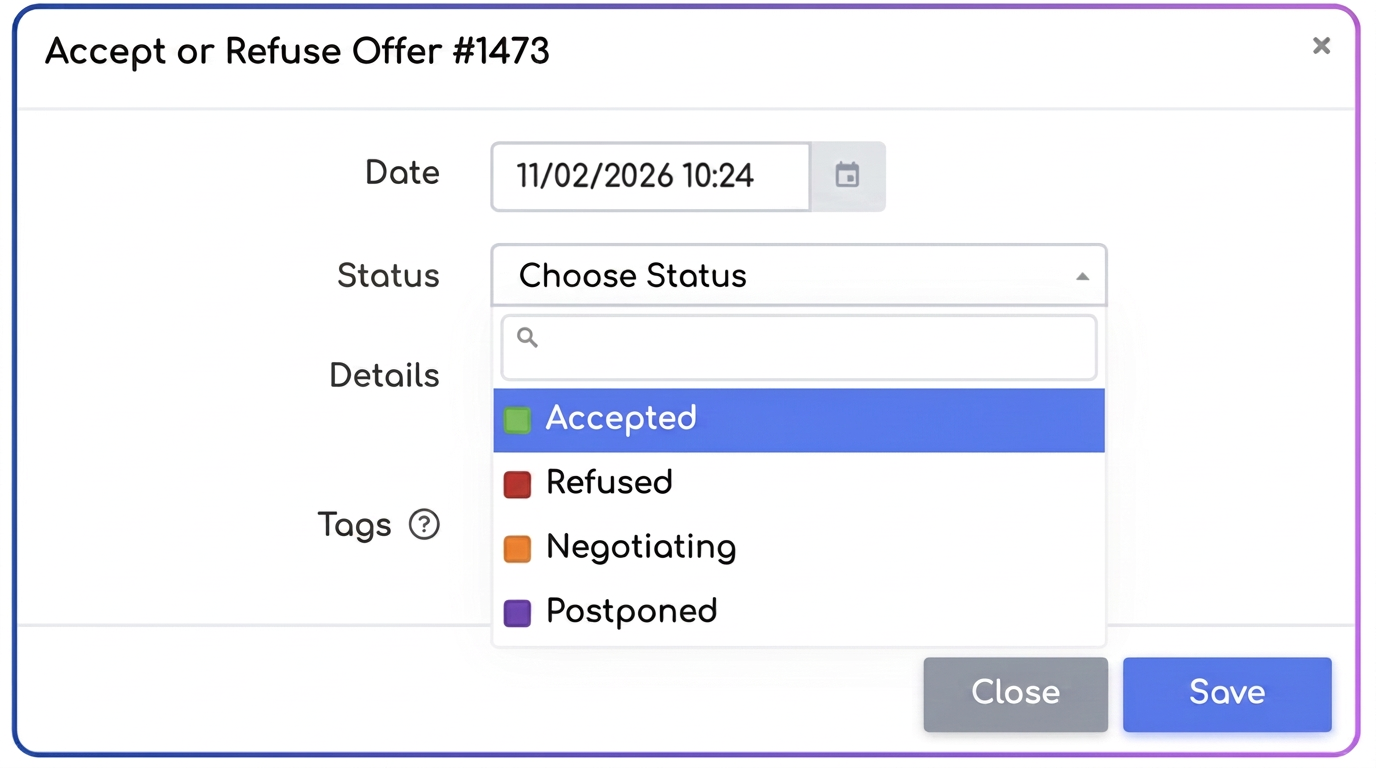
- Select the current stage and press Save.
4. Status Classification and System Constraints
It is important to understand the distinction between system statuses and informative ones:
- Native Statuses: Statuses such as New, Order, or I want details are managed automatically by the application logic and cannot be modified or deleted.
- Statuses with Functional Impact:
- Only the Accepted status allows the conversion of the offer into an Order or Invoice.
- The Rejected status blocks editing or sending the offer, requiring the generation of a new version to resume the flow.
- Informative Statuses (Custom): All newly created statuses (e.g., Negotiation) serve for marking and filtering, still allowing actions such as sending via email or modifying data, without imposing the restrictions specific to final statuses.
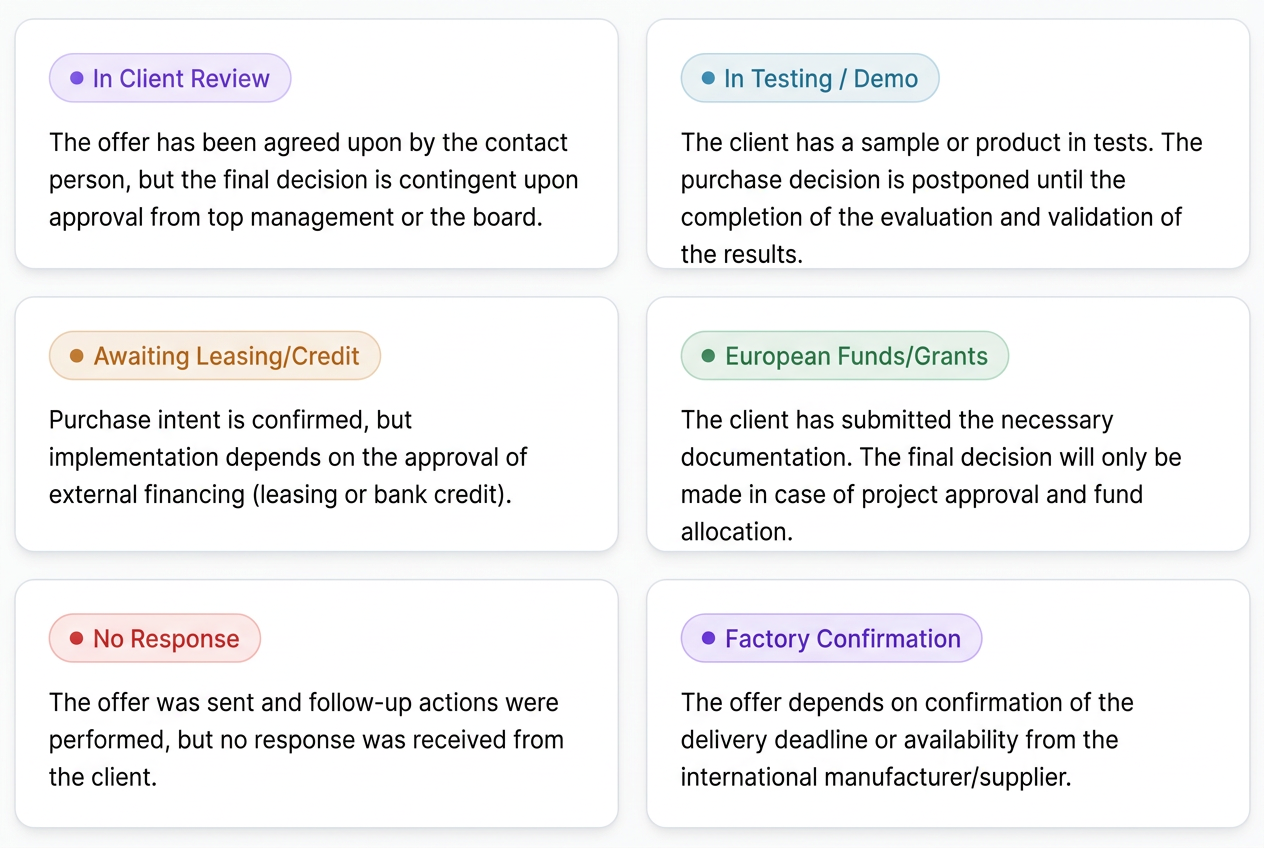
Here are several examples of custom statuses:
Removal of the "Expired" Status and New Operating Logic
Following optimization, the "Expired" status no longer exists as a distinct status in the nomenclature. In the new version, it has become a state attached to the offer, independent of the commercial status.
Thus:
- The status remains unchanged (e.g., "New", "Negotiation", "In analysis", "Postponed").
- If the validity period is exceeded, the system automatically applies a visual "stamp" type marking "EXPIRED" over the status badge.
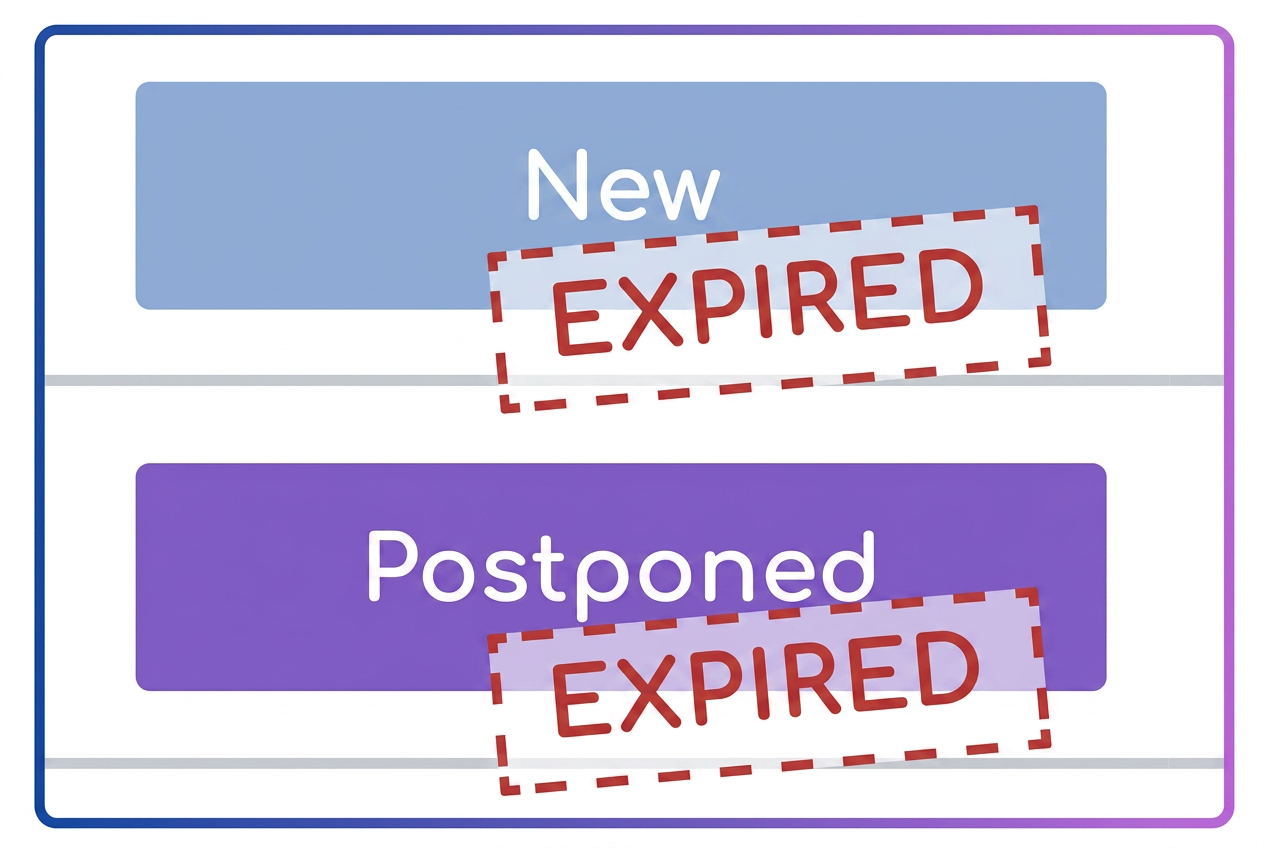
This approach allows:
- preserving the actual history of the commercial stage,
- differentiating between a "commercially blocked offer" and an "offer expired by term".
Filtering expired offers
To identify expired offers, explicit activation of the dedicated filter is required.
Steps:
- In the Offer list, access the Filter options button (icon represented by three horizontal lines).
- Check the Expired filter.
- Press Save to activate the filter in the interface.
- In the filter area, the selector will appear:
