This functionality allows you to request and obtain electronic signatures from customers directly on documents generated within iFlows. This process is secure, fast, and provides proof of agreement, eliminating the need for printing and scanning documents.
Initial Setup (One-time process)
For the signing functionality to be available, you must ensure that your templates (both document and email) are properly prepared.
Step 1.1: Adding the Signature Field to the Document Template
First, you must define the exact spot where the customer's signature will appear in the final document.
- Navigate to Documente (Documents) -> Tipizate (Standardized) and access the Șabloane Tipizate (Standardized Templates) tab.
- Create or edit the desired template.
- In the document editor, scroll down to the signatures section.
- In the left panel, under Câmpuri Variabile (Variable Fields), you will find a new special field: Semnatura Client (Customer Signature).
- Position the cursor in the document at the desired location and then click on the Semnatura Client variable.
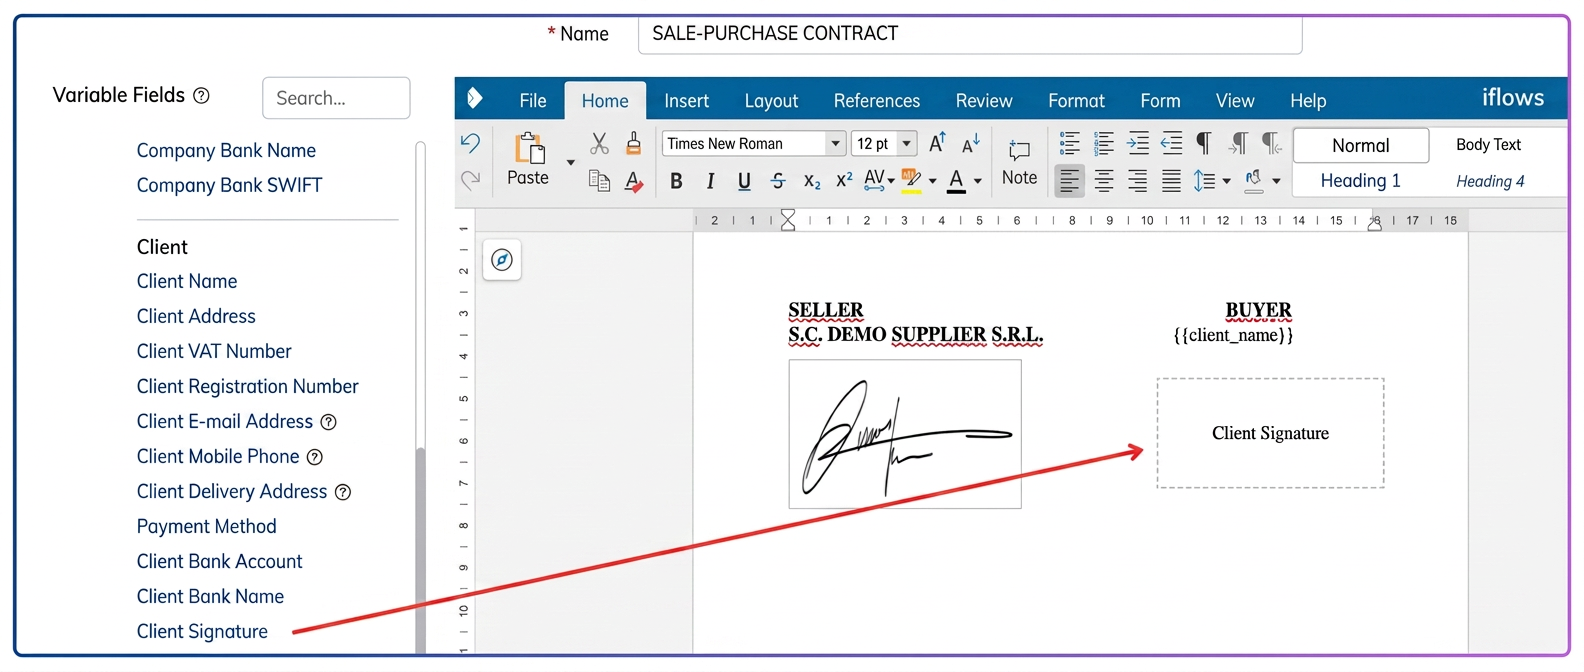
- A special box will appear in the document. You can resize and move this box to fit your document design perfectly. The size and position of this box will determine exactly where and how large the image of the customer's signature will be in the final document.
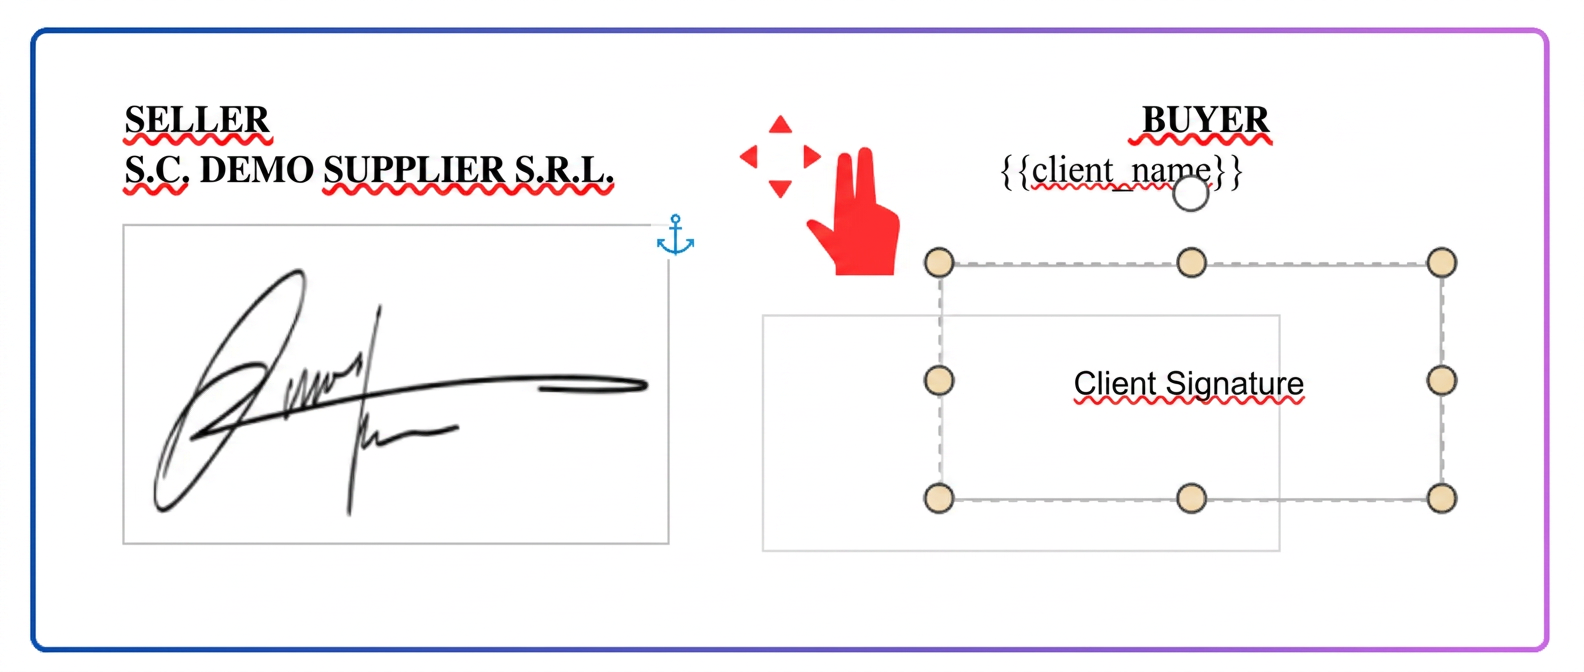
- After positioning the box correctly, press the Salveaza (Save) button.
Step 1.2: Adding the Signing Button to the Email Template
For signing to be possible, the email received by the customer must contain a special button that directs them to the signing page.
- Navigate to Setari (Settings) -> Sabloane (Templates) -> E-mail -> Predefinite (Predefined)
- Find and edit the template with the Document Tipizat (Standardized Document) section. This is the standard email sent by the system when you dispatch a standardized document.
- In the email editor, ensure you have the signature variable. Usually, this is already present in the form of a large blue button with the text "View and sign document".
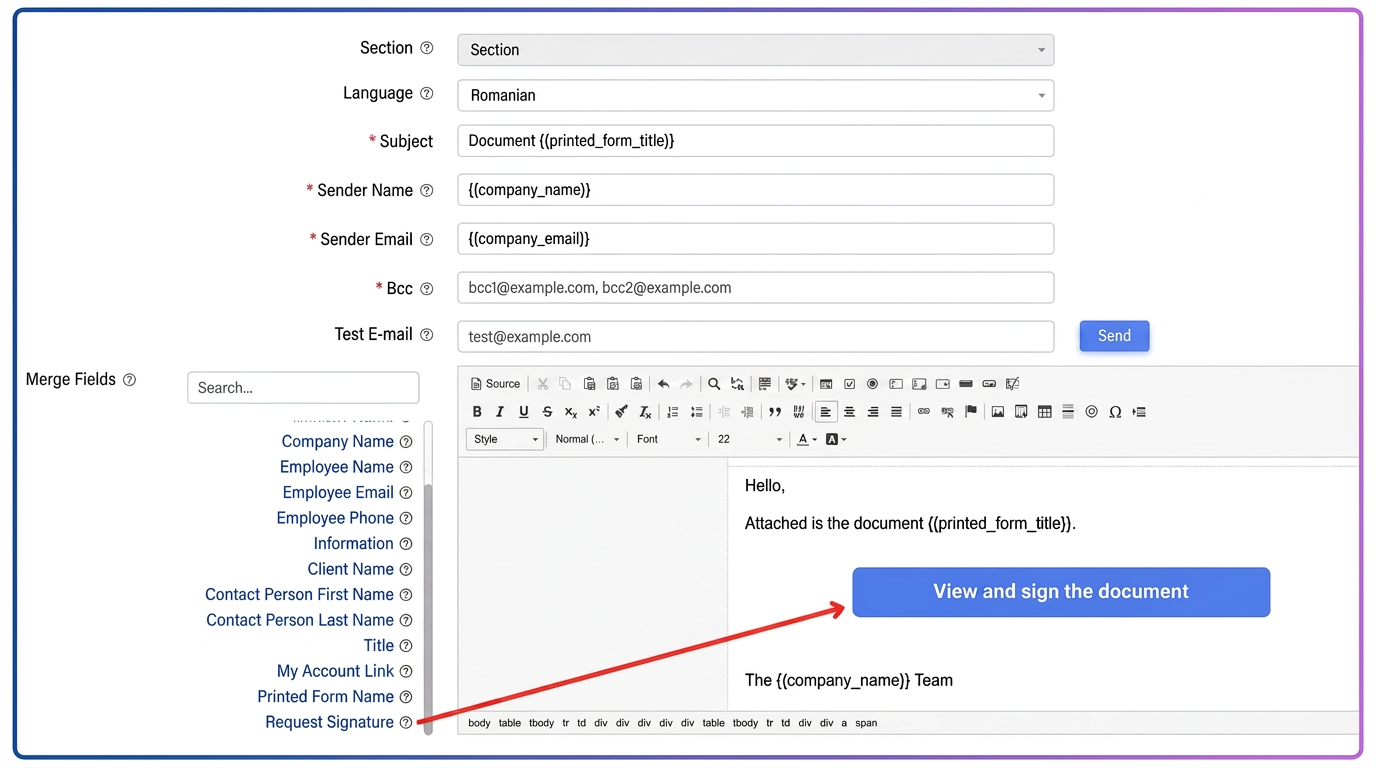
- If it does not exist, you can add it manually from the Câmpuri Variabile list on the left. This button is smart: it will appear in the email only when you request a signature.
- Save the email template.
Note: you can create multiple templates related to the standardized section, one for each type of document. Later, select which template to use during dispatch.
Part 2: Generating and Sending a Document for Signing
Now that the templates are configured, the sending process is very simple.
Step 2.1: Generating the Standardized Document
- Go to the relevant section associated with that standardized document (e.g., Vanzari (Sales) -> Comenzi (Orders)).
- Identify the order for which you want to generate the document and click on the Generează Document Tipizat icon (red symbol).
- Select the document template you prepared in Step 1.1.
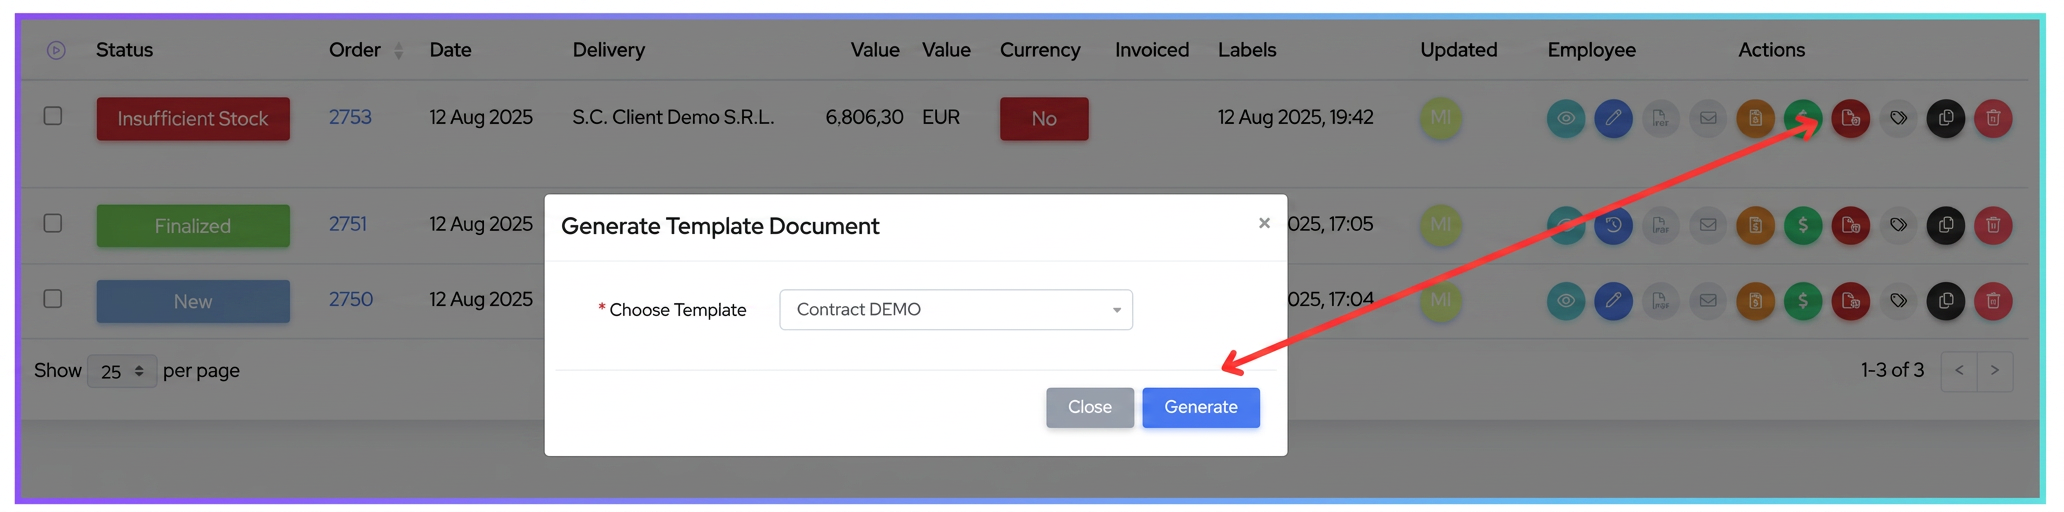
- The system will open the document pre-filled with data from the order. Check the information and manually complete any necessary custom fields (e.g., registration number, date, etc.).
- Press Salveaza. You will be redirected to the order page, in the Documente Tipizate tab, where you will see the newly created document.
Step 2.2: Sending the Email with a Signature Request
- Next to the newly generated document, click on the Trimite E-mail (envelope) icon.
- The email composition window will open. Here you will notice a new option: Solicita Semnatura (Request Signature).
- Enable the switch for "Solicita Semnatura".
- Once enabled, a new field will appear: Valabilitate (zile) (Validity (days)). Enter the number of days for which the signing link will be active (e.g., 5 days).
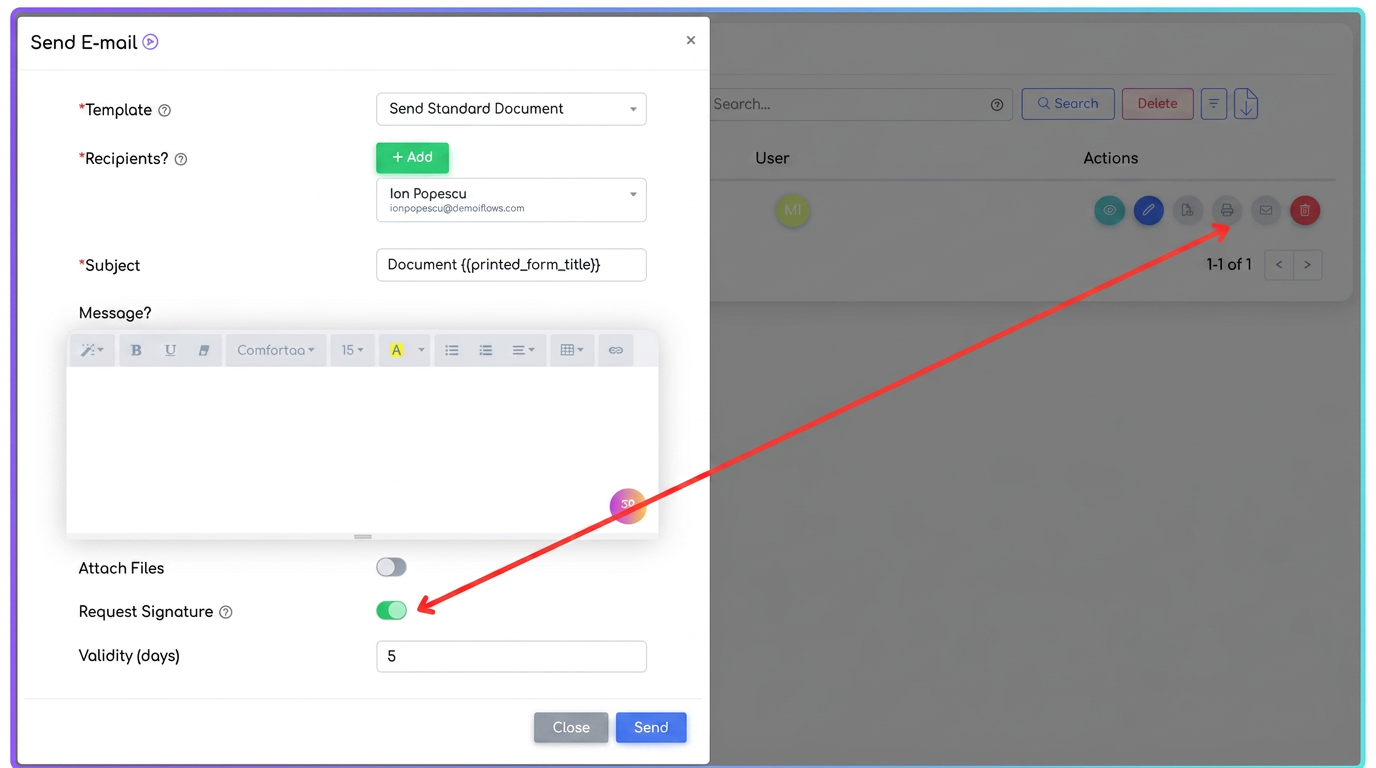
- Press the Trimite (Send) button.
Part 3: The Signing Process (Customer Experience)
Your customer will go through a secure and intuitive process.
- The customer receives an email containing the button "View and sign document".
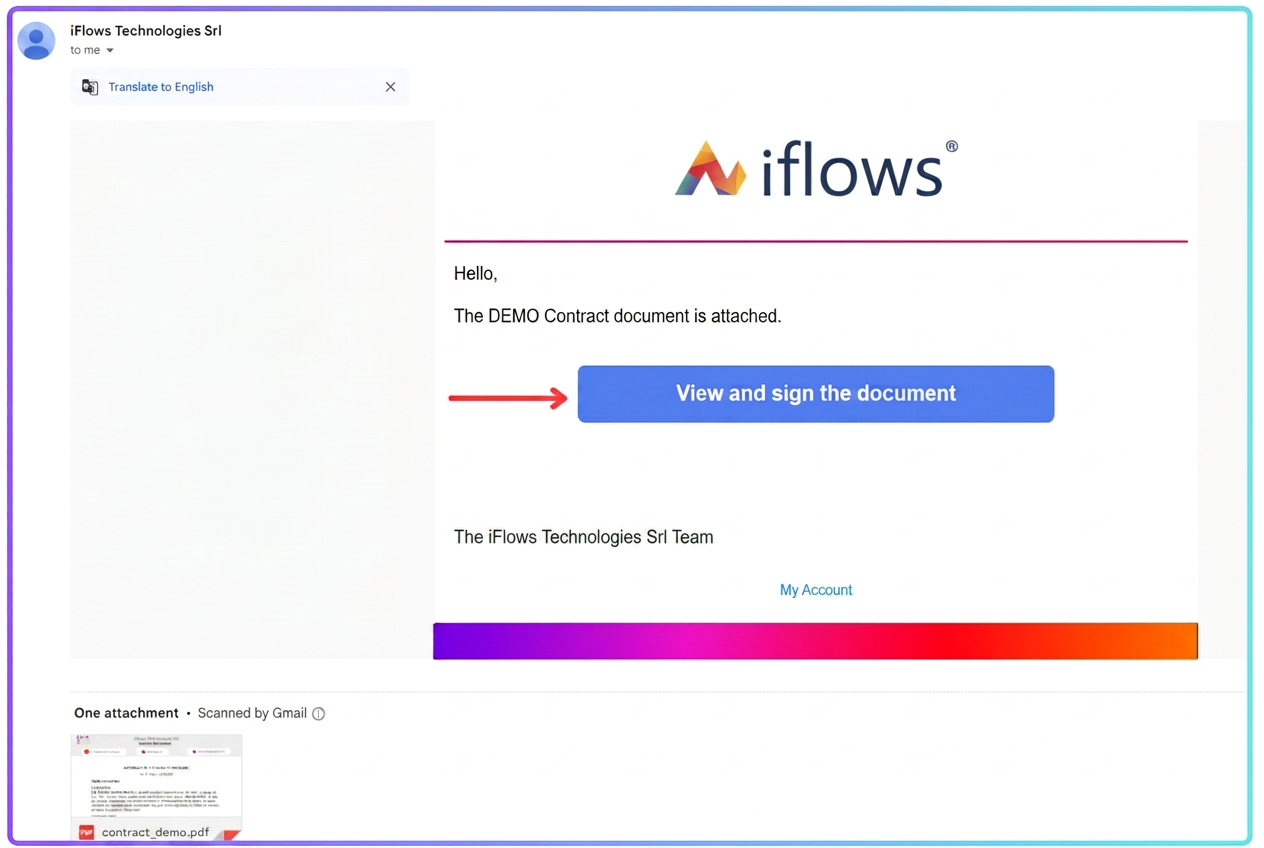
- By clicking the button, they are redirected to a secure signing page.
- On this page:
- On the right side, they will see the full PDF document.
- On the left side, they will have a form to complete:
- Full Name: The name of the person signing.
- Private Code: For security, the customer must click the "Trimite Cod Privat prin SMS (Send Private Code via SMS)" button. They will receive a unique code on the phone number associated with their account.
- Signature: They have two options:
- Draw the signature directly in the box using a mouse or on a touchscreen.
- Upload an image (PNG/JPG) of their signature.
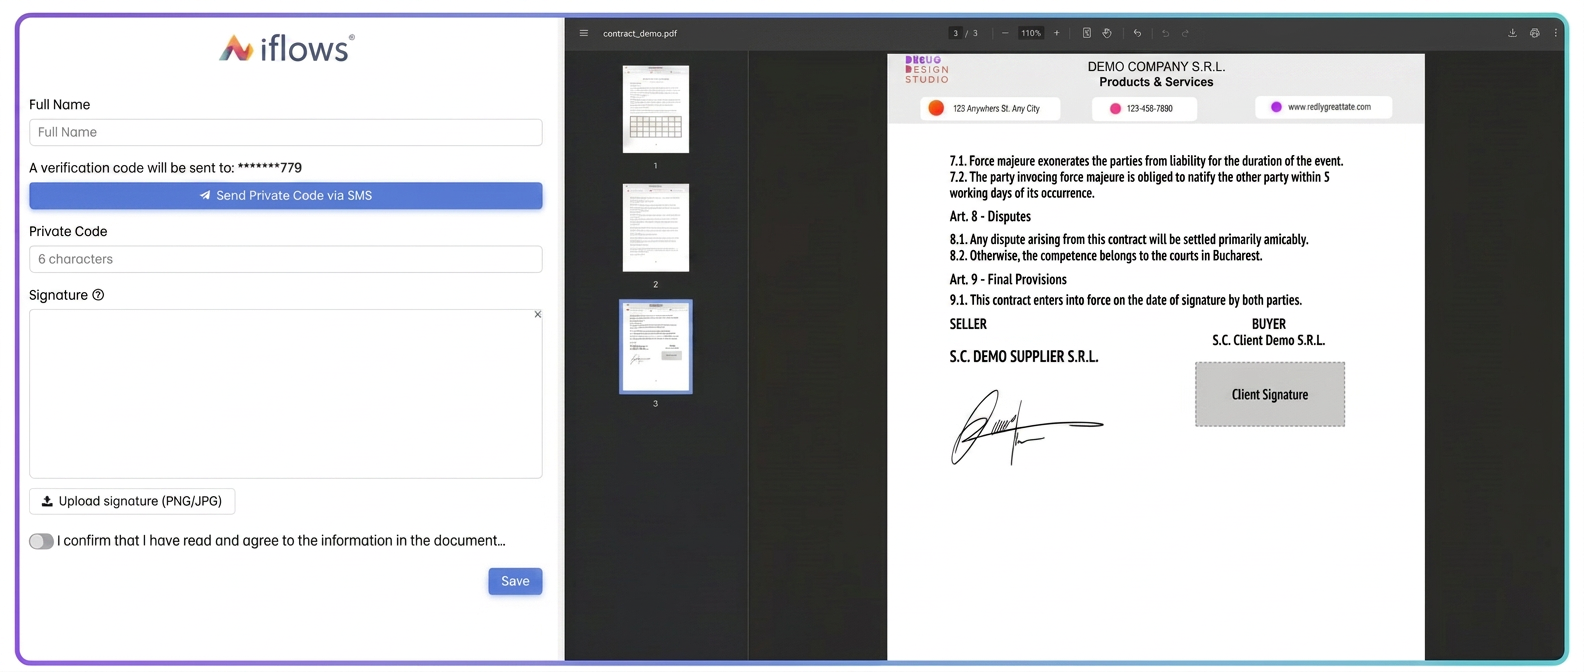
- After completing all fields, the customer checks "I confirm that I have read and agree with the information in the document".
- Press the Salveaza button.
Part 4: Checking Status and the Signing Certificate
After the customer has signed, you will have full visibility and proof of action in iFlows.
- Navigate to Documente -> Tipizate and access the Generate (Generated) tab.
- Next to the sent document, you will notice a green checkmark in the "Semnat" (Signed) column, confirming that the document has been signed.
- Click on the row expansion arrow to see the signature details: Date and time of signing, Signatory's name, and their Email.
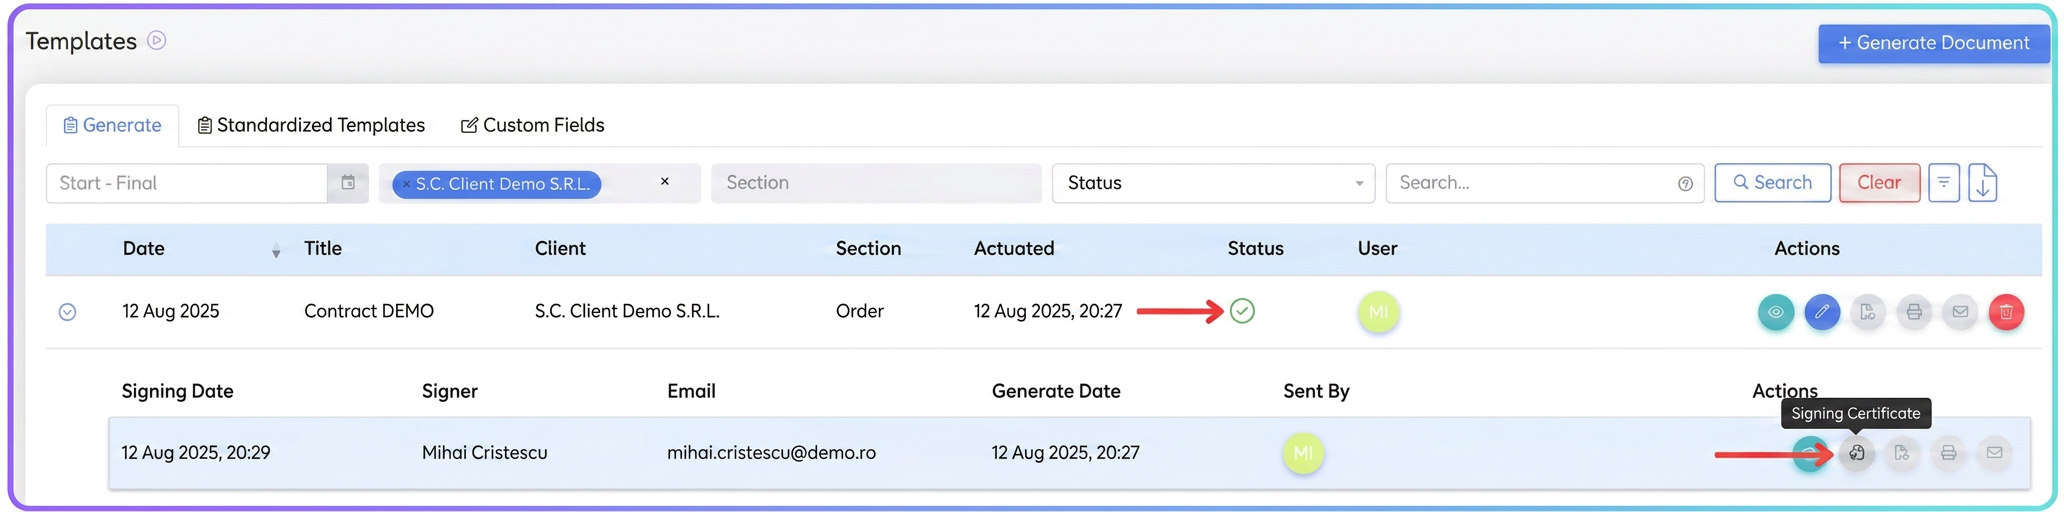
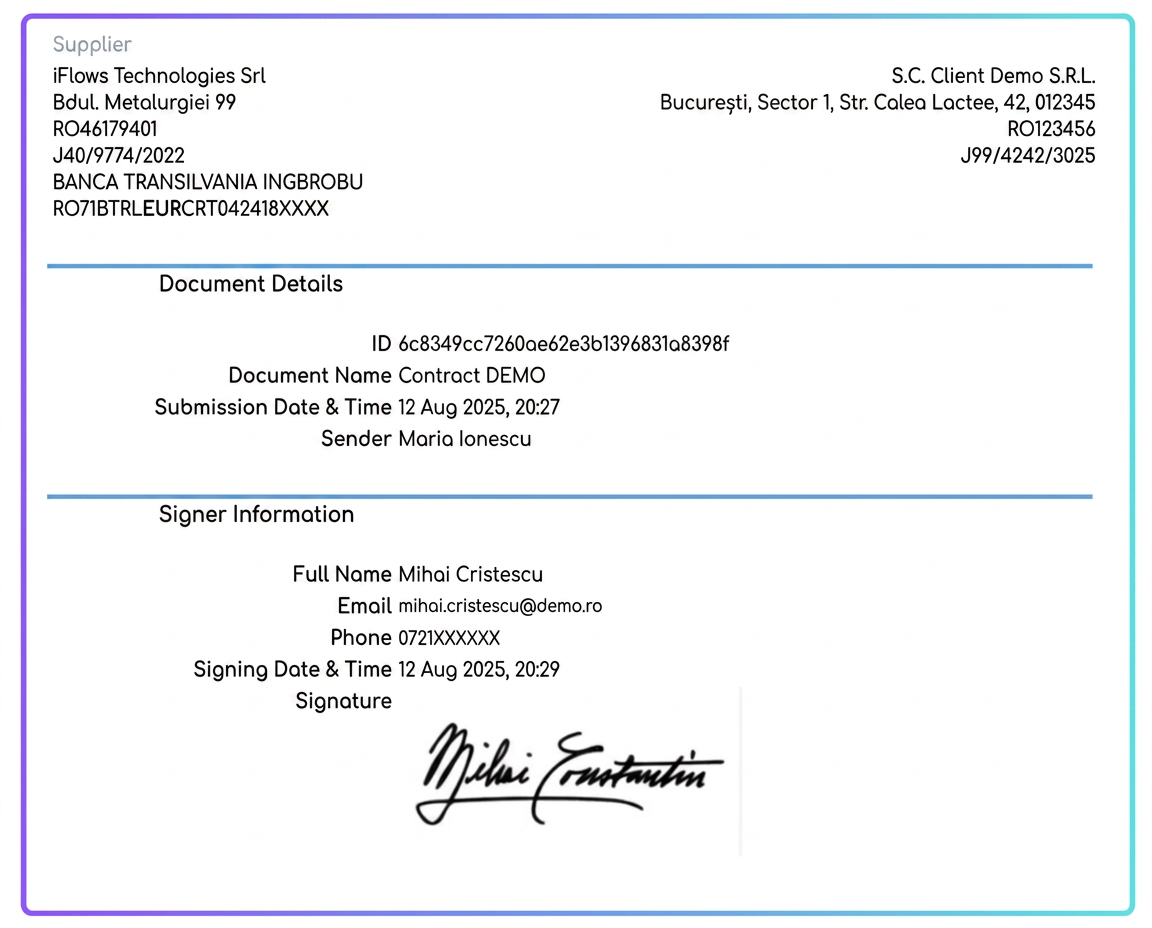
- In the "Actiuni" (Actions) column, a new icon will appear: Certificat Semnare (Signing Certificate). By clicking on this, you will download a separate PDF document that certifies all details of the signing process (document ID, signatory information, date and time, signature image), serving as legal proof.