
1. Accessing the Module
You can find the leave calendar in the main menu, under the Financial > Leave section.
2. How to Add a Leave Entry
Adding a leave entry is done directly in the calendar, in a visual and fast way.
- For a single day: Click directly on the day in the calendar for which you want to record the leave.
- For a range of days: Hold left-click on the first day of the range and drag the cursor to the desired last day.
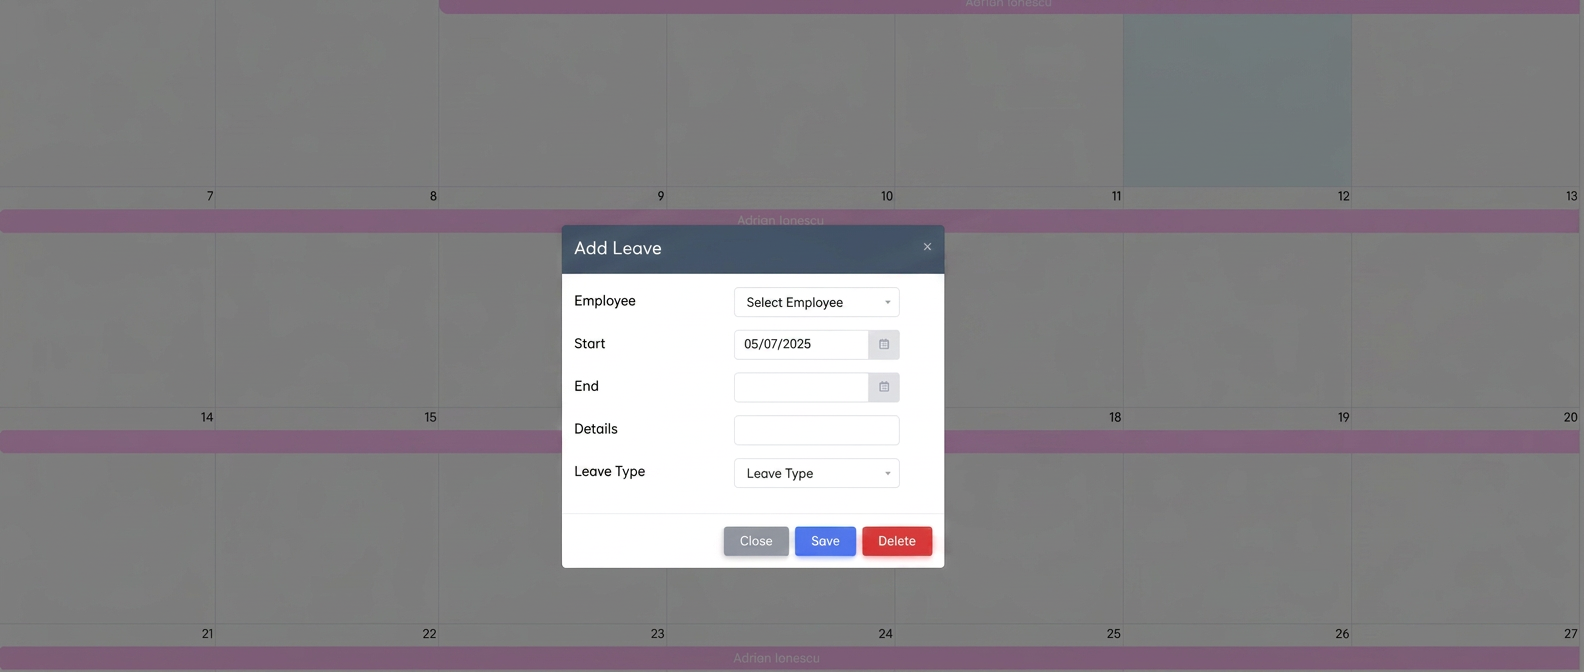
In both cases, the “Add Leave” window will open, where you must complete the following:
- Employee: Select the person going on leave from the list (all employees entered into the platform will be displayed, regardless of whether they have an active iFlows user account or not.)
- Start / End: The dates are automatically taken from the selection made, but you can modify them manually.
- Details: You can add any relevant additional information.
- Leave Type: Choose the correct type: Annual Leave, Medical, or Unpaid.
- Finalize by pressing the Save button.
3. Viewing Information
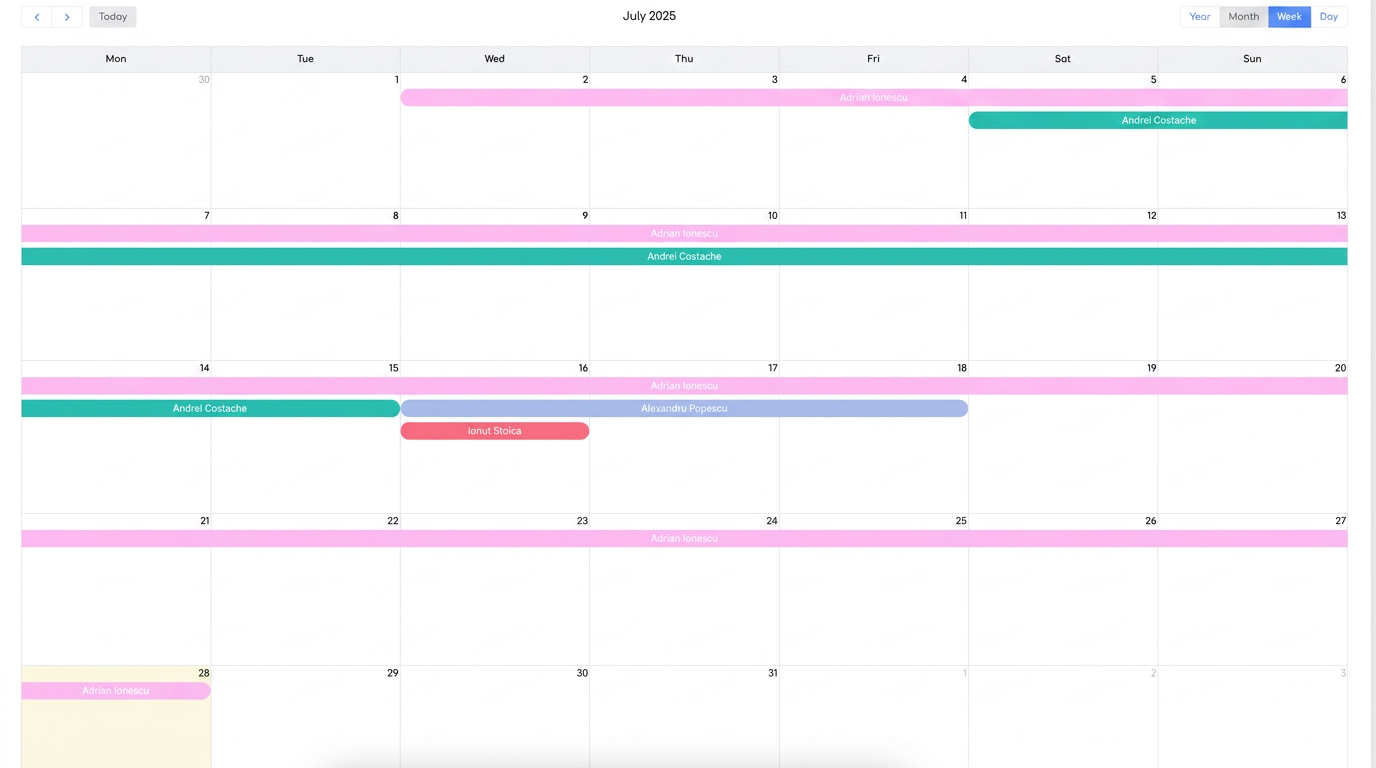
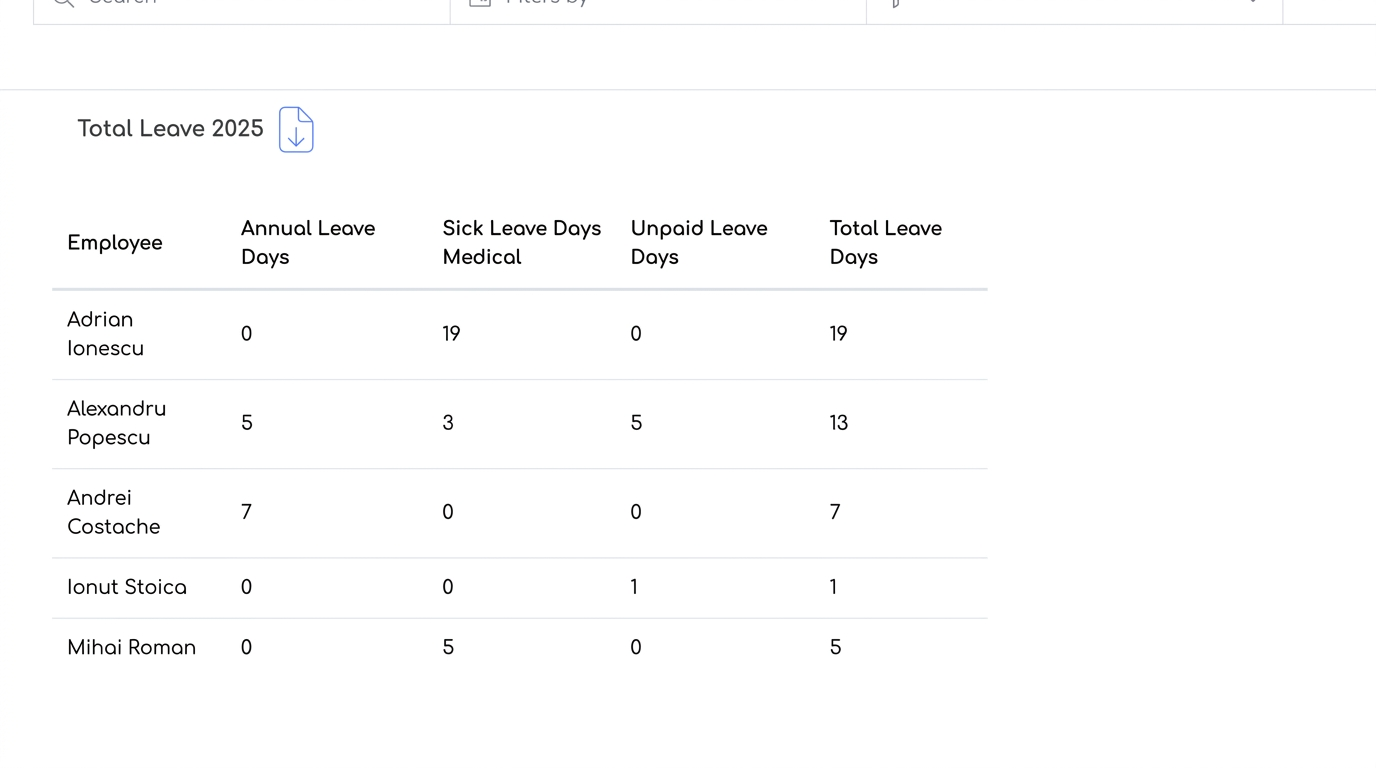
After saving, the leave will be displayed in the calendar as a colored bar, labeled with the employee's name. At the bottom of the page, you have a summary table that displays the total leave days for each employee for the current year.
4. Exporting Data
To generate a report, click on the download icon (📄) next to the table title. You will instantly get an Excel file with the leave summary for all employees.
5. Changing the Display
You can navigate and view the calendar in different formats using the buttons in the top-right corner: Day, Week, Month or Year.