
New: AI Assistant for Text Generation and Refining
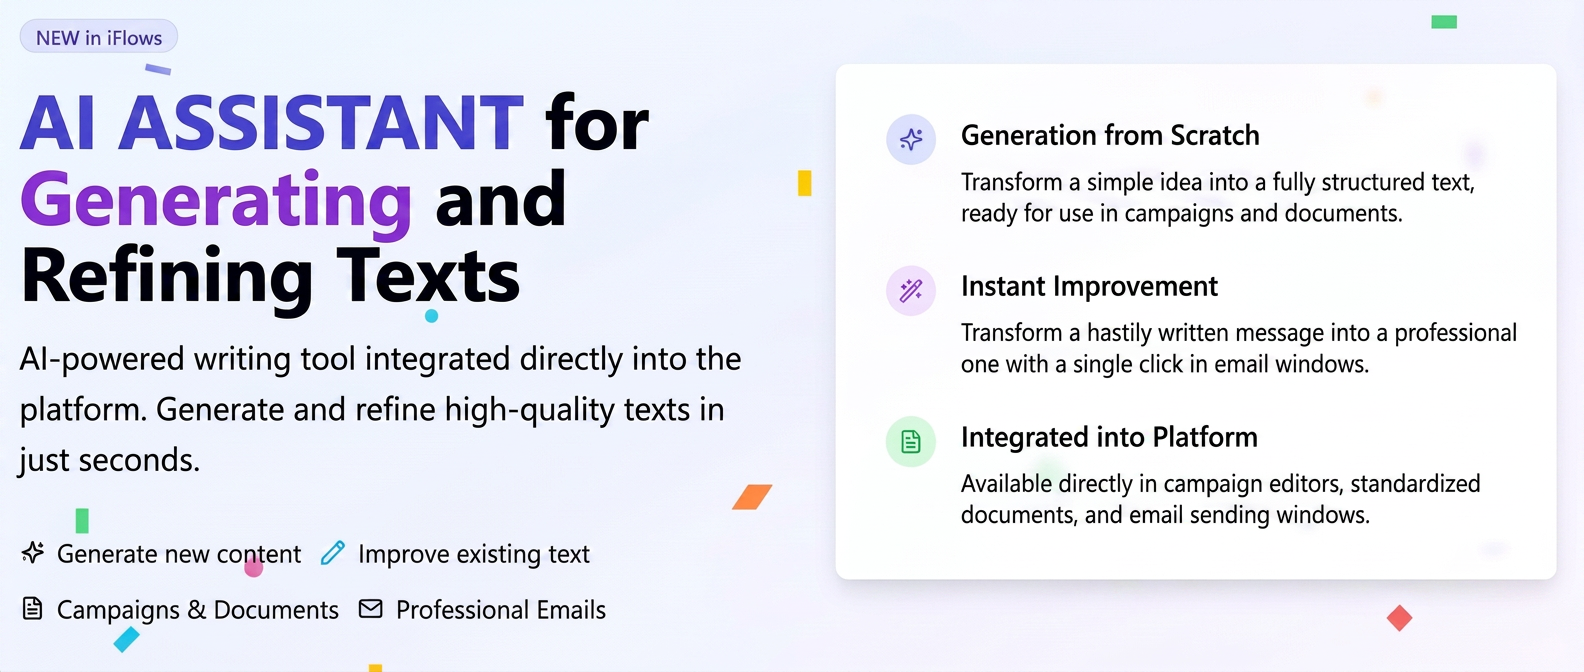
We have integrated an Artificial Intelligence writing tool into the iFlows platform. This functionality was designed to act as a creative partner and an editor, allowing you to generate and refine high-quality texts in just a few seconds, exactly where you need them.
How does the new AI tool work?
It operates in two main modes, adapted to your needs:
- Generating New Content from Scratch: Transform a simple idea into a complete text. Provide a few clear instructions, and the tool will build a structured message or document, ready to use.
- Improving an Existing Text: Already have a draft, but feel it could be better? With a single click, the same functionality can rewrite the text to correct errors, optimize its tone and coherence, transforming a hastily written message into a professional one.
Where and How Do You Use the AI Writing Tool?
We have integrated this tool into the key communication points of the platform.
- In Email Campaigns and Standard Documents (Generation Mode)
Ideal for creating marketing texts from scratch or structures for complex documents.
How to use:
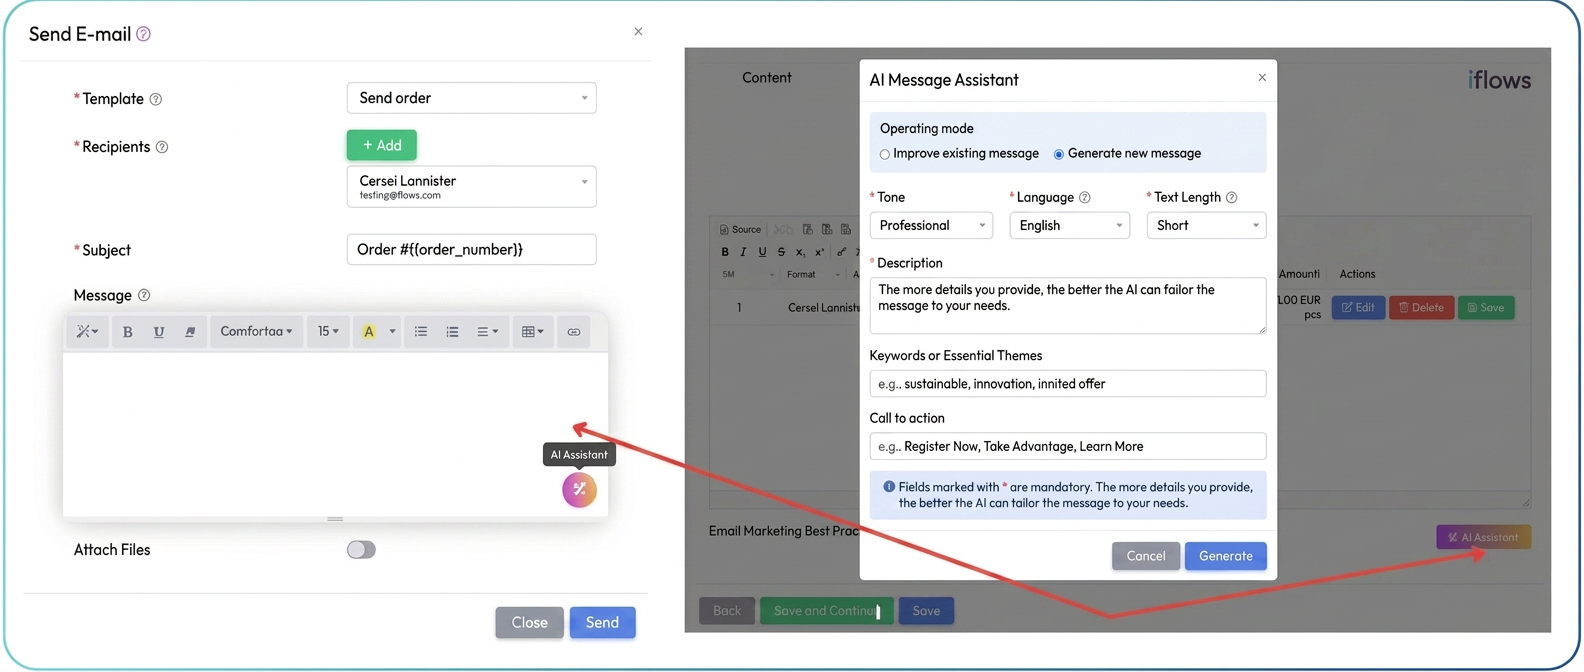
- In the text editor (either in Campaigns or in Standard Documents), you will find the AI Assistant button.
- Click on it and choose the option Generate new message.
- Complete the form to guide the creative process:
- Tone: Choose the desired style (Professional, Friendly, etc.).
- Description: Provide clear details about what you want the text to communicate (e.g.: "I want an email announcing a 20% discount offer on all our services" or "Generate a handover-takeover protocol (Proces verbal de predare-primire) for product X..")
- Press Generate.
- Analyze the proposed text and, if you are satisfied, press Insert to add it directly into the document.
- In Email Sending Windows (Improvement Mode)
Perfect for finishing daily communications quickly and efficiently.
How to use:
-
- In the email sending window (e.g.: from a quote page), write a quick message in the body of the text (e.g.: "Hello, please find the offer attached. Looking forward to your reply").
- Here you will use the tool's second capability. In the editor toolbar, click on the Improve message with AI icon.
- Instantly, your text will be analyzed and rewritten in a clearer and more professional form, while maintaining the central idea.
Optimization: Cost Calculator Integrated Directly into Quotes
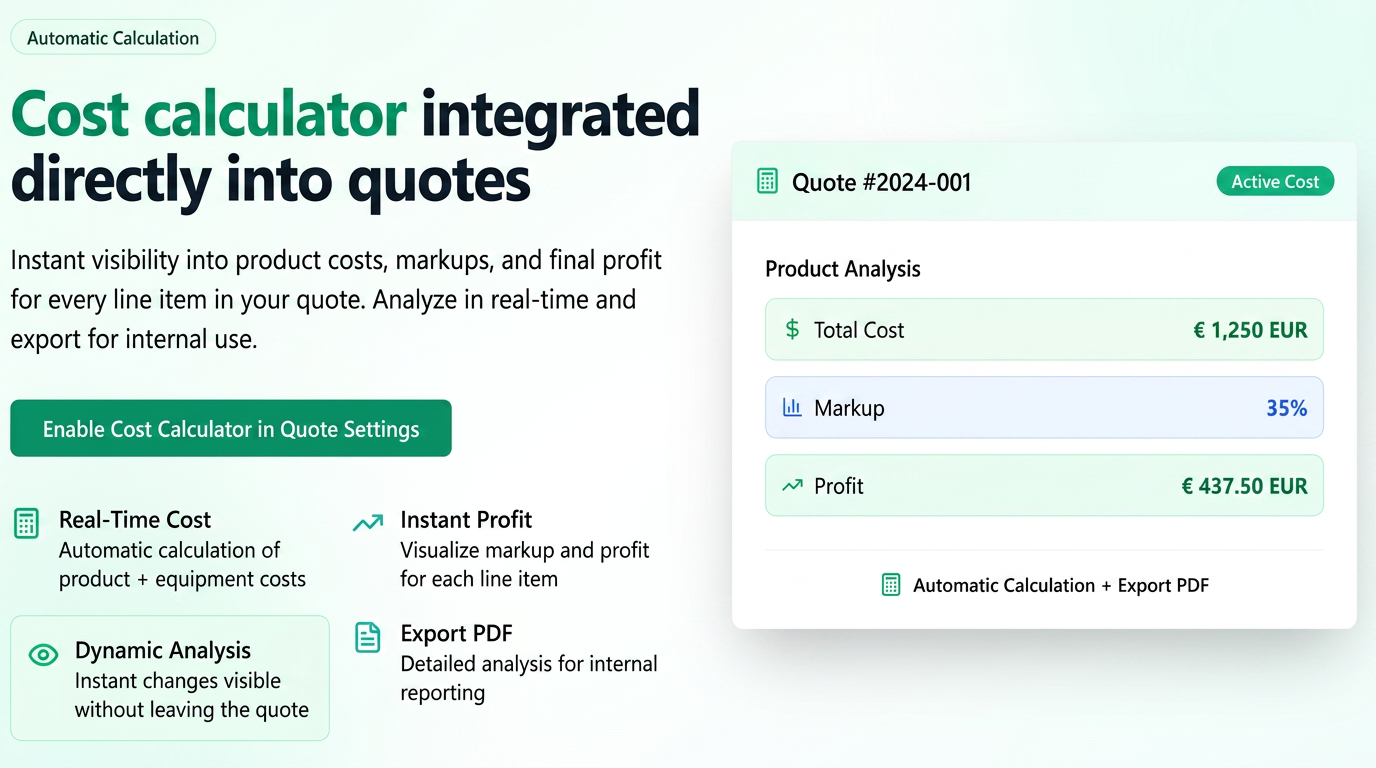
The functionality integrates a cost calculator directly into the quote creation screen. For each product added, you have instant visibility over costs, commercial markup, and final profit.
Step-by-Step User Guide
- Activating the functionality
To display the cost and profit columns in quotes, the function must first be activated in the general settings.
- Navigate in the main menu to Settings > Sales.
- Access the Quotes tab.
- Activate the Automatic Cost Calculation option (the toggle must be green).
- Press the Save button.
Once activated, the functionality will be available in all quotes, both when creating new ones and editing existing ones.
- Profitability analysis while creating the quote
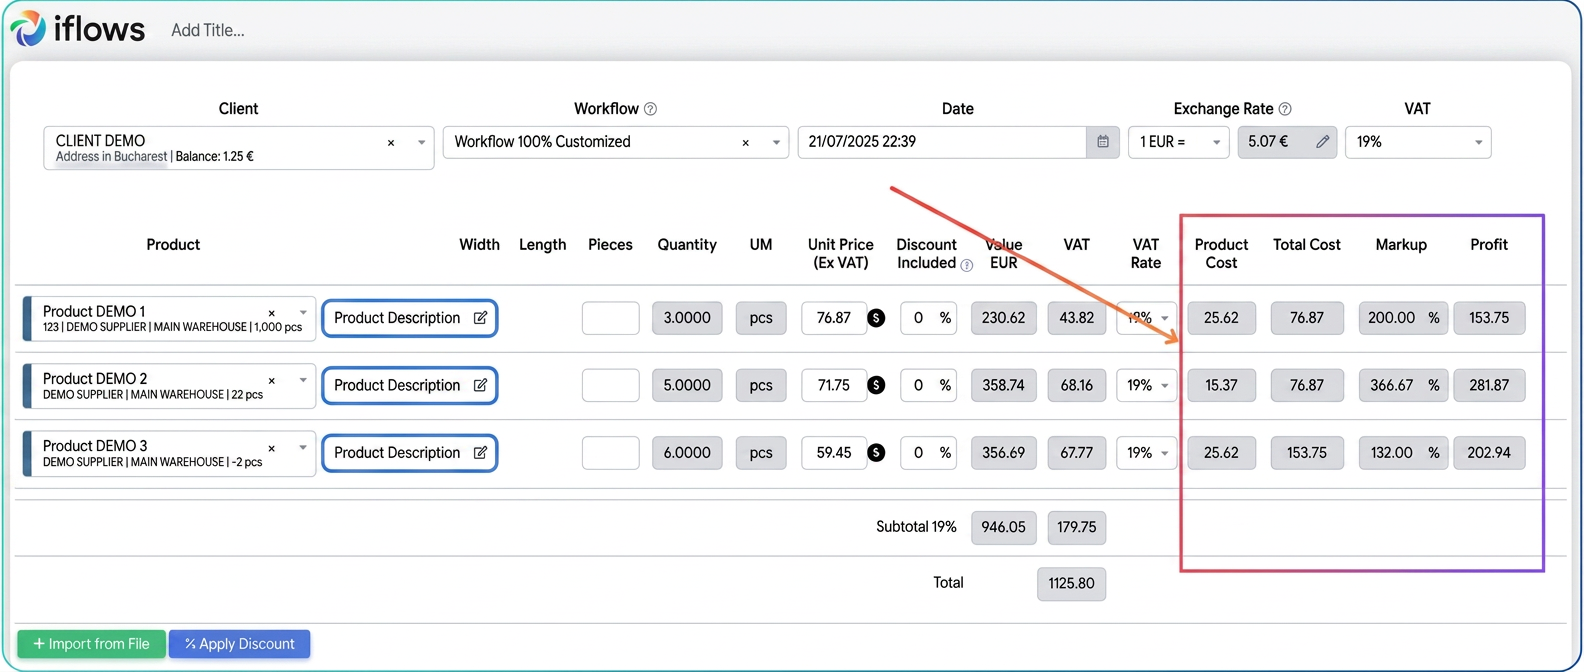
When you add products to a quote, the platform will automatically display the new financial columns, giving you a complete picture. Here is how to interpret them:
- Product Cost: Represents the acquisition or production cost of a single unit of product.
- Total Cost: Reflects the complete cost for the entire line in the quote. This is calculated automatically including all elements:
Total Cost = (Product Cost × Quantity) + Equipment Cost (if any) - Associated Equipment/Operations
Thus, you instantly see the real cost, which includes both the basic product and the labor or machinery used, if applicable. - Markup (%): The profit margin percentage.
- Profit: The final amount, in absolute value, that you earn on that product line, after covering all costs.
Helpful tip: For an even more detailed analysis, hover your mouse cursor over the value in the Profit column to see the unit profit (the gain on a single piece of product) displayed.
This dynamic view allows you to modify the price, quantity, markup, or equipment and immediately see the impact on profit without leaving the quote screen.
- Exporting the cost analysis for internal use
After completing the quote, you can quickly generate a detailed cost analysis, perfect for internal reporting or archiving.
-
- From the saved quote view, access the Actions menu.
- Select the Export Quote Costs option.
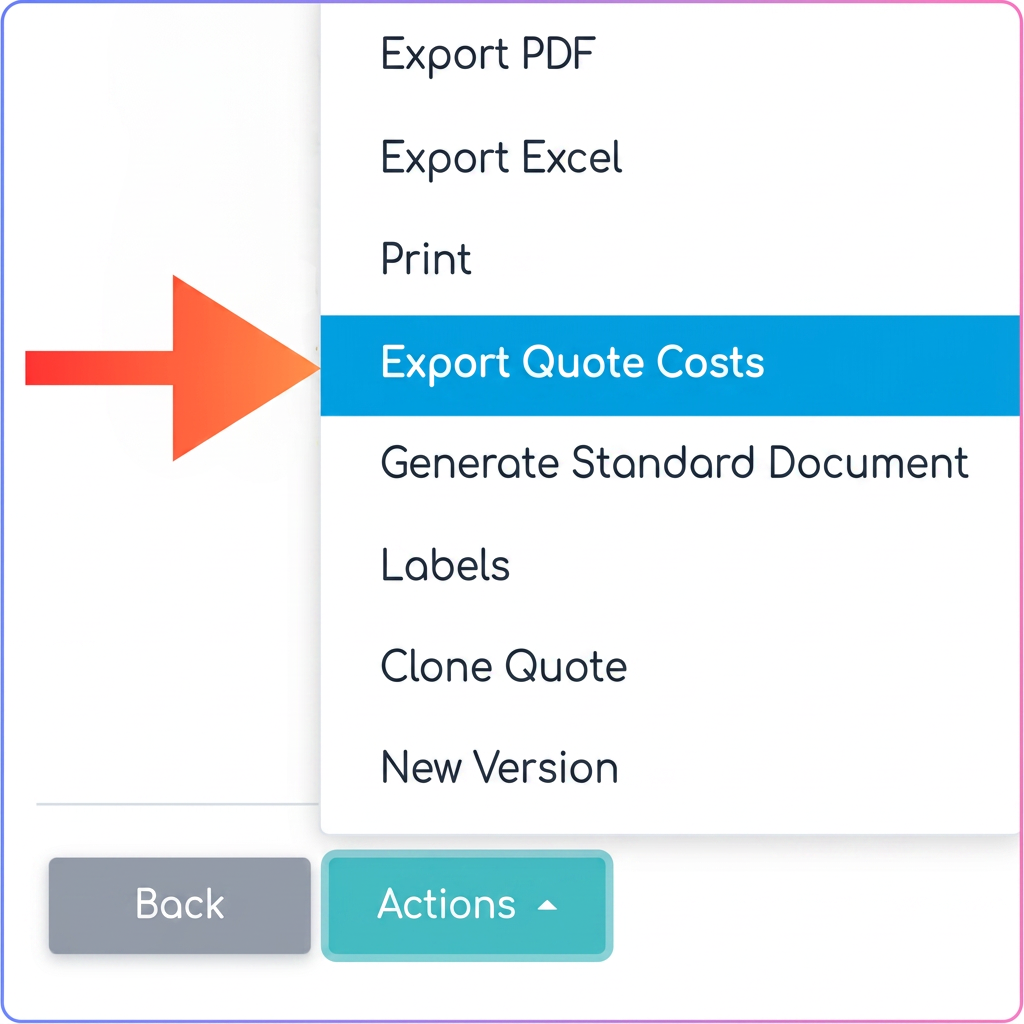
- The platform will generate a PDF document that centralizes all financial data: product costs, equipment costs, total costs, markup, and profit for each line in the quote.
Optimization: Advanced Payroll Functions
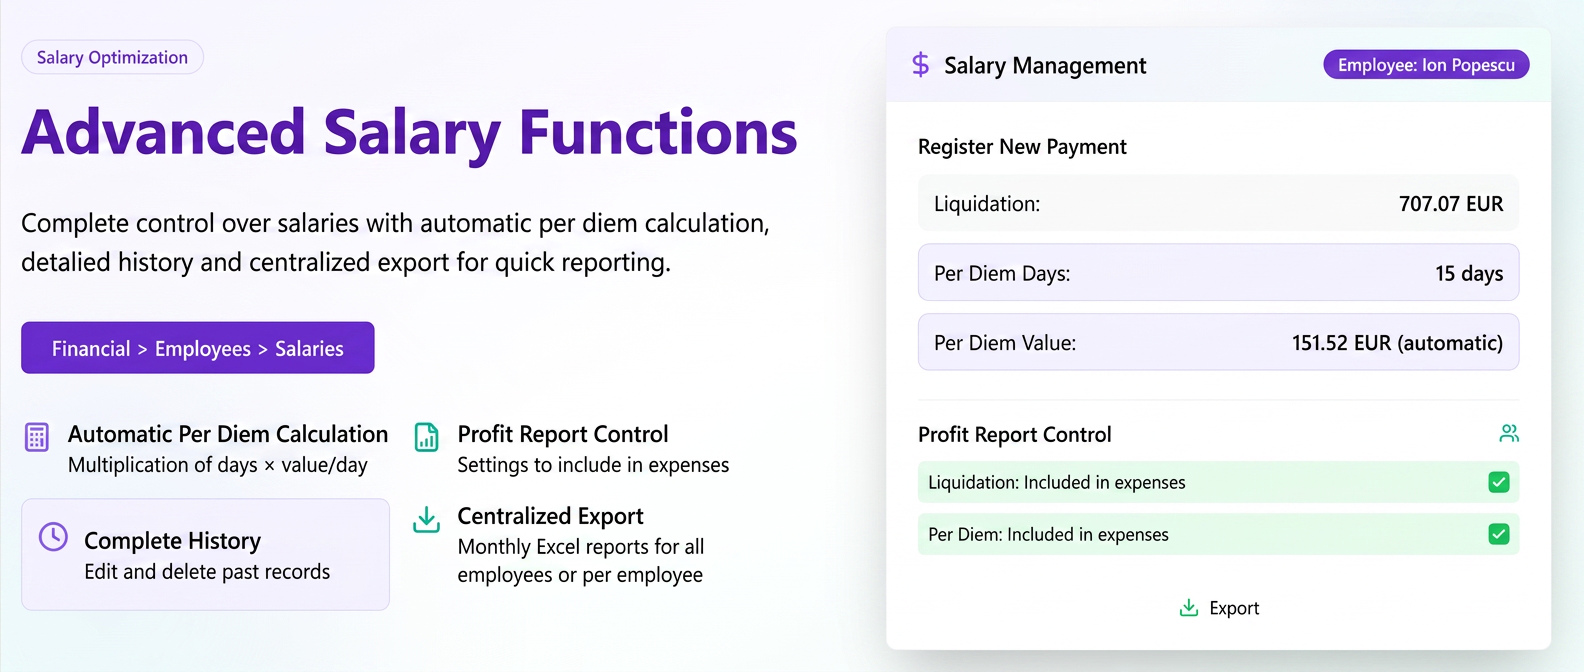
Efficient payroll management involves not only the correct recording of payments but also clear visibility into their impact on company profitability and the ability to generate quick reports. The payroll section in iFlows is designed to offer you detailed control over every aspect, from automatic per diem calculation to flexible exports.
Step-by-Step User Guide
The functionalities are structured on two levels: individual salary management per employee and centralized reporting.
- Detailed Salary Recording per Employee
To record a salary payment or to view an employee's history, follow these steps:
- Navigate to Financial > Employees and access the Salaries tab. Here you will see a list of all active employees.
- Next to the desired employee, in the Actions column, click on the green icon with the dollar symbol ($), titled Record Salary Payment.
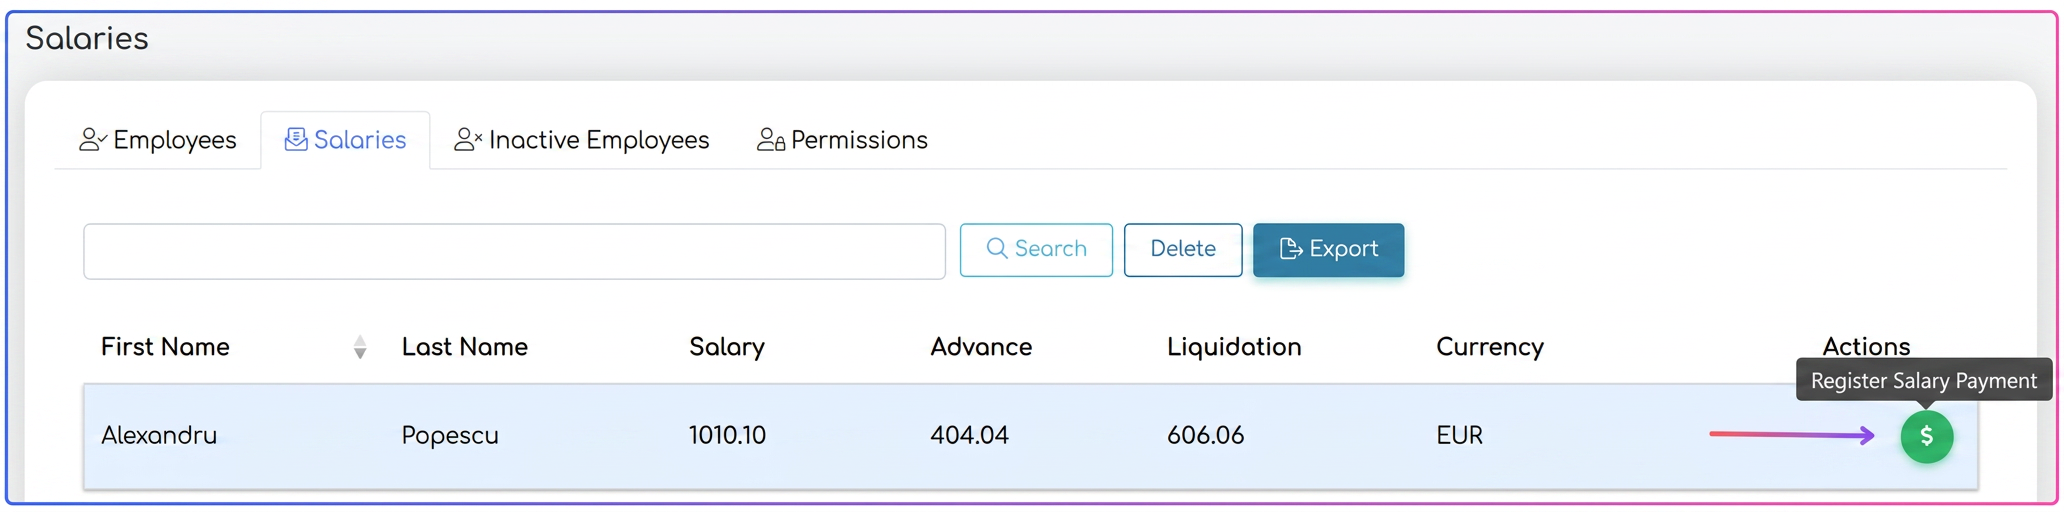
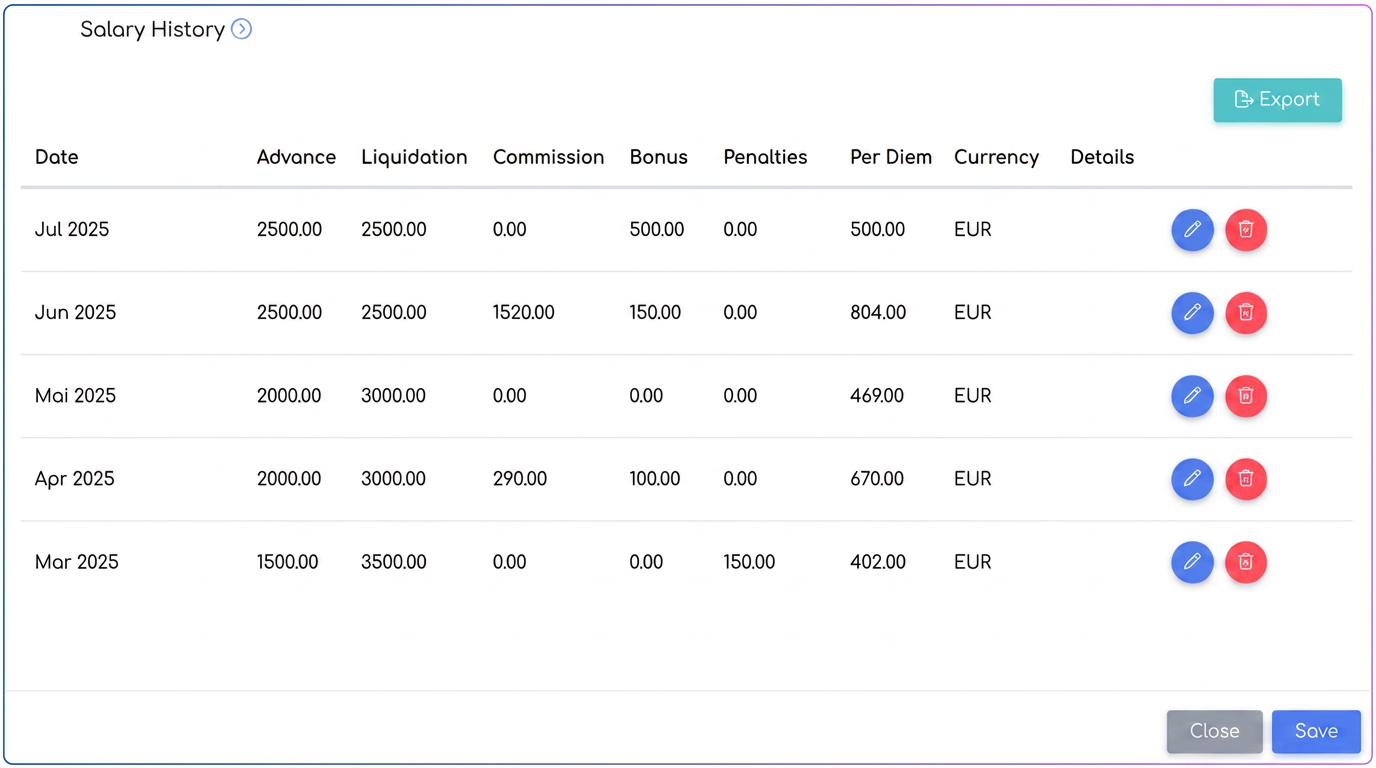
This action will open the salary management window for that employee. At the top you can add a new payment, and at the bottom of the same window, you will find the "Salary History" table, which centralizes all previous payments.
- Automatic Per Diem Calculation
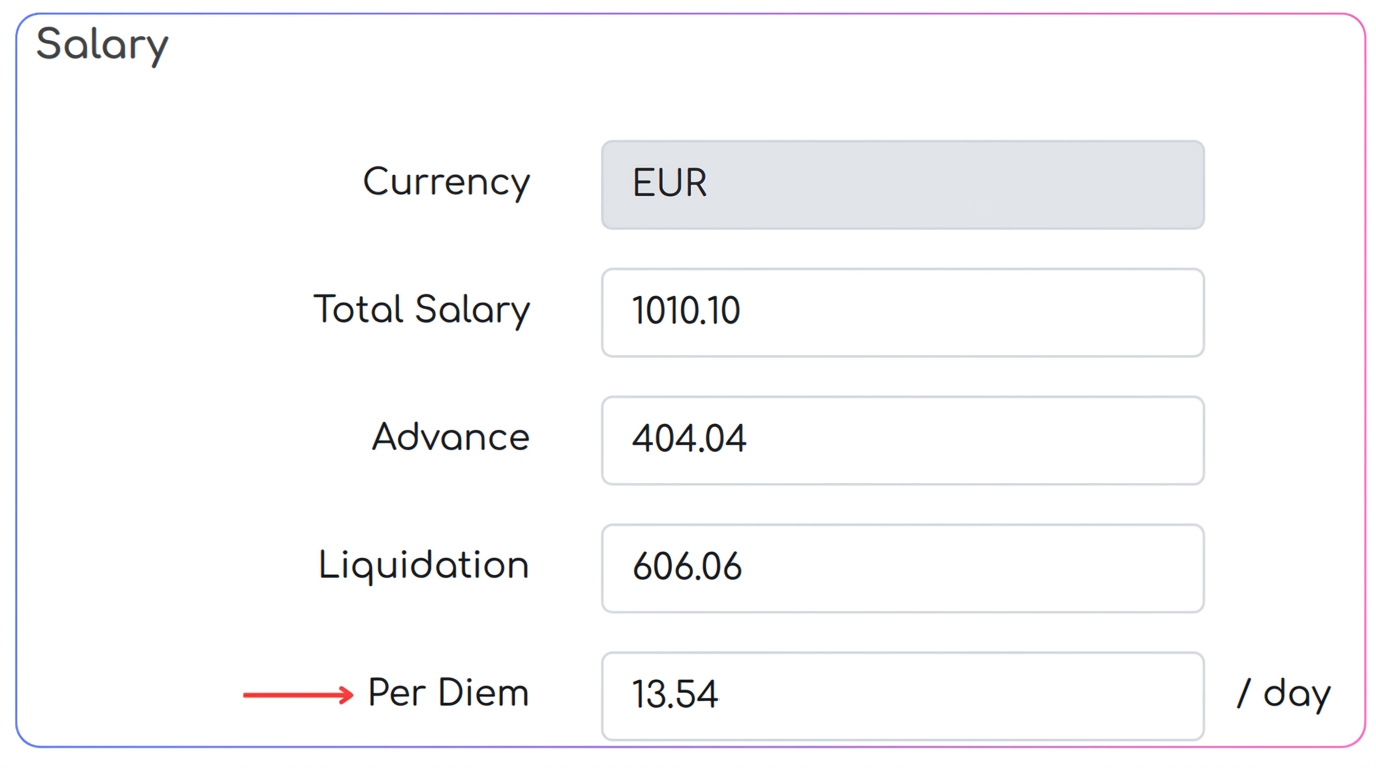
To automate the per diem calculation, first ensure you have set the per diem value in the employee's file (in the Salary section, complete the Per Diem / day field).
- When adding a new salary payment, fill in the "Per Diem Days" field with the corresponding number of days.
- The platform will automatically multiply the number of days by the set value per day and fill in the "Per Diem Value" field.
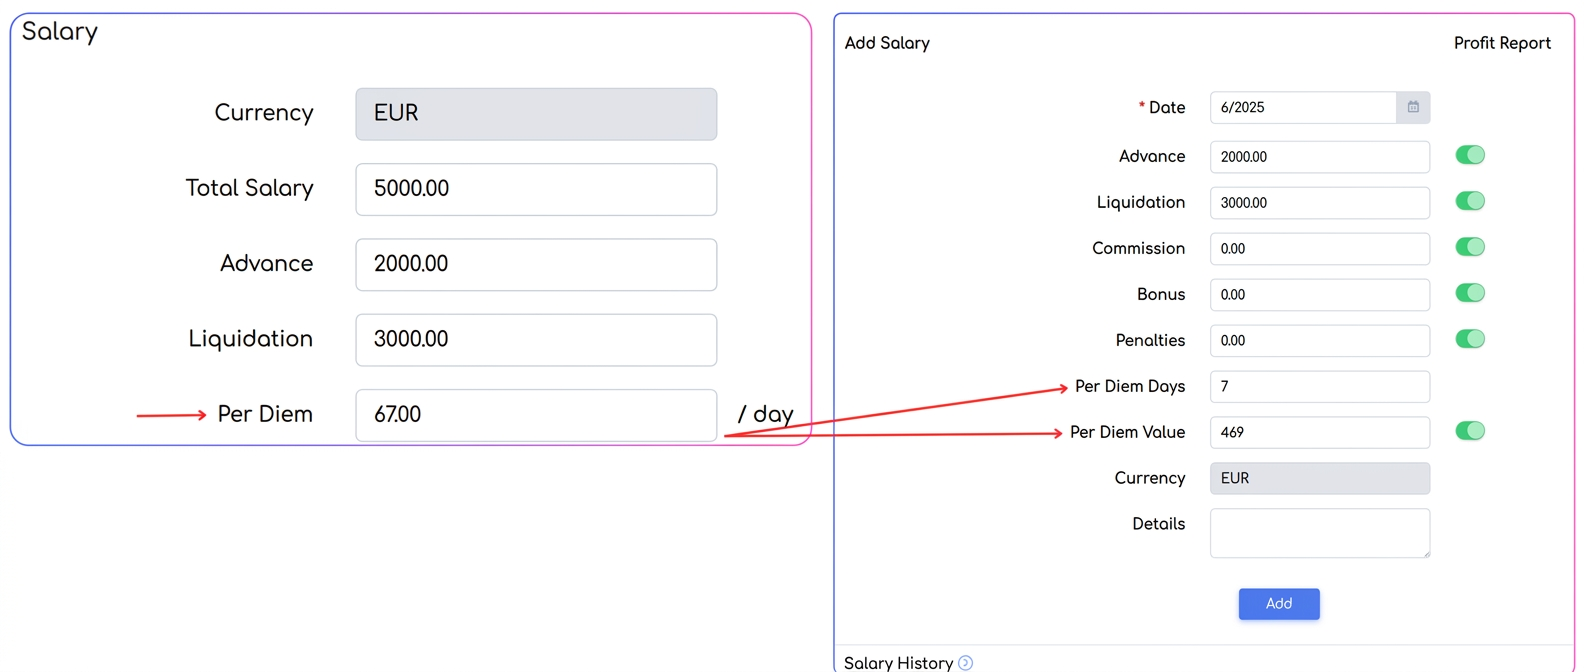
- Press the Add button to save this entry in the salary history.
- Control of Inclusion in the Profit Report
To correctly reflect salary expenses in financial reports, you can decide which salary components are included.
- Next to each component (Advance, Final Payment, Commission, Bonus, etc.), there is a toggle.
- When a toggle is ACTIVATED, that value will be automatically recorded as an expense in the Profit Report, in the "Expenses without Doc." column.
- Important: After setting the desired state for the toggles, you must press the Save button at the bottom of the window so that these preferences are remembered for future recordings.
- Salary History Management
The "Salary History" table gives you full control over past records:
- Edit and Delete: For each line in the history, you have the Edit (pencil icon) and Delete (trash can icon) buttons available to make quick corrections.
- Individual Export: To download the complete income history for the selected employee, use the Export button. This will generate a detailed Excel report just for that person.
- Centralized Export of Monthly Salaries
For company-level reporting, you can quickly extract salary data for all employees.
-
- Where to find it: Navigate to the main page Financial > Employees > Salaries.
- How it works: Click on the Export button in the top-right corner. Select the month and year for which you want the report. The platform will instantly generate an Excel document that centralizes all employees and their salary details for the selected period.
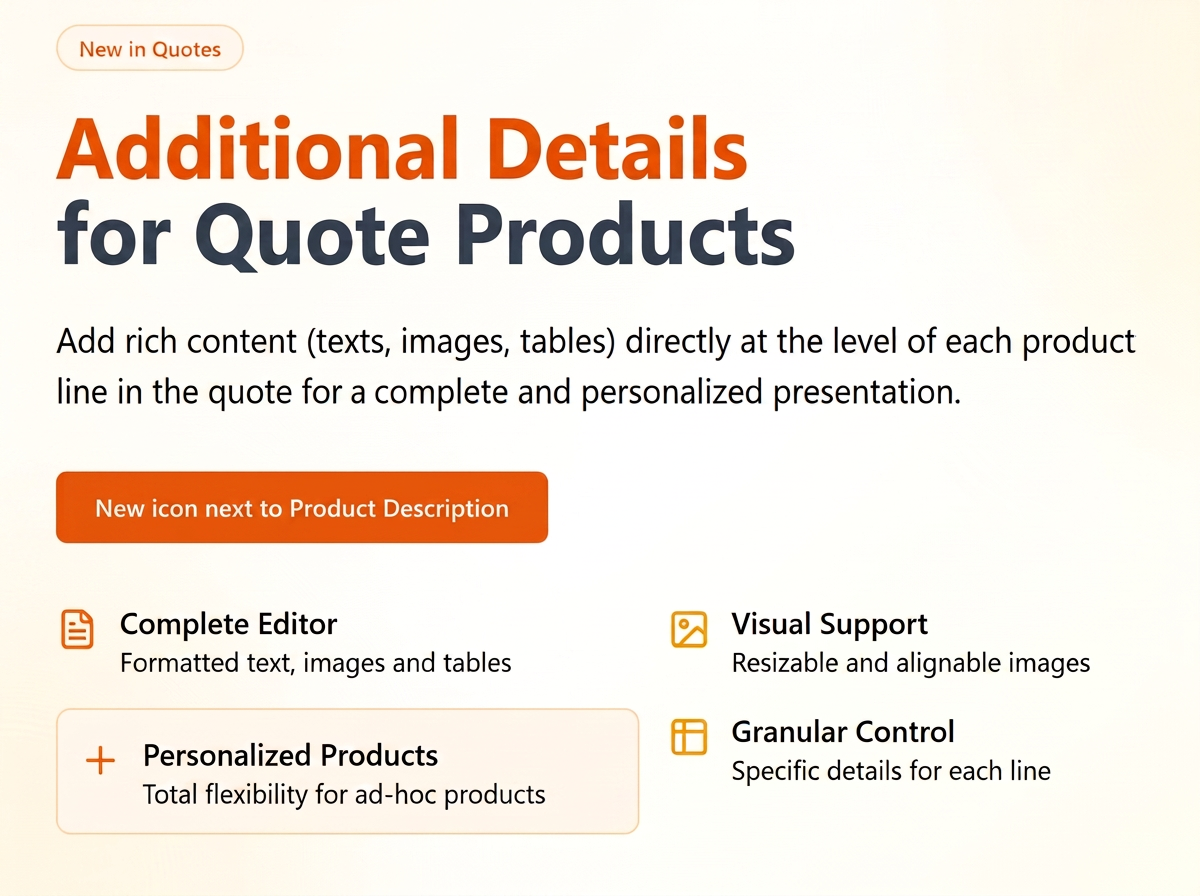
New: Additional Details for Products in Quotes
What problem does it solve?
Until now, to include complex details (images, technical specifications, extended descriptions) in a quote, you had two options:
- To have them predefined in the product file in the nomenclature. This approach did not cover scenarios for personalized or ad-hoc created products.
- To add them at the level of the entire document. In the case of multiple products, the details were not directly associated with a specific product.
The new "Additional Details" option completely removes these barriers. Now you have the flexibility to add rich content (text, images, tables) directly at the level of each product line in the quote, for specific situations where you need to detail certain products and that information does not apply to the standard.
Step-by-Step User Guide
The process is intuitive and takes place entirely on the quote creation or editing page.
- Access the details option
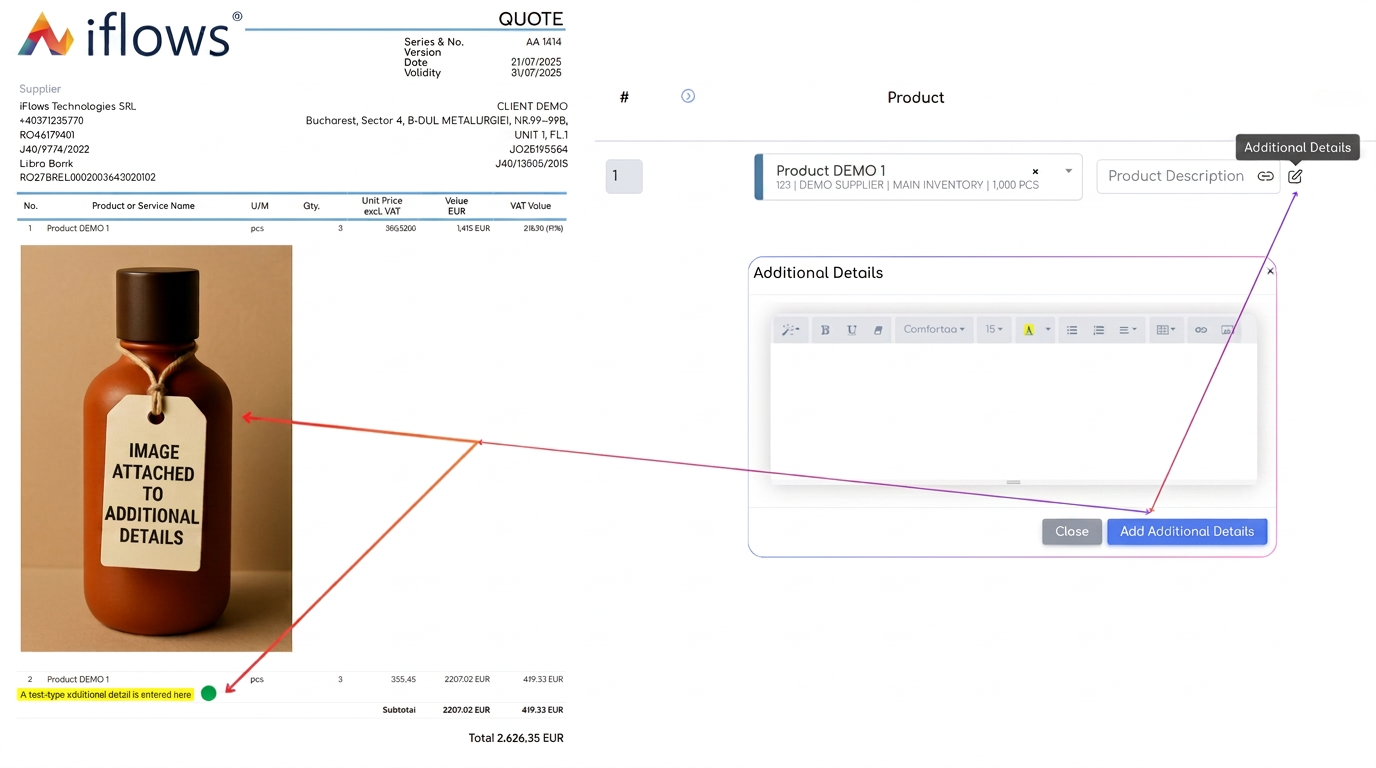
After adding a product to the quote, you will notice a new icon in the shape of a page with a pencil called Additional Details, located next to the "Product Description" field. Click on it to open the editing window.
- Add rich and personalized content
In the window that opens, you have a full text editor at your disposal, where you can:
- Write and format text: Add technical specifications, detailed descriptions, lists of benefits, or any other relevant information.
- Insert images: Upload product images, technical schemes, or diagrams to provide strong visual context. You can freely combine text and images to create complete presentations.
- Create tables: Structure complex data, such as lists of features or comparisons.
- Resize and align images
Once an image is inserted into the editor, you can click on it to access formatting options. From here, you can:
- Resize the image: Choose a predefined size (100%, 50%, 25%) to fit perfectly on the page.
- Align the image: Position the image to the left, right, or center for an aesthetic arrangement alongside the text.
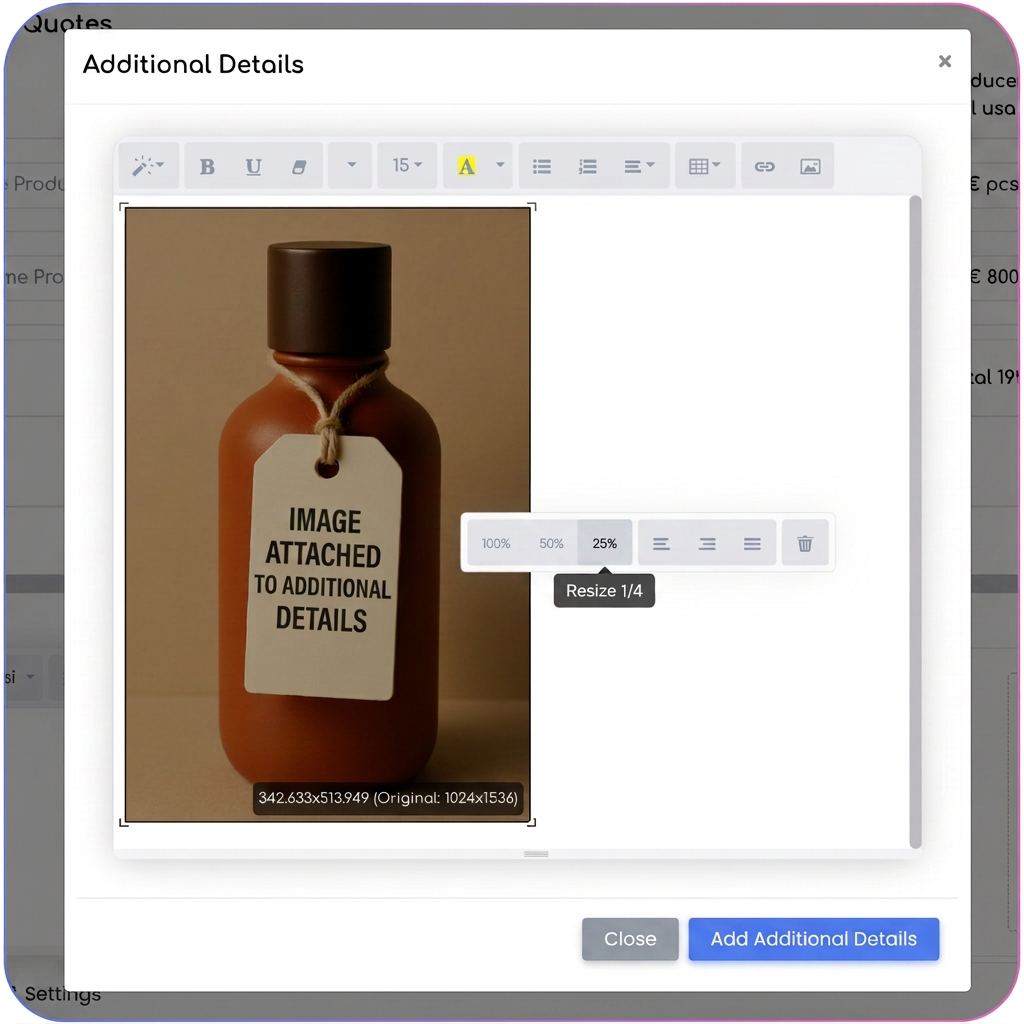
- Save and view the result
Once finished, press the Add Additional Details button. The content will be saved for that product line. When generating the PDF document, these details will be elegantly displayed immediately below the corresponding product line.
Key Benefits
- Total flexibility for personalized products: Ideal for custom-made products. You can add unique specifications and images for each client without overloading the product nomenclature.
- More convincing quotes: Enrich quotes with visual support and detailed descriptions to help the client fully understand the product's value and eliminate any ambiguity.
Granular control over details: You can use the same generic product in different quotes but with completely different additional details, perfectly adapted to the context of each sale.
Optimization: Organizing Email Templates by Sections
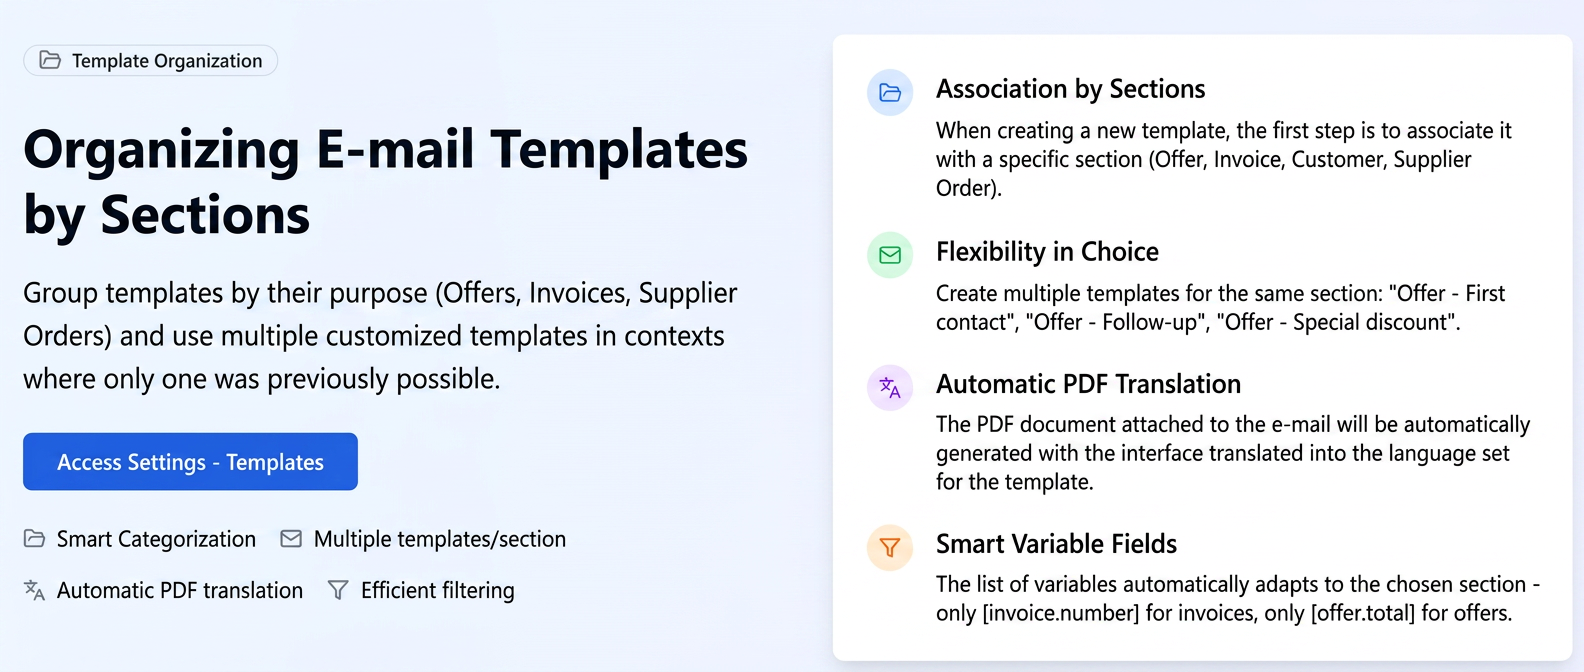
As the number of custom email templates grows, managing them becomes a challenge. Without a clear structure, it is difficult to quickly find the right template.
The Sections functionality solves these problems by introducing a categorization system. It allows you to group templates according to their purpose (e.g., Quotes, Invoices, Supplier Orders) and gives you the flexibility to use multiple custom templates in contexts where previously only one was possible. Thus, you achieve superior organization, speed in operation, and much more nuanced communication.
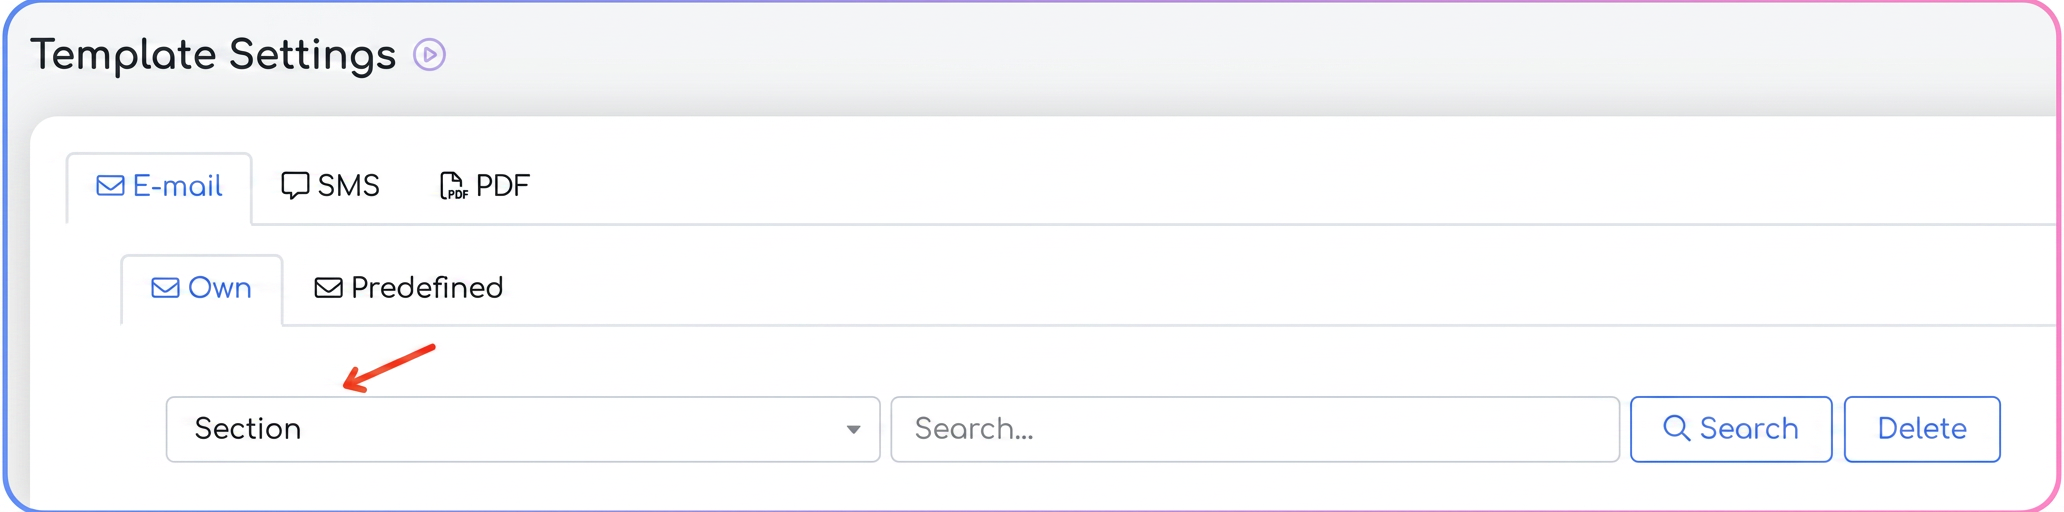
Step-by-Step User Guide
The basic principle is simple: each email template you create is now associated with a specific Section in the platform.
- Creating a new template and associating it with a Section
When adding a new template, associating it with a section is the first and most important step.
- Navigate to Settings > Templates and select the Email tab.
- Click on Add New Email Template.
- The first fields you need to fill in are:
- Section: Choose from the list the context in which the template will be used (e.g., Quote, Invoice, Client, Supplier Order, etc.).
- Language: Define the language in which the template is written.
- Immediate benefits in platform use
Once the templates are organized by sections, you will notice advantages in several places:
- Flexibility in template selection: When you send an email from a specific area (e.g., from a quote), the platform will no longer use a single default template. Instead, it will offer you a list from which you can choose any of the templates you created and allocated to the "Quote" section. You can have, for example, "Quote - First contact", "Quote - Follow-up", "Quote - Special discount".
- Smart List of Variable Fields: When you edit a template, the list of Variable Fields automatically adapts to the chosen section. Thus, if you are working on a template for the "Invoice" section, you will only have relevant variables for invoices available ([factura.numar], [factura.total_de_plata]), which makes the personalization process much faster and error-free.
- Automatic translation of attached PDF documents: If you set a template's language to English (or another available language), the PDF document attached to the email (invoice, quote, order) will also be automatically generated with the interface translated into that language.
- Efficient management and filtering of templates
On the main page at Settings > Templates, you can now use the new "Section" filter to quickly view all templates from a specific category, making their administration much simpler.
Important note for organization:
To benefit fully from this structure, it is recommended to edit previously created templates and assign them the correct section. Until they are associated with a section, they will remain visible in all selection lists in the platform, which can create clutter and make it difficult to choose the correct template.
Optimization: New Fields In the Supplier Profile
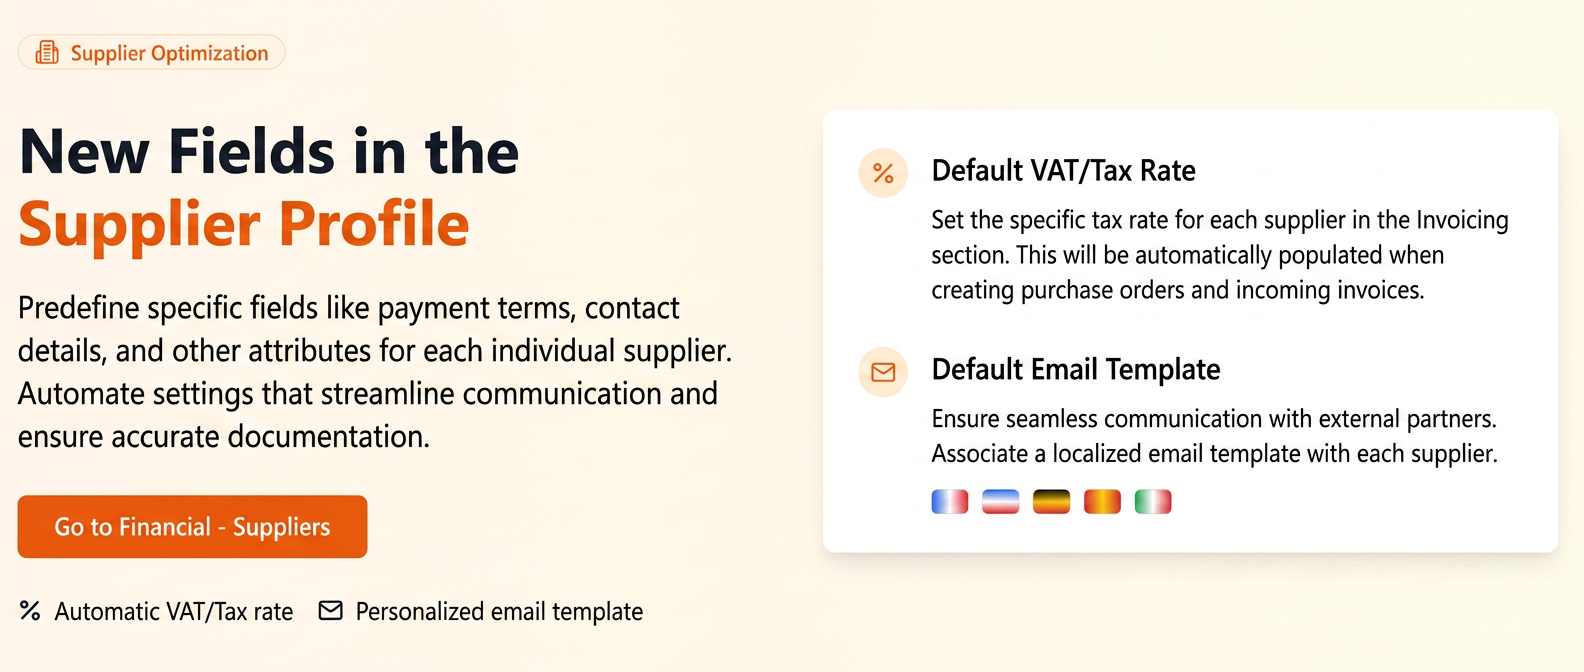
We have added two new fields in the Financial > Suppliers section that allow you to predefine the VAT rate and email template for each partner individually.
This functionality is particularly useful in two common scenarios:
- Collaboration with external (intra-community) suppliers: You can set a VAT rate of 0% for these partners, ensuring that all orders generated for them will automatically have the correct tax regime, and purchases will automatically carry the same rate.
- Communication in foreign languages: You can associate a translated email template (e.g., in English) with an external supplier, so that all communications are automatically sent in the correct language.
Step-by-Step User Guide
Configuration of these settings is done directly from the supplier edit page.
- Setting the Default VAT Rate for a Supplier
Where to find the option:
- Navigate to Financial > Suppliers and identify the desired supplier.
- Click the Edit button.
- In the Invoicing section, locate the VAT Rate field.
How it works:
Select from the list the VAT rate that this supplier usually uses on their invoices. For example, for intra-community acquisitions, you will select 0%.
Benefit: When creating a new order for this supplier, the VAT rate you set here will be automatically applied to the document, eliminating the risk of omitting this detail.
- Choosing a Default Email Template
Ideal for standardizing communication and using the correct language for each partner.
Where to find the option:
- Access the supplier edit page (following steps 1 and 2 above).
- In the Delivery section, locate the Default Email Template field.
How it works:
Choose from the list an email template you previously created (for example, a standard order template translated into English).
Benefit: When you use the function to send the order via email directly from the platform, iFlows will automatically load the template you selected, ensuring fast, correct, and professional communication.