
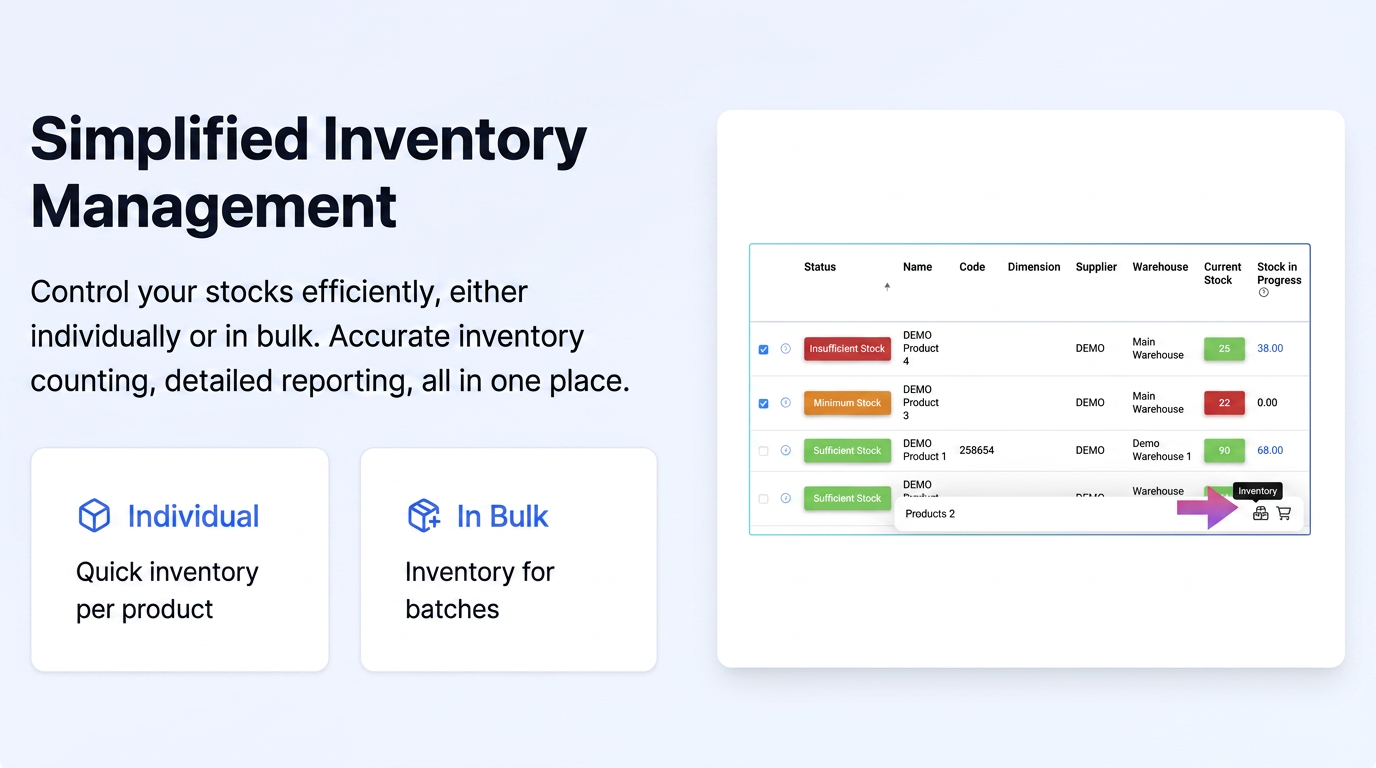
We will cover the two main methods of performing an inventory: individual (per product) and bulk (for multiple products simultaneously).
Section 1: Accessing the Inventory Function
- Navigate in the main menu to the Products section.
- Select the Stocks section. Here you will see a list of your products and current stock levels.
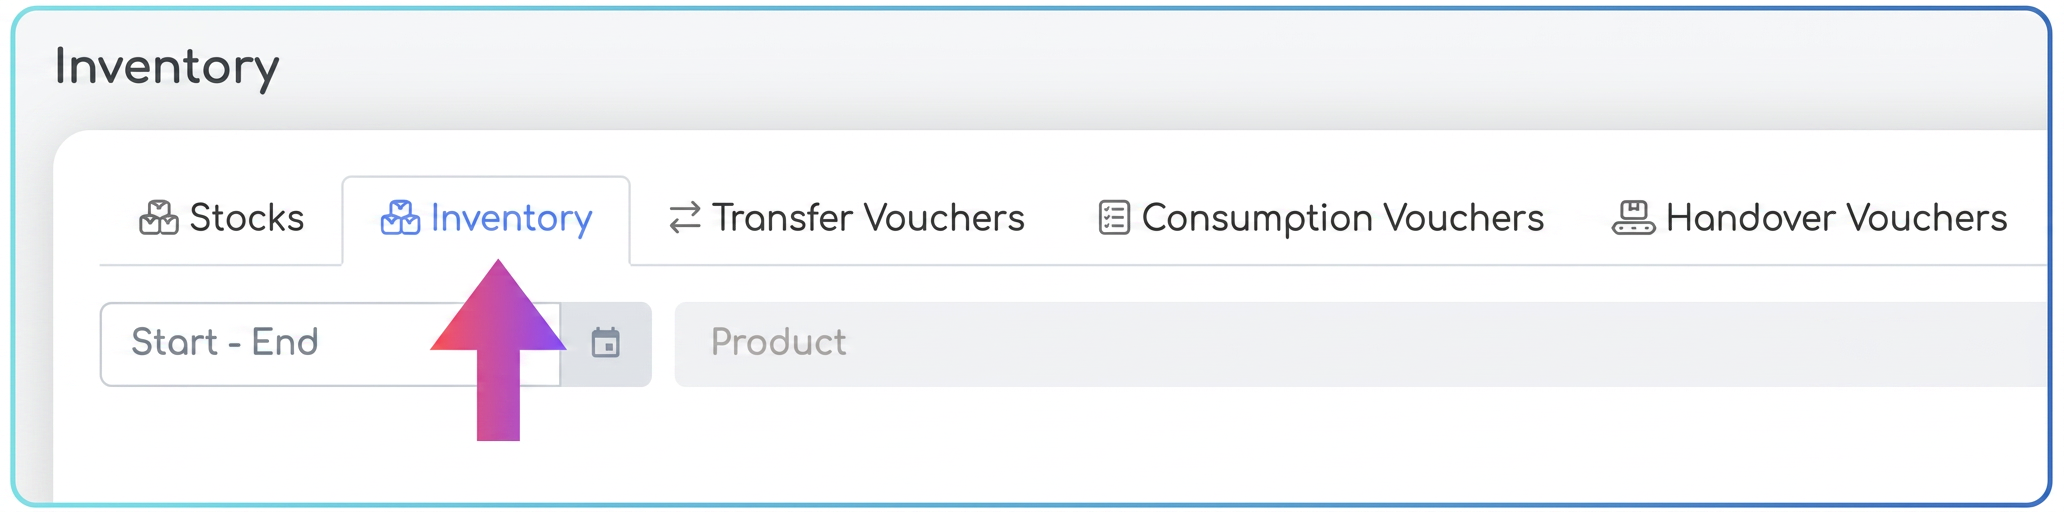
- Notice the Inventory tab added at the top of the grid, next to the "Stocks" tab. This will list all created inventory documents.
Section 2: Performing Inventory for a Single Product
This method is ideal for specific stock adjustments for a particular product.
- Identify the Product: Find the desired product in the list under the "Stocks" section.
- Initiate Inventory: On the respective product line, click the "Inventory" icon on the right side.
- Create Inventory Document: A pop-up window named "Create Inventory Document" will open.
- Title: Enter a relevant title for this document ("Product X Stock Adjustment – April 2025").
- Date: Select the date the inventory is being performed.
- Observations: Add any notes or comments related to this inventory (optional).
- Product Details: The window will automatically display the selected product, the management (warehouse), the initial stock (existing in the system before inventory), and a field for New Stock.
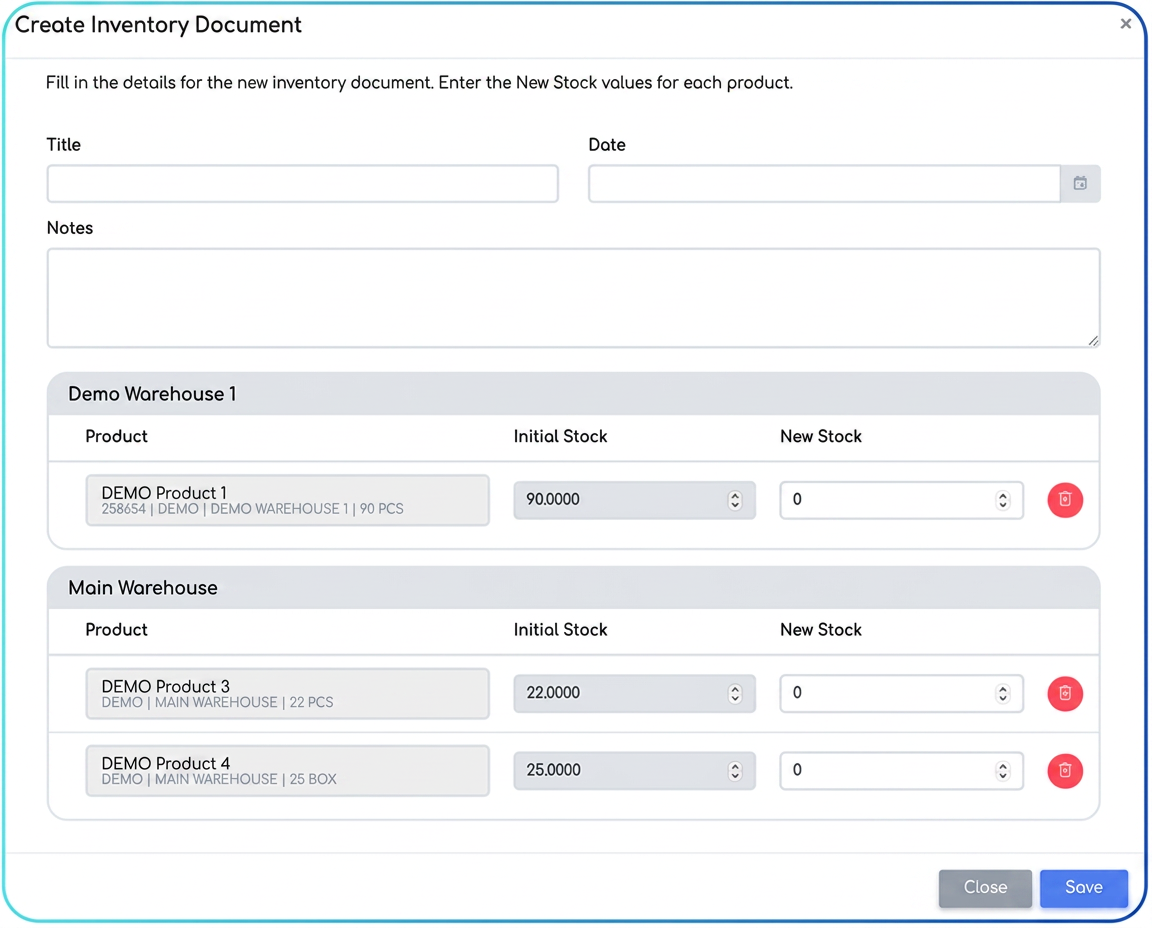
- Enter New Stock: In the "New Stock" field, enter the actual quantity of the product determined after the physical count. (E.g.: If the initial stock was 3 and you counted 4, enter 4).
- Save Document: Press the "Save" button.
- Confirmation and Update:
- You will receive a confirmation message at the top of the screen: "Inventory [Document Number] has been created successfully."
- In the main "Stocks" grid, the value in the "Current Stock" column for that product will update immediately to the value entered in "New Stock".
- You can expand the product line (by clicking the arrow on the left) to see the movement history. A new "Inventory" type entry will appear, showing the previous stock, the adjusted quantity, and the current stock.
Section 3: Performing Inventory for Multiple Products (Bulk)
This method allows for adjusting stocks for multiple products simultaneously.
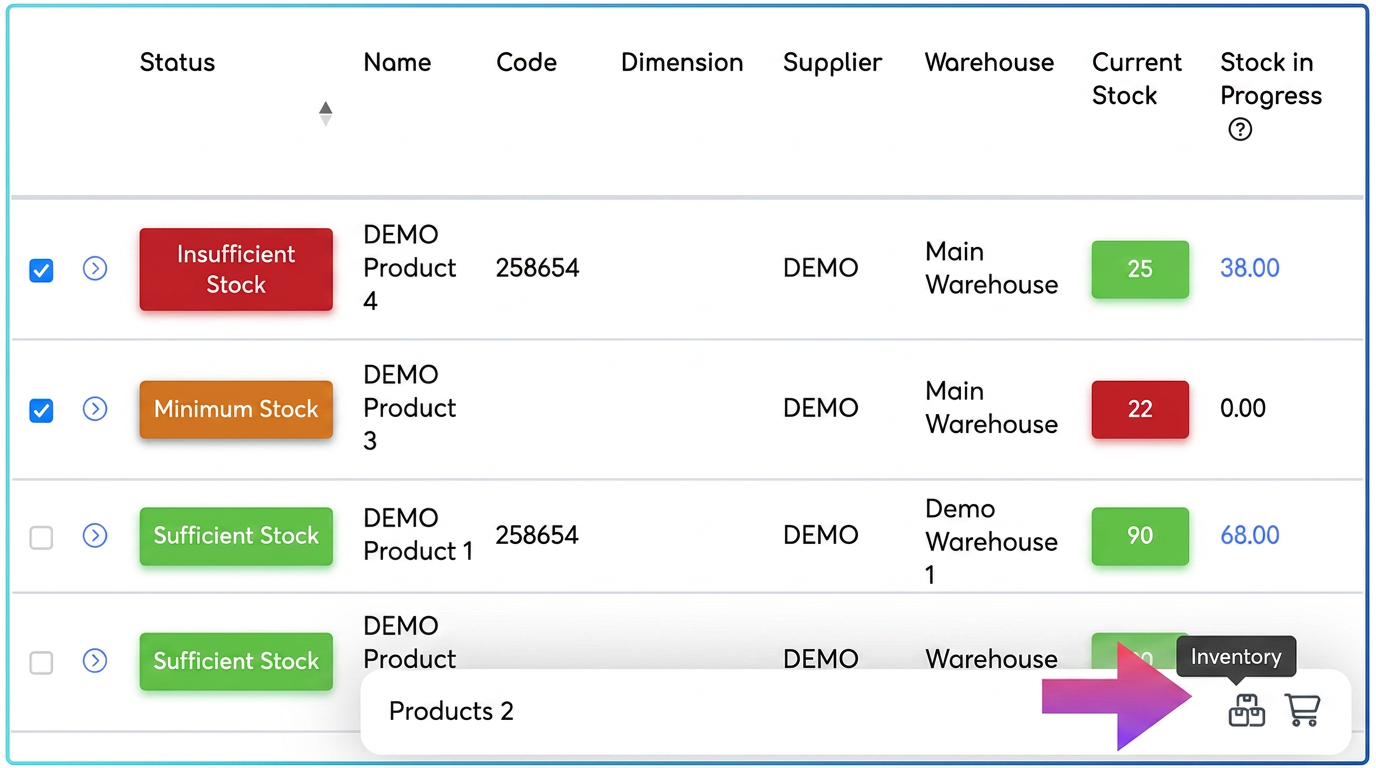
- Select Products: Check the selection boxes to the left of the lines corresponding to the products you wish to inventory.
- Activate Bulk Action: Once you have selected at least one product, a floating action bar will appear at the bottom of the screen.
- Initiate Bulk Inventory: Click the "Inventory" icon in the floating action bar.
- Create Inventory Document (Bulk): A similar pop-up window will open, but structured differently:
- Title, Date, Observations: Complete these fields as in the individual inventory (e.g.: Title: "DEMO Supplier Bulk Inventory - April 2025").
- Products Grouped by Management: The selected products will be displayed grouped according to the Management (warehouse) they are located in.
- Enter New Stocks: For each listed product, enter the actual (counted) quantity in the corresponding "New Stock" field.
- Save Document: Press the "Save" button.
- Confirmation and Update:
- You will receive a confirmation message indicating that the documents (possibly multiple, one per involved management/warehouse) have been created.
- In the main "Stocks" grid, the current stocks for all products included in the bulk inventory will be updated.
Section 4: Reviewing and Managing Inventory Documents
All inventory operations generate documents that can be reviewed later.
- Access Inventory List: Click on the main "Inventory" tab (next to "Stocks"). Here you will find a list of all created inventory documents, sorted chronologically (most recent first), with details such as: Document No., Created, Document Title, Document Date, No. Updated Products, Updated, Employee.
- View Document Details: Click on a document number (e.g.: INV-2025-0048) to open the details page. This displays:
- General information: Date, No. of updated products, General observations.
- Product details: Grid with products included in that inventory, Management, UM (Unit of Measure), Acquisition Cost, Initial Stock, New Stock, Difference Value.
- Update History: A section that records who created or modified the document, what observations they added at that time, and the date/time of the modification.
- Edit Document: From the details page, you can press the "Edit" button. The initial pop-up window will reopen, allowing you to modify the title, date, observations, or values in the "New Stock" field.
- Delete Document: From the details page, the "Delete" button allows for the removal of the inventory document. Caution: This action may affect stock history and should be used with care.
- Bulk Inventories and Management Locations: Note that a bulk inventory action involving products from different management locations (warehouses) will generate a separate inventory document for each management location. This ensures a logical separation of adjustments per location.
Related articles
Generating PDF Documents from the Inventory Module: Inventory Report and Inventory ListTutorialsAssociating an Order to a Stock TransformationTutorials“Stock Difference” Column in Products > StocksTutorialsAdvanced stock transformation function (Increase/Decrease, Assembly/Disassembly, Transformation)TutorialsExport Stock Movement History per ProductTutorials