
This functionality is intended for companies implementing projects within the Casa Verde (Green House) program that need to include a specific QR code on invoices issued to beneficiaries, according to AFM (Environmental Fund Administration) requirements.
Step 1: Activating the "Casa Verde QR Code" Integration
- Navigate to the Settings section in the main left-hand menu.
- Select the Integrations option.
- Access the Available tab.
- Search for and identify the integration named Casa Verde QR Code.
- Click the + button (Install integration) next to it.
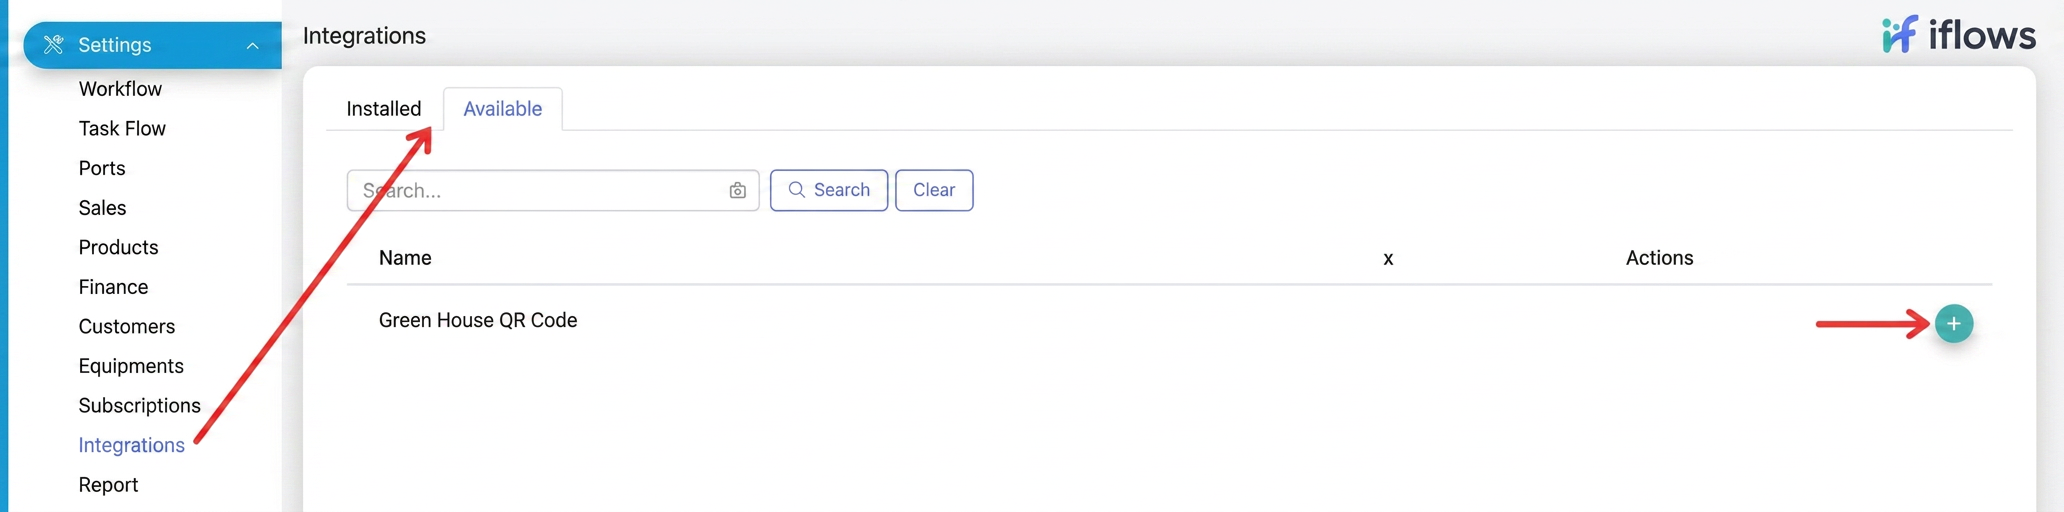
- After installation, the integration will appear in the Installed tab, confirming the functionality is active.
Step 2: Accessing the Invoice QR Code Option
- Navigate to the Sales section in the main left-hand menu.
- Select the Invoices sub-option.
- Create a new invoice from an order or edit an existing invoice by clicking the edit icon (pencil).
- In the invoice creation/edit screen, scroll down to the new QR Code option.
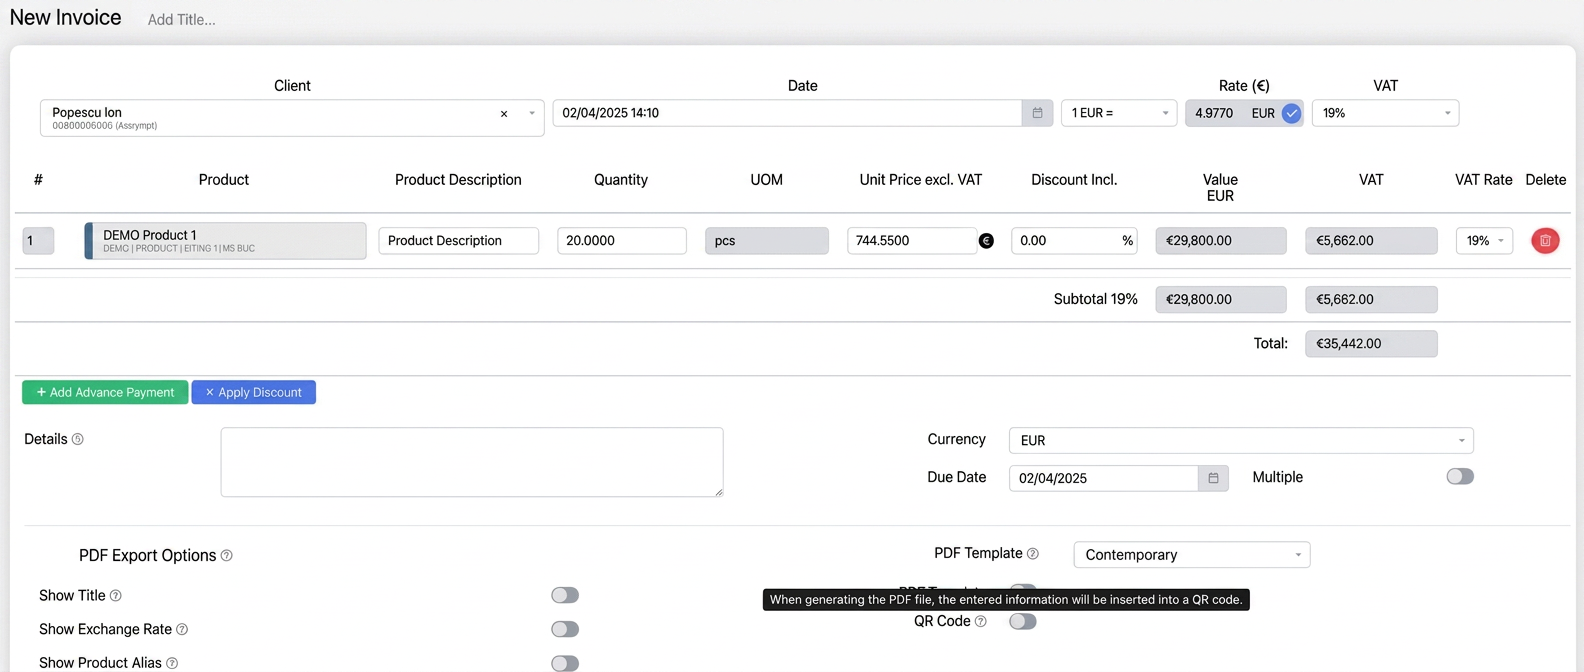
Step 3: Configuring and Filling Data for the QR Code
- Enable the QR Code option by checking the box (toggle) next to it.
- Select the Session corresponding to the Casa Verde program for which you are issuing the invoice (e.g., 2023 Session or 2024 Session). The set of required fields varies by session.
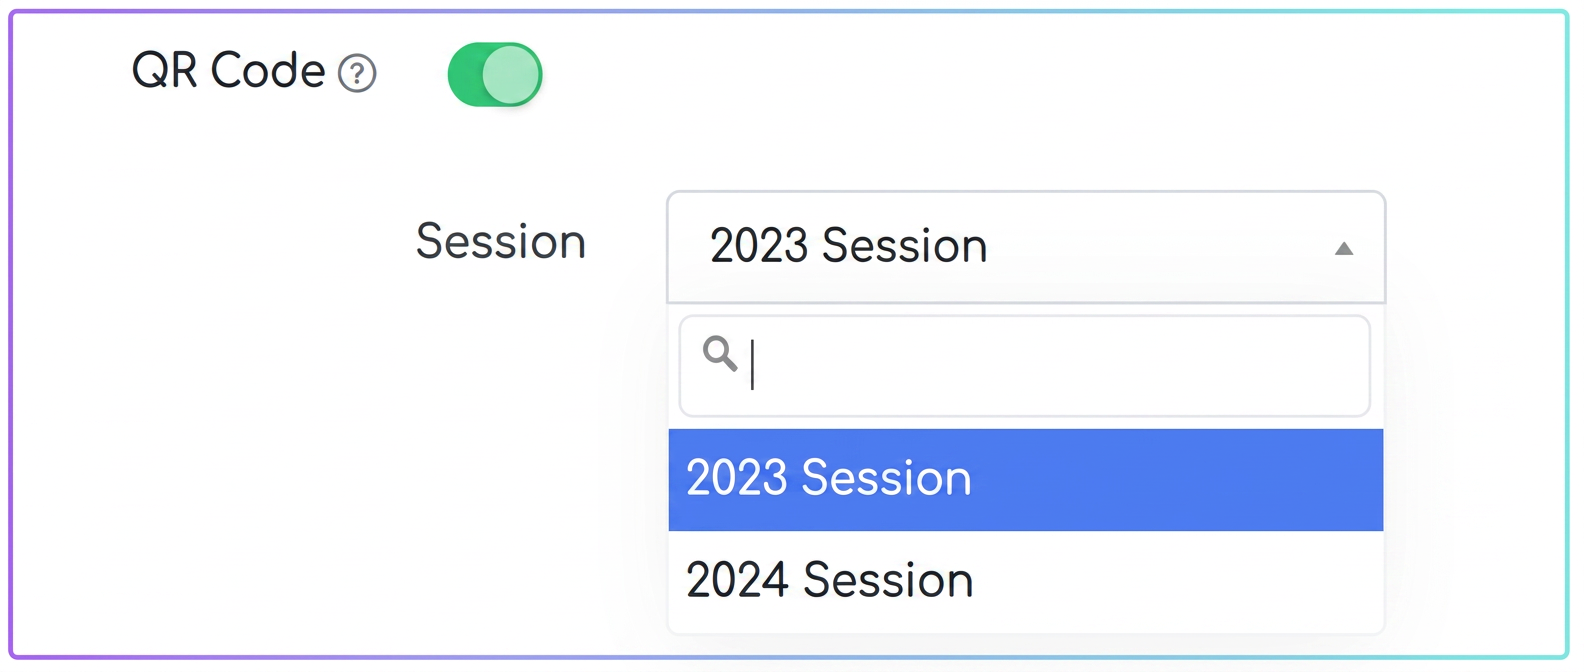
-
- For the 2023 Session:
- Select Applicant Type (Natural person or Religious unit).
- Verify the automatically pre-filled fields (Invoice No./Date, Beneficiary Name, CIF/CNP, County).
- Manually complete, if necessary, address data that was not previously recorded in the system.
- Mandatory fields:
- Installed Power (e.g., 3kW, 5kW, etc.)
- Inverter Serial Number
- Photovoltaic Panel Serial Numbers: Enter the serial numbers of all installed panels, strictly separated by a vertical bar (|). Example: PanelSerial1|PanelSerial2|PanelSerial3
- For the 2024 Session:
- Verify the automatically pre-filled fields (Invoice No./Date, Beneficiary Name, CIF/CNP, County).
- Manually complete, if necessary: Commune/City, Street, Street Number.
- Mandatory fields:
- Installed Power (e.g., 3kW, 5kW, etc.)
- Grid Connection Certificate Number
- Grid Connection Certificate Date (select date from the calendar)
- For the 2023 Session:
- A QR Code Content field will display the text to be encoded as you fill in the data. This is for informational purposes only.
Step 4: Saving the Invoice and Generating the PDF
- Once you have filled in all the necessary fields for the selected session, click the Save button at the bottom of the page.
- Return to the invoice list.
- Generate the PDF document of the newly saved/edited invoice (by clicking the specific PDF generation icon).
- Open the generated PDF file. You will notice that the specific QR code, containing the information entered in Step 3, has been added to the invoice.
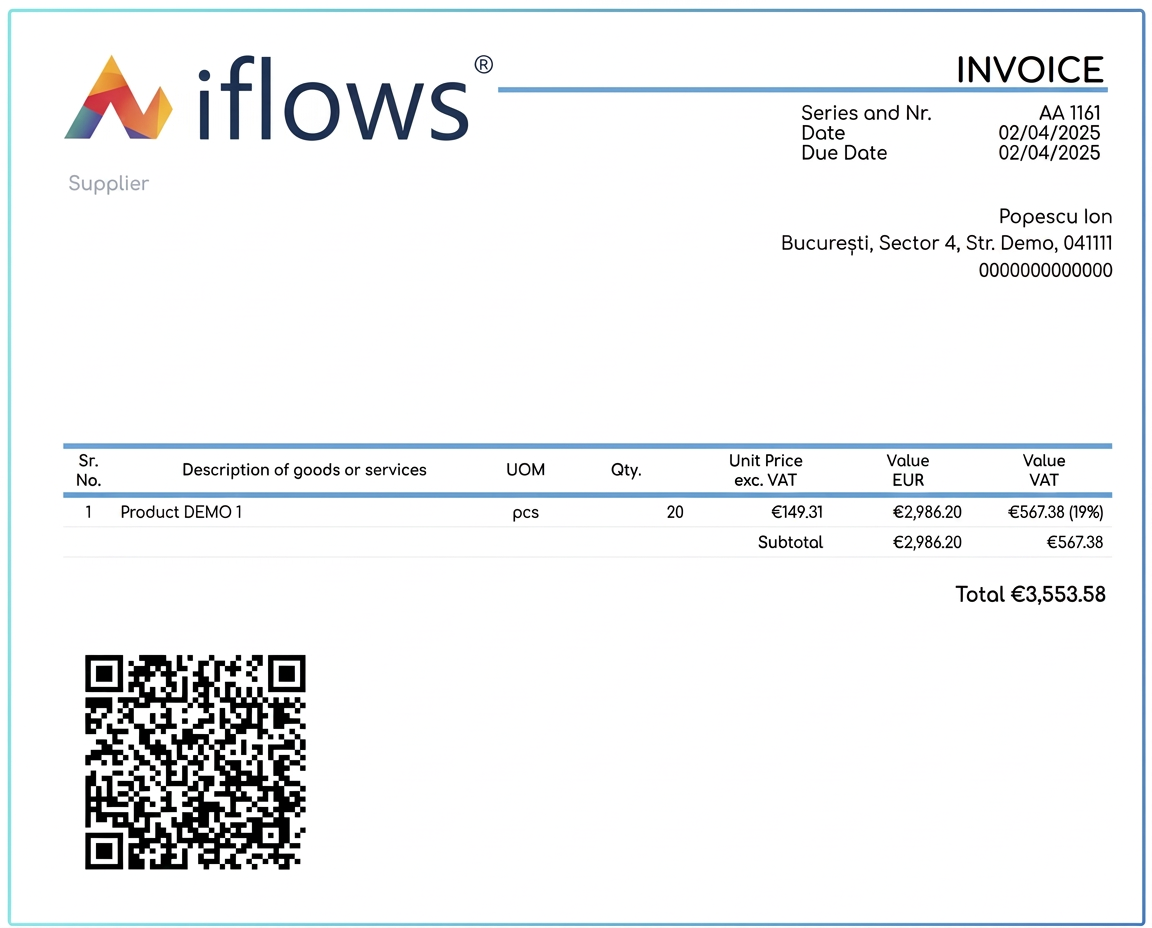
This QR code can be scanned and contains data structured according to the requirements of the Casa Verde Fotovoltaice (Green House Photovoltaics) program for the respective session.