
YouTube Tutorial Link: https://youtu.be/F64TJBkZuuw
With this integration, you can generate FAN Courier AWBs directly from iflows, and the shipment data is automatically transmitted to your SelfAWB account. Thus, the entire delivery process becomes faster and simpler, without the need to manually enter information into the FAN Courier application.
Initial Configuration
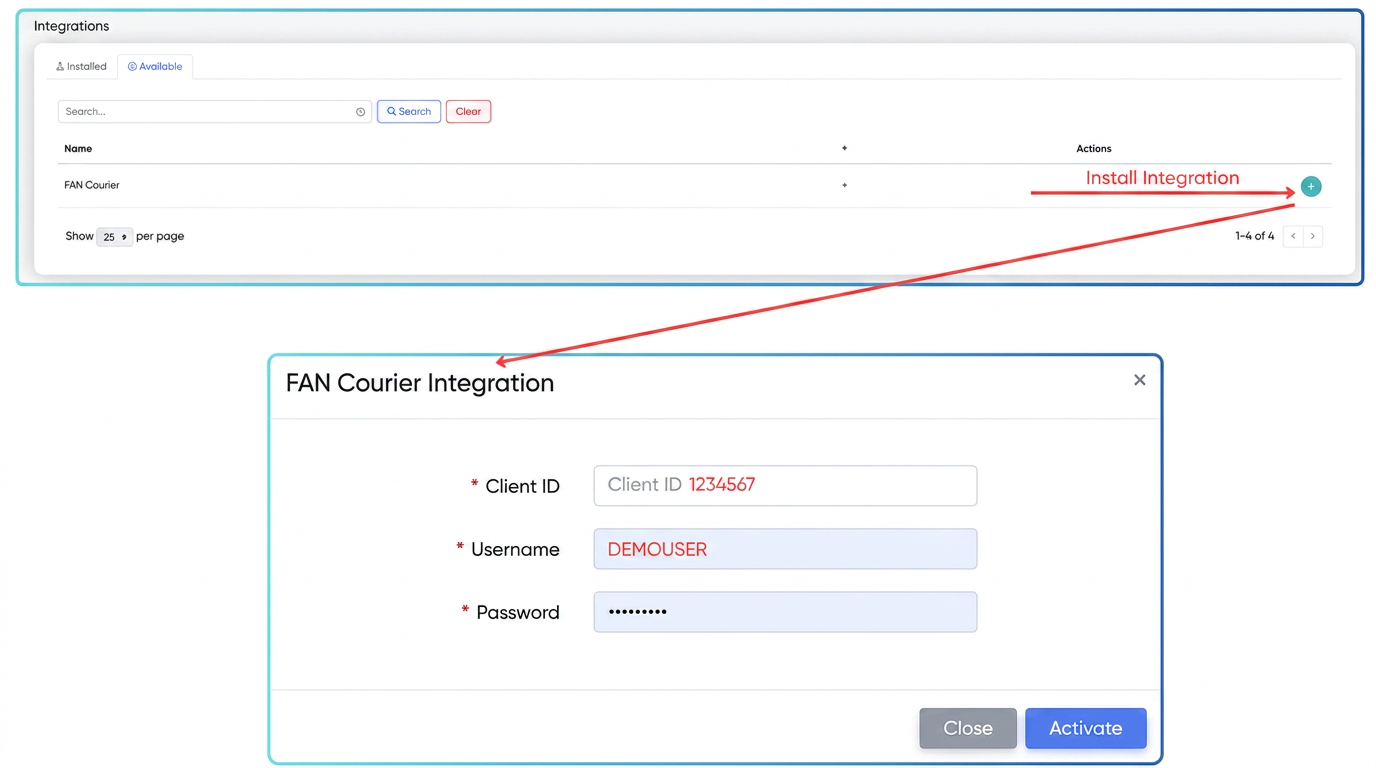
- Access the "" section.
Here you will see the list of available integrations, including FAN Courier. - Install FAN Courier integration
- Next to the FAN Courier integration, press the "+" symbol and fill in the required fields:
- Client ID
- Username
- Password
- Attention! These credentials are the ones used in the FAN Courier SelfAWB application and you can usually find them in the "Account Settings" section of SelfAWB.
- Next to the FAN Courier integration, press the "+" symbol and fill in the required fields:
- Verifying User Permissions
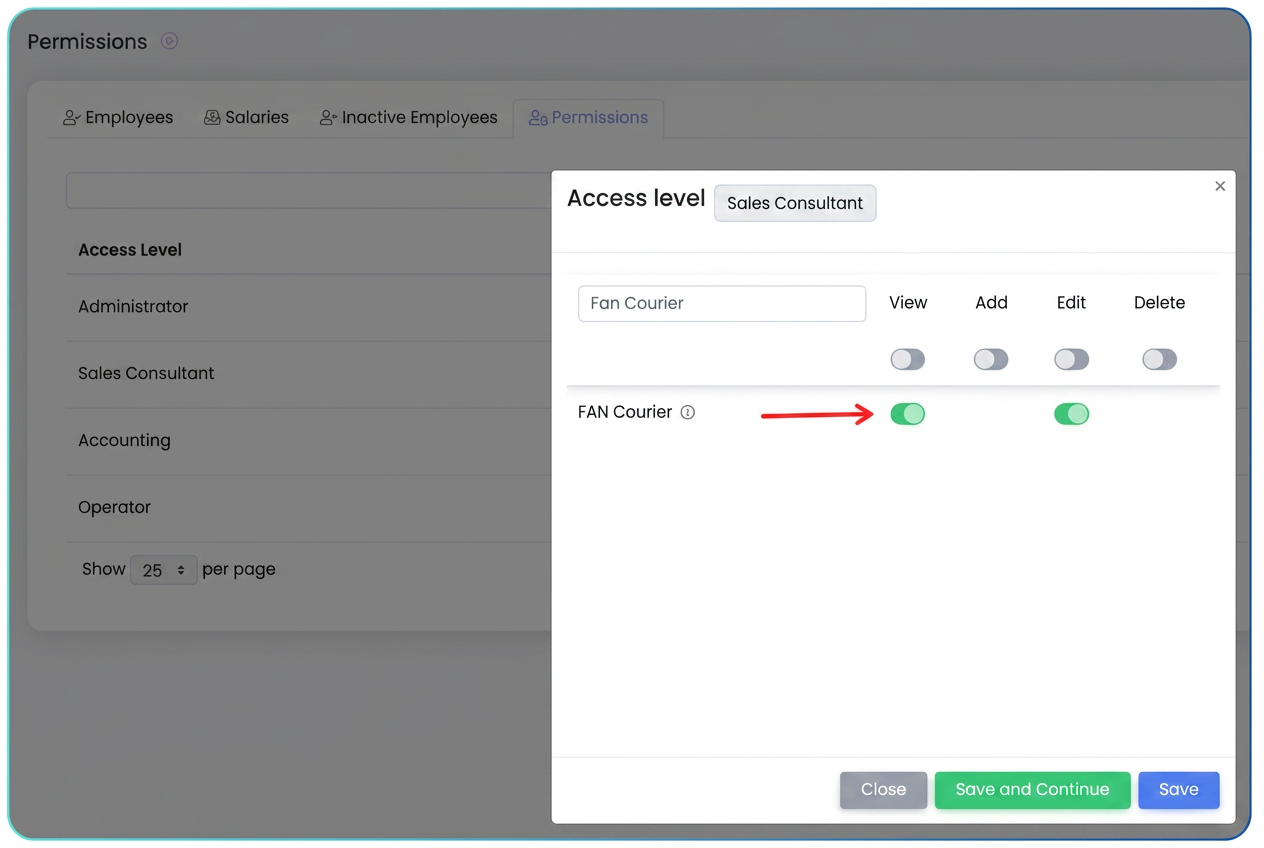
- In order for certain users to be able to access and edit FAN Courier data, it is necessary to check the permission settings in .
- Make sure the "View" and "Edit" options for FAN Courier are activated for the desired access level, otherwise employees in that department will not be able to generate AWBs.
3. AWB Generation
The iflows – FAN Courier integration offers you three ways to generate an AWB:
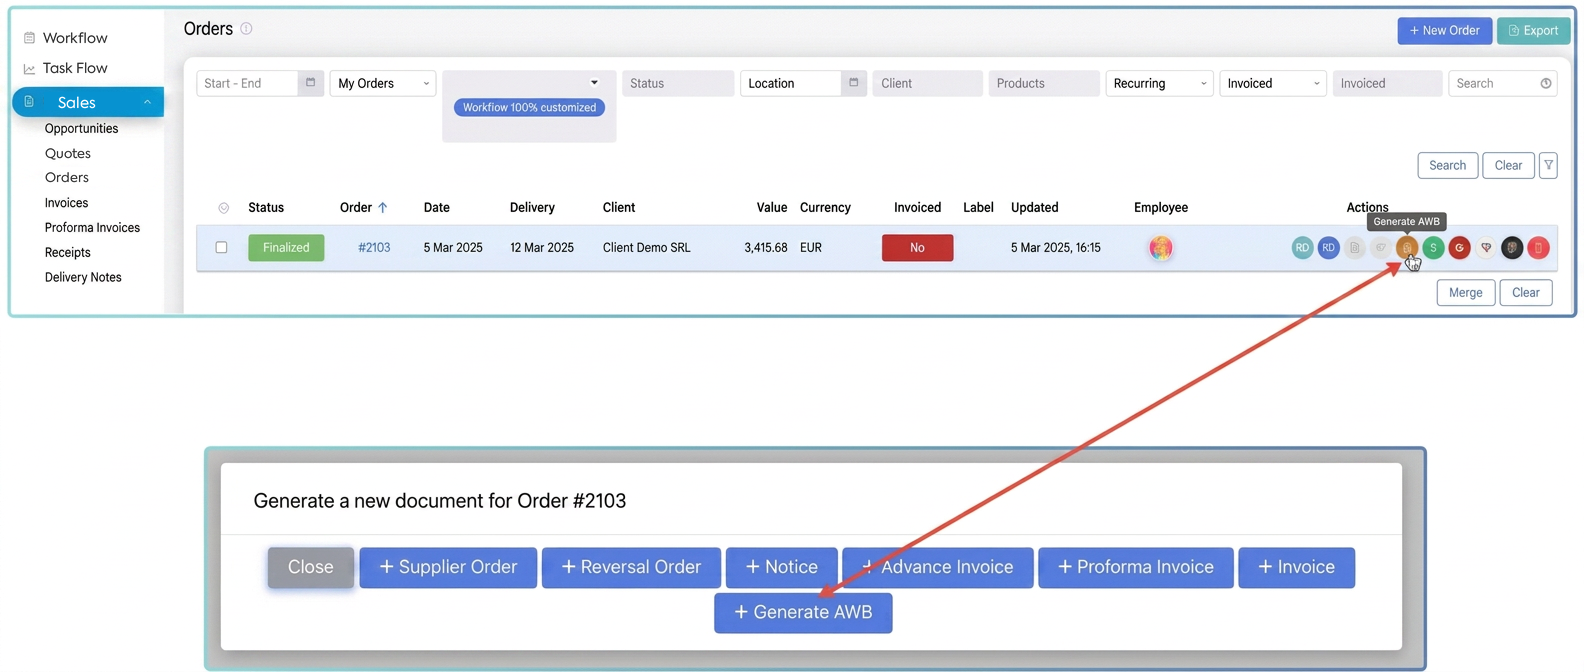
- Access the desired order and click on the "Generate document" button.
- Select "Generate AWB".
- Fill in the sender details (required only for the first time you use the integration):
- Choose or add a corresponding address for the sender (e.g., Warehouse 1) or you can edit the current address so that it complies with the sorting requested by Fan Courier.
- Company Name
- Contact Person, Phone, Email
- County, Locality, Address, Postal Code etc.
- After saving, the address remains available for future delivery requests.
- Choose or add a corresponding address for the sender (e.g., Warehouse 1) or you can edit the current address so that it complies with the sorting requested by Fan Courier.
Note: If the County is Bucharest, for Locality enter Bucharest as well, not the sector.
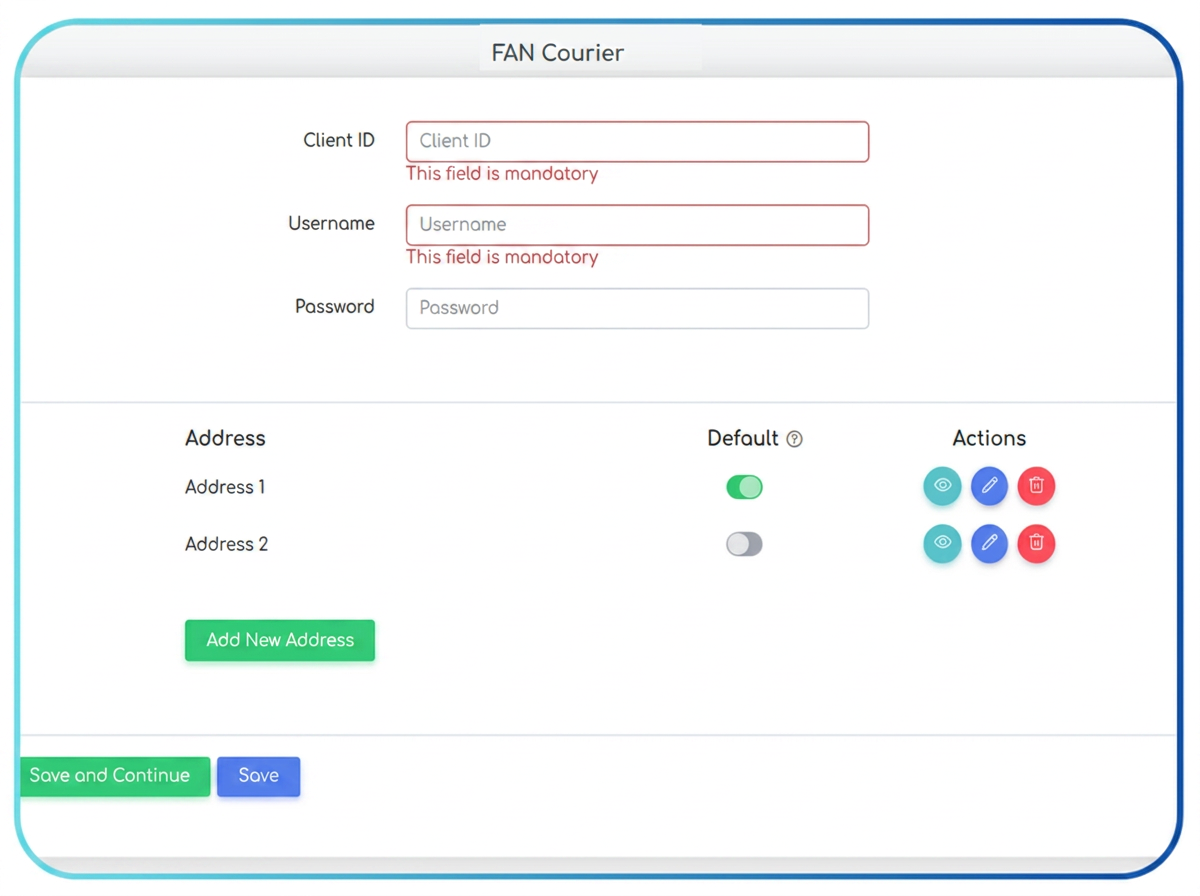
Also, all pickup/delivery addresses associated with your company will also be found in Settings – Integrations – Edit Settings ”Fan Courier”
- Fill in the recipient details:
- You can use an already saved address or create a new one. It is important to mention that for the first time, you must also edit the existing address so that it is ordered according to the fields requested by Fan Courier. You can add a new address just by typing a name that does not exist in the list.
- Also, in each client's profile, under the "Delivery" section, multiple addresses can be added and managed, and one can be set as default.
- Configure shipment details:
- Shipment type
- Number of packages, Total weight
- Dimensions of the largest package.
- Payment details and remarks:
- Choose who pays the shipping costs (Sender or Recipient).
- Activate, if applicable, "Cash on delivery collection".
- Write any additional notes in the observations field.
- Save, and then iflows will upload the data into the FAN Courier system.
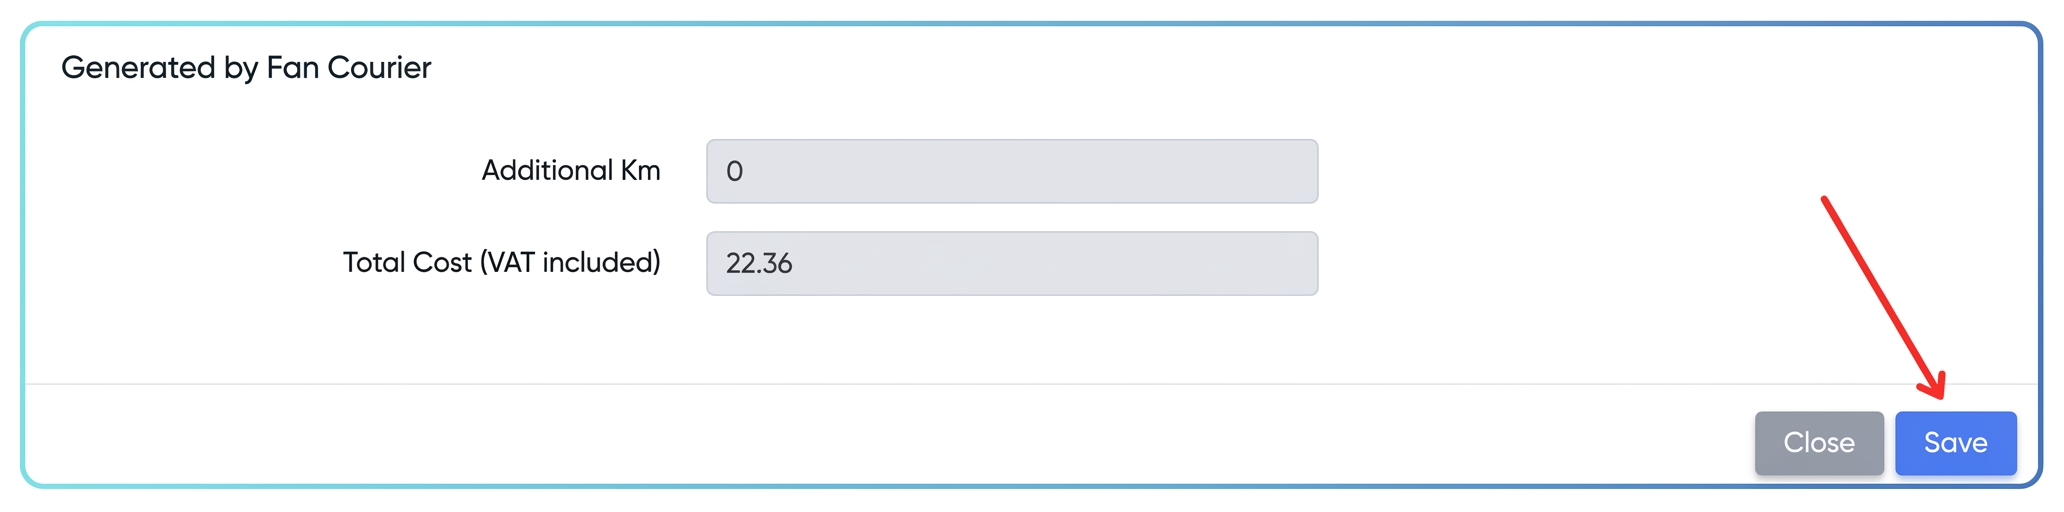
- After saving, a new section generated by FAN Courier will appear in the same window, where you can see the total cost and any extra kilometers.
- Confirm the rate to finalize.
- Viewing the AWB:
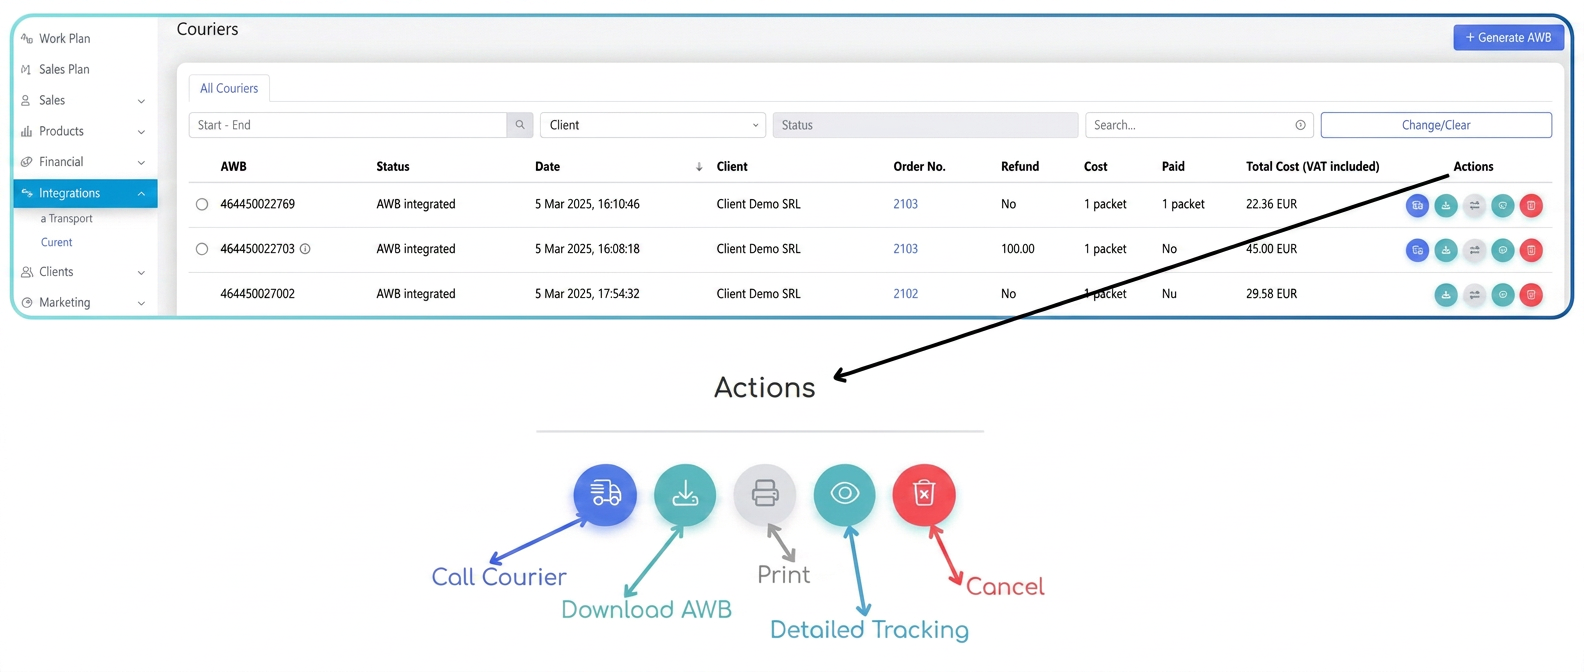
- After generation, iflows redirects you to , where you can see all created AWBs.
- Here you can "Call the courier" (if the shipment hasn't been picked up), download or print the AWB, check the status (tracking), or cancel the shipment.
-
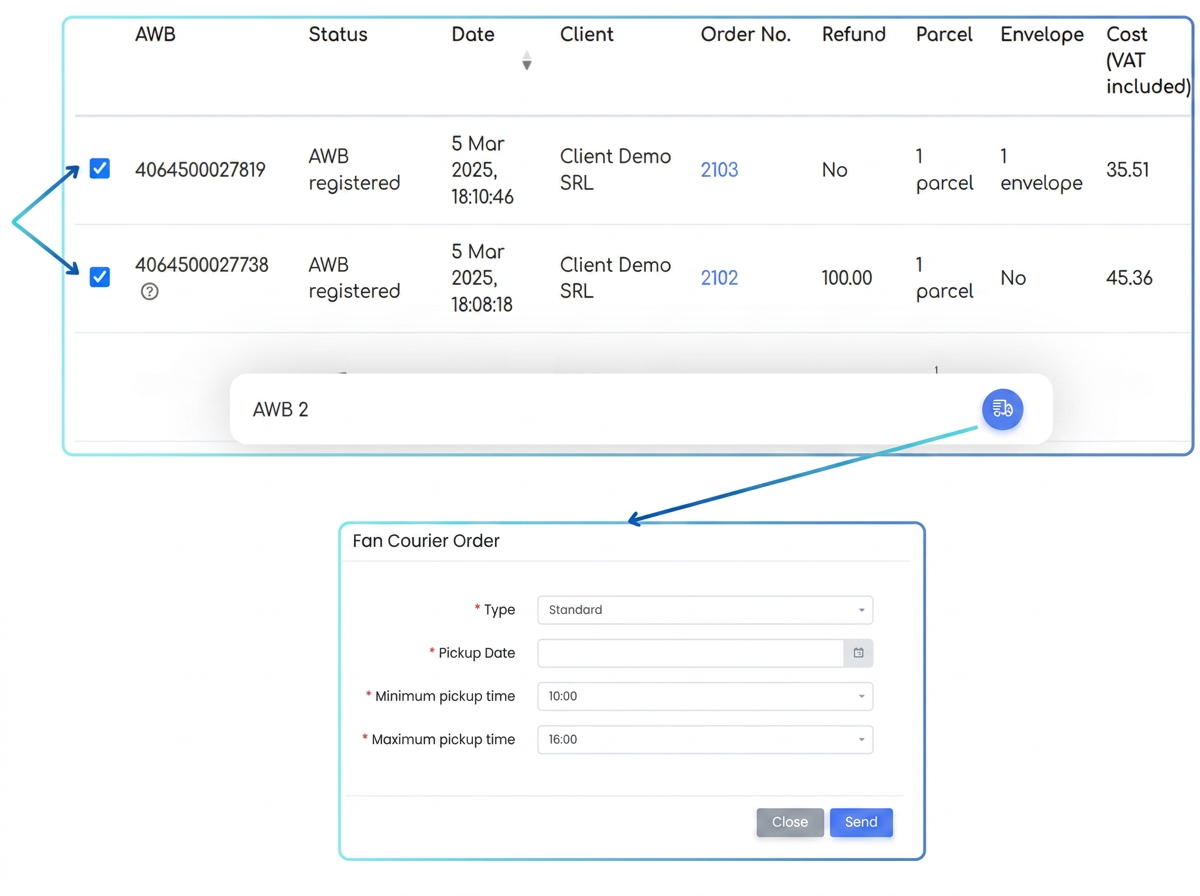
- To call the courier for multiple AWBs simultaneously, check them and use the quick menu at the bottom of the screen.
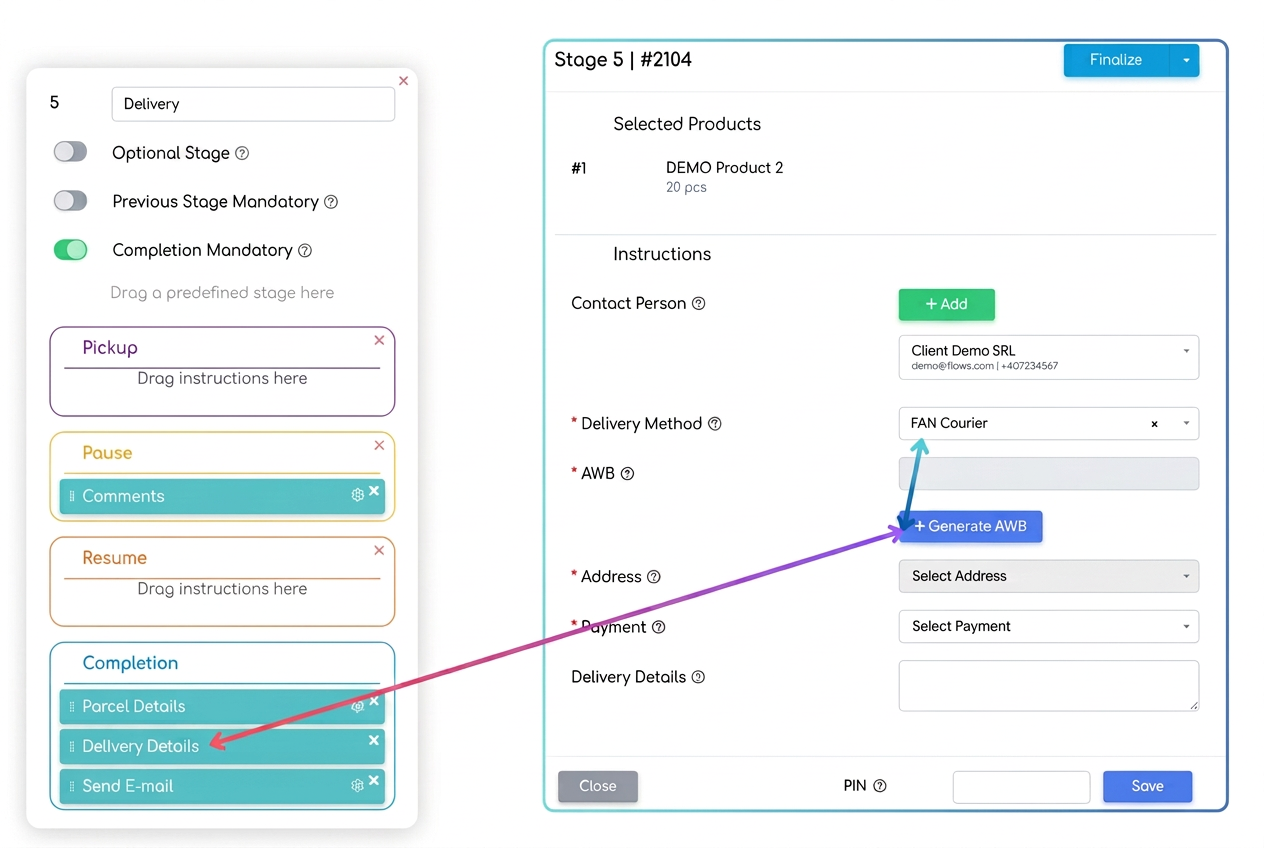
3.2. The next way to generate an AWB is from the Workflow ("Delivery Details")
- Include the "Delivery Details" instruction in the workflow.
- Select the "FAN Courier" option when you reach the instruction.
- Press "Generate AWB" and follow the same steps as generating from orders (configuring the sender, recipient, and packages).
3.3. Another way to generate an AWB is Manually, from the
- .
- Press "Generate AWB".
- Enter the full shipment details, including sender and recipient data and package dimensions.
- Save to complete the process.
- The AWB will be available later in the AWB list, where you can track its progress or perform other actions.