
NEW: "Templates" Module in the "Documents" Section
The "Templates" (Tipizate) module in the "Documents" section allows users to quickly create and customize a variety of documents, including: Contracts, Minutes, Annexes, Warranty Certificates, Declarations of Conformity, or any other necessary document type. Templates are documents with a preset format, meaning they have a fixed structure but can be personalized based on each situation or client.
- We will start by creating a new template
Step 1: Accessing templates
Access the Documents > Templates section, select the Template Models tab, and click the "New Template" button.
Step 2: Choosing the associated section
The associated section indicates the place in the platform from which the data used in the document will be automatically retrieved. For example, a template can be associated with the Clients, Orders, Invoices, or Offers section.
We will create an example where we want to generate a sales contract for an order placed by a client, so we select the Orders section. Choosing this section ensures that all relevant information about the order will be automatically pulled into the document.
Step 3: Entering the document title
The document title should clearly reflect its purpose. In our case, we will use the title PHOTOVOLTAIC EQUIPMENT SALES AND SUPPLY CONTRACT, to illustrate a more complex example.
- Drafting the text in the editor
We will proceed to draft the document in the text editor. At this stage, we have two options:
- Text can be entered manually into the editor.
- Alternatively, if a template already exists in a file like Word, the text can be copied and pasted directly into the editor.
In our example, we already have a template created in Word, so we will copy and paste it here.
- Using variable fields
On the left side of the editor, there is a list of variable fields grouped by category.
What are variable fields?
Variable fields are elements that, once added to the text, are automatically populated with the information available in the system.
Examples:
- The "Client Name" field will automatically pull the name of the client associated with the order.
- The "Company Address" field will insert the address of the company configured in the platform.
- The "Currency" field will indicate the currency used for the order.
Note: When you add a variable field to the document, the platform inserts only the value from the system into the text, not the field description. For example:
- If you choose the "Company Name" field, the actual name of the company (e.g., "X SRL") will appear in the text, and not the phrase "Company Name: X SRL".
Adding custom fields
In certain situations, part of the information required for a document is not available in the platform. In such cases, the platform allows the creation of custom fields.
Custom fields are defined by the user and can be placed in the document to be filled in manually with each use. These are useful for information that:
- Is not standardized in the system.
- Varies depending on the document, client, or project.
Examples of custom fields: Registration Number, Down Payment Percentage, Execution Time, specific Warranties for each product/service, and others.
How do we add a custom field?
Inserting variable fields
To insert a variable field into the text, place the cursor where you want the information to be located, then select the desired field from the list. After selection, the platform will add a specific formula to the text, such as {{company_name}}. This formula is an identifier that knows how to pull the correct value from the platform when the document is generated.
- In the template editor, on the left side, click the "+ Add Custom Field" button.
- A window will open requesting three fields to be filled:
- Field Name: The name describing the role of this field (e.g., "Down Payment Percentage" or "Execution Term").
- Field Code: A unique identifier for this field. This must be short, without spaces, and briefly describe the field. Essentially, it is a "technical name" that helps the system understand which data to use.
- Initial Value: (Optional)
- This is a preset value that can be automatically entered into documents if you need a standard starting point.
For example:
- If, generally, the standard down payment is "30%", you can enter 30 as the initial value. When generating the document, this field will already contain the value "30", but it can be manually adjusted if necessary.
- If you do not have a fixed starting value, you can leave the field empty, and the value will be filled in manually later for each document.
- After completing this information, click the "Save" button. The custom field will now appear in the list on the left and can be inserted into the document, just like any other variable field.
- Generating Documents Based on Templates
After configuring a template, it can be used either from the section it was associated with (in our case, the Orders section) or from the "Documents" - "Templates" section, in the "Generated" tab.
- Option 1: Using the template from the associated section
- Access the relevant section (e.g., "Orders").
- Identify the desired order.
- Click the "Generate Template Document" button in the "Actions" column.
- Choose the desired template and click "Generate".
- Option 2: Using the template from the "Documents" - "Templates" section
- Access the "Documents" > "Templates" section.
- Select the "Generated" tab.
- In the top right, click the "Generate Document" button.
- Choose the desired template and enter the order number.
- Click "Generate".
The platform will pull the corresponding data and create the document according to the selected template.
- Option 1: Using the template from the associated section
- Completing the document from the template
After clicking the "Generate" button, the document will be created based on the selected template. It will contain variable fields that are automatically filled from information already existing in the platform and fields that may remain empty if they are custom fields.
How fields are completed:
- Directly in the document:
You can edit fields directly in the document. For example, you can add additional information, modify the value of an automatically completed field, or delete sections that are not necessary. - More efficiently: By filling in the boxes on the left:
On the left side of the screen, there is a section with fields to be completed. These boxes are linked directly to the document. If you fill in a field in the boxes on the left, this field will automatically update in the document on the right, without the need to manually edit each section.
How to find generated template documents
After generating a template document, it will be available in two locations:
- In the "Template Documents" section:
- You will find the document in the "Generated" tab within the Documents - Templates section.
- In the source section of the document (e.g., orders):
- If the document was generated from an order, you must view that specific order.
- When viewing the order, you will notice a new tab named "Template Documents".
- This tab will contain the template documents generated for that specific order.
Options for download/print/send
In both locations, you have the following options available: Download, Print, Send by email.
Also, at any time, we can view, edit, or delete the document.
Access to the template documents module
To have full access to the template documents module, it is necessary to ensure you have the correct permissions set. These permissions are configured in the Financial > Employees > Permissions section.
In this section, you must check the following options for each relevant category:
- View, Add, Edit, Delete
Here are the categories for which you must activate permissions:
- Clients – Templates, Orders – Templates, Documents – Templates, Invoices – Templates, Offers – Templates
- Directly in the document:
Optimization: Managing Working Time in the Task Flow
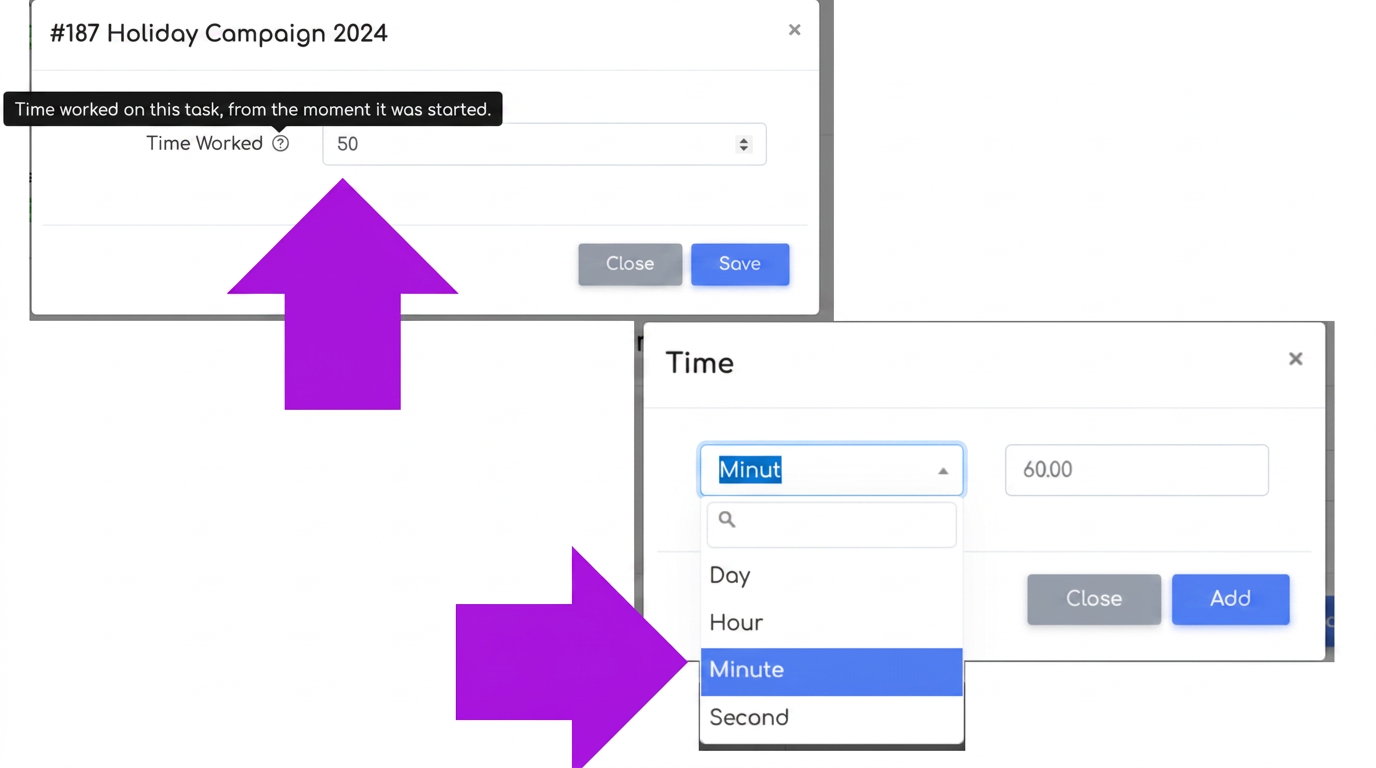
Example: If the task was picked up at 10:00 and put on pause at 12:00, the pre-filled time will be 2h. If the actual time worked was only 1h 30min, the user can enter this value manually.
- Entering Working Time at Pause
When a task is set to Pause, a modal will automatically open to record the working time.
- The time will be automatically pre-filled with the duration between the moment the task was picked up and the moment the Pause button was pressed.
- If the pre-filled time does not reflect the actual duration worked, the user can manually modify its value.
- Editing Working Time in Task History
In the Task History section, users can now edit previously recorded working time, including for tasks set to pause.
- On the history lines where the task was set to pause, an edit button appears.
- After clicking it, a modal will open allowing for manual adjustment of the reported time to correct any errors.
- The edited time is saved and displayed immediately in the task history.
Optimization: Copying the Task Link

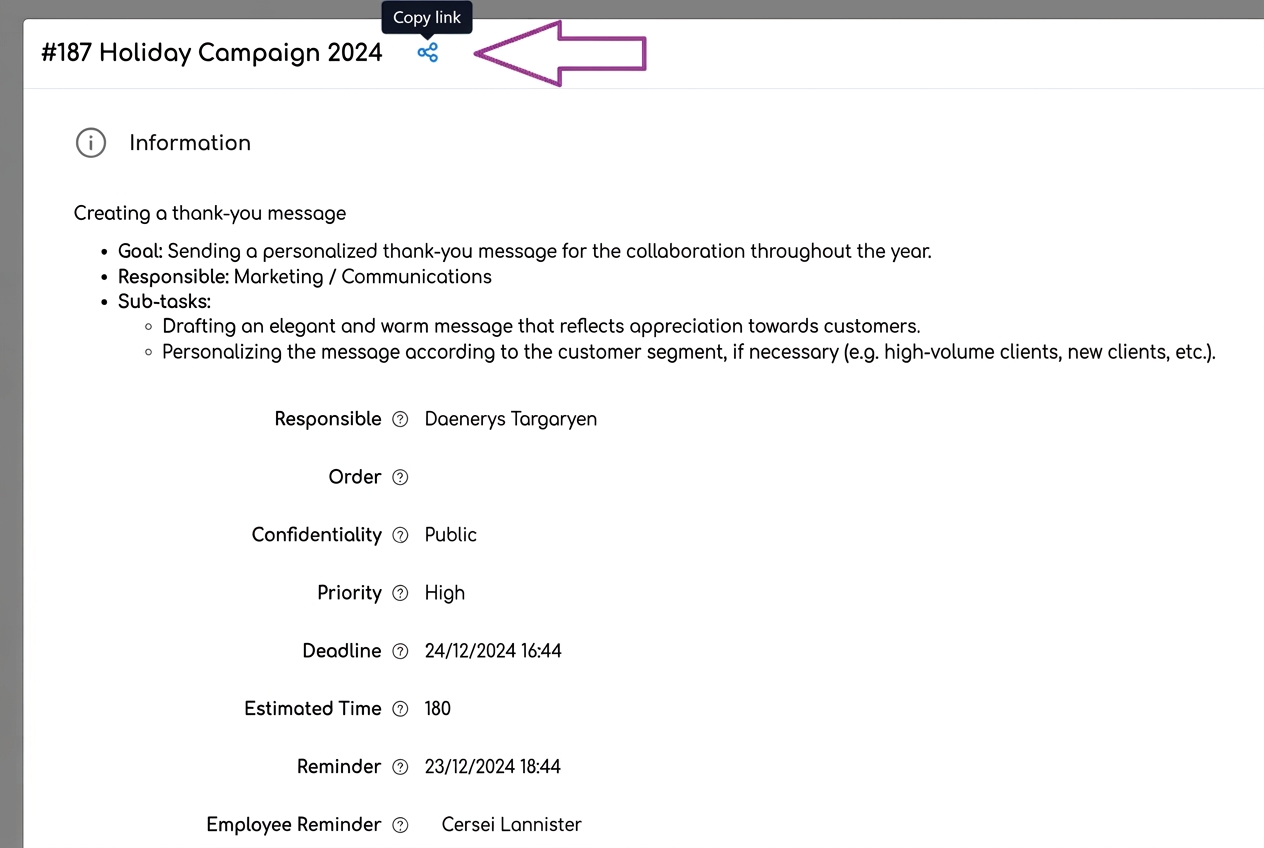
To facilitate quick task sharing, a link copy button has been added in the View mode, positioned next to the title of each task.
This functionality allows for instantaneous copying of the link to that specific task.
Optimization: Editing Working Time in Orders
Users can manually adjust the recorded working time for products and services in orders, in case the automatically counted time does not correctly reflect the completion of activities due to non-compliance with real start and end times (for example, operators did not pause a product or service, or forgot to finalize an order stage).
Required Permissions
To use this functionality, the Working Time permission must be activated in the platform:
- Access Settings > Financial > Employees.
- Navigate to the Permissions tab.
- Ensure the user has been granted the Working Time permission to manually edit recorded time.
How to edit working time:
Note: Recalculating reports: the system will automatically update data based on manually entered values.
Optimization: Generating e-Transport for Purchase Orders to Suppliers
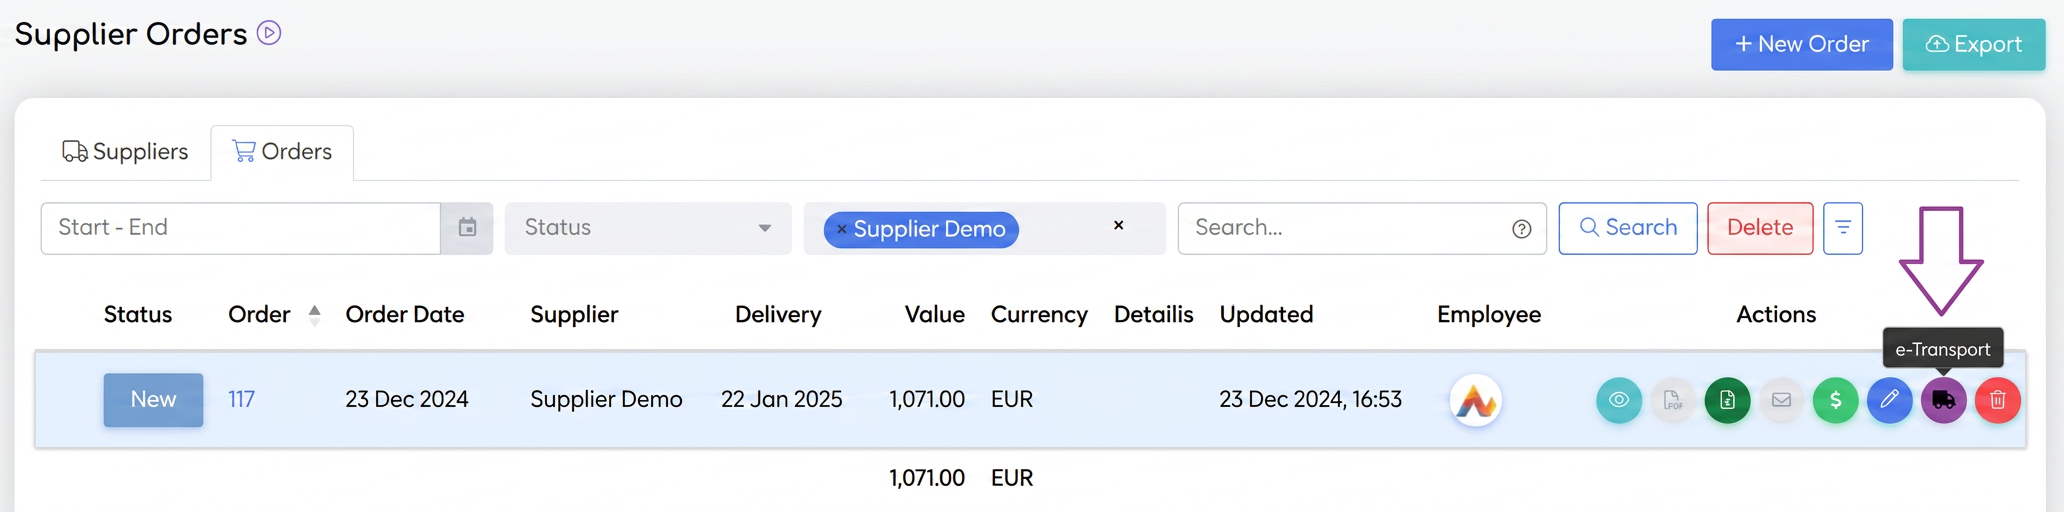
The e-Transport document generation functionality is now also available for orders to suppliers, directly from the Orders in Financial > Suppliers section. This extends the existing use options already present in the sales – invoices section.
How to use:
- Navigate to the Financial > Suppliers section.
- Access the Orders tab.
- In the Actions column, the Generate e-Transport button will appear for each order to a supplier.
- Click the Generate e-Transport button for the desired order.
- A form will open, automatically pre-filled with relevant information from that order, including:
- Supplier details
- Products or services included in the order
- Transport data (destination, means of transport, etc.)
Optimization: Selecting NC Codes for Products
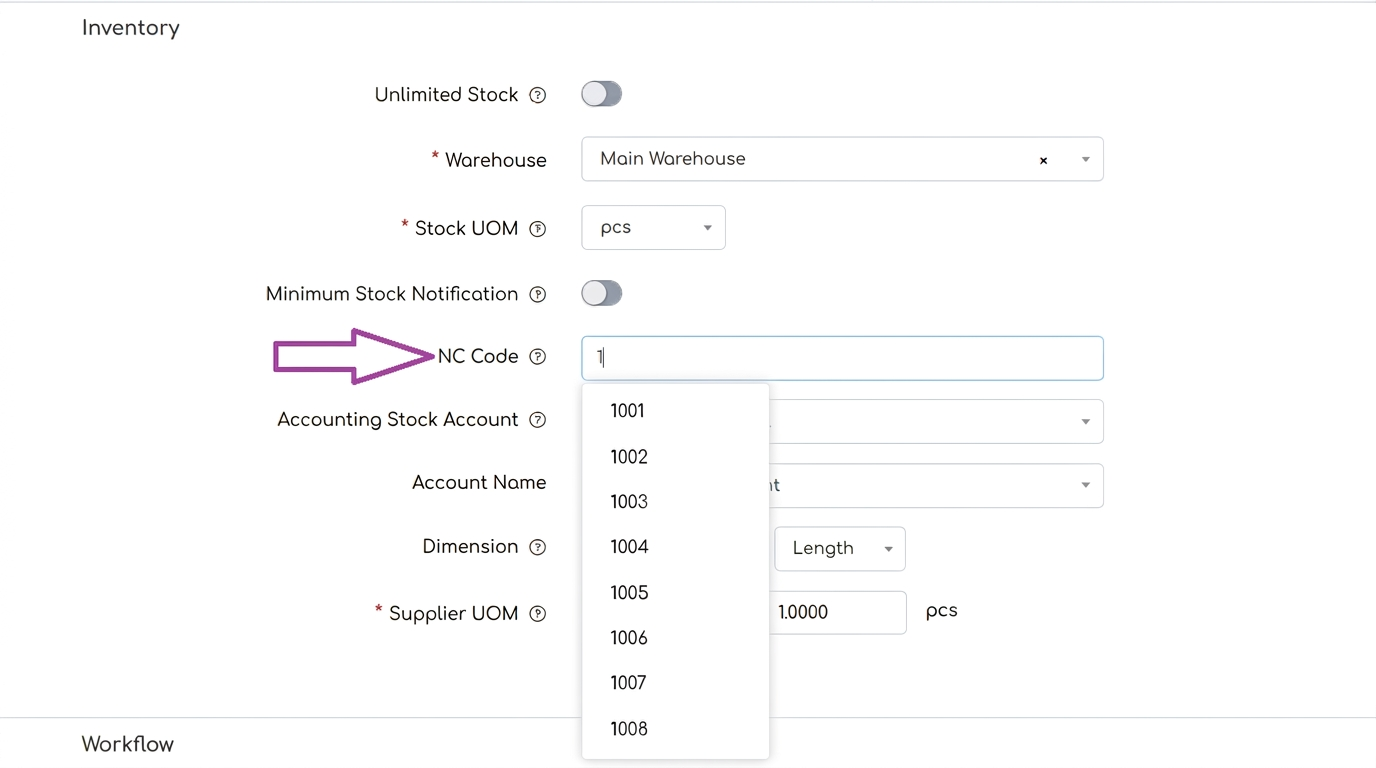
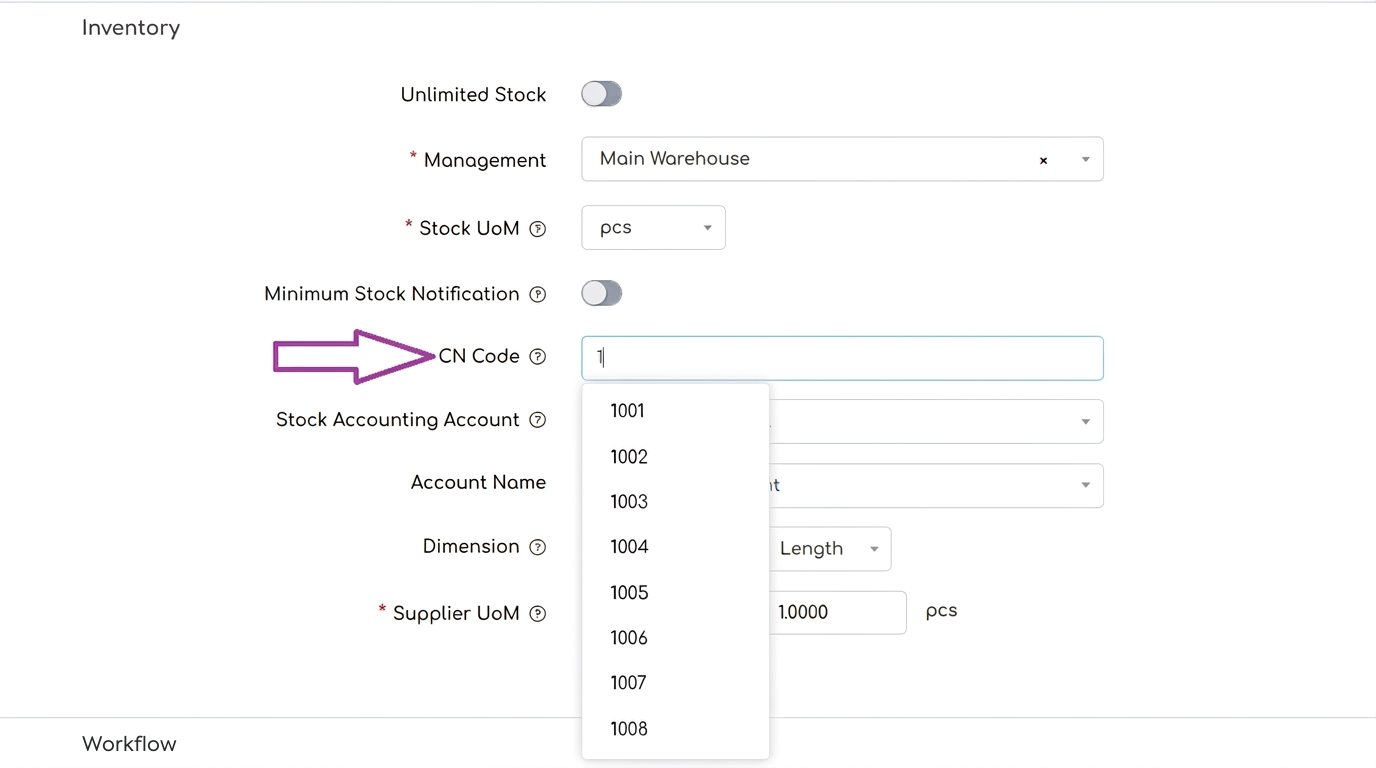
A predefined nomenclature containing basic NC (Combined Nomenclature) codes has been introduced. Additionally, if the user enters a new code, the system will remember this code and automatically add it to the selection list for future use.
How it works:
- When adding or editing a product, the user can select an NC code from a predefined list of basic codes.
- If the user enters an NC code that does not exist in the predefined list, the system will remember this code and add it to the nomenclature available for selection.
- For subsequent uses, the user can start typing the first characters of the previously entered NC code, and the system will automatically recommend that code.