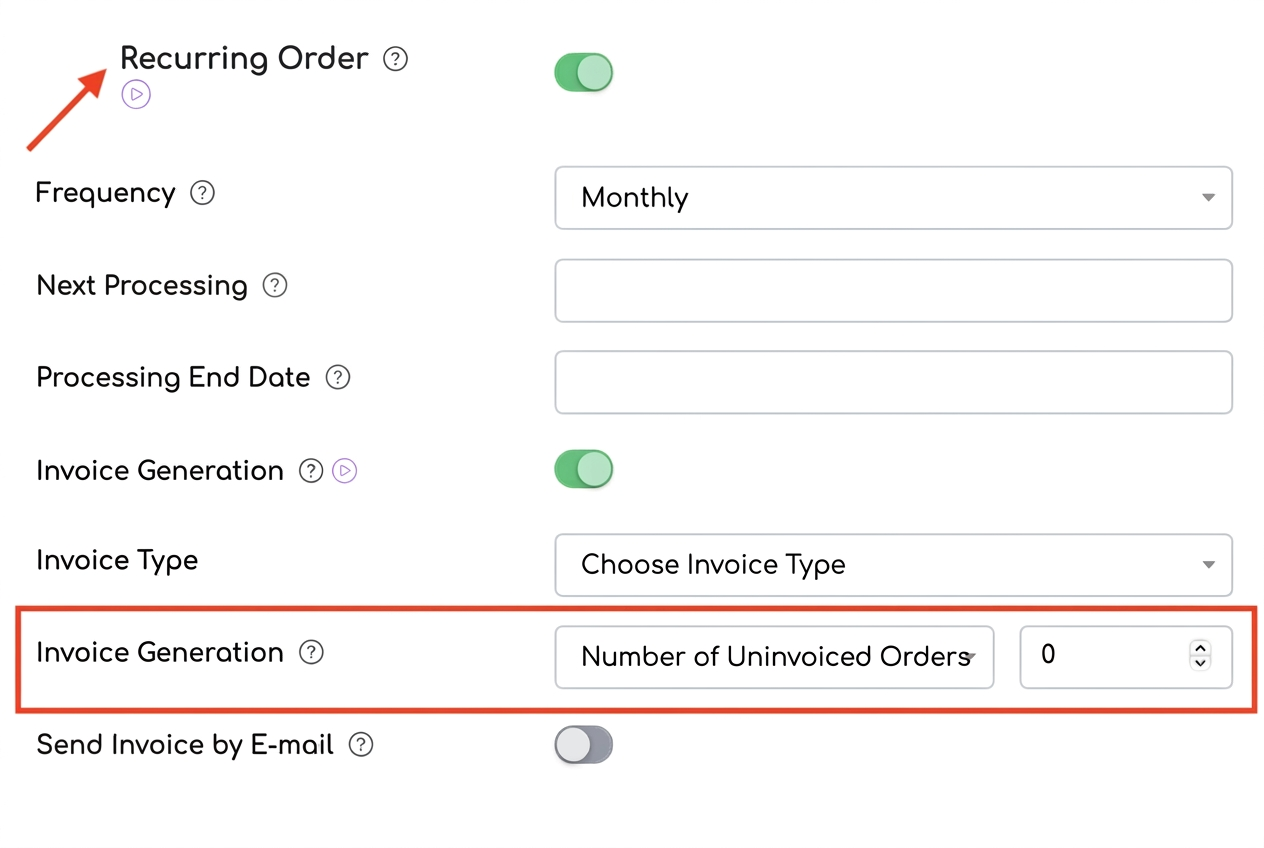
List View in Task Workflow
We have added a new view mode for the task workflow: in addition to the Kanban mode, you can now use the List mode. This allows you to see all tasks in a compact format.
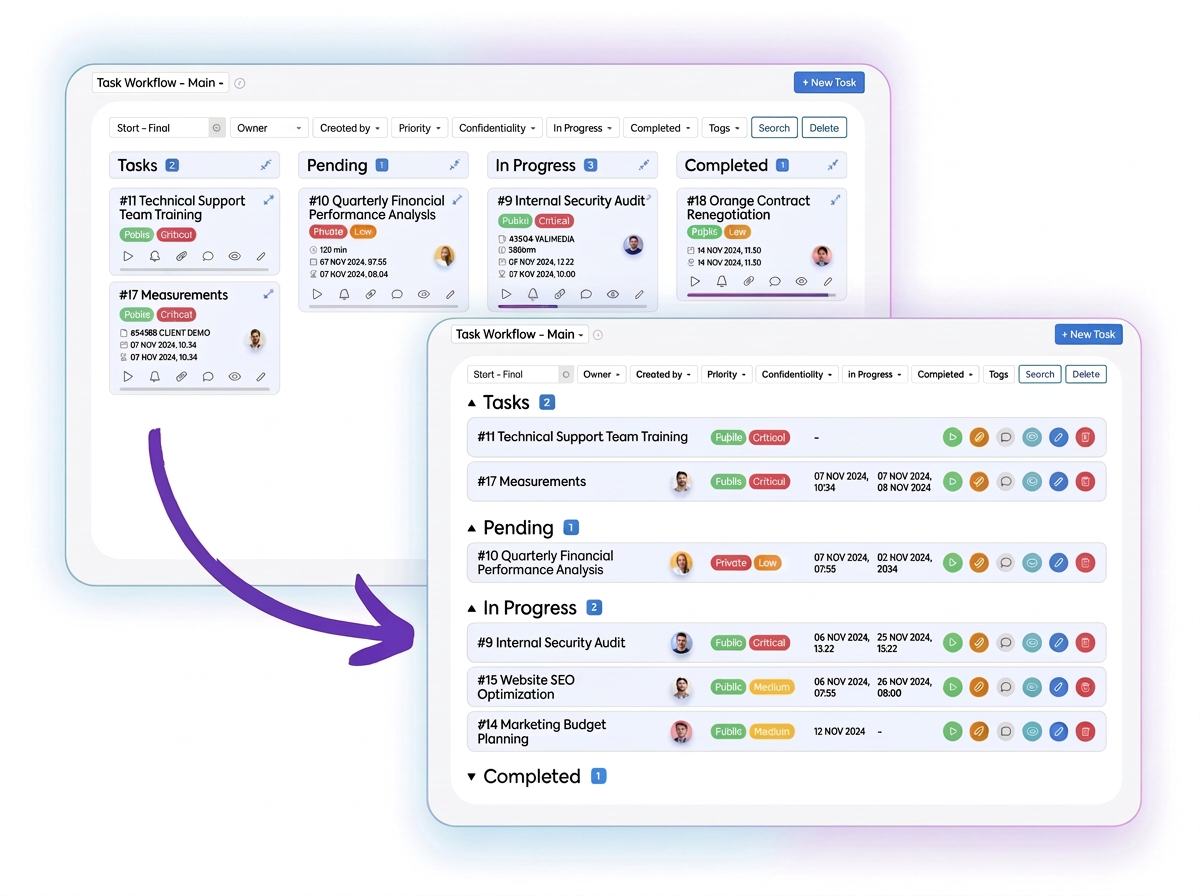
How it works:
- Activating the List view:
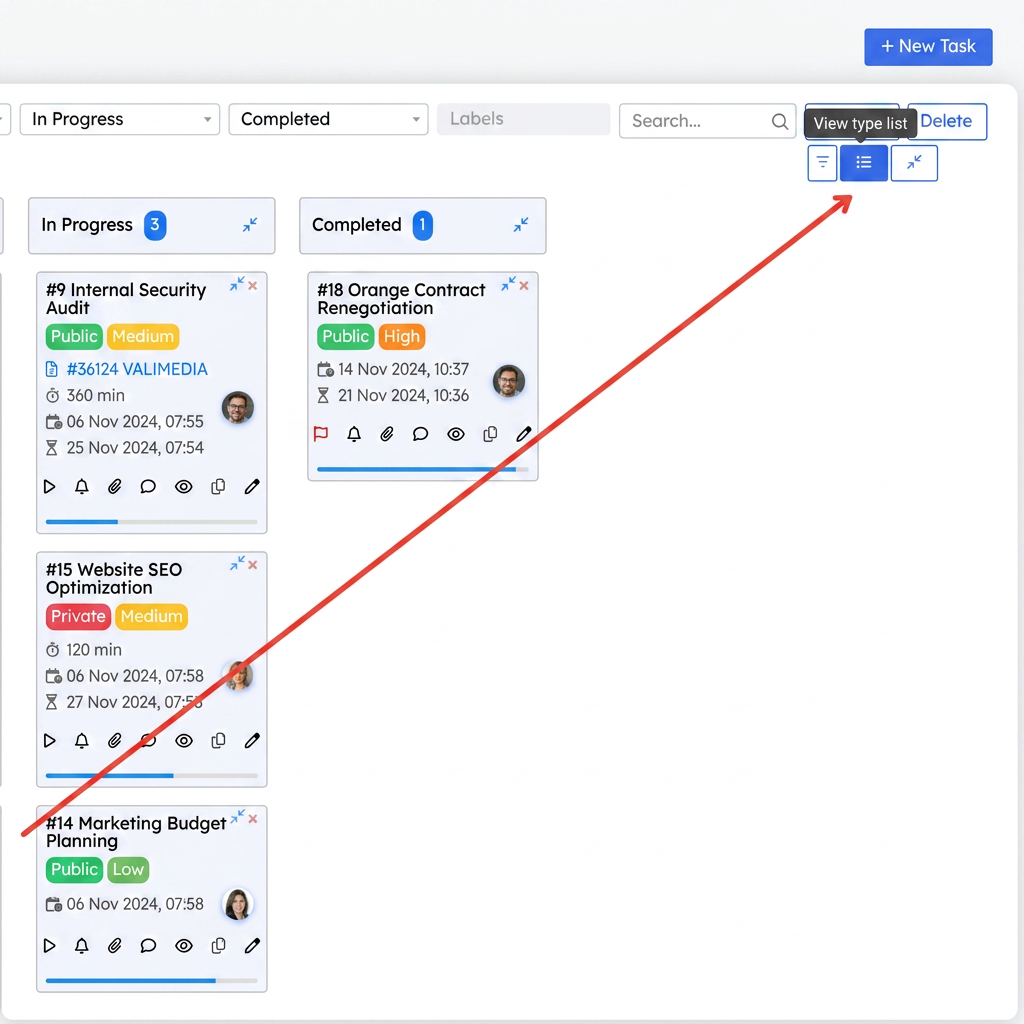
- Locate the button with 3 horizontal lines at the top of the page.
- Press it to toggle between Kanban mode and List mode.
- Usage:
- You continue to use drag and drop to move tasks between stages.
Recurring Tasks
Recurring tasks are activities or responsibilities that repeat at regular intervals (daily, weekly, monthly, etc.) and which, due to their repetitive nature, must be entered constantly.
Tasks that must be performed periodically can now be configured to be generated automatically, without the user creating them every time.
Examples of recurring tasks:
- Periodic reporting: Sending a financial report every month.
- Recurring meetings: Planning a weekly team meeting.
- Regular maintenance: Checking technical equipment every quarter.
- Payroll: Processing employee payments monthly.
Benefits of recurring tasks:
- Automation: They reduce the need to manually create the same tasks every time.
- Efficiency: You ensure that repetitive activities are not forgotten.
How to set and activate recurring tasks?
Step 1: Activate the Frequency option
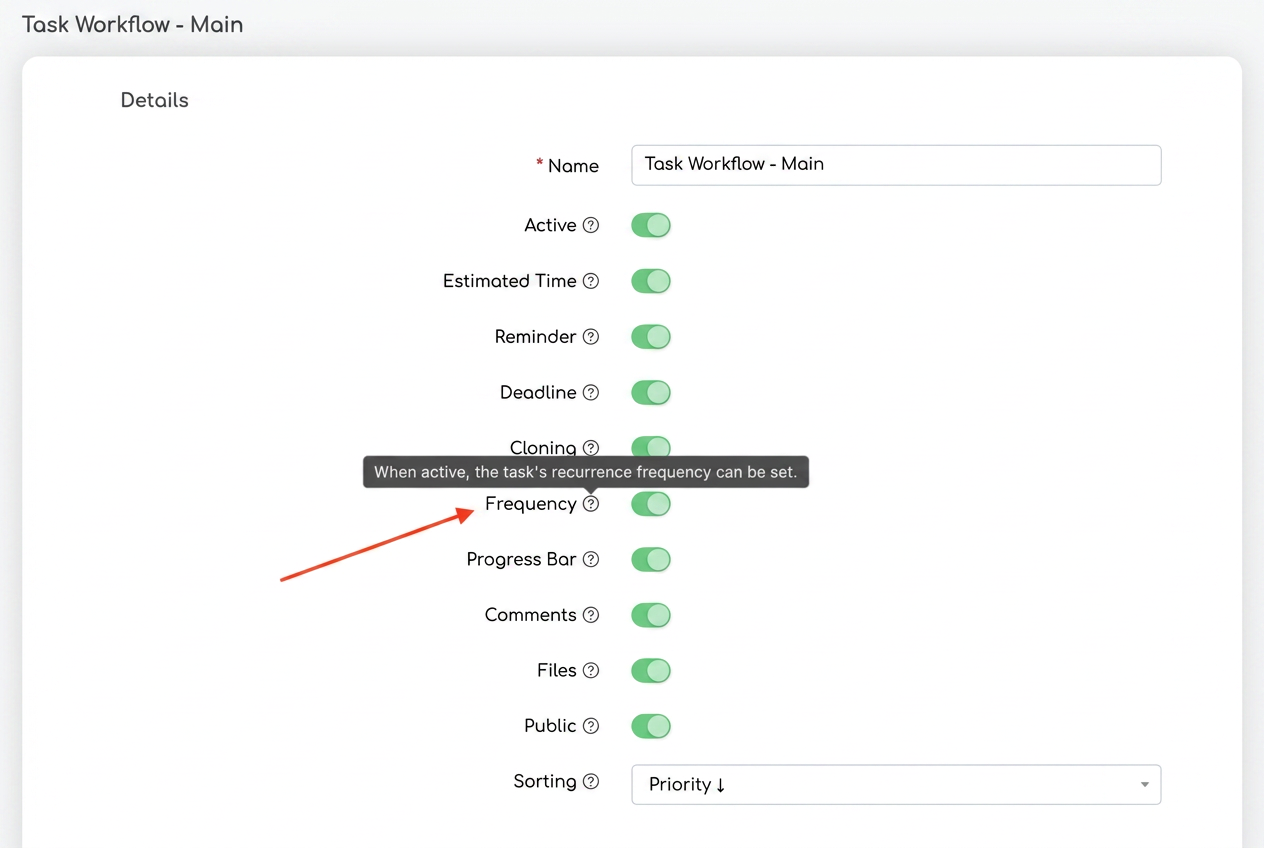
- Access Settings:
- Navigate to the main menu of the iflows platform and select Settings.
- Configure the Task Workflow:
- In the Settings section, find the Task Workflow option and click the Edit button.
- Activate Frequency:
- Check the Frequency option to allow the creation of recurring tasks.
Step 2: Configure a recurring task
- Create or edit a task:
- Go to the task workflow and select New Task or edit an existing task.
- Set the recurring details:
- Fill in the usual task fields (Title, Description, Responsible Person, etc.).
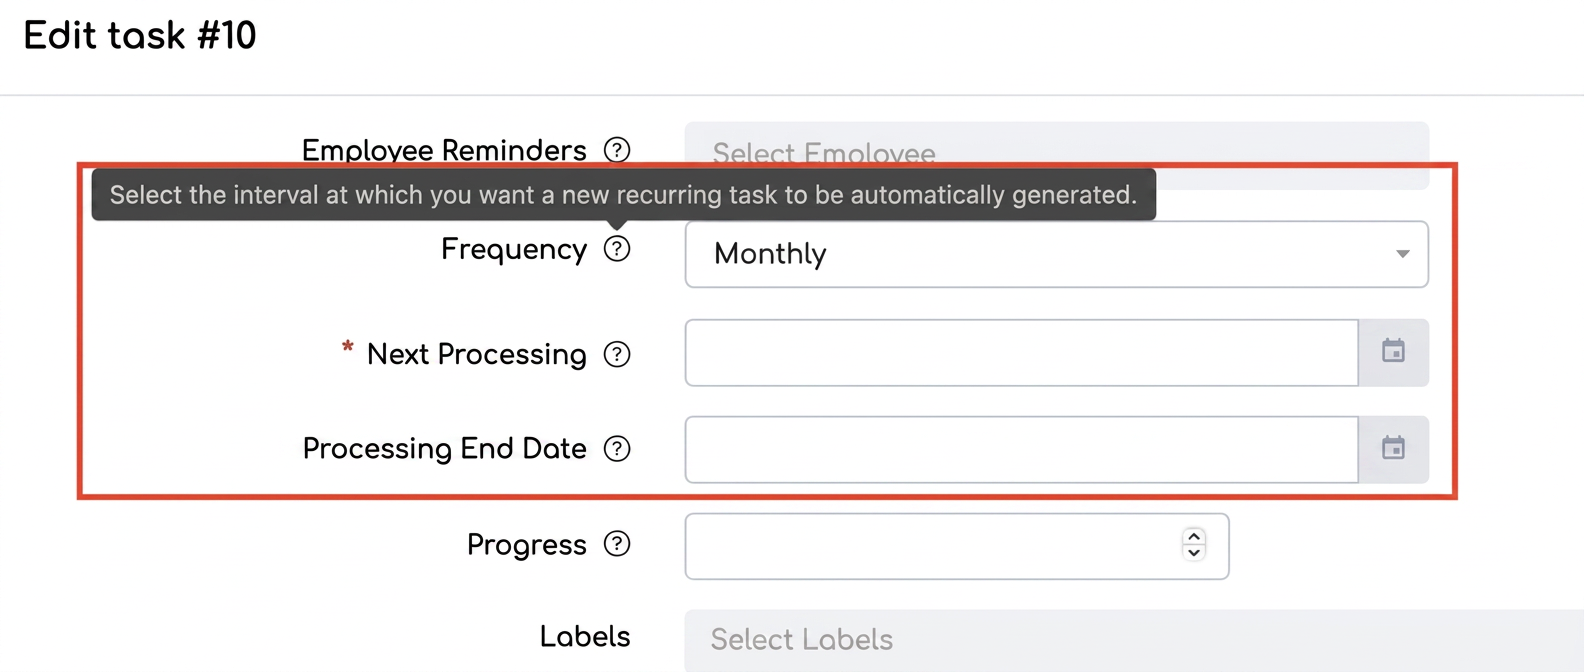
- Activate the Frequency option and configure:
- Repeat interval: Choose how often the task should be generated (daily, weekly, monthly, etc.).
- Next processing date: Set the first date when the task will be automatically created.
- End date: If necessary, set an end date for the recurrence (e.g., after 6 months).
Step 3: Identifying and managing recurring tasks
- Recurring tasks will be automatically marked with the Recurring label.
- These will appear in the first stage of the task workflow, just like any other manually created task.
- You can use the Frequency filter option in the workflow to view only recurring tasks.
Task Cloning
There is now the possibility to quickly duplicate an existing task. Save time by replicating tasks with essential information already filled in, without needing to create them from scratch.
How to activate the Cloning option:
- Access Settings:
- Navigate to the main menu of the platform and select Settings.
- Configure the Task Workflow:
- Find the Task Workflow section and click the Edit button.
- Activate Cloning:
- Check the Cloning option to activate the functionality.
How to use the Cloning function:
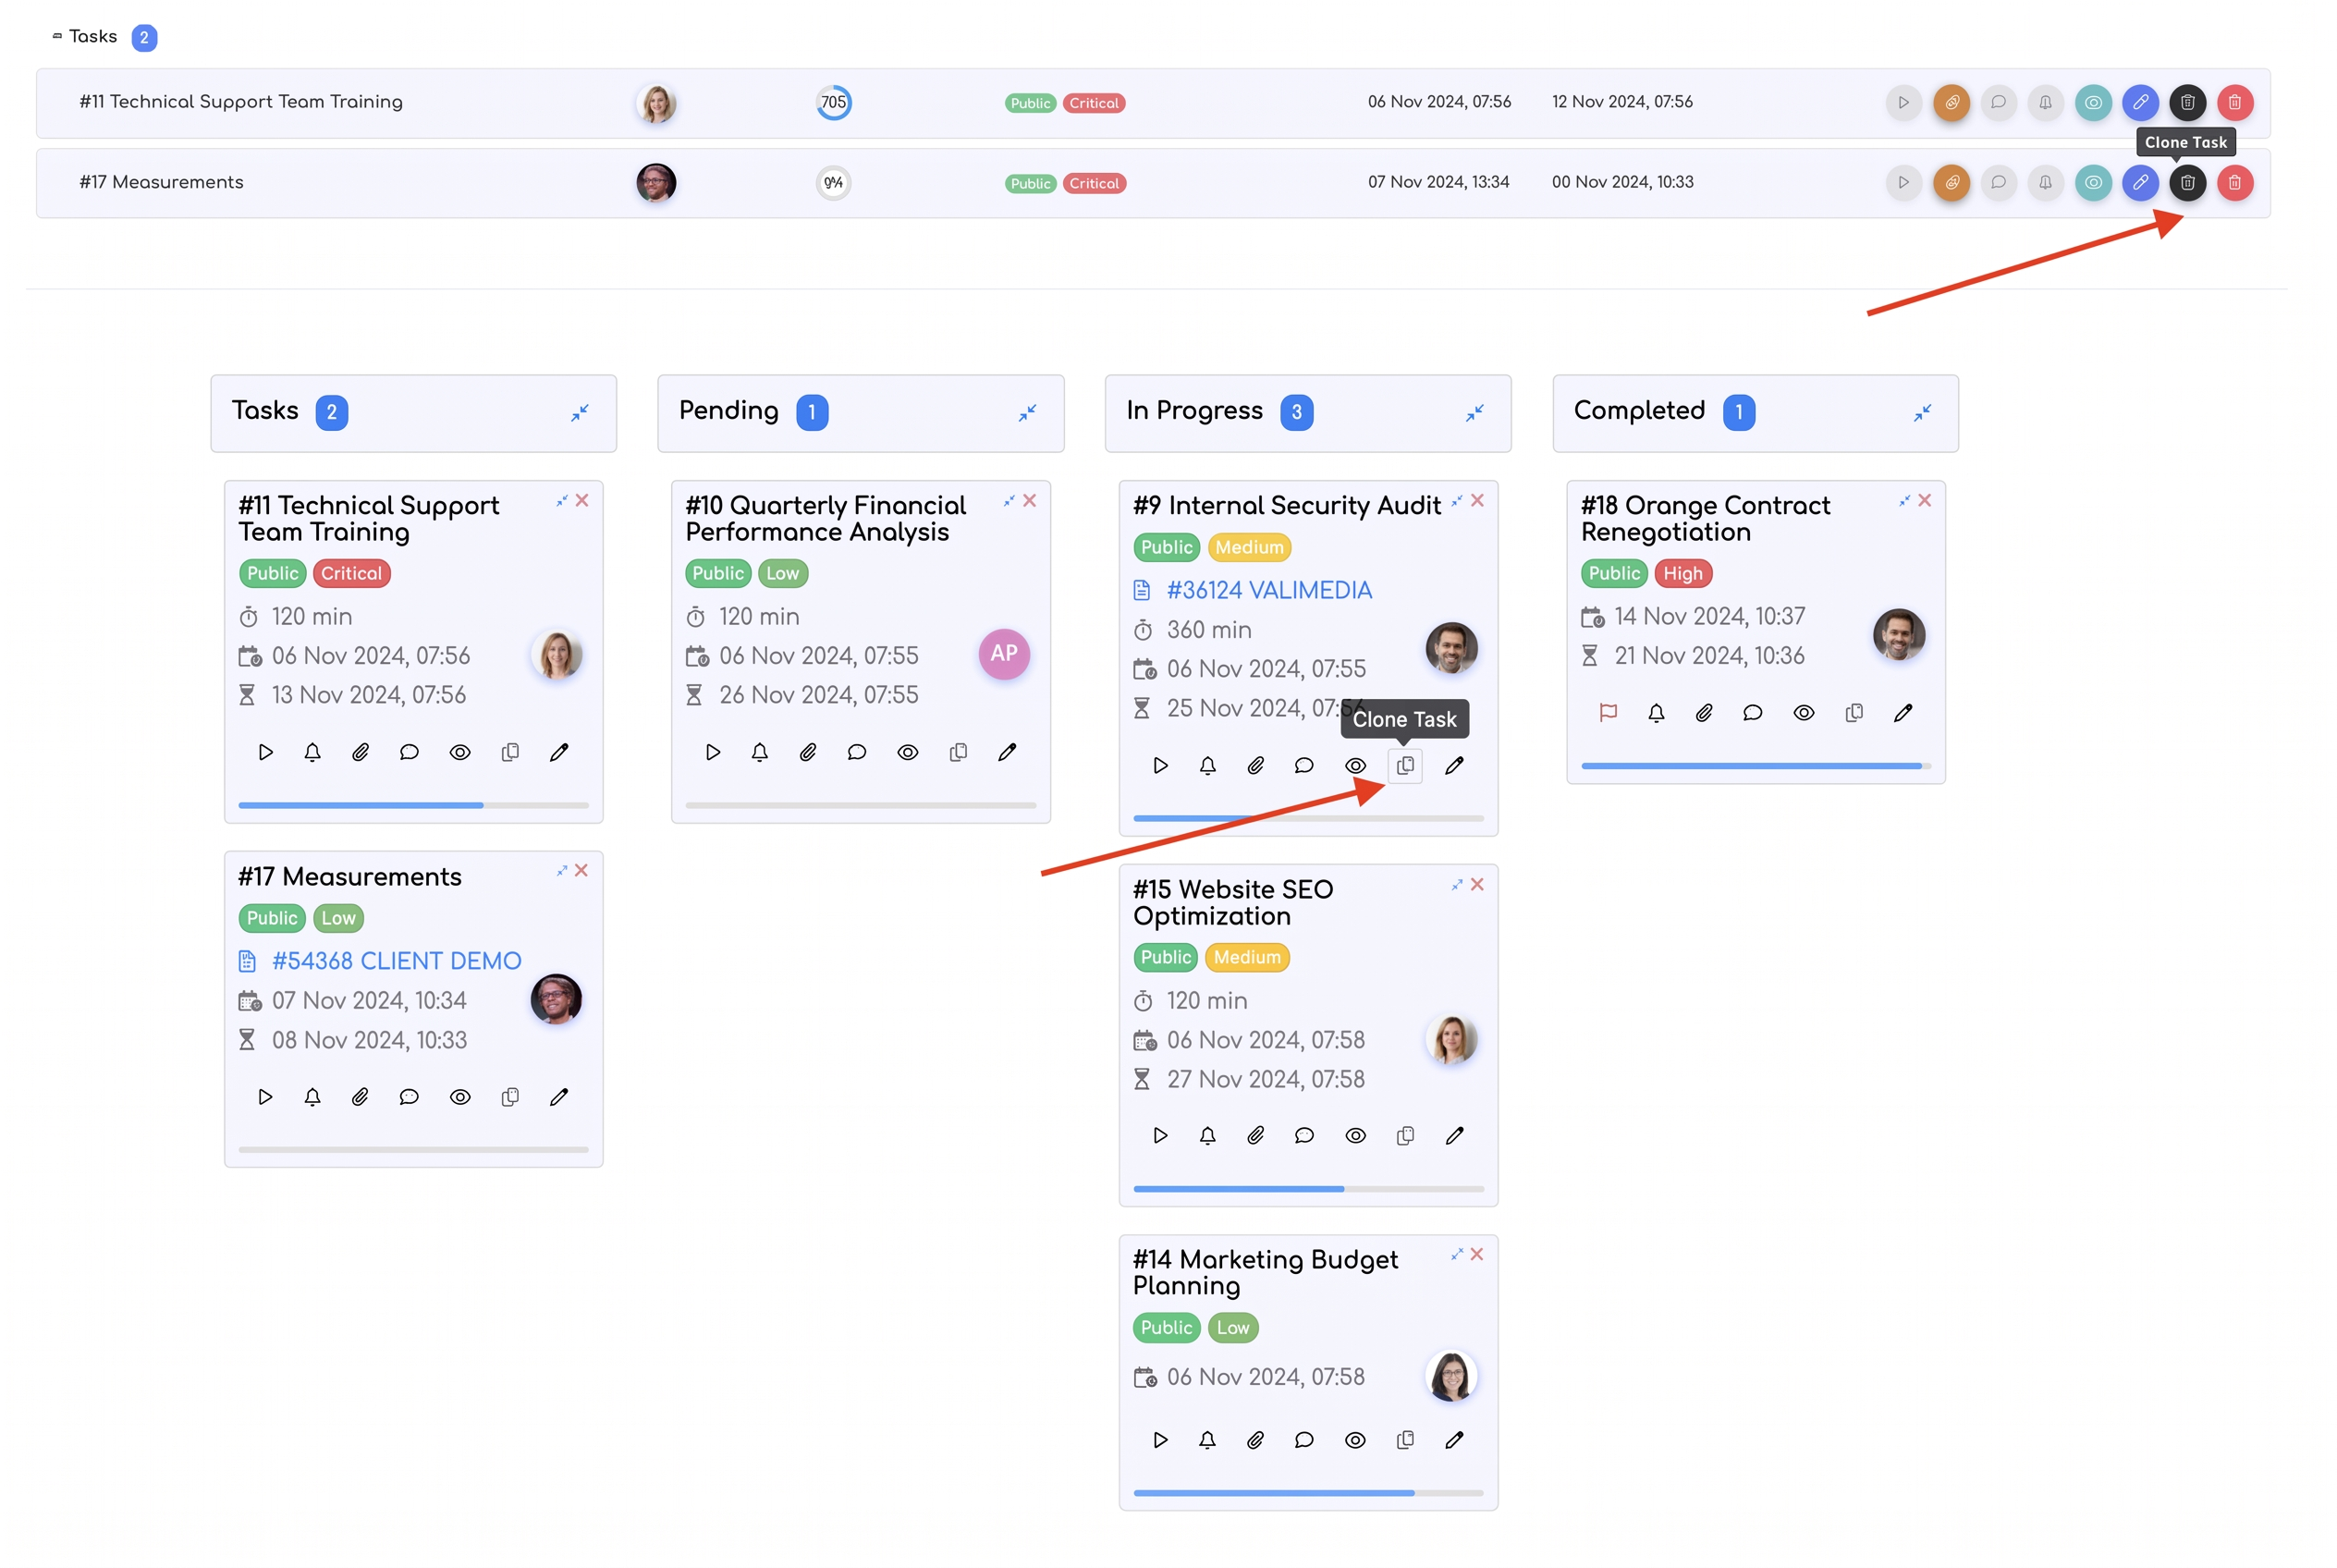
- In the task workflow, locate the task you wish to clone.
- Click the Clone button (visible next to each task).
- The cloned task will be instantly generated and will include the following information:
- Title
- Description
- Responsible Person
- Priority
- Reminder
- Employees
- Labels
- Where is the cloned task placed?
- The duplicated task will be automatically positioned in the first stage of the task workflow, ready for processing.
How to recognize cloned tasks:
- Each cloned task will automatically have the Clone label for easy identification.
Unit of Measure: kWh (Kilowatt-Hour)
This can now be used within the platform to record entries and manage products/services, consumption, or other processes requiring the measurement of electrical energy.
Recurring Orders - Automatic Billing Threshold
For recurring orders: In addition to the existing options for generating an invoice upon completion of the current order or on a fixed date, you can now set the "Number of Unbilled Orders".
This functionality allows the automatic generation of an invoice (or proforma invoice) when a specified number of unbilled orders is reached. The invoice will include all unbilled orders up to that moment.
How it works:
- Activating recurring orders:
- Within the configuration of a recurring order, activate the Generate Invoice option.
- Setting the "Number of Unbilled Orders" option:
- Choose the "Number of Unbilled Orders" option from the dropdown menu.
- Specify the number of orders at which you want the invoice to be automatically generated.
- The result:
- When the number of unbilled orders reaches the set threshold, the system will generate the invoice automatically.
- The invoice will include all unbilled orders, including the order created at the time of the recurrence processing.