
How to control what operators see in the Workflow
In iFlows, what an operator sees in the Workflow is not decided in a single place. There are four controls that work together: the first decides which information is displayed in the order, the second covers shop-floor terminals that open the Workflow without signing in, and the last two decide which workflow and which stages each person can reach.
This tutorial goes through all four controls, one by one, with the screens from the platform and the result as it appears in the Workflow and in the order.
| Control | Where to configure it | What it decides |
|---|---|---|
| 1. The “Operator” access level | Which information is displayed in the order: prices, customer name, documents, comments, the generate-PDF button, appointments | |
| 2. Access by IP address | What is displayed on a shop-floor terminal that opens the Workflow without a username and password | |
| 3. Stage delegation | › workflow › stage | Who can take over and complete a given stage |
| 4. Public or private workflow | › workflow | Who sees the workflow in the workflow list |
Two different situations. An operator can reach the Workflow in two ways: with their own account, where the access level applies (control 1), or from a shared terminal opened without signing in, where the IP address settings apply (control 2). If you use both, configure both — otherwise information you hide in one place stays visible in the other.
Control 1. The “Operator” access level
“Operator” is a predefined access level in iFlows, designed for shop-floor workstations. Unlike the other levels, for “Operator” the platform only shows the small set of permissions that make sense in a production workflow.
Step 1. Open the list of access levels
Where to find it:
From the left-hand menu choose , then the Permissions tab. On the Operator row, click the blue pencil button. The green button with the eye opens the same list, but read-only.
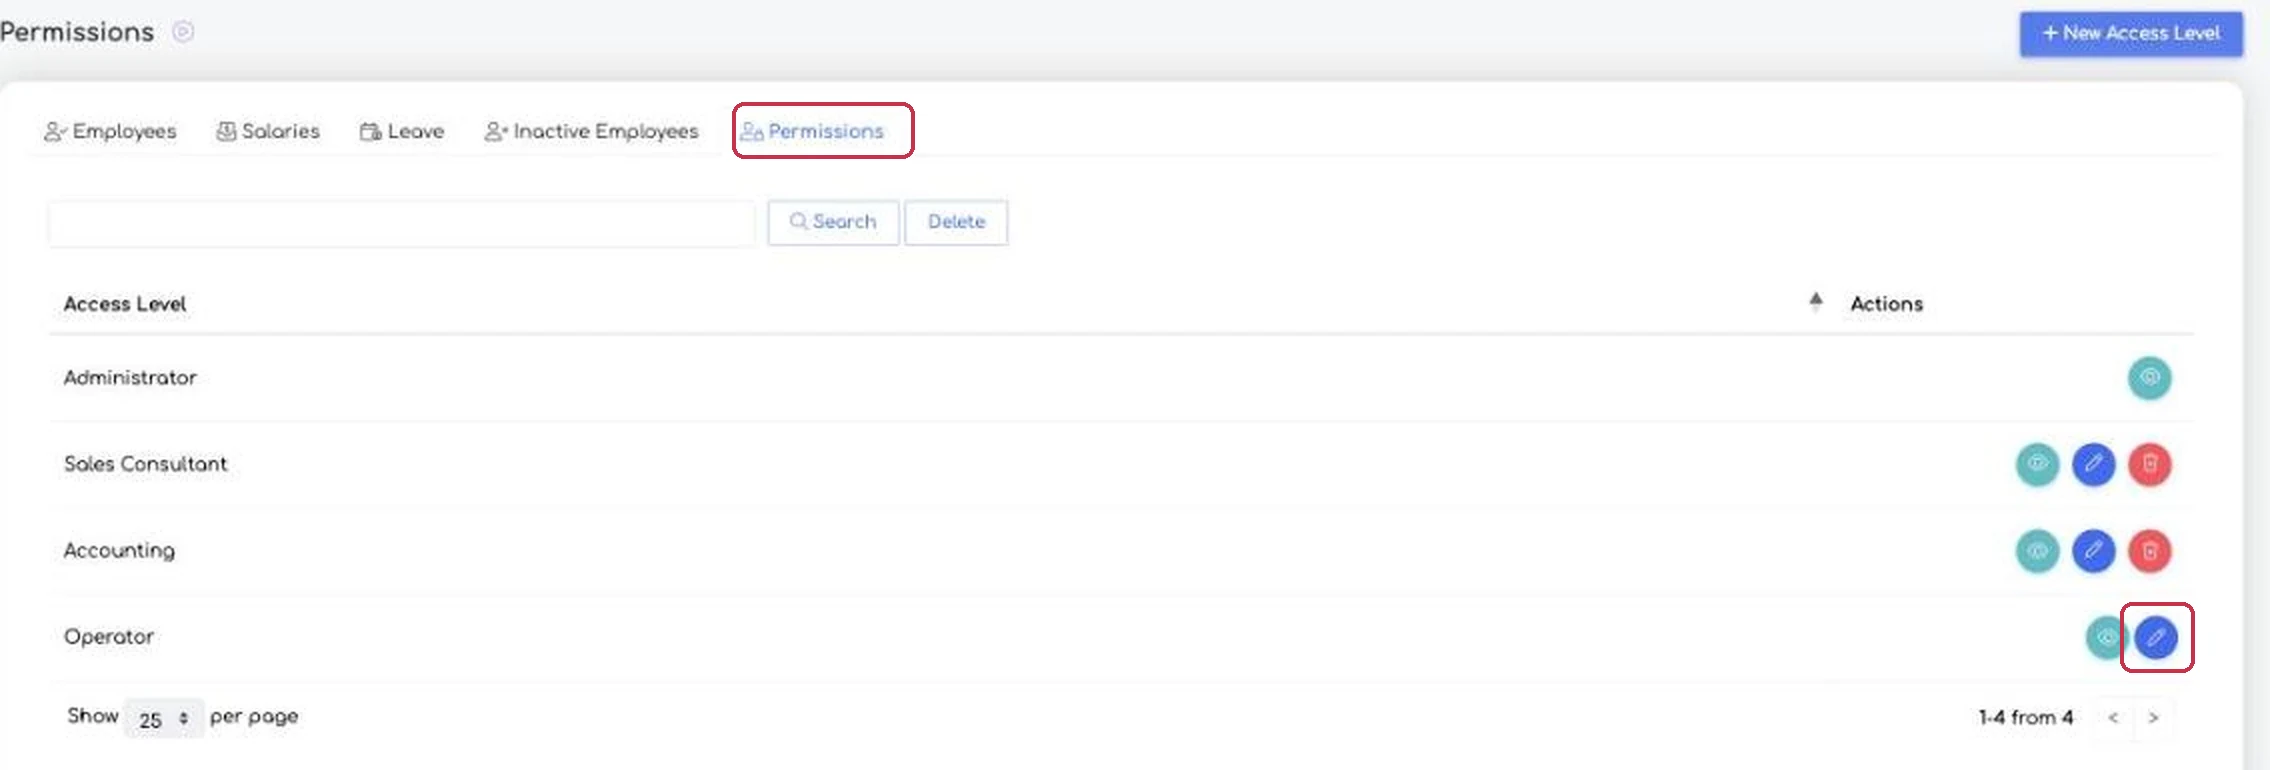
The Permissions tab and the button that opens the “Operator” access level for editing.
Step 2. Check what always stays visible
The first two lines — Workflow Section and Taskflow Section — are fixed for the “Operator” level and cannot be switched off. An operator has access, by definition, to the workflow they work in.
The Appointments line, on the other hand, has four columns: View, Add, Edit and Delete. You can let operators see the appointments without being able to change them.
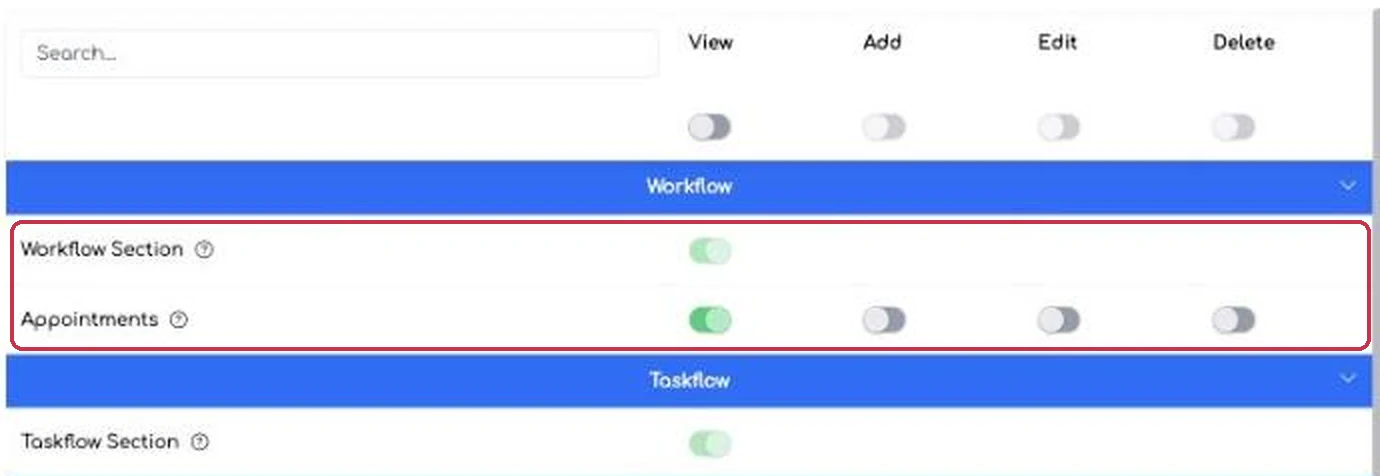
The fixed permissions of the “Operator” level and the four separate rights for Appointments.
Step 3. Choose what is hidden in the order
The block holds the information you can hide one item at a time. A green switch means “displayed”, a grey one means “hidden”.
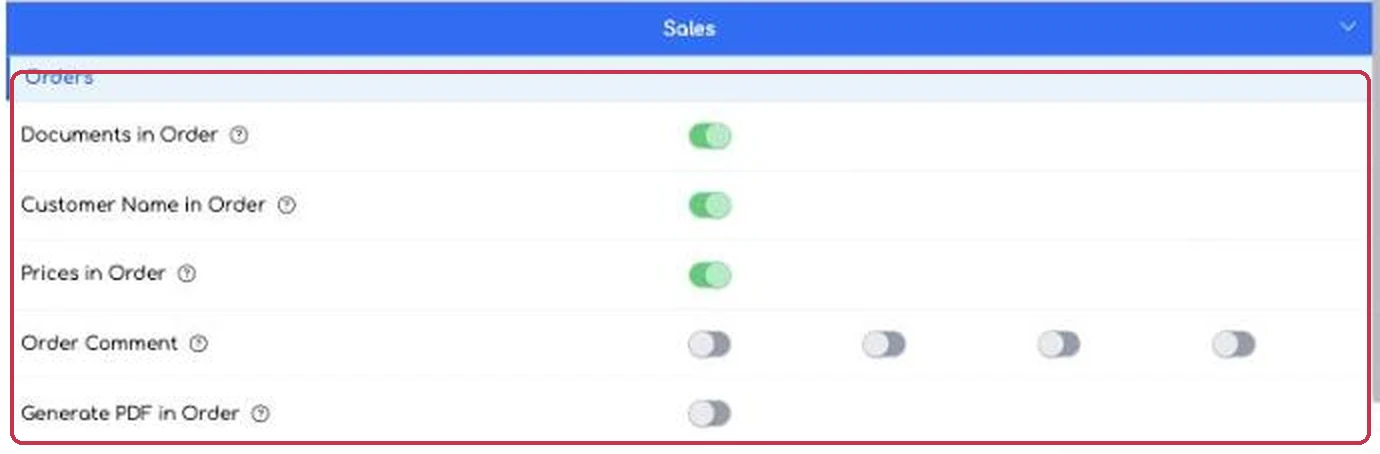
, with all information displayed.
| Permission | What disappears from the screen when the switch is off |
|---|---|
| Prices in Order | The order total, the VAT rate, the unit price, the discount, the line value and the invoice amounts in the Documents section |
| Customer Name in Order | The Client column in the Workflow lists and the customer name in the order header |
| Documents in Order | The Documents section of the order — issued invoices and courier tracking numbers |
| Order Comment | The Comments tab in the order (with separate rights to add, edit and delete) |
| Generate PDF in Order | The button that downloads the order sheet as a PDF |
| Appointments | The Appointments tab in the Workflow |
Step 4. Save the configuration
In the example below we switched off Customer Name in Order and Prices in Order. Operators still see the order, the products and the quantities, but not who the customer is or what the job is worth.
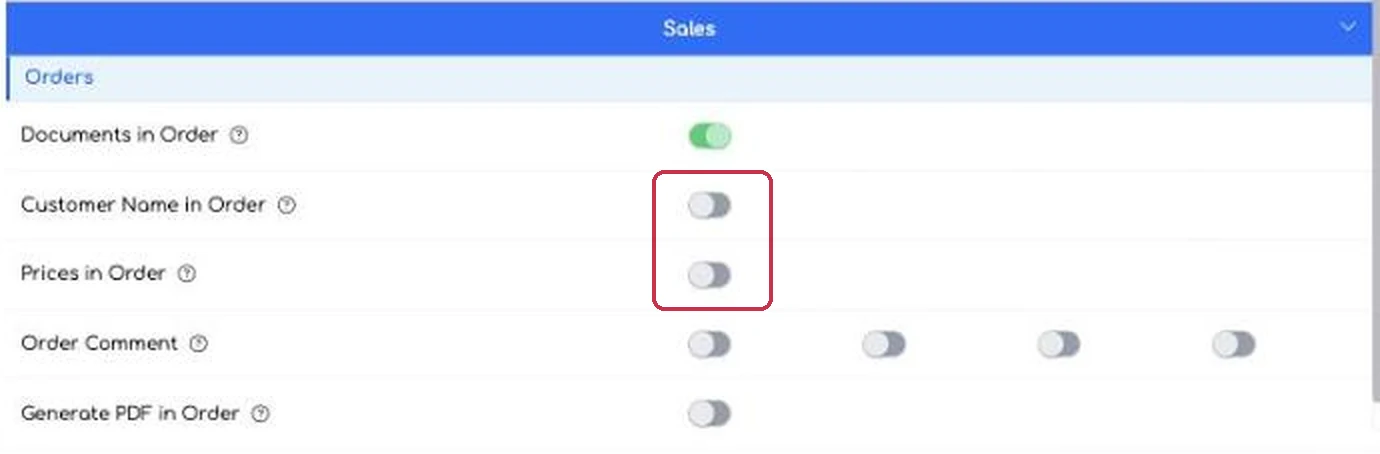
The two switches turned off. The change takes effect once you press Save.
Worth knowing. An access level applies to every employee assigned to it. If you need different rules per team, create a new access level with the + New Access Level button and assign it separately.
Step 5. Assign the level to the right people
Where to find it:
In the employee list, the Account Type column shows who is an “Operator” and who is a “User”. Below the list, the platform also shows how many licences of each type your subscription is using.
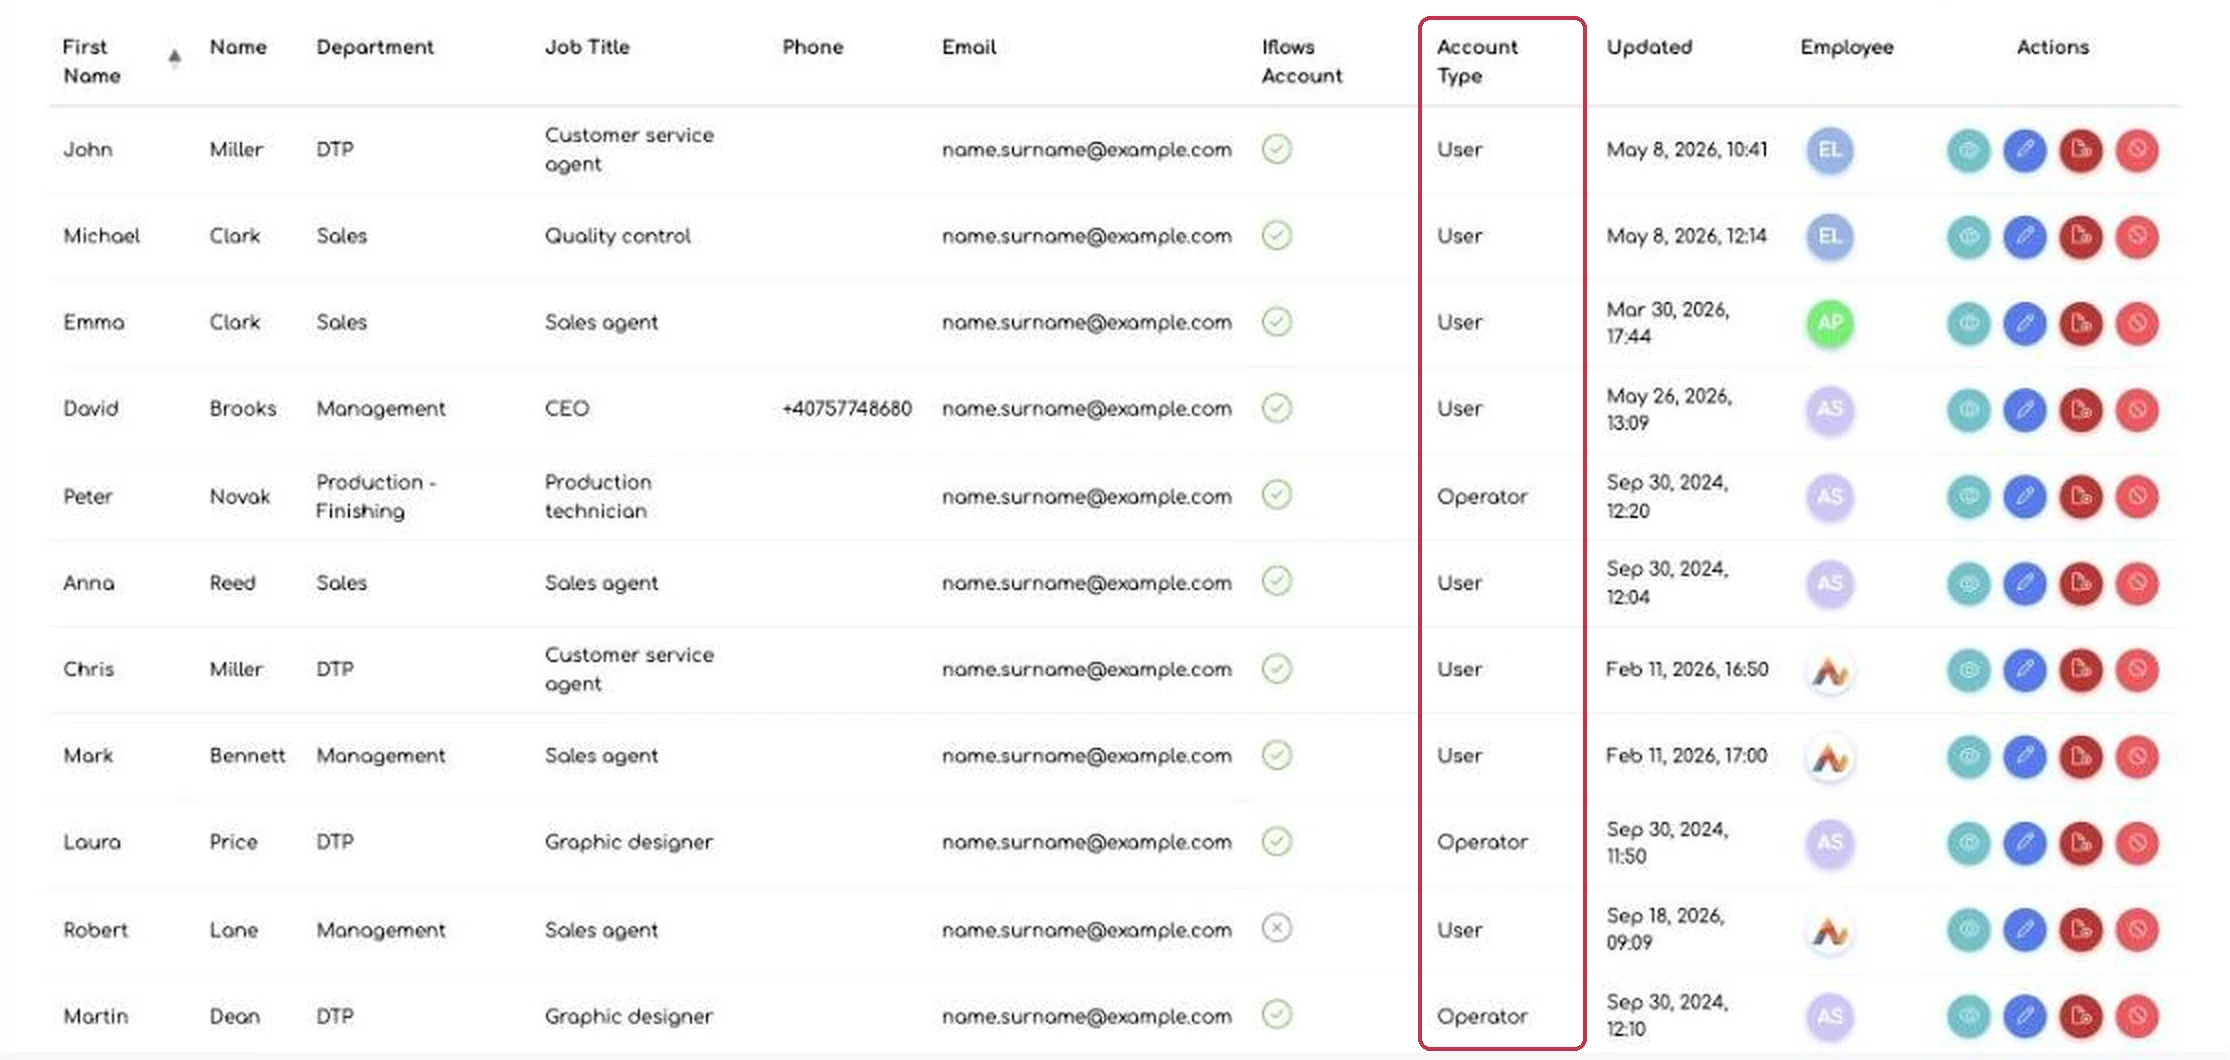
The Account Type column in the employee list.
In the employee card, the Access section holds the Access Level field. Choose “Operator” there. The same section holds the Flux PIN — the code the person uses to identify themselves when taking over or completing a stage directly from the Workflow. For accounts that sign in with a username and password, the PIN is taken automatically.
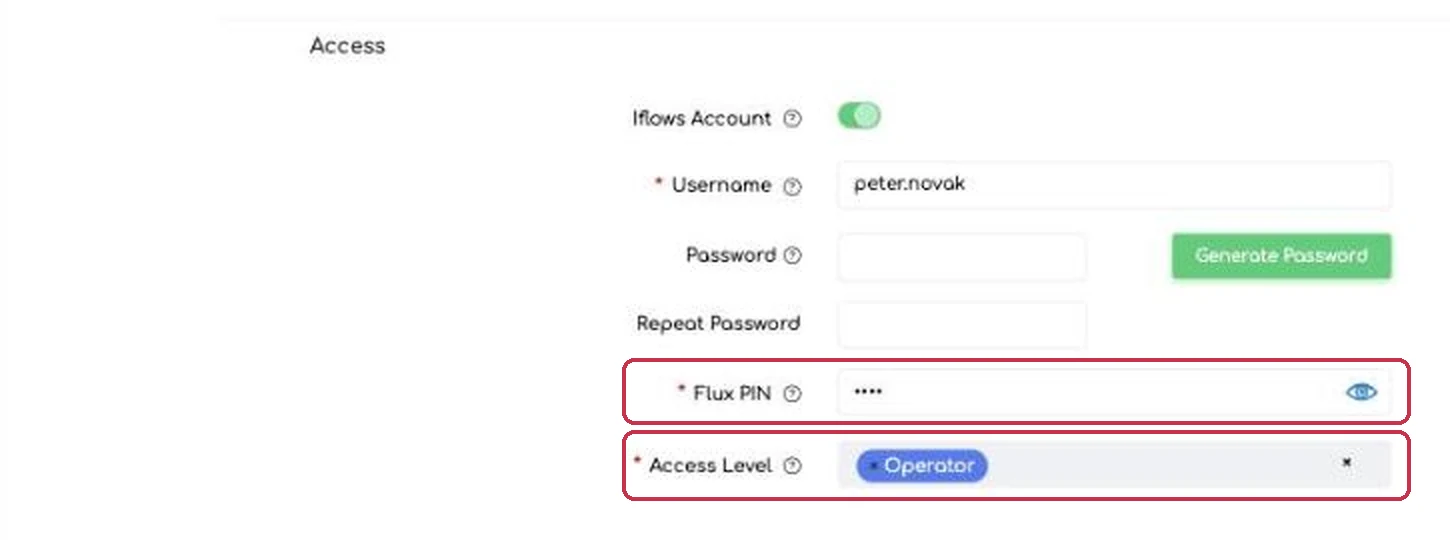
The Access section of the employee card: Flux PIN and Access Level.
What actually changes on screen
The next four screenshots show the same two screens twice: once as a user with full rights sees them, and once as an operator sees them after the customer name and the prices have been hidden.
The Workflow list
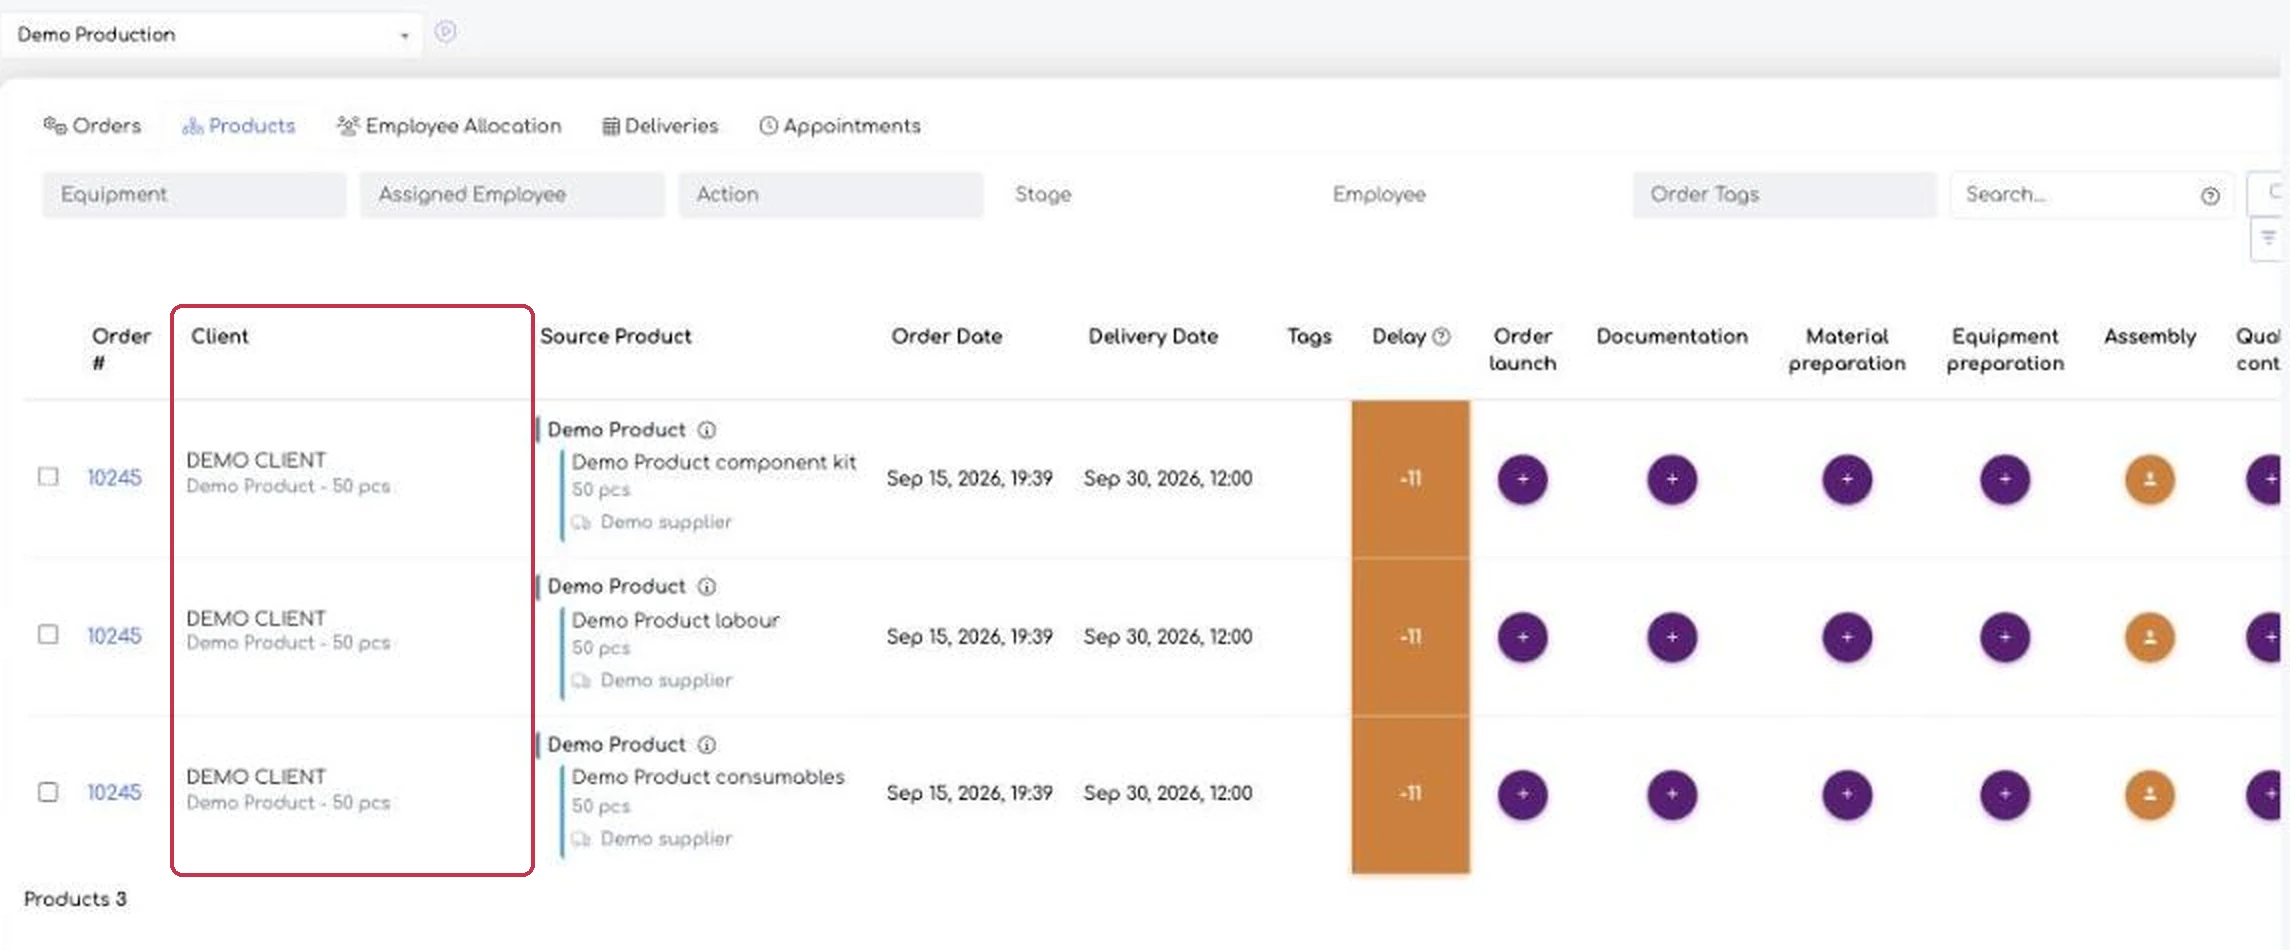
Full view: the Client column is present in the list.
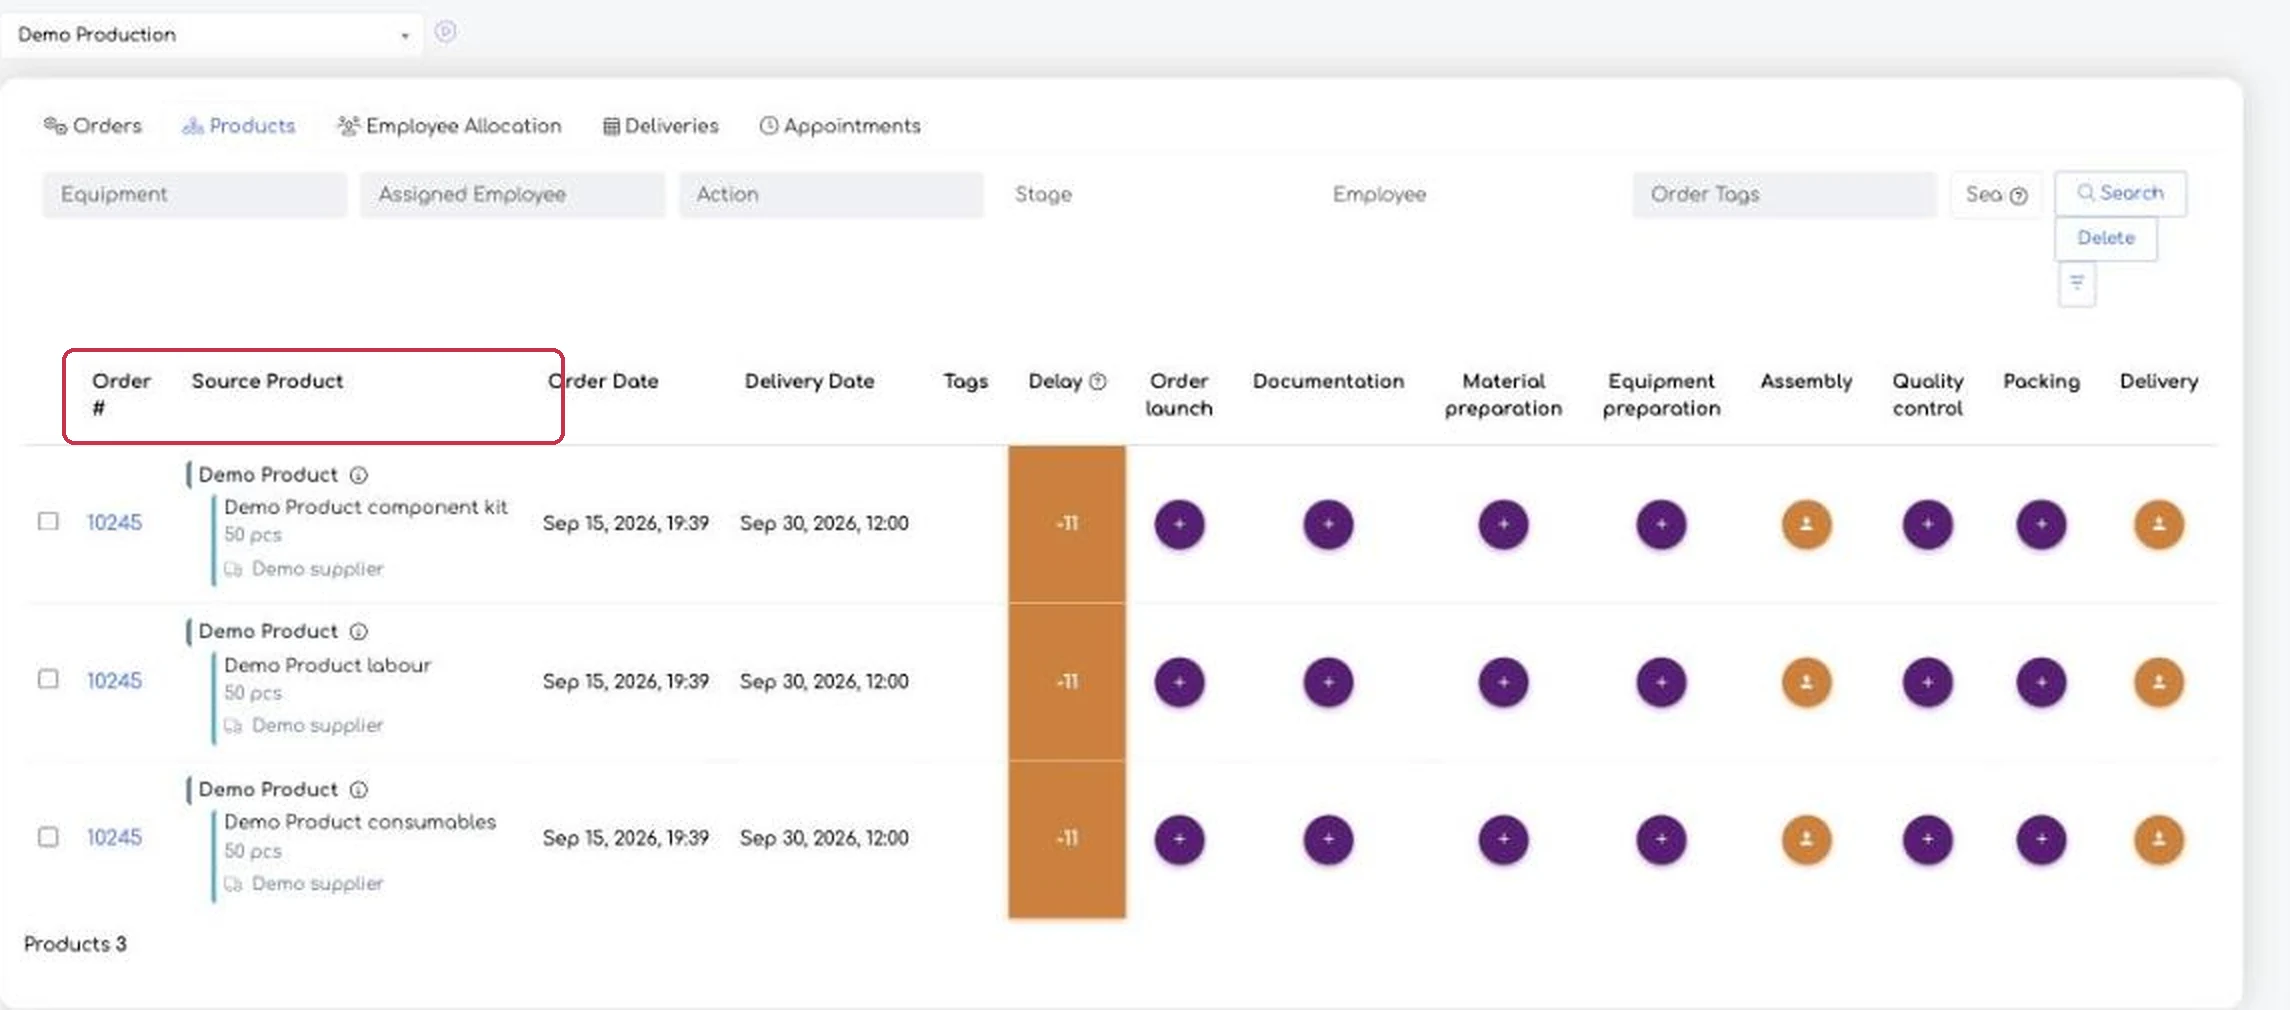
The operator’s view: the Client column is gone, and the job is identified by the order number and the product.
The order opened from the Workflow
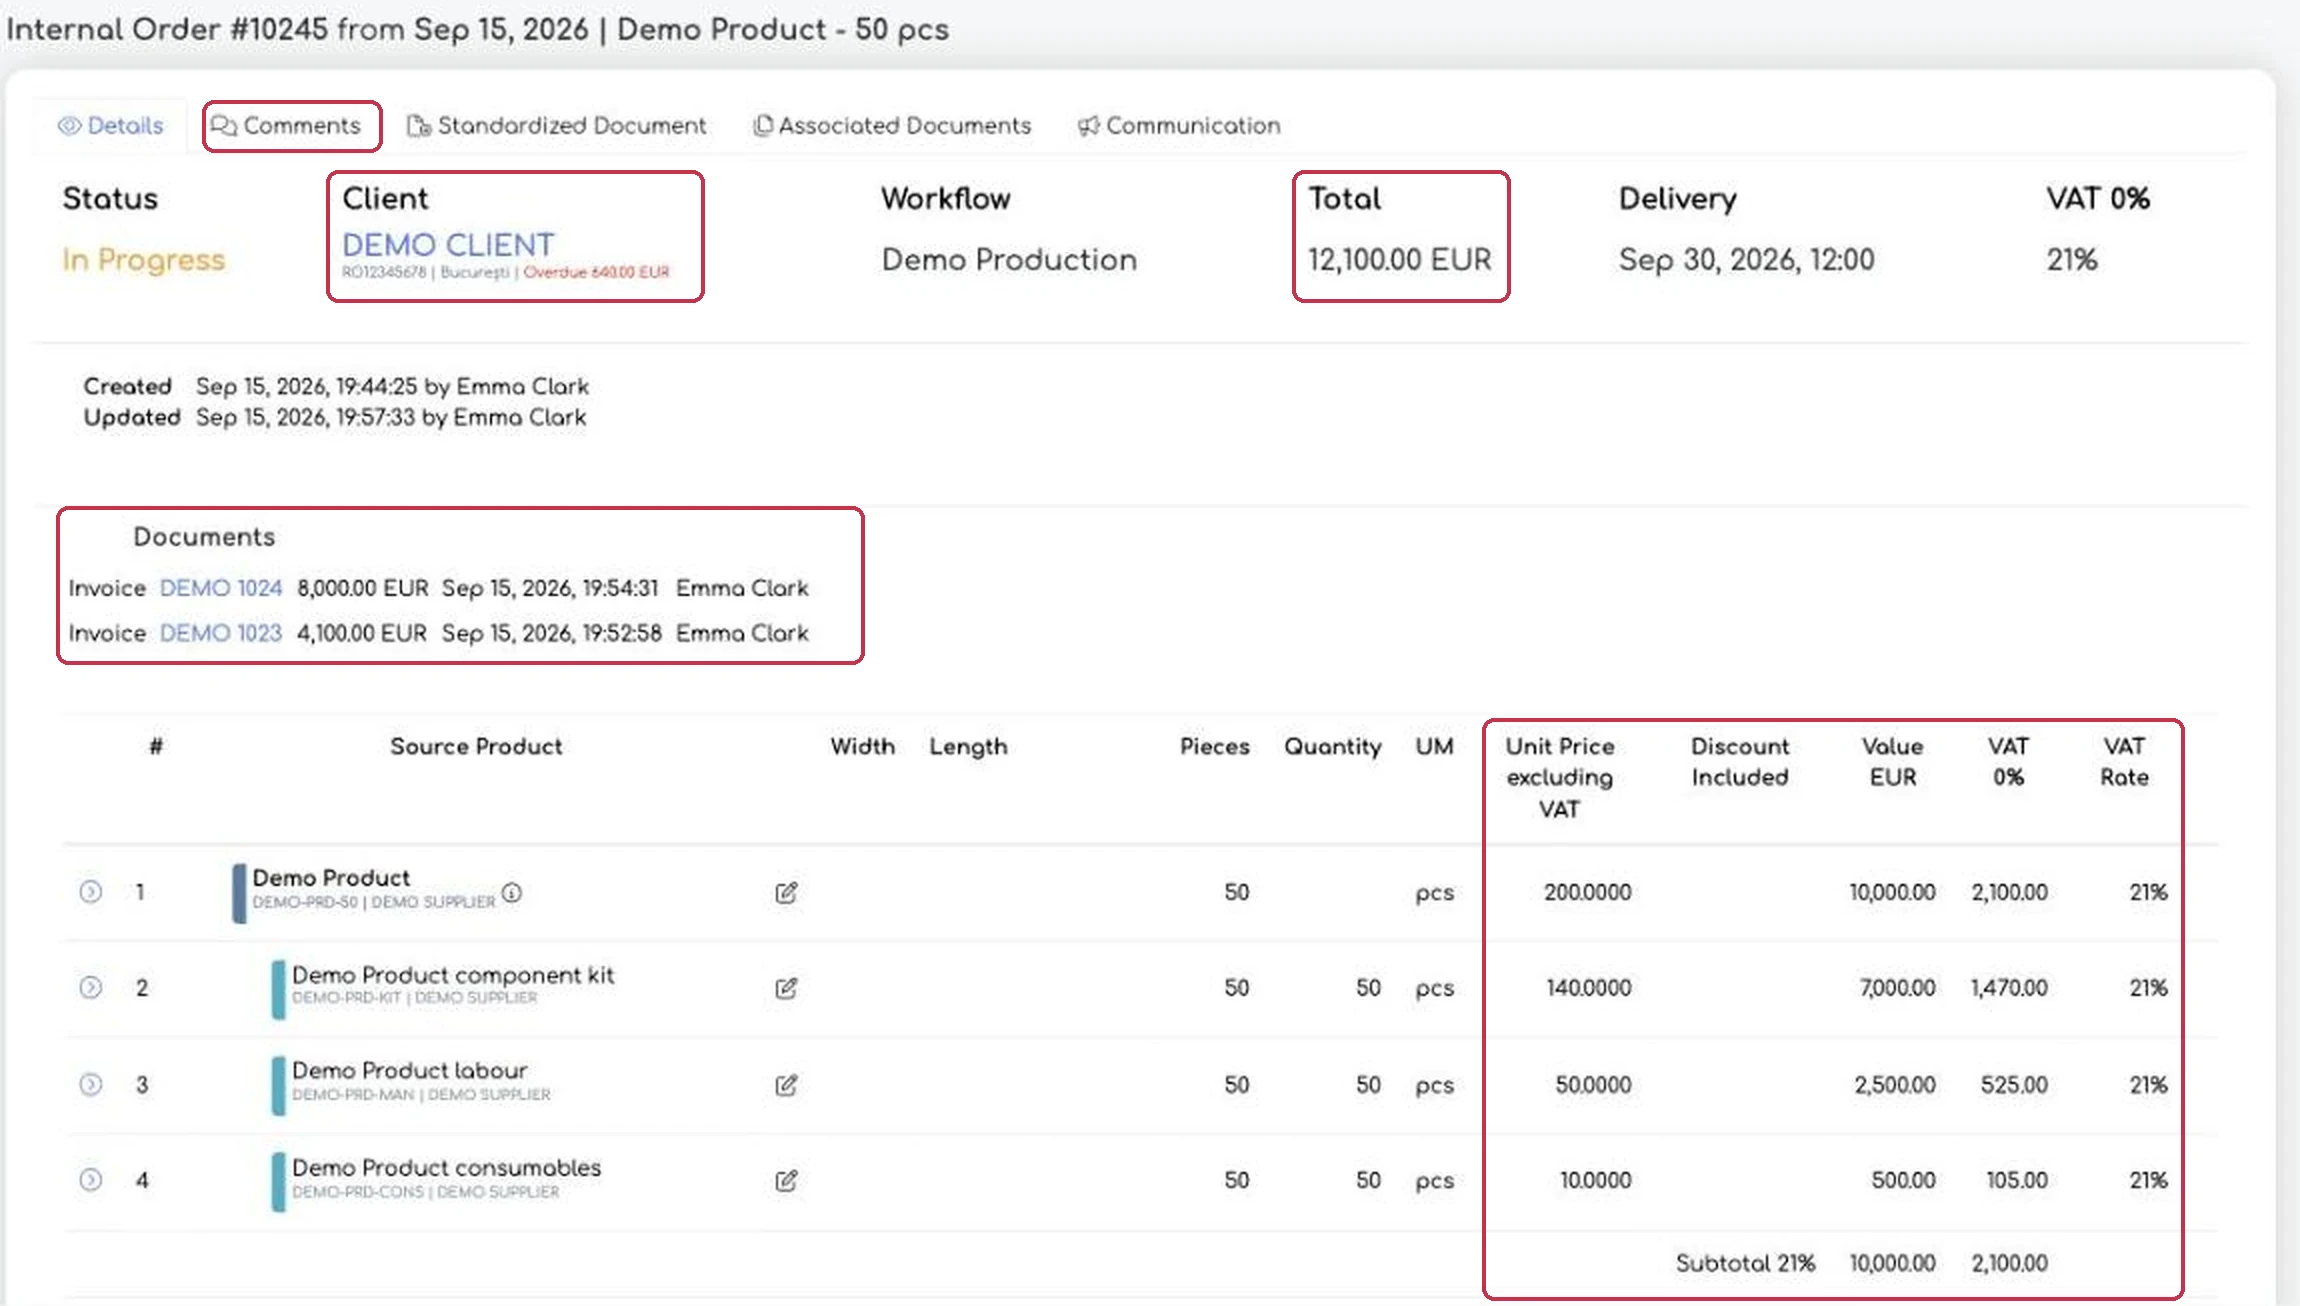
Full view: the Comments tab, the customer, the total, the Documents section and the price columns.
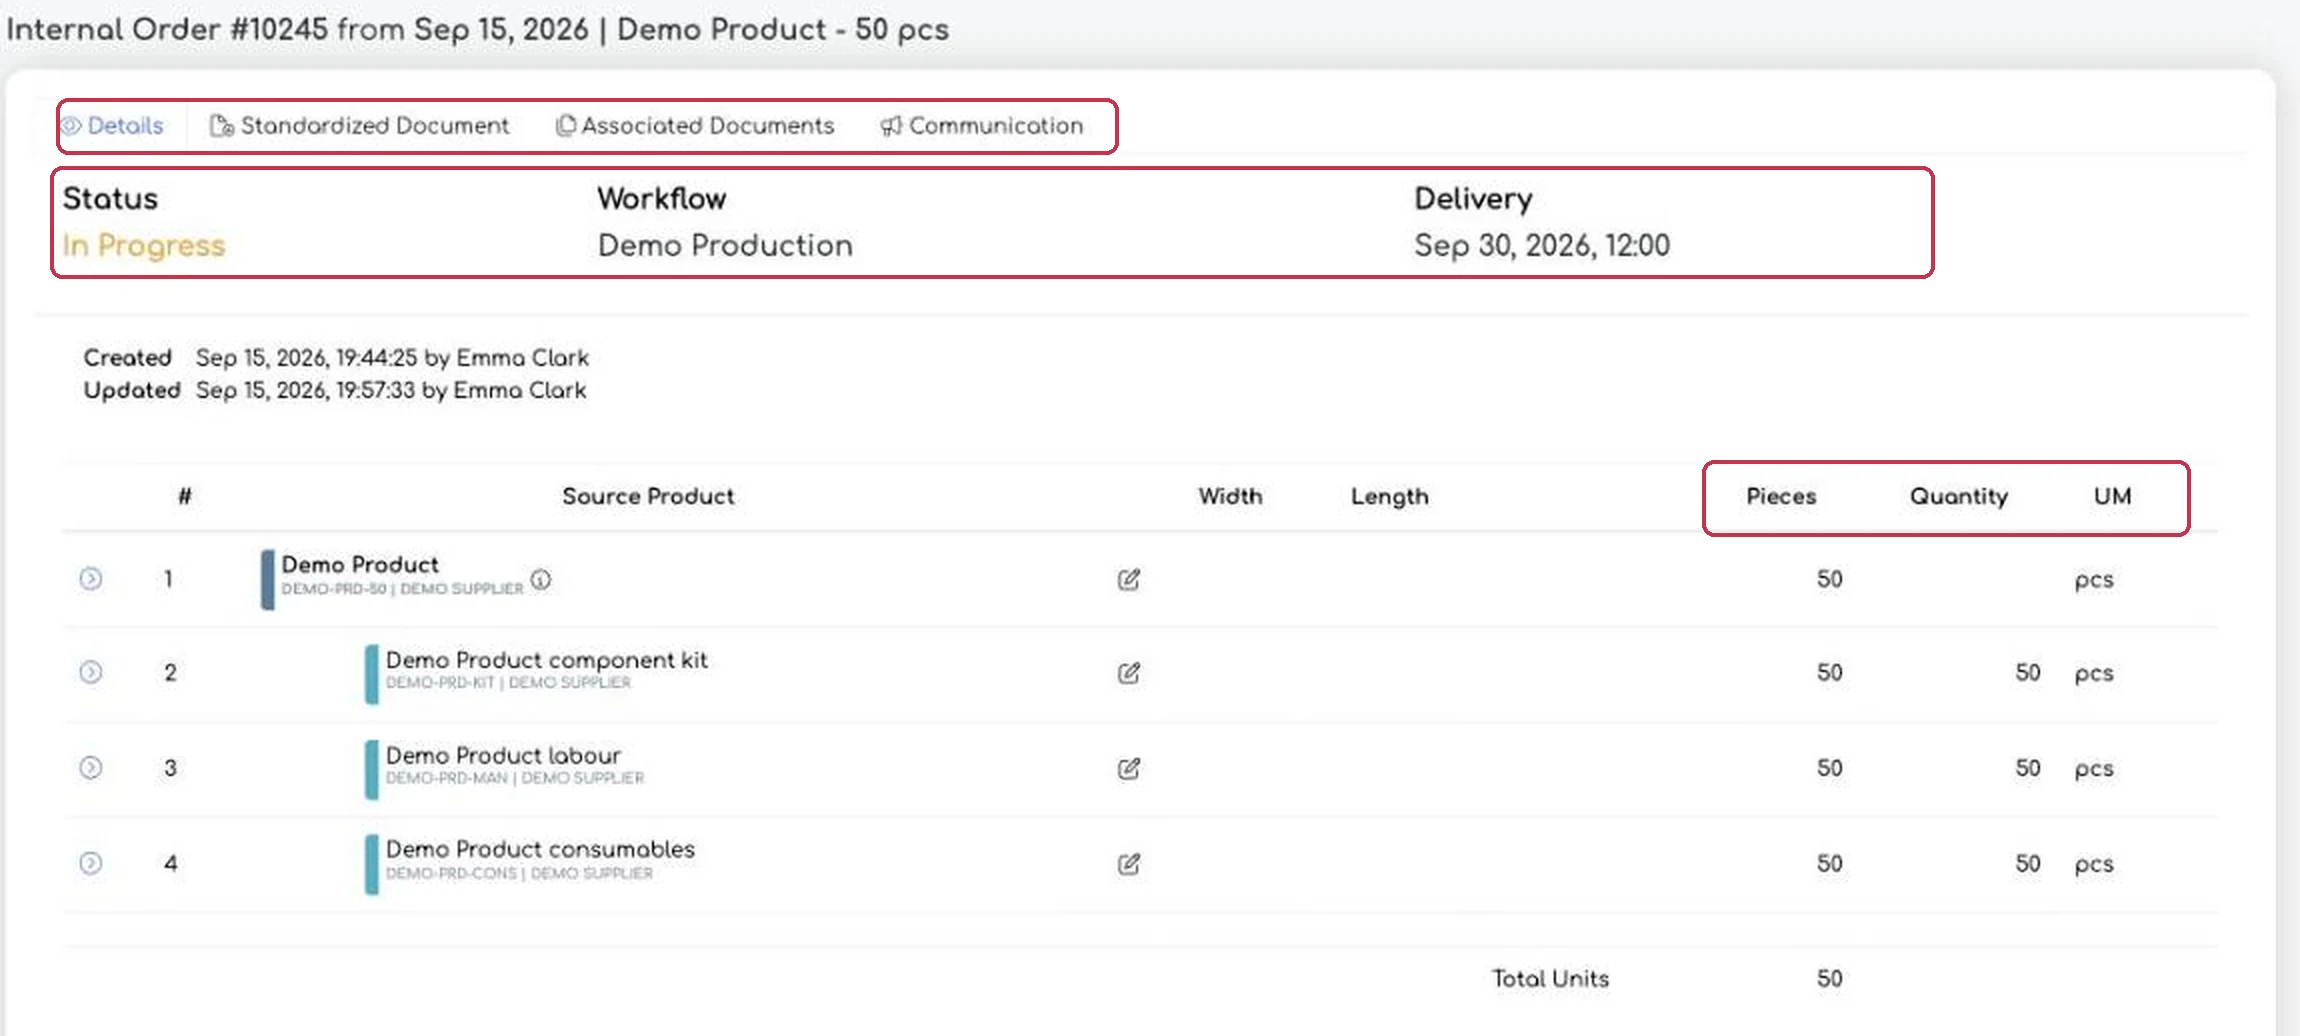
The operator’s view: the status, the workflow, the delivery date, the products and the quantities remain. Nothing else is displayed.
Control 2. Shop-floor terminal, without signing in
Where to find it:
If your operators work on a shared terminal that opens the Workflow page directly, without a username and password, the access-level permissions no longer apply — there is no authenticated account. In that case, what is displayed is decided by the IP address of the internet connection the page is opened from.
Add the IP address, give it a name in the Details column and tick, on the right, exactly what that terminal is allowed to display.
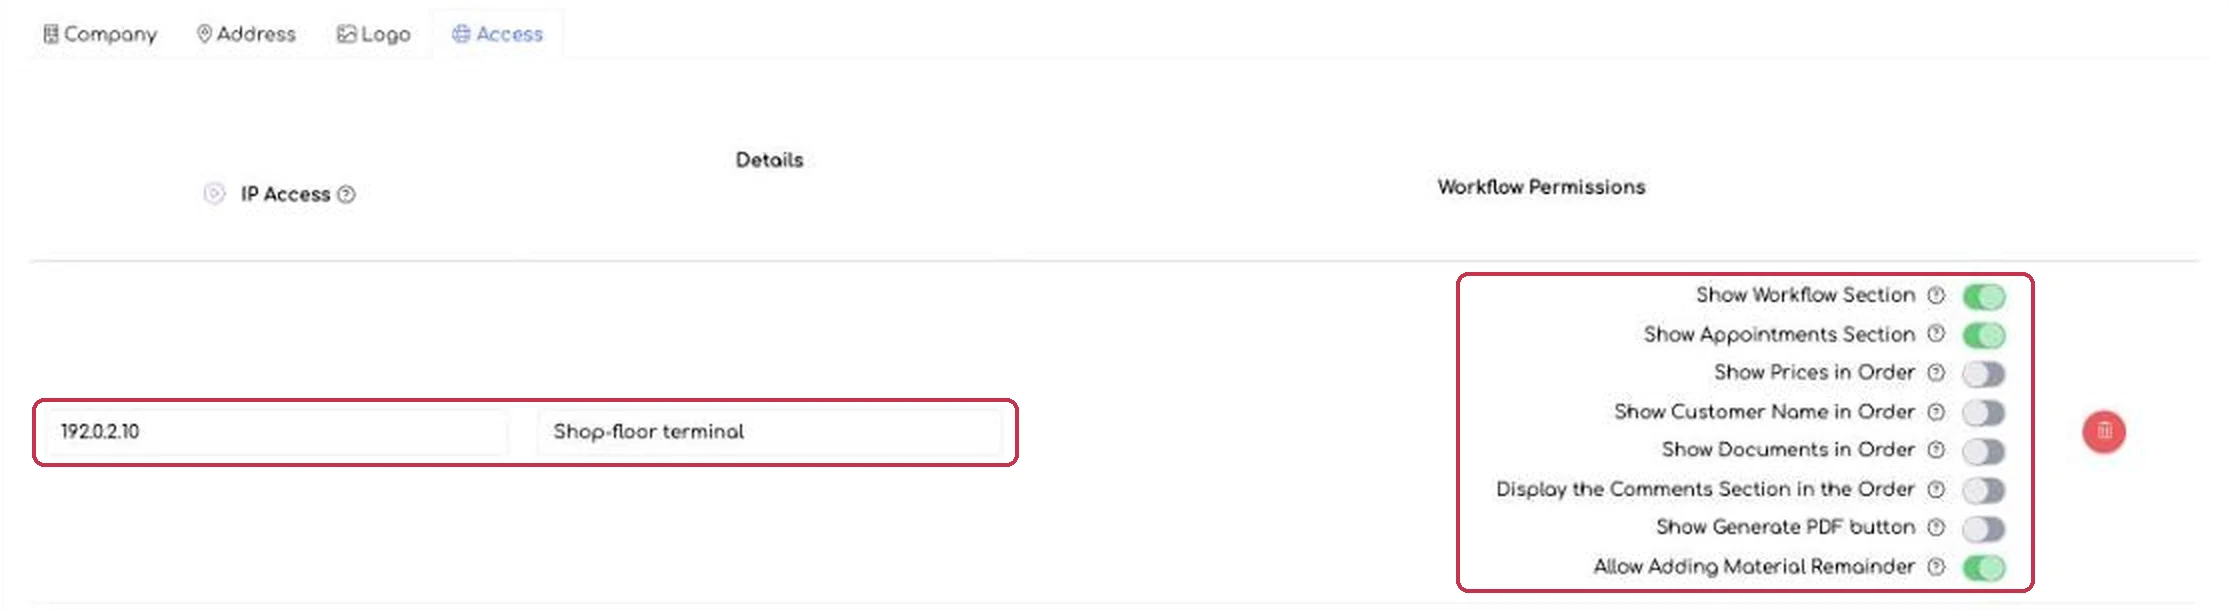
A shop-floor terminal configured restrictively: it sees the Workflow and the Appointments, but no prices, customer names, documents or comments.
The eight switches available for each IP address:
Show Workflow Section — access to the Workflow itself
Show Appointments Section — the Appointments tab
Show Prices in Order
Show Customer Name in Order
Show Documents in Order
Display the Comments Section in the Order
Show Generate PDF button
Allow Adding Material Remainder — adding leftover material directly from the Workflow
Recommendation. The IP address has to be static. If your internet provider assigns a dynamic address, access is lost every time the address changes. Check this with your network administrator before you configure the terminals.
Control 3. Stage delegation
Where to find it: › the workflow › stage
Delegation answers a different question: not which information the operator sees, but which stage they are allowed to work on. On each stage card, next to the stage name, there is an icon with two people — the delegation button.
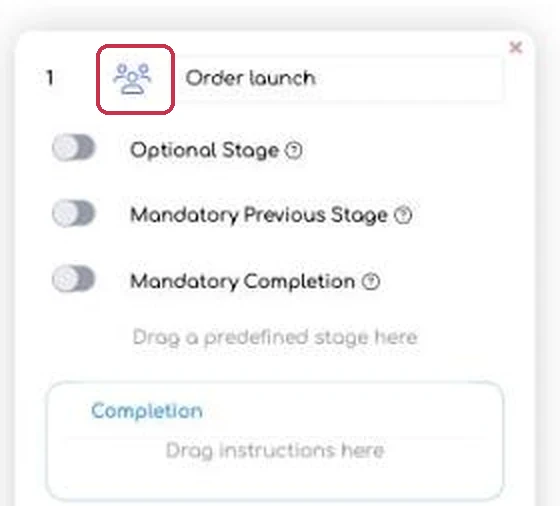
The delegation icon on the stage card.
Select employees, departments or both. Only the people you choose — or the members of the departments you choose — will be able to take over and complete that stage. If you select nobody, the stage stays open to everyone.
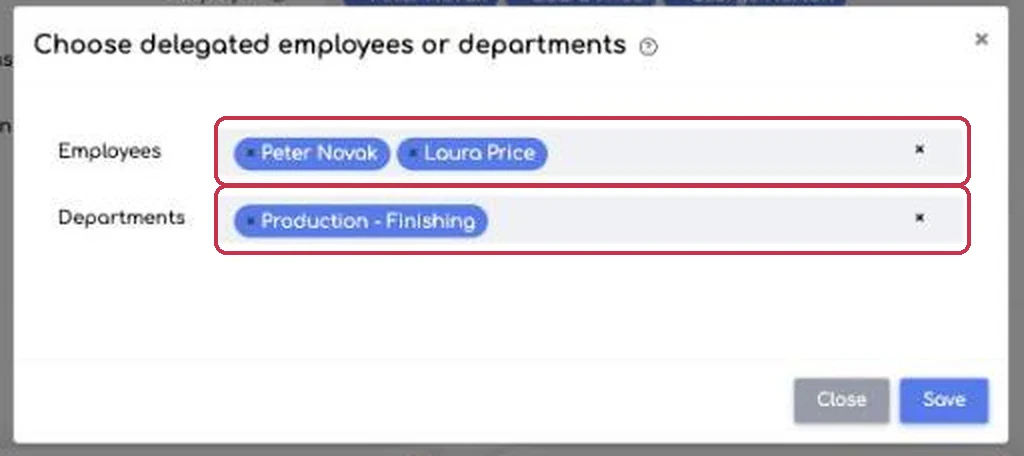
The delegation window: employees and departments.
Control 4. Public or private workflow
Where to find it: › the workflow
In the Details section of the workflow, the Public switch decides who sees the workflow in the drop-down list on the Workflow page. When it is on, the workflow is visible to everyone. When you switch it off, the Employee field appears: the workflow stays visible only to the people you add there.
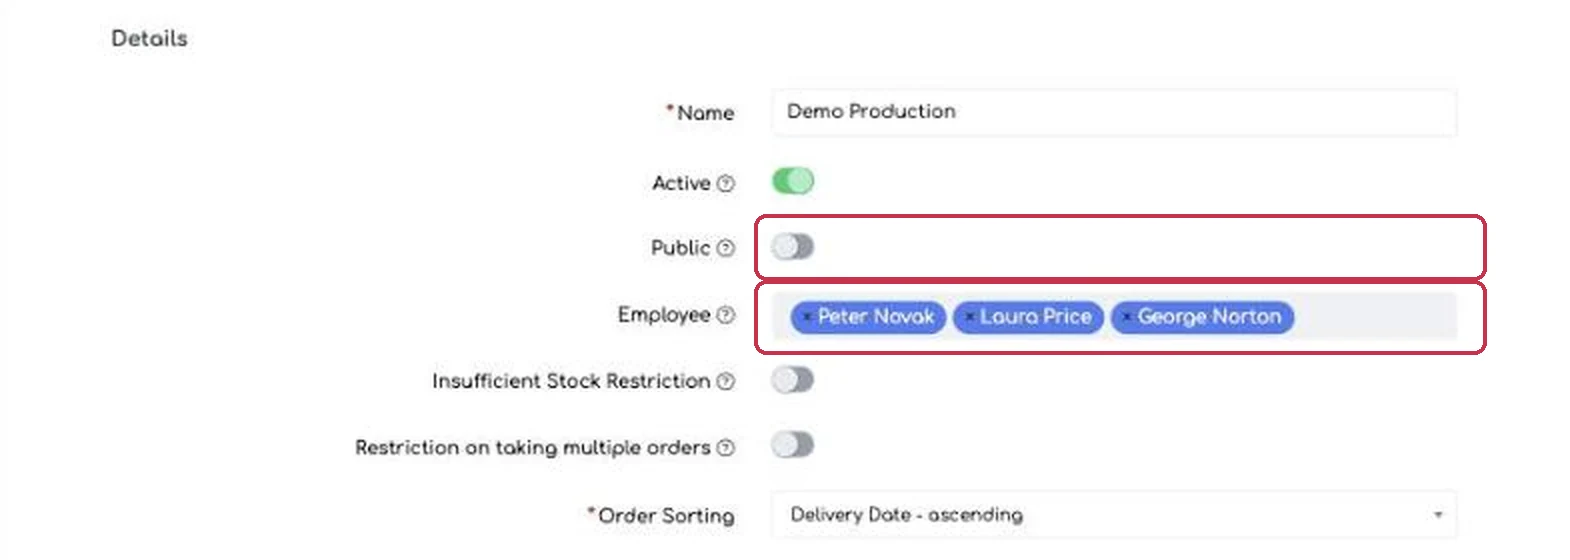
A private workflow, with the list of employees allowed to see it.
The limit of this setting. The visibility restriction applies to the Workflow section. The associated data — orders and reports — may remain visible in other sections of the platform, depending on each user’s general permissions.
Summary table
| I want to hide… | Operator with their own account | Terminal without signing in |
|---|---|---|
| Prices and the order value | ||
| The customer name | Order | |
| Invoices and courier tracking numbers | ||
| Comments on the order | ||
| Downloading the order sheet as PDF | ||
| The Appointments tab | ||
| A whole workflow | › workflow › Public off + employee list | › workflow › Public off + employee list |
| A single stage | › workflow › stage › delegation | › workflow › stage › delegation |
Before you apply it
Decide first what operators must not see, and only then start switching things off. The summary table shows where each item lives.
Check whether you also have terminals that work without signing in. If you do, the same information has to be switched off in both places.
Test with a real operator account, on a real screen, before you announce the change to the team.
If you need different rules per team or per section, create separate access levels instead of changing the existing “Operator” level.