
The “Client Account” feature is the module that allows each client of an iFlows user to have a secure online portal, where they can offer:
- Total Transparency: Clients can track the status of their orders in real-time without needing to contact you. They will see the exact stages of the workflow, but exclusively for their own orders, with specific details and updates.
- Official Complaint Channel: Clients can open a complaint directly on a specific order, attaching documents or photos, creating a clear and easy-to-follow history.
- Self-Service: Clients can download important documents such as invoices, proformas, or receipts themselves, whenever they want.
- Efficient Communication: Clients can upload files directly into the portal (e.g., graphics for an order, documents), thus centralizing all communication.
- Dedicated Product Catalog: You can choose to display certain products in a catalog visible only to them.
- Personalized Control: Clients can manage their notification preferences.
This Client Account functionality is particularly useful for recurring clients with whom you collaborate constantly, as it centralizes all orders, documents, and communications in a single space, facilitating rapid information exchange and minimizing administrative effort on both sides.
Step-by-Step Guide
Step 1: Accessing the Clients Section
- From the main menu of the iFlows platform, located on the left side of the screen, click on the "Clients" option.
Step 2: Viewing the Details of a Specific Client
- Search the list for the client for whom you want to create an account.
- Next to the client's name, in the "Actions" column, click on the eye (👁️) icon, which corresponds to the "Client Details" action.
Step 3: Creating and Managing the Client Account
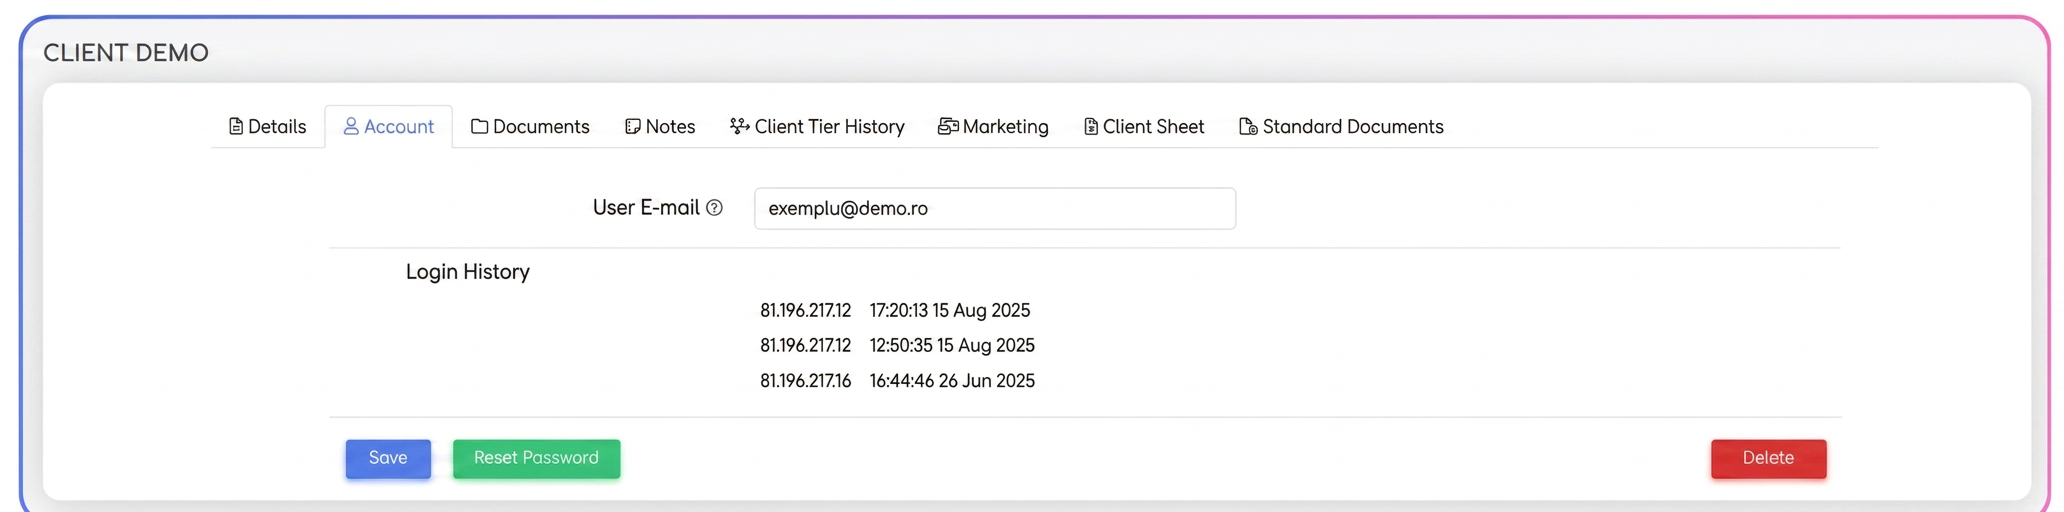
- Once you have entered the client profile, you will see several tabs at the top of the page ("Details", "Account", "Documents", etc.). Click on the "Account" tab.
- To create a new account:
- In the "User Email" field, enter the valid email address of the contact person from the client company.
- Note: As the informational message indicates, this email address will become the username for authentication. Access data (login link and password) will be automatically sent to this address.
- After entering the email, press the "Save" button. The system will create the account and send the activation email to the client.
- For an already existing account:
- On this screen, you can see information about the already created account.
- User Email: The field is already filled with the client's email address.
- Login History: This section shows you a log of all client logins to their portal. You can see the IP address, exact time, and date of each session, providing an additional level of security and audit.
- Regenerate Password: If the client has forgotten their password, you can click this green button. The system will automatically send a new password reset email to the client's address. You will receive a confirmation notification in the top right corner: "The new password has been sent to [email address]".
- Delete: This red button permanently removes the client's access to the portal.
Step 4: The Client Experience in the Dedicated Portal (What the Client Sees and Can Do)
Once the client receives the email and logs in, they will have access to a simplified interface where they can view and manage the following:
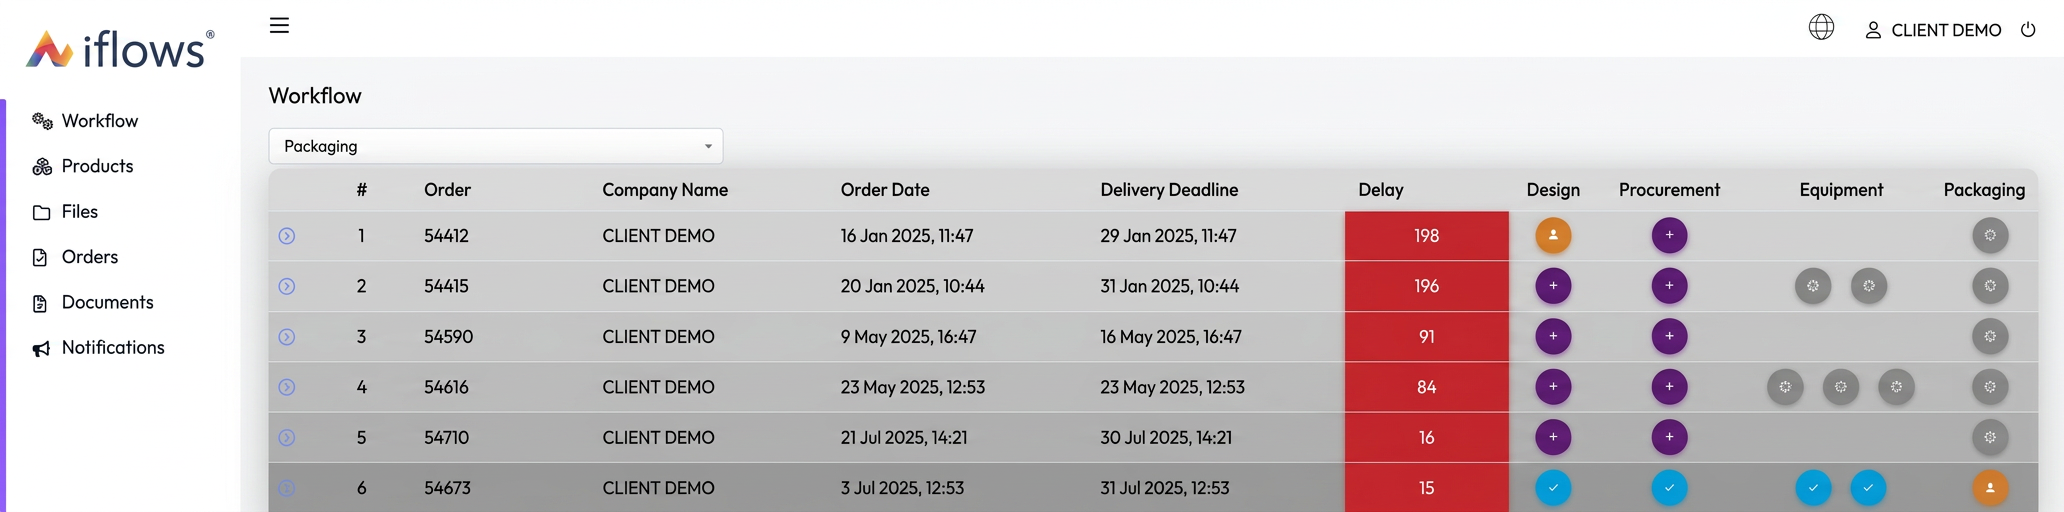
- Order Tracking: Sees a list only of orders belonging to them and can track the status of each (e.g., "In progress", "Completed", "Delivered").
- Adding a Complaint/Remark:
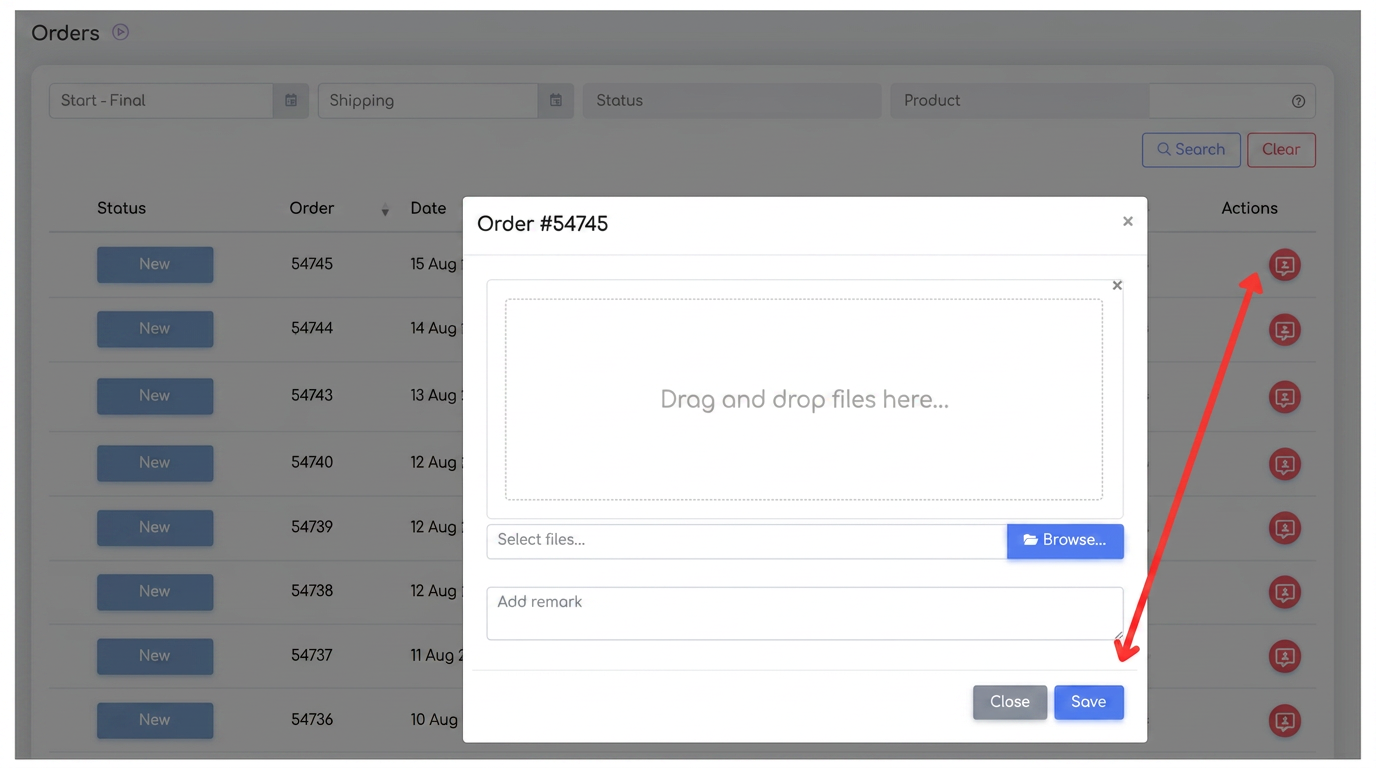
- Next to each order in the list, the client has a special button to add a complaint.
- Clicking this button will open a window where they can write detailed text (a "remark") explaining the problem.
- They can attach a file (for example, a photo of a defective product, a document, or any other relevant evidence).
-
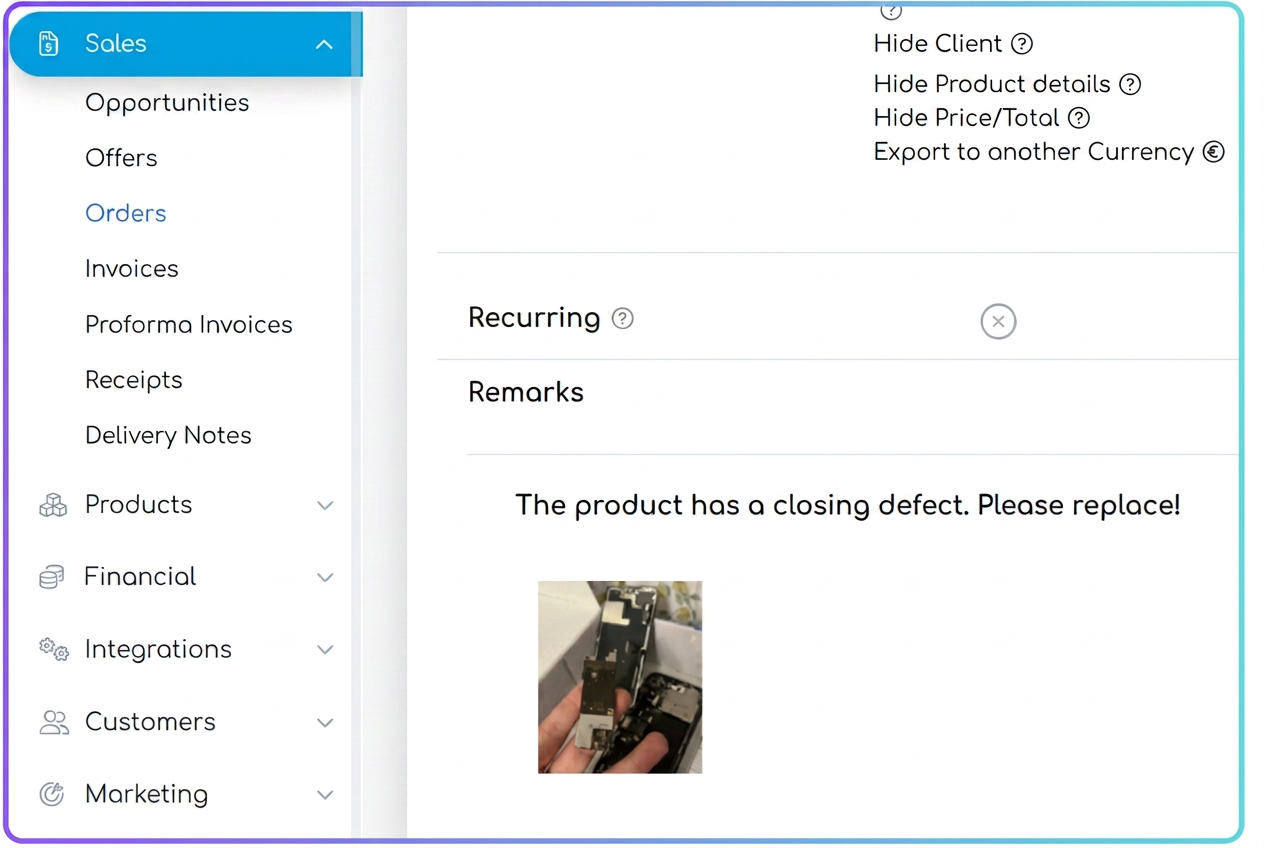
- After pressing "Save" or "Add remark", this complaint is sent and associated directly with that order in your system (in the order view module).
- Downloading Documents: Can access and download Invoices, Receipts, and Proforma Invoices issued for them.
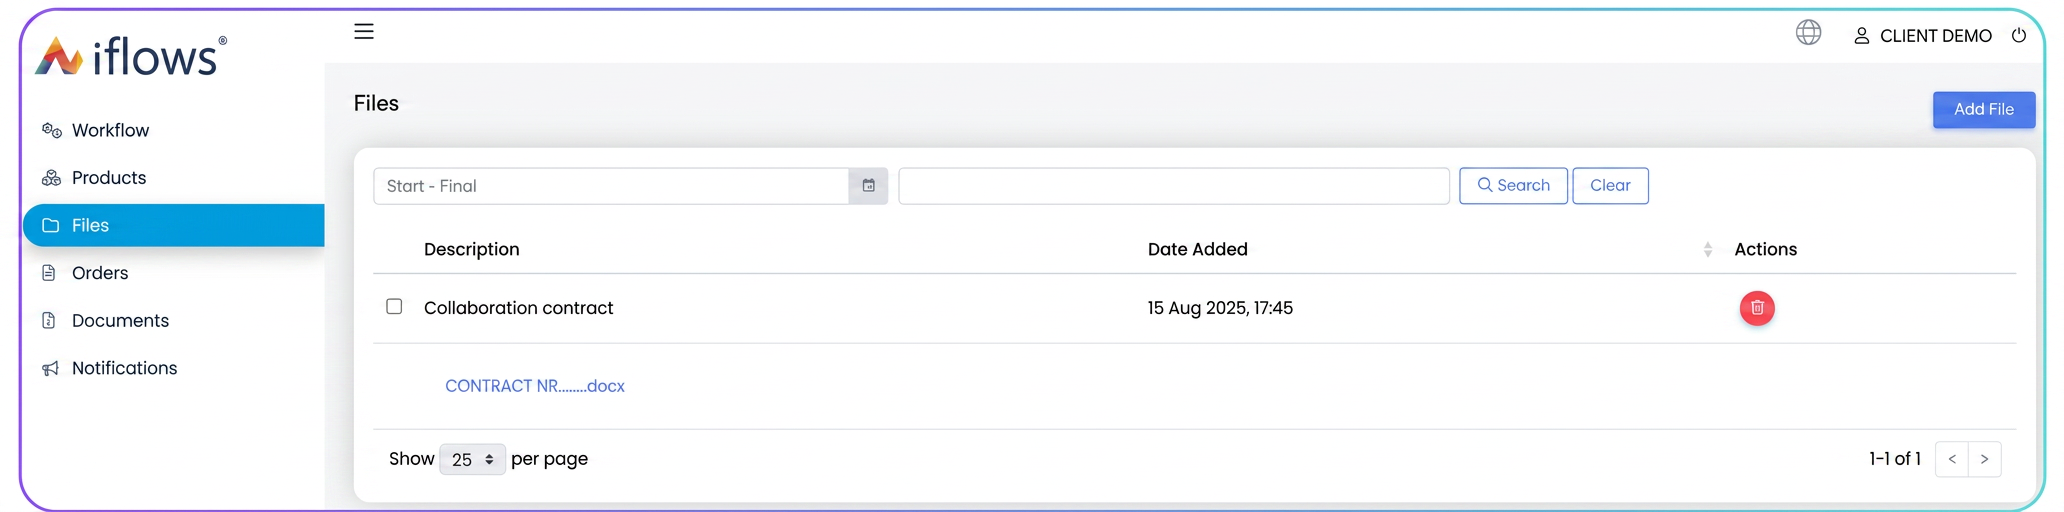
- Uploading General Files: Separate from complaints, there is a "Files" section where the client can upload general documents (e.g., a new contract, updated company data, etc.).
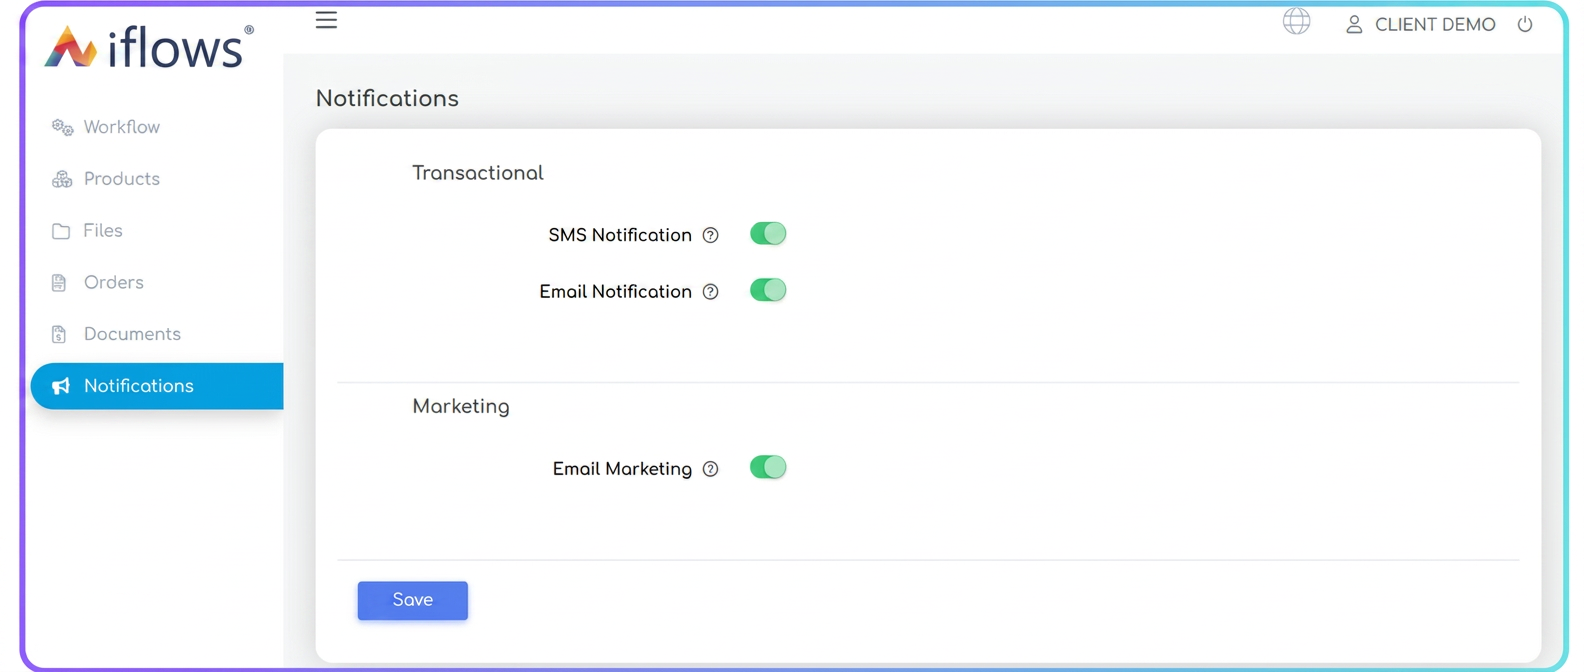
- Managing Notifications: Can give or withdraw consent to receive notifications via SMS, email, or marketing communications. Thus, this information will be automatically updated in your client's profile.
Step 5: Viewing Files Uploaded by the Client in iFlows
When a client uploads a file through the portal, you will be able to see that file directly in your platform.
- From the main menu on the left, go back to "Clients".
- Select the "Files" sub-menu.
- In this list, you will see all uploaded files. You will be able to identify the file by:
- Description: The text entered by the client during upload.
- Client: The name of the client who uploaded the file.
- Date Added: The exact date and time of the upload.
- In the "Actions" column, you can download (⬇️) or delete (🗑️) the respective file.
Step 6 (Optional): How to Display a Product in the Client Account
For a client to be able to see products in their portal, you must activate them manually.
- From the main menu, go to "Products".
- Choose a product from the list and click on the edit (pencil ✏️) icon.
- On the product editing page, look for the "Display in Client Account" option and toggle the switch.
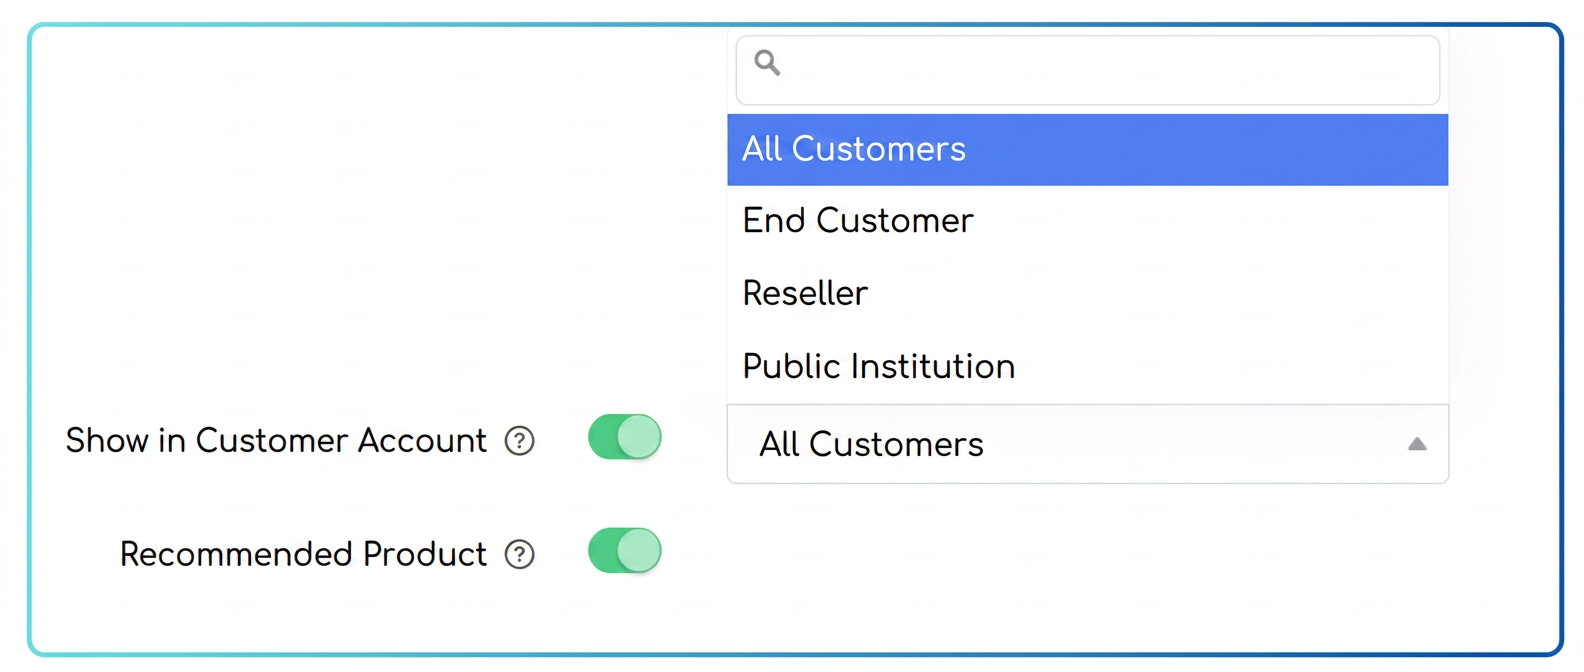
- Press "Save". From now on, that product will be visible in the catalog of the portal for all clients who have an active account.
Step 7: Editing Email Templates
When you create a new account for a client or when they request a password regeneration, the iFlows platform automatically sends an email with the necessary instructions. These emails are generated using predefined templates.
The editing function for these templates allows you to:
- Personalize the message: You can modify the text to fit your brand tone.
- Add useful information: You can include links to the help section of your website, a phone number for technical support, or other specific instructions.
Step-by-Step Guide for Editing Templates
Step 1: Navigating to the Templates Section
- From the main menu of the iFlows platform, located on the left, click on "Settings".
- From the sub-menu that opens, select the "Templates" option.
Step 2: Selecting the Correct Template Category
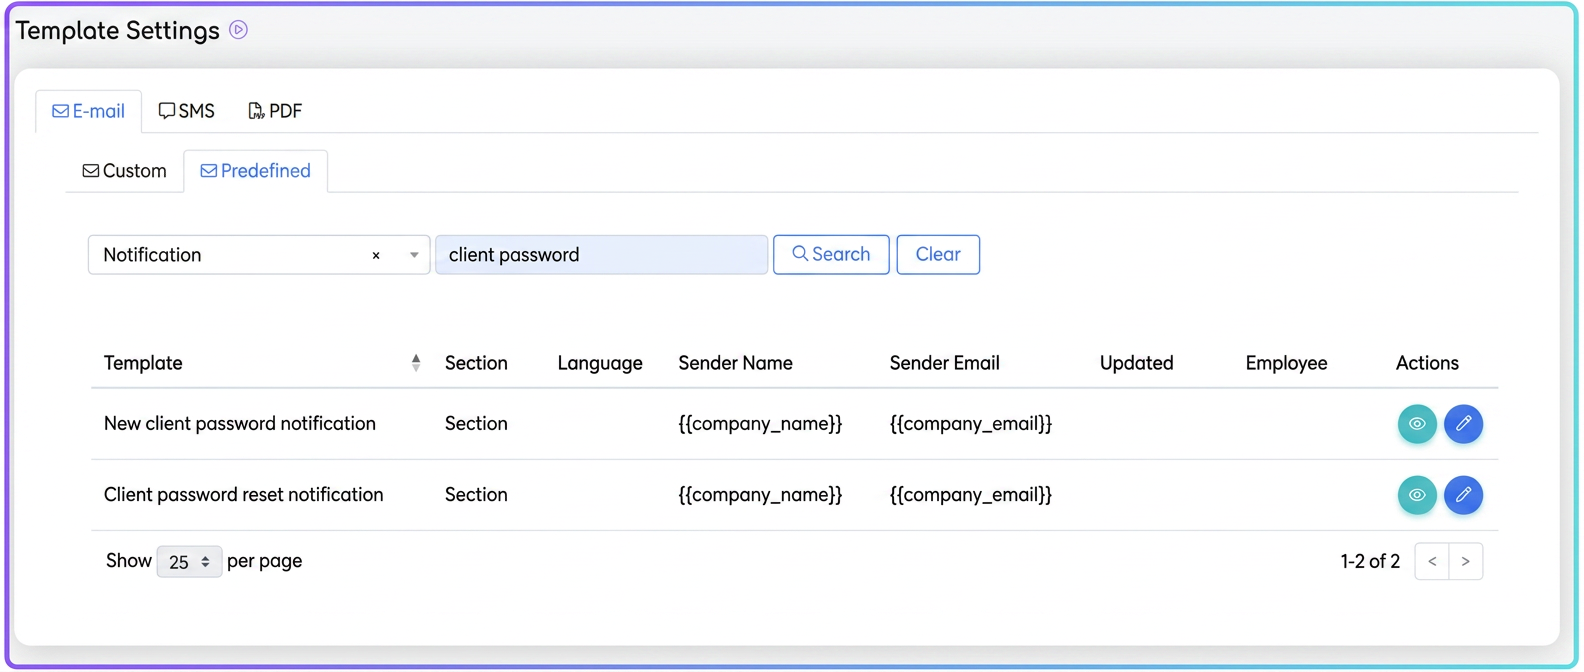
- On the "Template Settings" page, you will see several tabs: Email, SMS, and PDF. Make sure you are on the "Email" tab.
- Below these tabs, there are two options: "Own" and "Predefined". Click on "Predefined" to access the system's default templates.
Step 3: Finding Specific Templates for the Client Account
To quickly find the templates we are interested in, we can use the search function.
- In the search field below the "Own" / "Predefined" buttons, type a relevant keyword, for example: "client password".
- Press the "Search" button.
- The system will filter the list and display the two templates you can modify:
- Client new password notification: This is the email sent when you first create an account for a client.
- Client password regeneration notification: This is the email sent when a client (or you, on their behalf) requests a password reset.
Step 4: Editing the Template
- Next to the template you want to modify, in the "Actions" column, click on the pencil (✏️) icon to enter editing mode.
- The template editor will open, where you can modify:
- Email Subject: This is the title the client will see in their inbox. (e.g., "Your access details for the [Your Company Name] Client Portal").
- Email Body (Content): Here you can modify the main text of the message. You can add a personalized greeting, additional instructions, or contact details.
- ATTENTION to Dynamic Variables: Inside the text, you will notice tags between double curly braces, such as {{company_name}} or {{company_email}}. These are dynamic variables (placeholders) that the system automatically replaces with the correct information (company name, client email, reset link, etc.). It is crucial NOT to delete or modify these variables, especially those containing access links or passwords, as this will make the email non-functional. You can move them within the text, but do not alter their content.
Step 5: Saving Changes
- After you have finished personalizing the text, scroll to the bottom of the page and click the "Save" button.
- Your changes are now active. Every time a new account is created or a password is reset, the system will use your personalized version of the email template.