
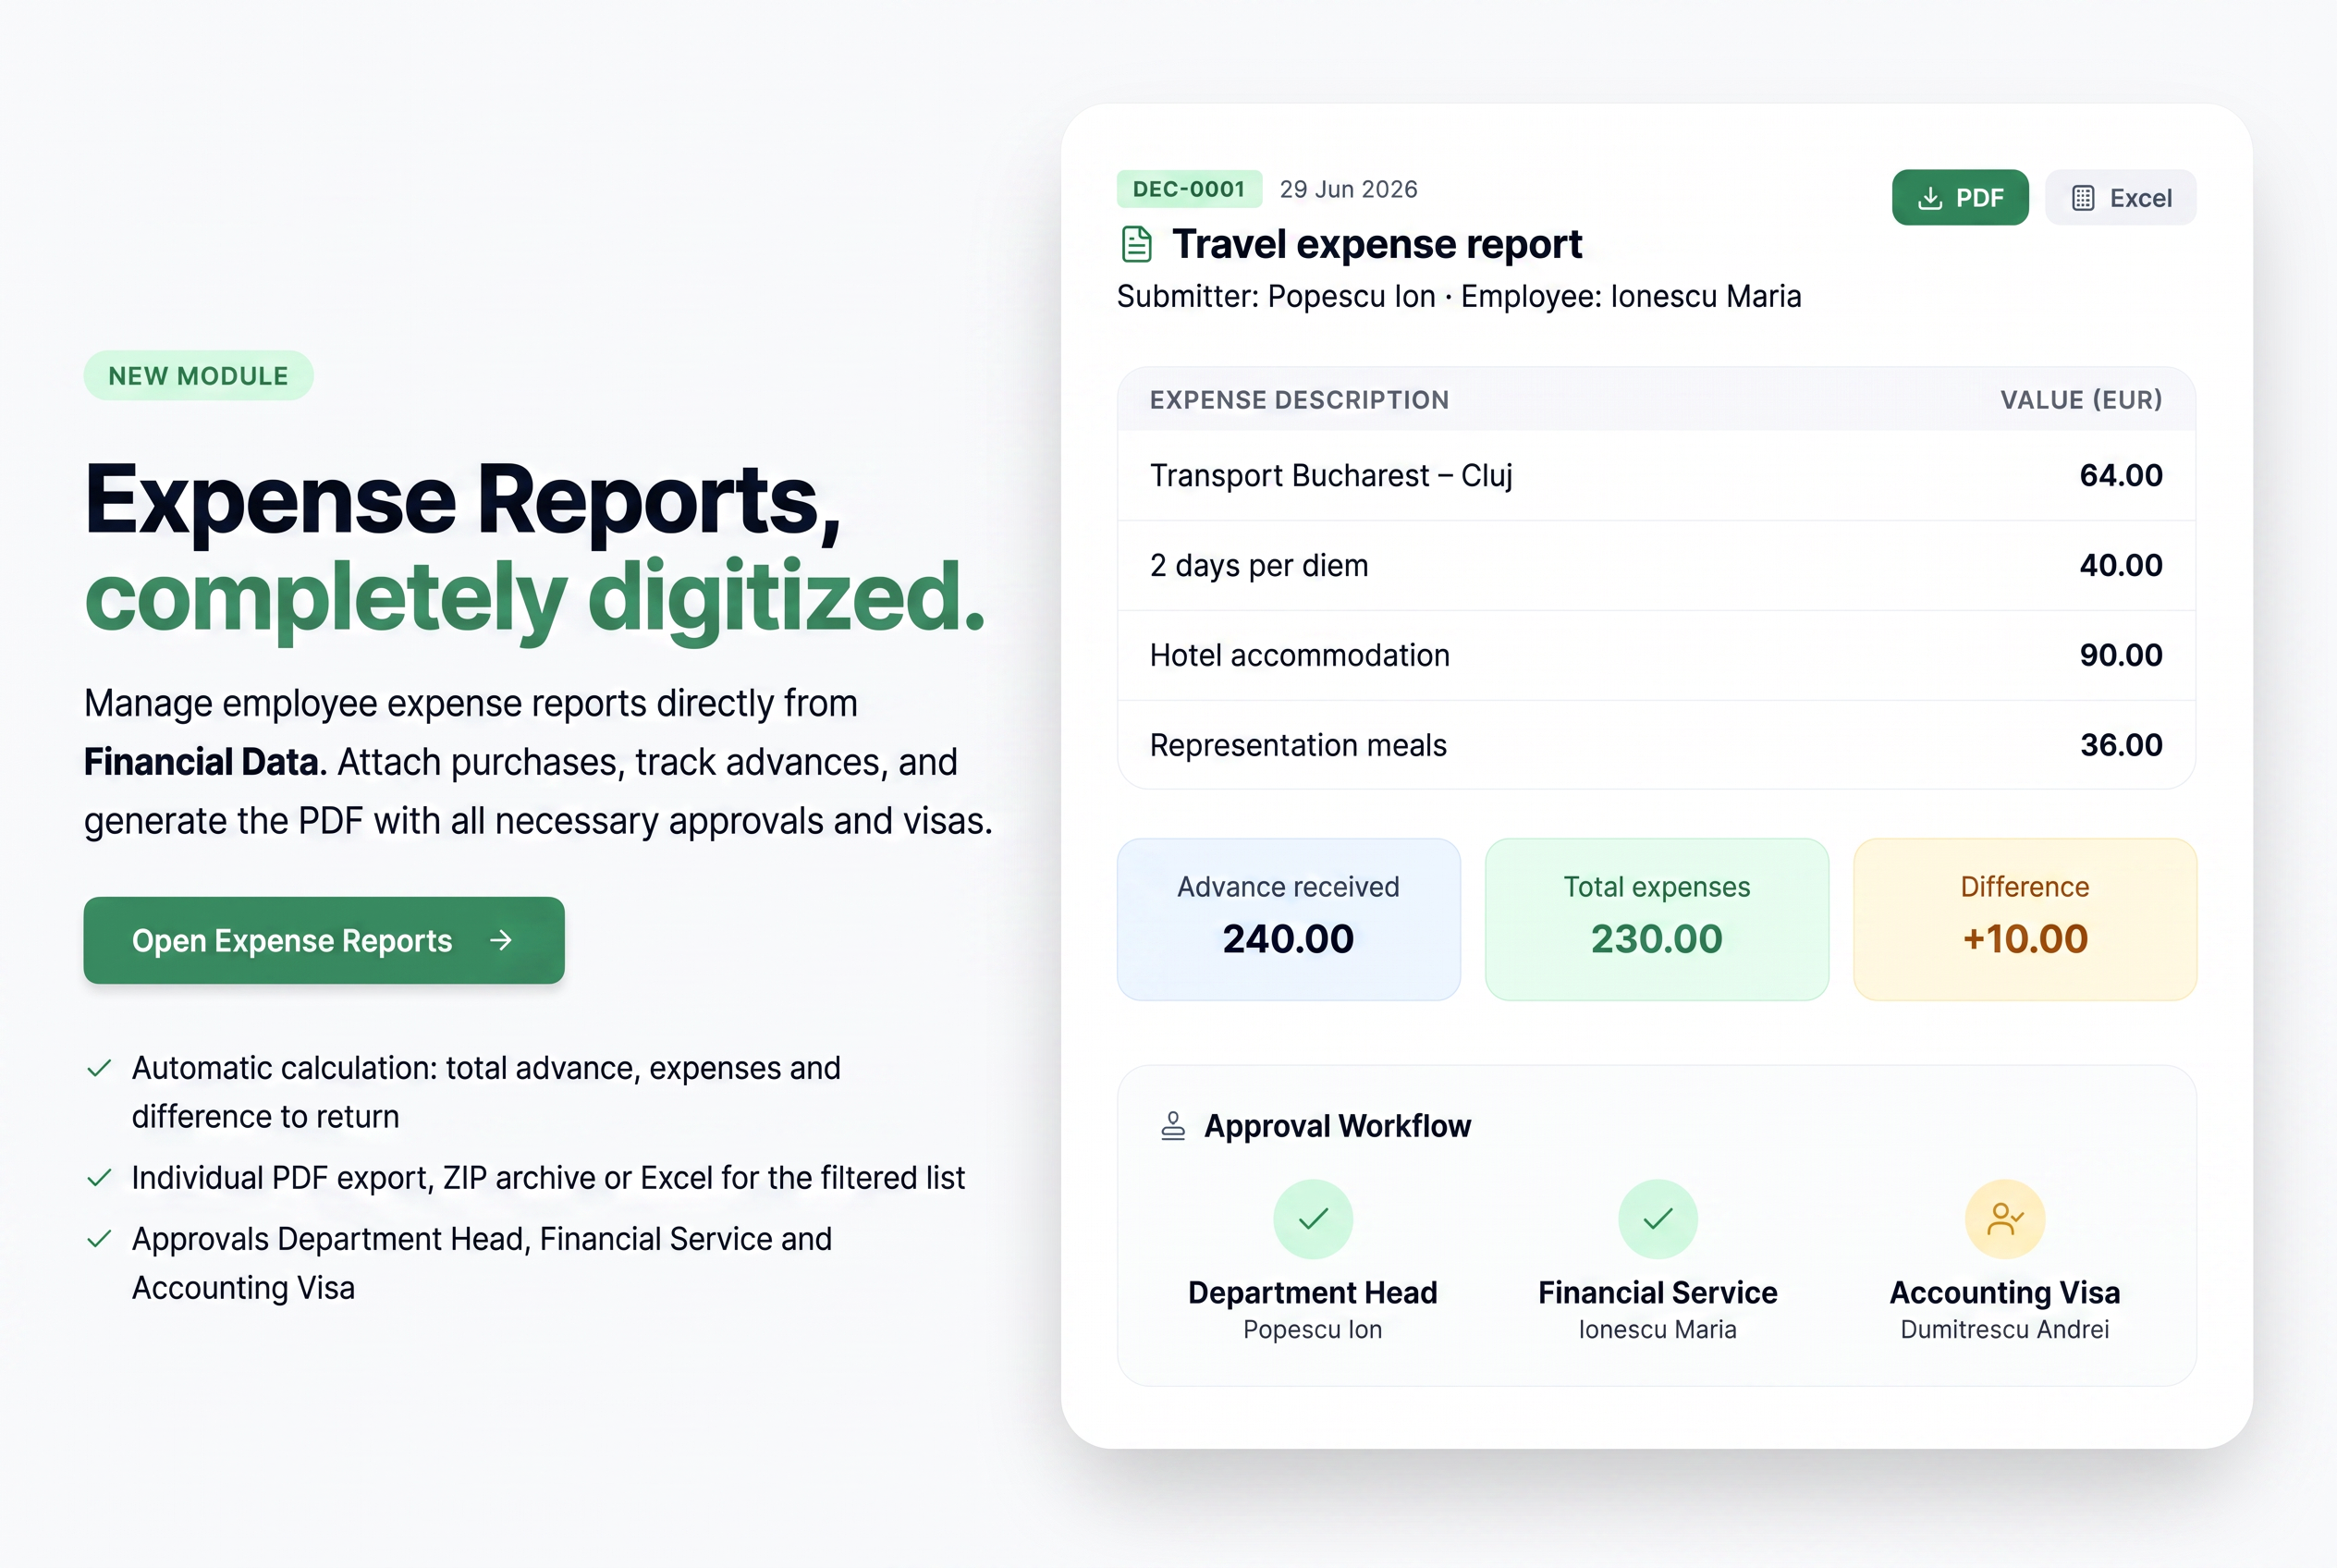
1. General Overview
Expense Settlements allows you to manage employee expense reports. For each settlement, choose the holder, attach the purchases (expense documents), and complete the advance records, then generate the settlement in PDF format with the necessary approvals and visas.
The module also maintains automatic numbering of settlements. It is intended for the financial-accounting team and persons processing employee settlements.
It is accessed from the Accounting Data section. Each settlement is generated in PDF format, and the list of settlements can be downloaded either as a ZIP archive (with one PDF for each settlement) or as an Excel file.
2. How to Access
From the main menu, open Financial, then Accounting Data. In the Standard section, look for the Expense Settlements card and press Open. The list of existing settlements will open.
3. List Page
Upon opening, you arrive at the settlement list. Each row shows the document number, creation date, associated purchases, value, last update date, holder and employee, plus an actions column.
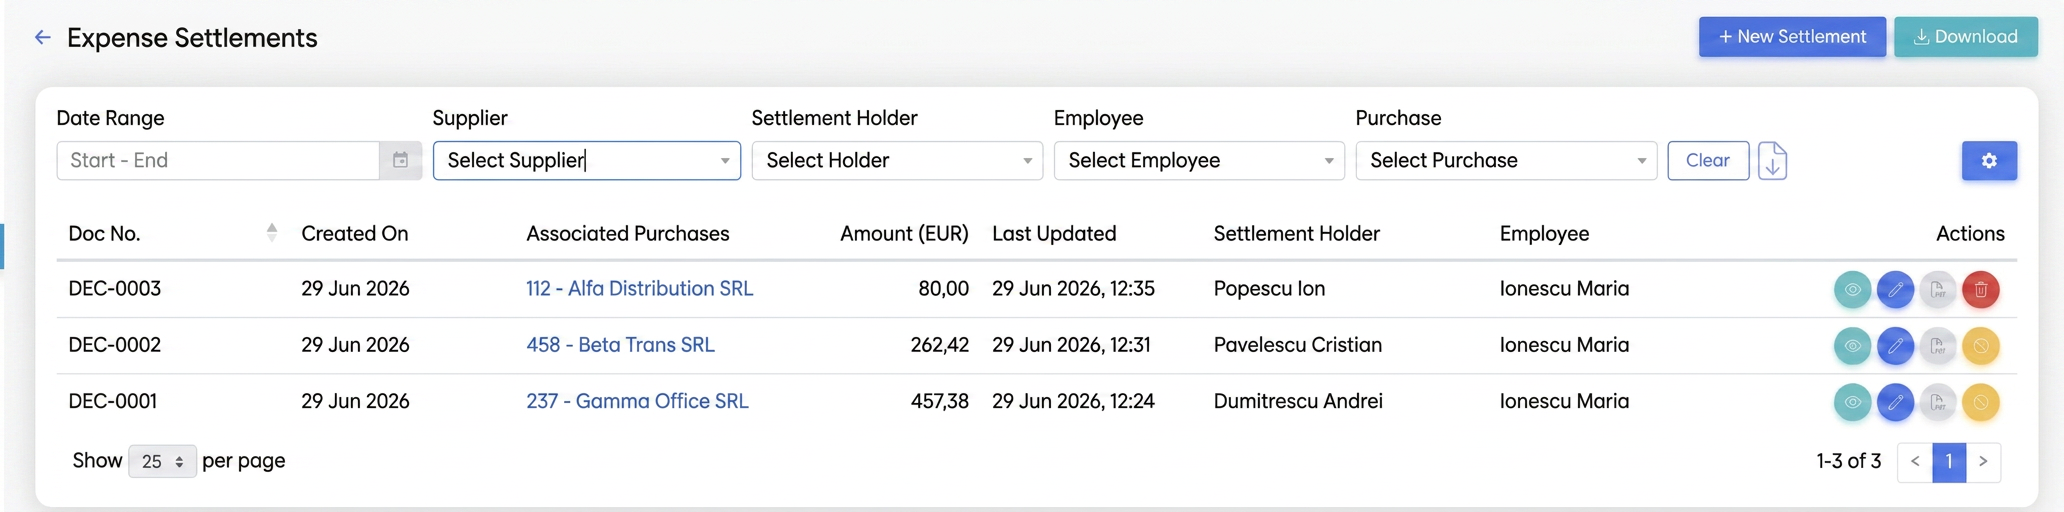
Settlement list page.
At the top and next to the filters, you have the following commands:
- New Settlement — opens the form to create a settlement.
- Download — downloads all settlements matching the filters into a ZIP archive, one PDF for each.
- Export button — the down arrow icon next to the filters, exports the filtered settlement list to Excel.
- Settings — the gear icon, opens the module settings (see section 6).
- Filters — date range (Start – Final), Supplier, Settlement Holder, Employee, and Purchase; the Clear button empties the filters.
On each row, depending on the settlement status, you have actions for PDF preview, PDF download, edit, delete, and cancel.
List Pagination. Below the table, you have the "Show ... per page" control (default 25) plus page navigation buttons (‹ / ›).
Action Icons Legend (Actions column). Colored round buttons appear on each row; hovering over them displays the action name:
- View (light blue/turquoise button, eye icon) — opens the PDF preview of the settlement in the page.
- Edit (blue button, pencil icon) — opens the settlement in the editing form.
- Download PDF (light gray button, PDF document icon) — downloads the individual PDF of the settlement.
- Delete (red button, trash icon) — appears only on the last settlement in the series (the one with the most recent number).
- Cancel (yellow button, prohibition icon) — appears on settlements that are not the last in the series; marks them as canceled (see section 5).
Thus, a typical row has either the red delete button (if it's the last in the series) or the yellow cancel button (if it's not).
4. Creating a Settlement
- In the list, press New Settlement.
- Fill in the form (fields are described below).
- Add at least one purchase in the Included Documents section.
- Press Save. The system automatically assigns the settlement number and returns you to the list.
The Cancel button, located next to Save at the bottom of the form, closes the form without saving changes and returns you to the list.
Important: A settlement cannot be saved without at least one purchase added in Included Documents.
General Data
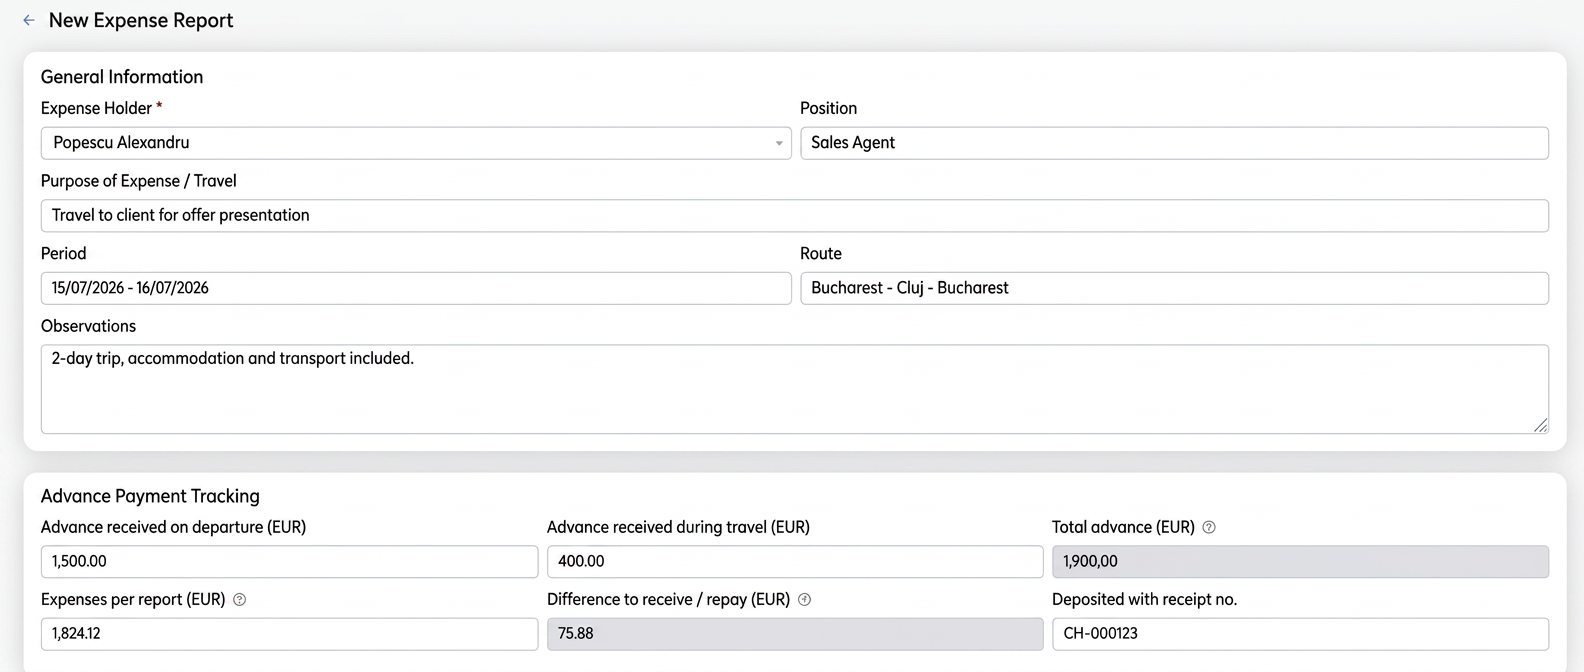
General Data and Advance Record sections.
- Settlement Holder — the employee in whose name the settlement is made; selected from a searchable list (mandatory field).
- Position — the holder's professional position.
Important: If you leave the Position blank, it is automatically filled with the position from the holder employee's file.
- Purpose of expense / travel — free text (e.g.: client visit, purchase of consumables).
- Period — travel date range.
- Route — travel route (free text).
- Observations — additional notes.
Advance Record
Here you register the advance received and see how it relates to expenses. Fill in the advance received at departure and, if applicable, the one received during travel, as well as the deposit receipt number (field "Deposited with receipt no.").
Important: The fields Total Advance, Expenses as per Statement, and Difference to be Received / Refunded are calculated automatically (from advances and total purchases respectively) and cannot be edited. Advance values cannot be negative.
Each calculated field has a help icon (?) explaining the calculation method:
- Total Advance (EUR) — automatically calculated as the sum of "Advance received at departure" and "Advance received during travel".
- Expenses as per Statement (EUR) — automatically calculated from the total of associated purchases in the "Included Documents" section.
- Difference to be Received / Refunded (EUR) — automatically calculated as the difference between "Total Advance" and settled expenses.
Included Documents
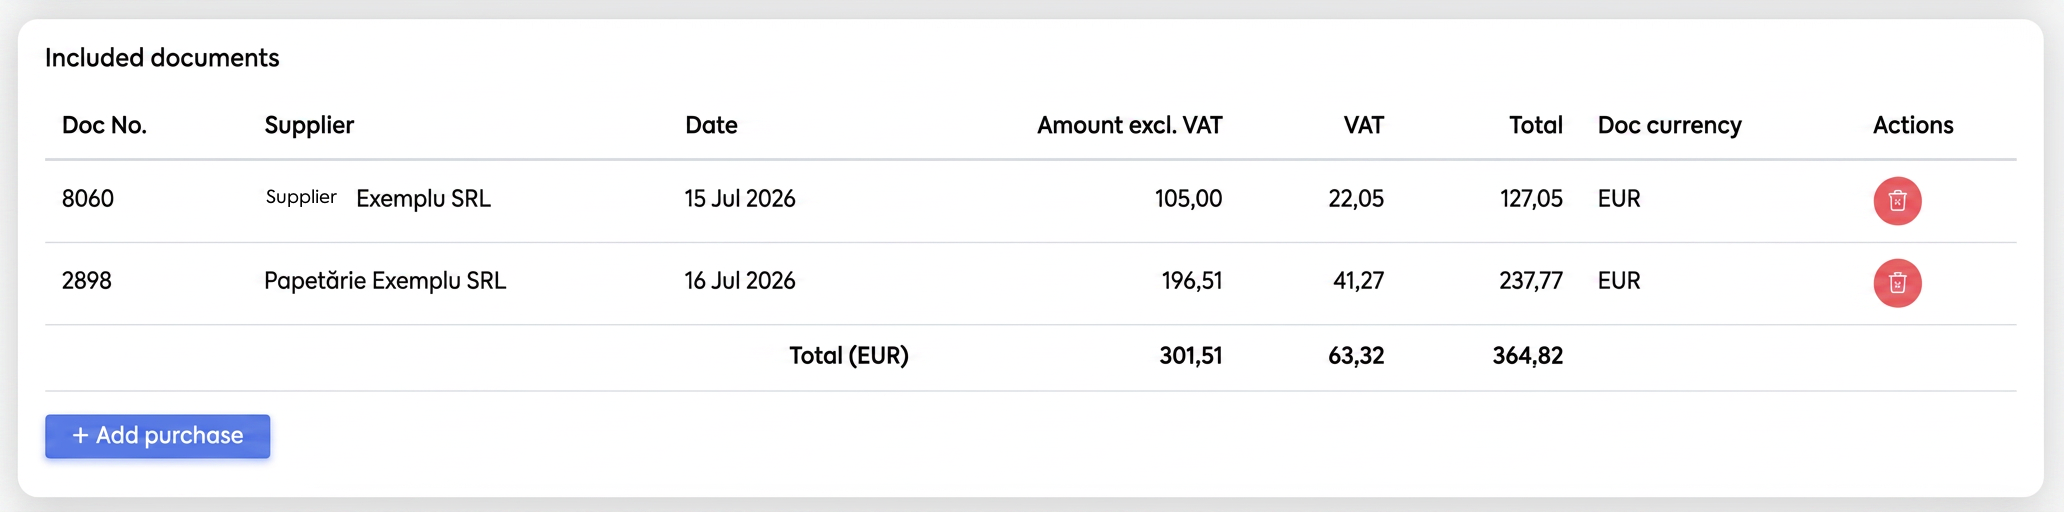
Included Documents section, with settled purchases.
Press Add Purchase. A new row is added to the table with a "Choose purchase" selector, from which you search for the expense document (by supplier, series, or number). Each added purchase populates the columns: Doc. No., Supplier, Date, Val. without VAT, VAT, Total, Doc. Currency and Actions. Below the table, the Grand Total (EUR) row appears, with totals for the value columns. A purchase can be removed from the list using the red delete icon on the row.
If the document is issued in foreign currency, the "Doc. Currency" column indicates the currency, and the grand total is reported in EUR (EUR).
Important: If a purchase is already used in another settlement, a warning appears when you add it.
Approvals and Visas
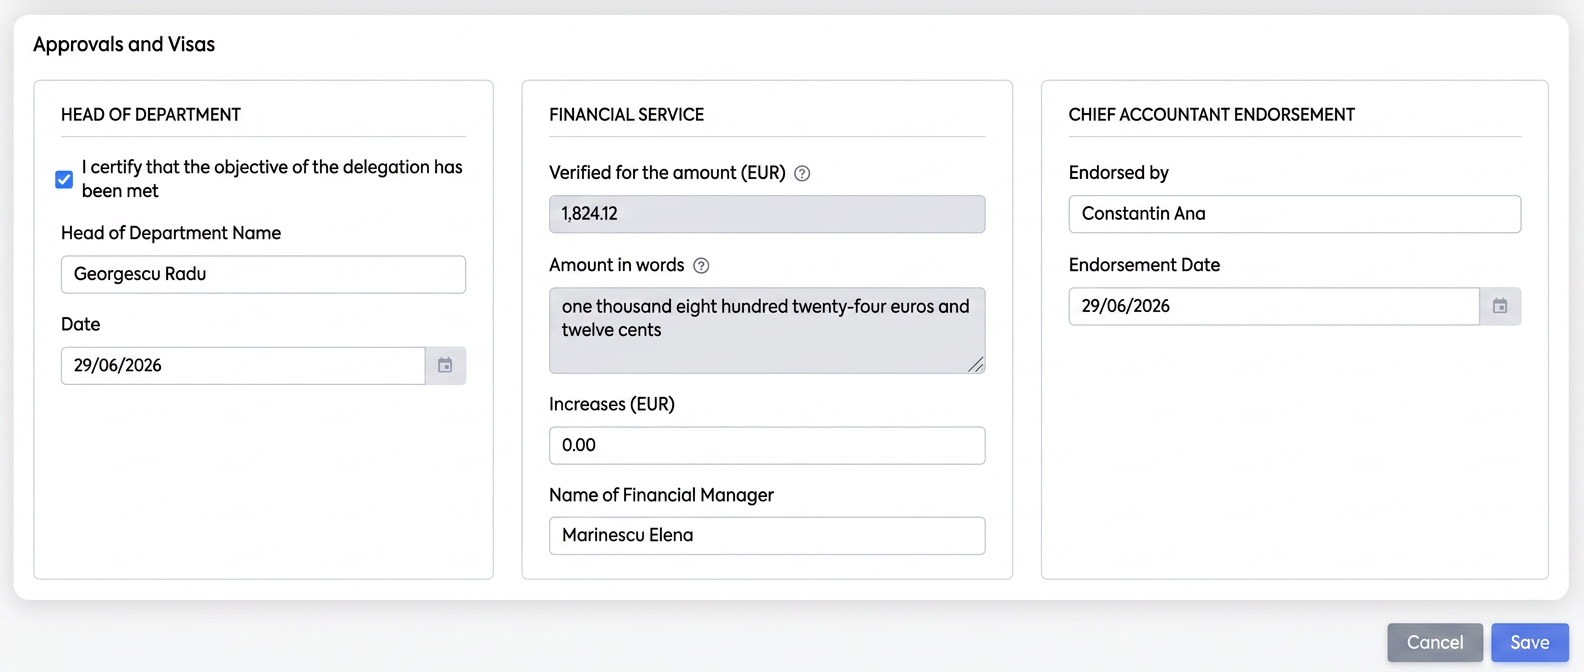
Approvals and Visas section.
The section has three blocks — Department Head, Financial Service, and Chief Accountant Visa — and all fields within it are optional. Under Department Head, check the certification of objective fulfillment and fill in the name and date. Under Financial Service, "Verified for amount" and "Amount in words" are automatically filled from the total purchases, while "Increases" and "Financial Manager Name" can be filled manually. Under Chief Accountant Visa, fill in who visaed it and the visa date.
Important: If you check the certification under Department Head without filling in the date, the date is automatically filled with the current day.
5. Generation, Editing, Deletion, and Cancellation
After saving, from the list you can preview the settlement (the PDF opens in the page) or download it in PDF format. Besides the individual PDF, you also have the ZIP archive with all filtered settlements (Download button) and the Excel export of the list (export button next to filters). Editing is done from the row action.
Important: Only the last settlement in the series (the one with the most recent number) can be deleted. Settlements that are not the last in the series can only be canceled — they remain registered but marked as canceled. A canceled settlement can no longer be edited.
6. Settings
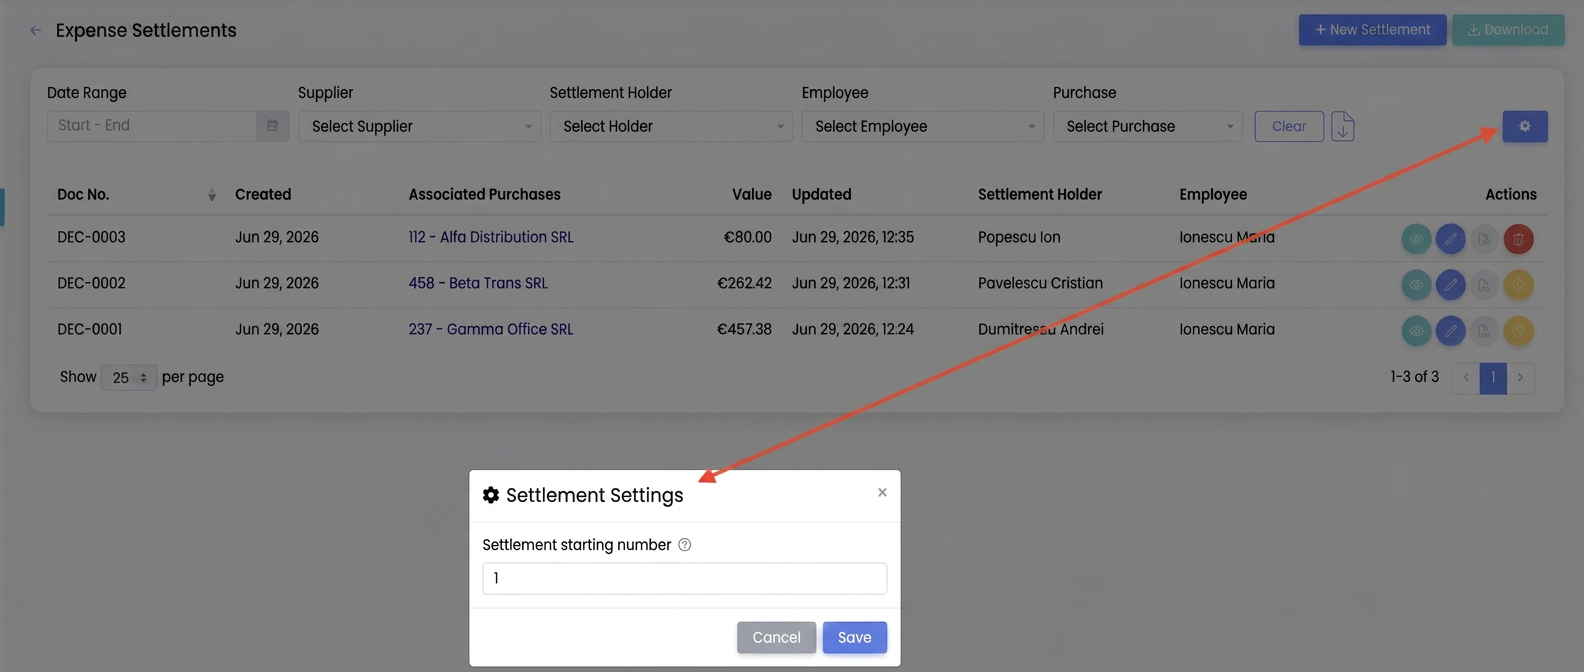
Settlements settings window.
The Settings button (gear) opens a window with the Start No. Settlements option — the number from which automatic numbering begins. The next generated settlement will receive this number, and the rest will be incremented automatically. Press Save to keep the setting.